A vital hardware component in an operating system, regardless of its developer, is RAM , this RAM (Random Access Memory or Random Access Memory), has the function of storing the data or files we use frequently for the purpose to access them much faster in the following opportunities, today we have different types of RAM , such as DDR or DDR4, which offer great speeds of administration and performance of the equipment but it does not mean that our memory modules can present failures at some point.
Some symptoms of RAM errors are:
- Application or operating system lock
- Newly installed applications cause problems
Before going to technical support, Windows 10 offers us a tool that has been specially developed to diagnose RAM in detail and thus rule out some critical error. Through this tutorial TechnoWikis will explain some ways of how we can run this free utility and thus know in detail the state of the memory.
What is the Memory Diagnostic Tool in Windows 10
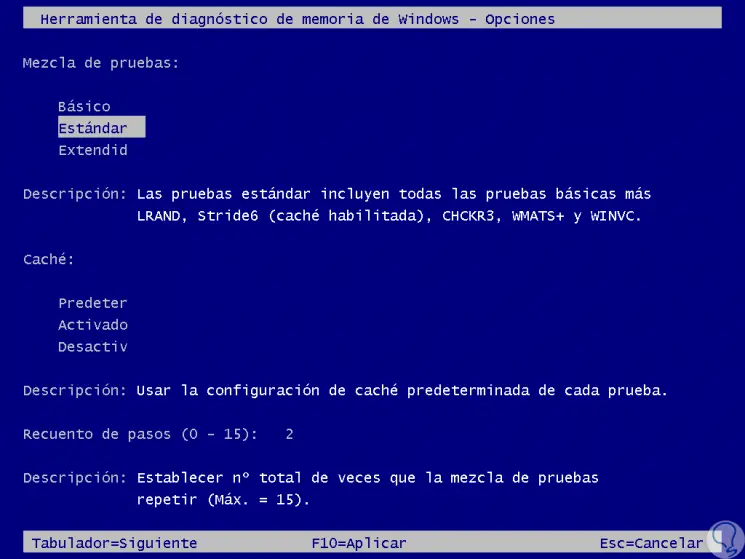
The Windows 10 memory diagnostic tool offers three types of tests that are:
- Basic, selecting this option executes the MATS +, INVC and SCHCKR operations (support cache)
- Standard, with the standard test all the basic tests are included, and additional to it LRAND, Stride6 (activate cache), CHCKR3, WMATS + and WINVC are added.
- Extended, with this option the complete available tests are executed including all standard tests, in addition to MATS + (cache disabled), Stride38, WSCHCKR, WStride-6, CHCKR4, WCHCKR3, erand, Stride6 (cache disabled), and CHCKR8.
By default, the diagnostic utility runs a standard test which is sufficient to detect RAM problems.
When the utility is running, it is possible to click on the F1 key to see advanced options of the tool and there select a specific type of test, with the "Standard" test the estimated time is around 30 minutes. The Extended test may take a few hours to complete, which requires time to do so..
To keep up, remember to subscribe to our YouTube channel! SUBSCRIBE
1. How to run memory diagnostic tool in Windows 10
When the utility is loaded on system reboot, it automatically starts the process of scanning the RAM. As we said, the Windows memory diagnostic utility starts in standard mode, which includes 6 different successive memory tests where each of them makes use of an exclusive algorithm in order to look for different types of errors. A screen will be displayed where each individual test will be seen while it is running and there we will see its progress and the range of memory addresses that are being scanned, after completing those 6 tests, the tool executes another pass using the same tests and will continue executing the process until you exit the software permanently.
Normally with a single pass we can know if the memory is defective or not, otherwise we can switch to Extended mode, which will run 11 separate memory tests to better define the memory status.
When executing the tool, we have the “Advanced options†section, where we can switch between the different modes available and it will also be possible to carry out tasks such as:
- Disable processor cache during scans, which forces the tool to access data directly from RAM and thus ensure more thorough testing.
- Access the System Information command which lists the capacity and type of RAM installed in each slot of the analyzed equipment.
This Windows 10 memory diagnostic tool supports x86-based platforms, including Intel Pentium and Celeron processors, and AMD K6, Athlon and Duron CPUs but the tool can only address up to 4 GB of RAM and will not scan beyond this capacity. Now we will see the various options available for execution.
2. How to use memory diagnostic tool in Windows 10
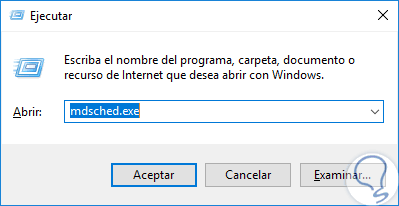
Step 1
To make use of this option we will log in to the computer to be analyzed and there we will use the following key combination where we will execute the following command:
+ R
mdsched.exe
Step 2
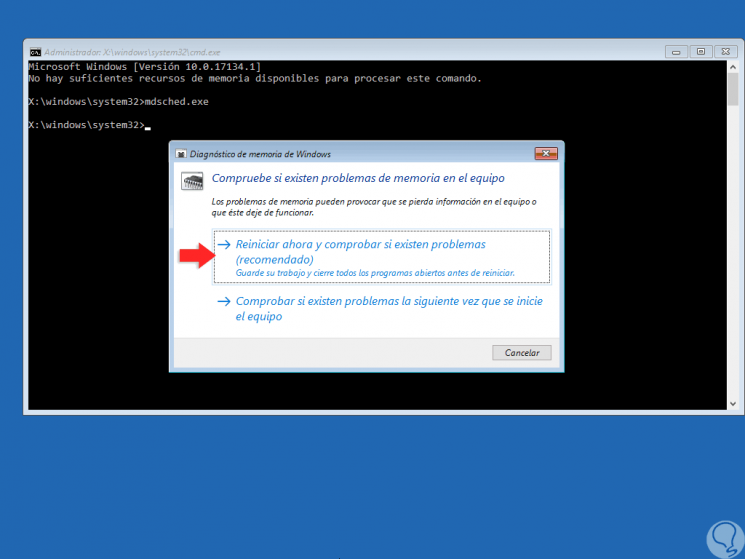
There we press Enter or Accept and the following window will be displayed:
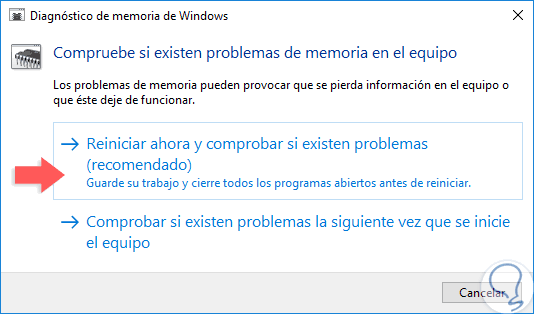
Step 3
There we select the option "Restart now and check if there are problems" and once the system is rebooted we will see that the memory diagnostic process begins:
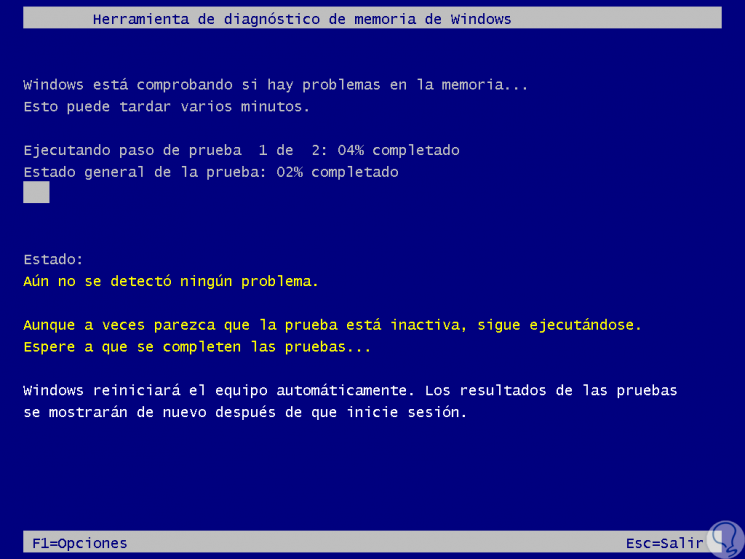
Step 4
If we press the F key we will access the test modes and other options of the tool. In the "Status" line we will see the errors, if they exist, that are detected. In this case we expect the two tests to be completed by default and the system will be restarted once the process is finished. We can see that the test results will be displayed after restarting the device only if errors have been detected.
F
3. How to use memory diagnostic tool since advanced restart in Windows 10
Step 1
To access the advanced restart of Windows 10 we have the following options:
- Go to the Start menu, there press the power off button of the device and, together with the Shift key, press the reset button.
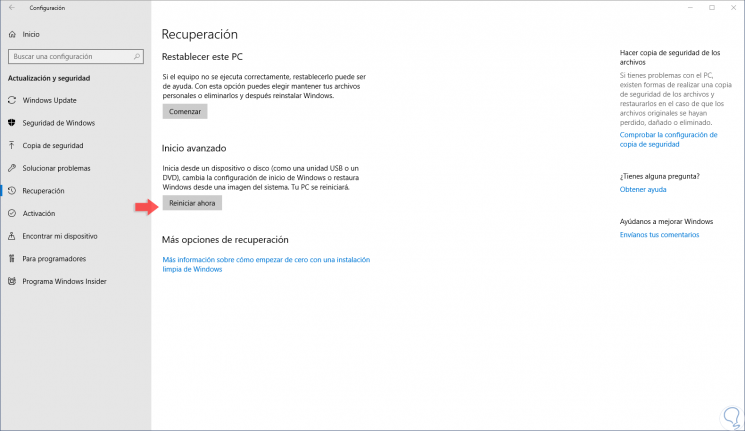
- Go to the next route and click on the "Restart now" button located in the "Advanced start" section:
Start
Configuration
Update and security
Recovery
Step 2
There the system will be restarted and then we will see the following:
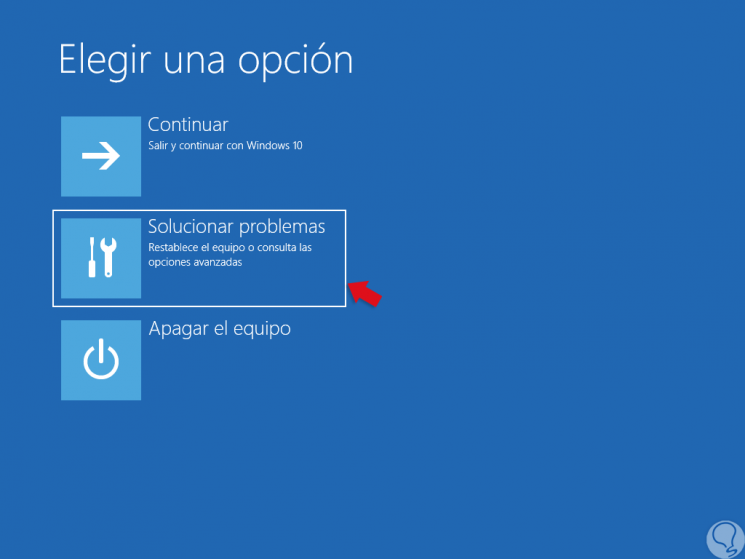
Step 3
There we select the option “Solve problems†and the following alternatives will be displayed:
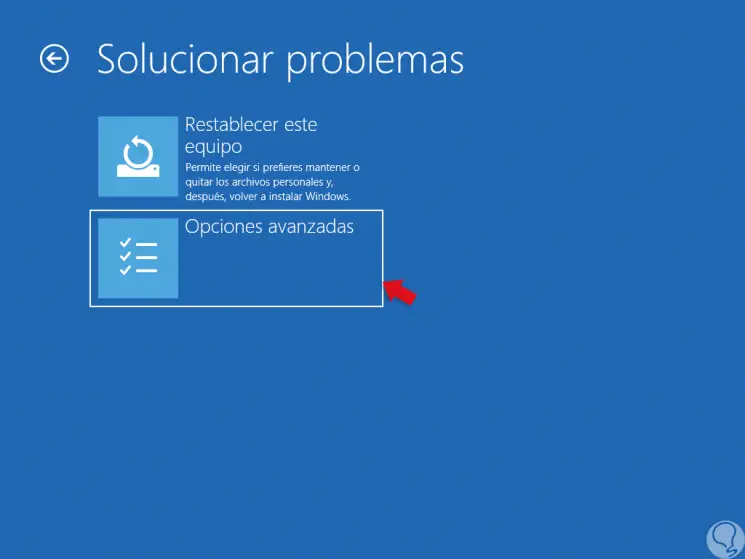
Step 4
Select "Advanced options" and in the new window select "Command Prompt":
Step 5
The following will be displayed:
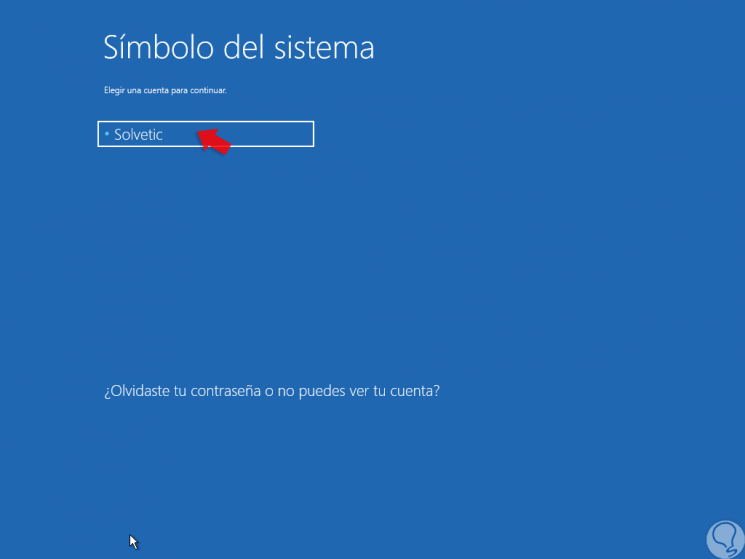
Step 6
Select the account and enter the password:
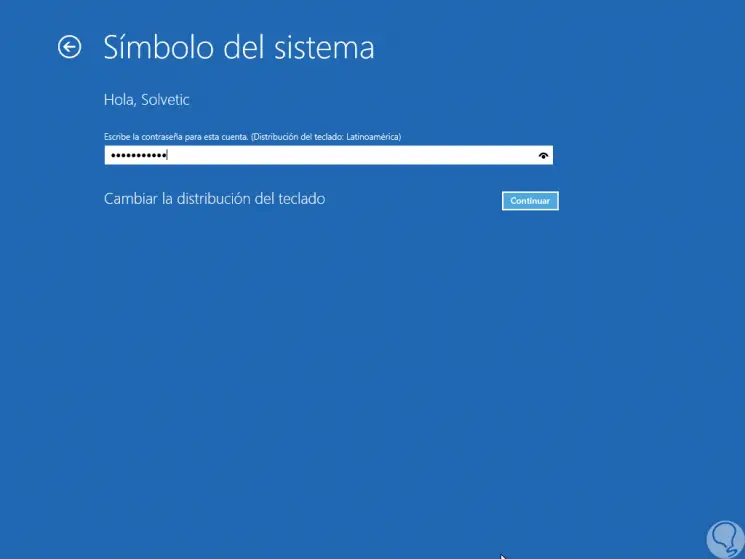
Step 7
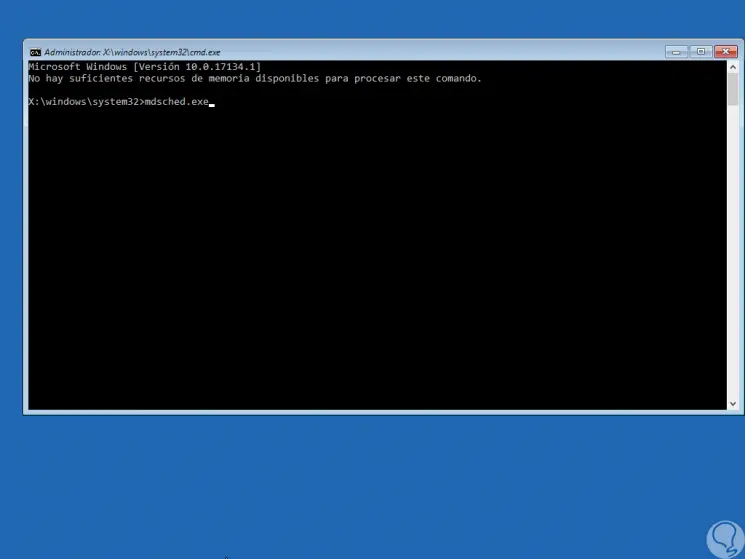
Click on Continue and in the console that will be displayed we execute the following command:
mdsched.exe
Step 8
Press Enter and the following will be displayed. There we click on the option "Restart now and check if there are problems" and we will follow the process mentioned above.
4. How to use memory diagnostic tool from the installation disk in Windows 10
Step 1
For this method, we must have the Windows 10 installation media either on USB or DVD, and then configure the BIOS or UEFI boot from there:
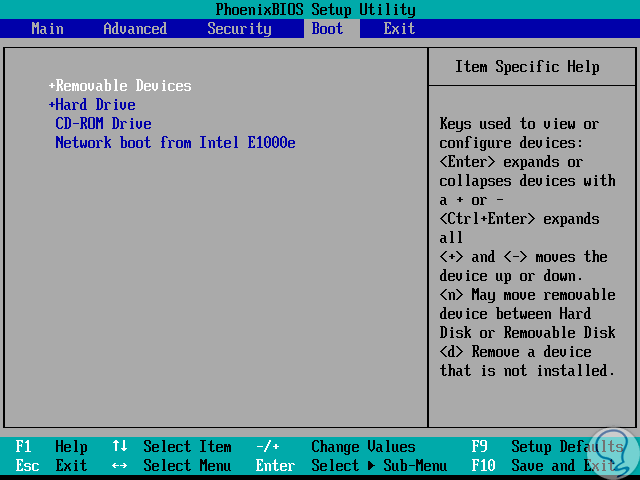
Step 2
Once this is defined, we will start from the CD and press some key to boot from there and see the following:
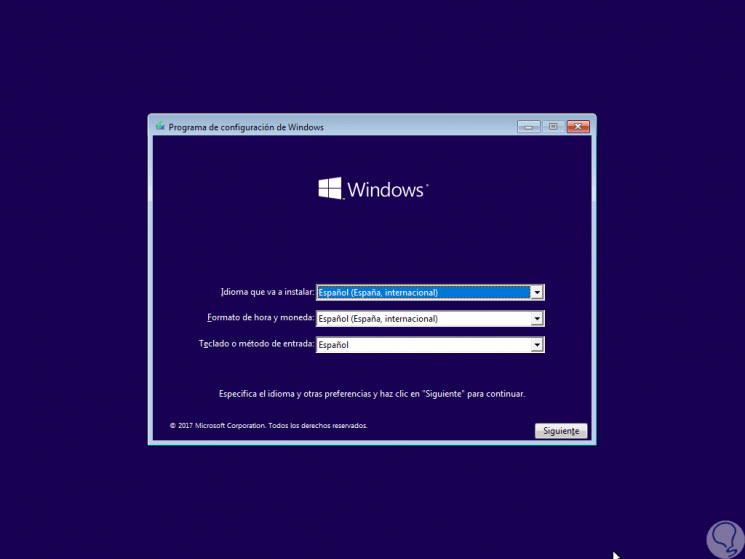
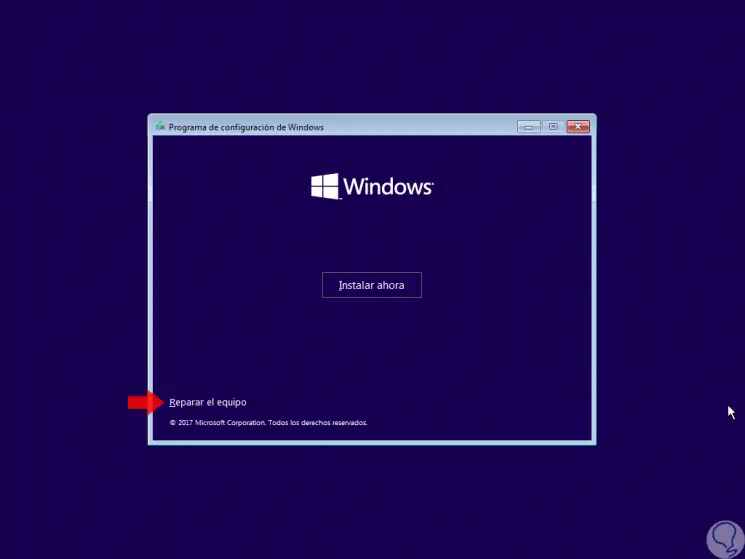
Step 3
Select our language and click on Next and in the next window click on the bottom line "Repair the equipment":
Step 4
By clicking there we will see the following:
Step 5
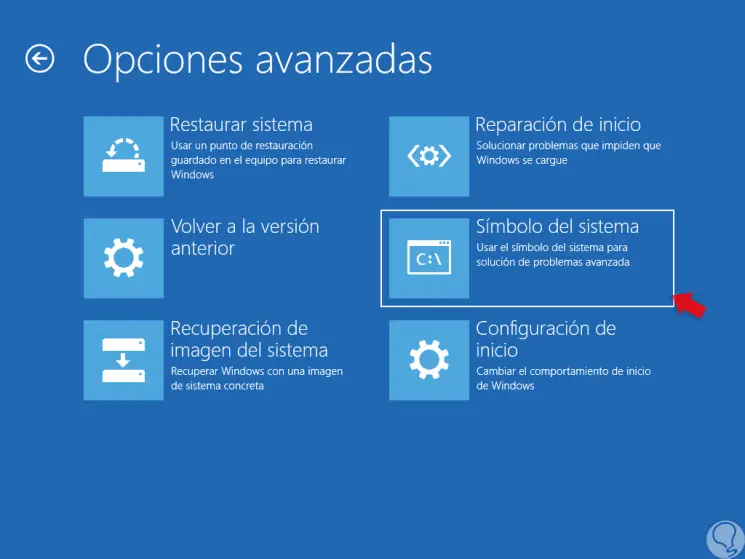
Click on "Troubleshoot" and in the next window we go to Advanced Options:
Step 6
In the next window we will go to “Command Promptâ€:
Step 7
By clicking there we will be redirected to the console where we run “msdched.exeâ€:
Step 8
Press Enter and we will see the following. There we execute the first option to run the analysis as seen in the first optional point.
Thus, we have this useful integrated Windows 10 tool to carry out a comprehensive analysis according to our need and thus know in real time what the status of the RAM in the system is..