To stay up to date, remember to subscribe to our YouTube channel!
SUBSCRIBE ON YOUTUBE
From the moment we turn on our PC, hundreds of processes occur in the background that allow the operating system to load correctly. They are key processes and if any of them fail we will simply encounter access errors, restarts, crashes and problems. sometimes much more delicate..
One of the main components that act on the startup of Windows 11 are the boot configuration data files (BCD – Boot Configuration Data) which allow a store to be created in which the boot applications and configuration settings are established. These applications, these elements are responsible for replacing the Boot.ini file from previous versions of Windows.
Mistakes
When we use Windows 11, there are some errors that may be present when starting the system, some of them are:
- BOOTMGR is missing or corrupted
- no bootable device – insert boot disk and press any key
- NTLDR is missing or corrupted
Each of these files is directly related to the Boot Record, this is the system's boot record, it is classified as a critical part of the hard drive file system since it is the first sector of the disk, we can also know it as MBR (Master Boot Record) or as a boot sector, there is the information necessary for Windows to boot, within the MBR elements we find a "boot loader" which has the task of loading the operating system directly from the hard drive ..
Features
From BCD it is possible to manage:
- The alternatives to use to start Windows with winload.exe
- Each of the boot and boot parameters of the Boot Record volume
- Options for hosting and launching previous versions of the operating system
When we encounter any of these errors, it is time to work on system startup repair and TechnoWikis will teach you how to achieve this.
1 Repair Windows 11 startup from Advanced Startup
Step 1
For this method we will use the CMD console both in advanced mode and from the active session, to start we must have the Windows 11 ISO image which we find for free at the following official link:
Windows 11
Step 2
When we have the ISO image we have two options:
- Burn it to a DVD and use your computer's CD/DVD drive (if you have one)
- Burn the ISO to a USB and manage it as boot media
Step 3
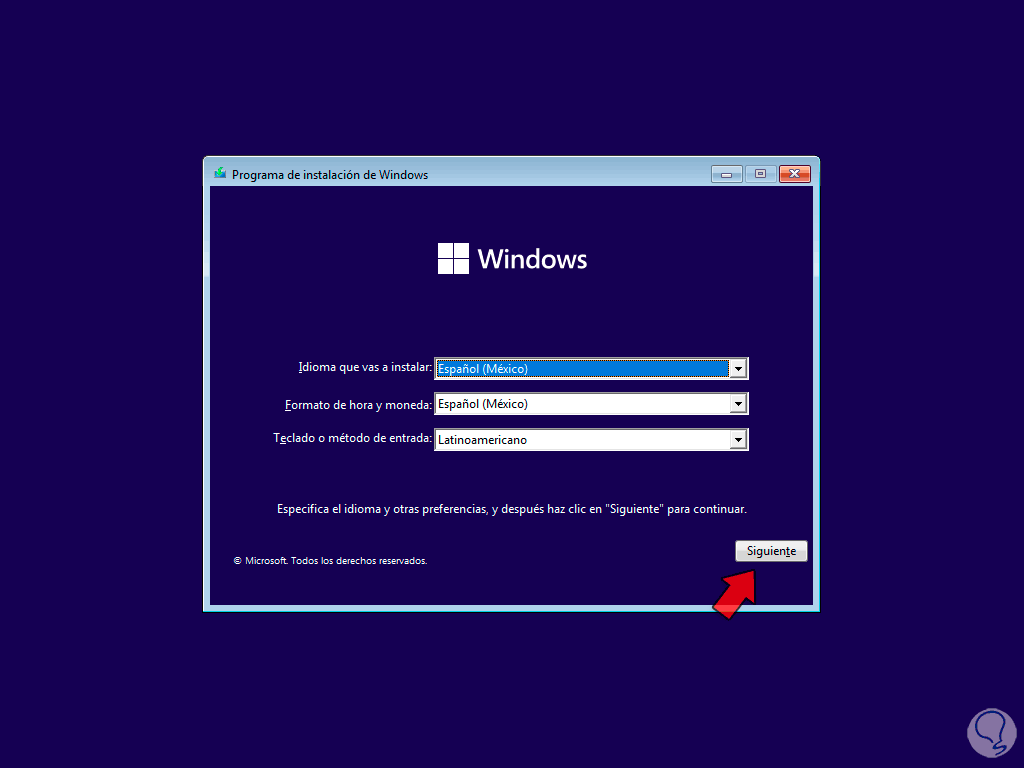
We turn on the equipment. When it starts from there we will see the following: There we click on the “Next” button to see this window:
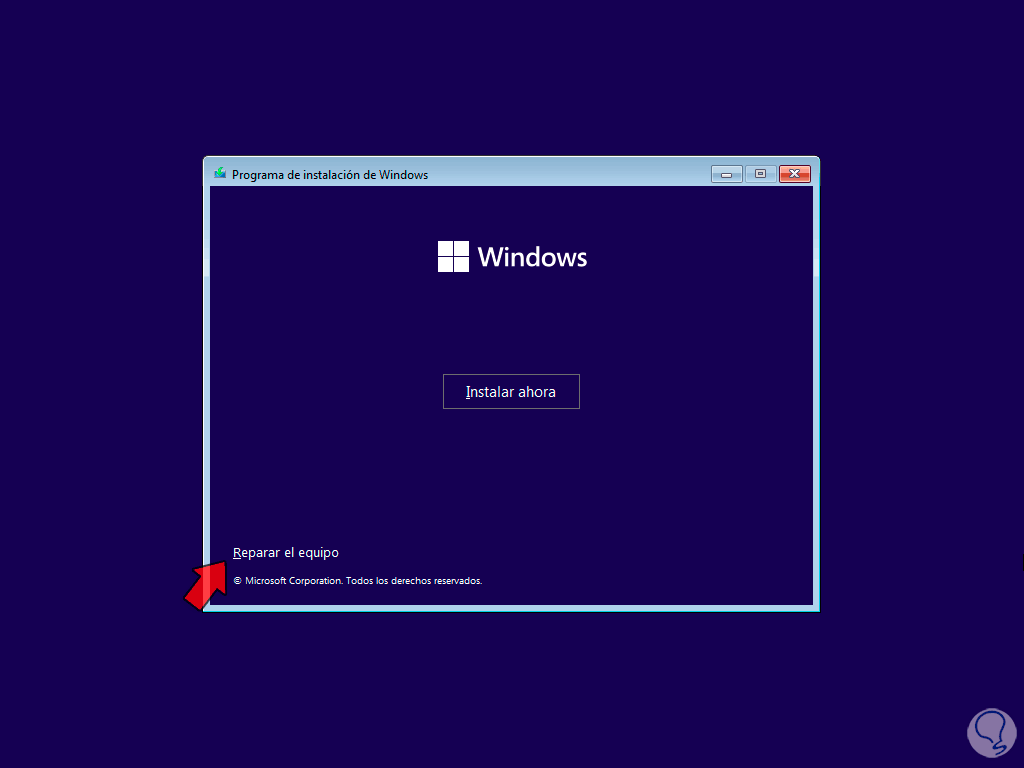
Step 4
Here we will click on the line “Repair the equipment”
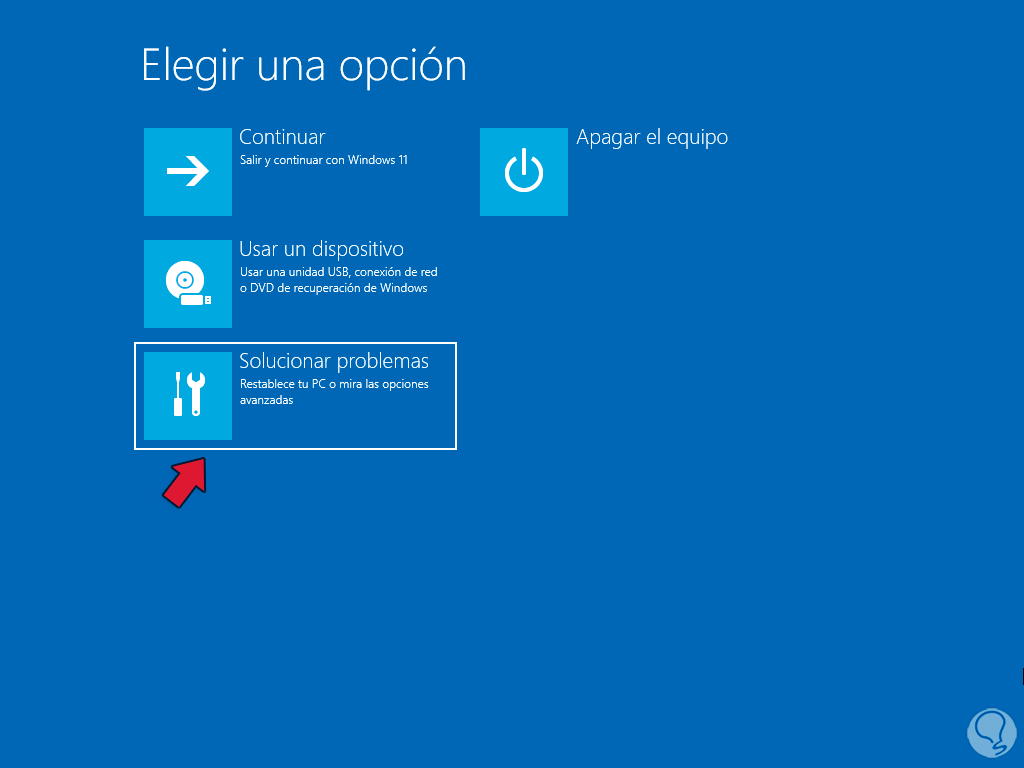
Step 5
A series of options to use will be displayed. Here we click on “Troubleshoot” and then see the following:
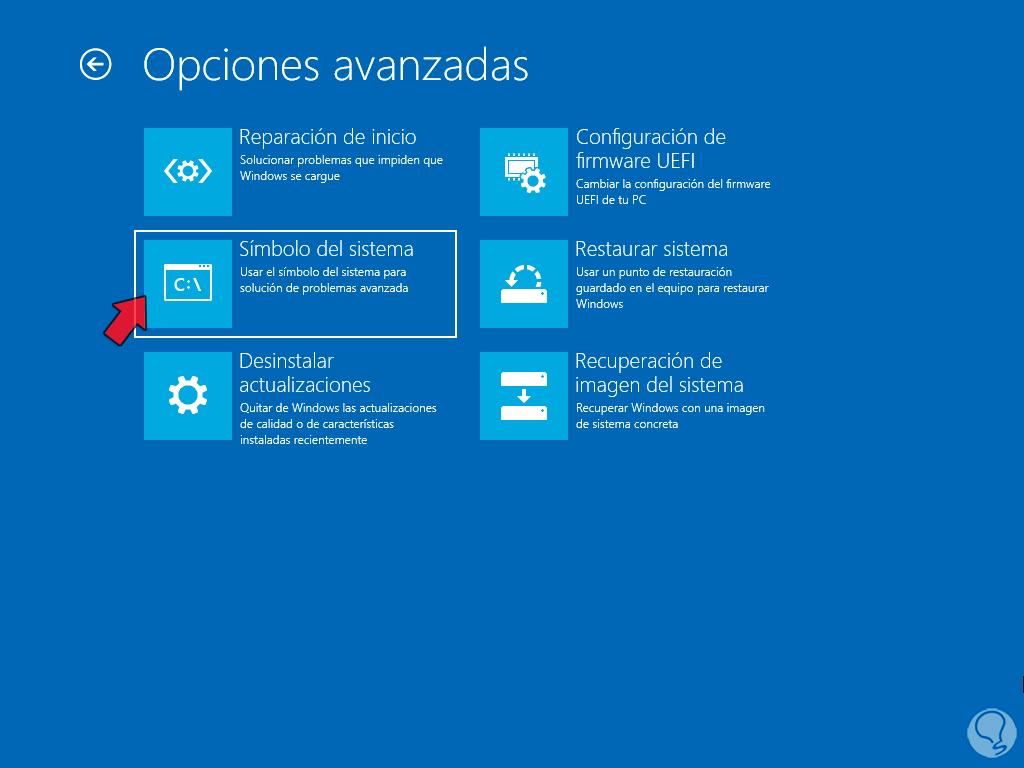
Step 6
In this series of options we will click on “Command Prompt” to access the command prompt console in advanced mode
Step 7
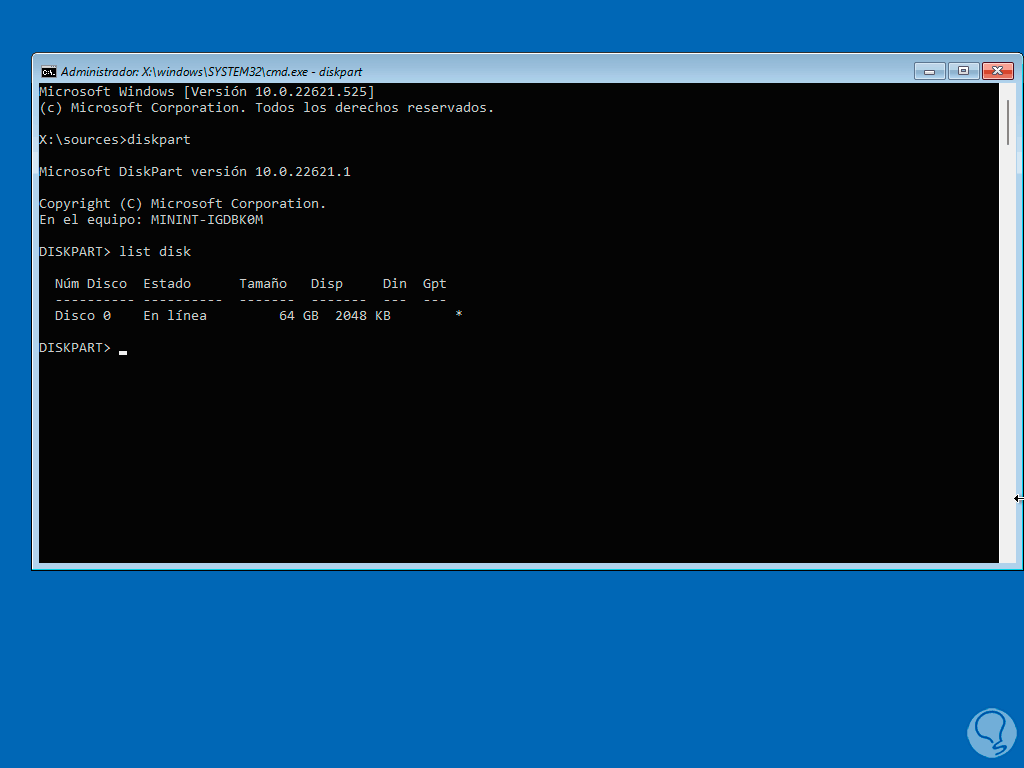
, in the console we are going to execute the “diskpart” command to use the disk management tool:

Step 8
First of all, we are going to list the available disk(s):
list disk
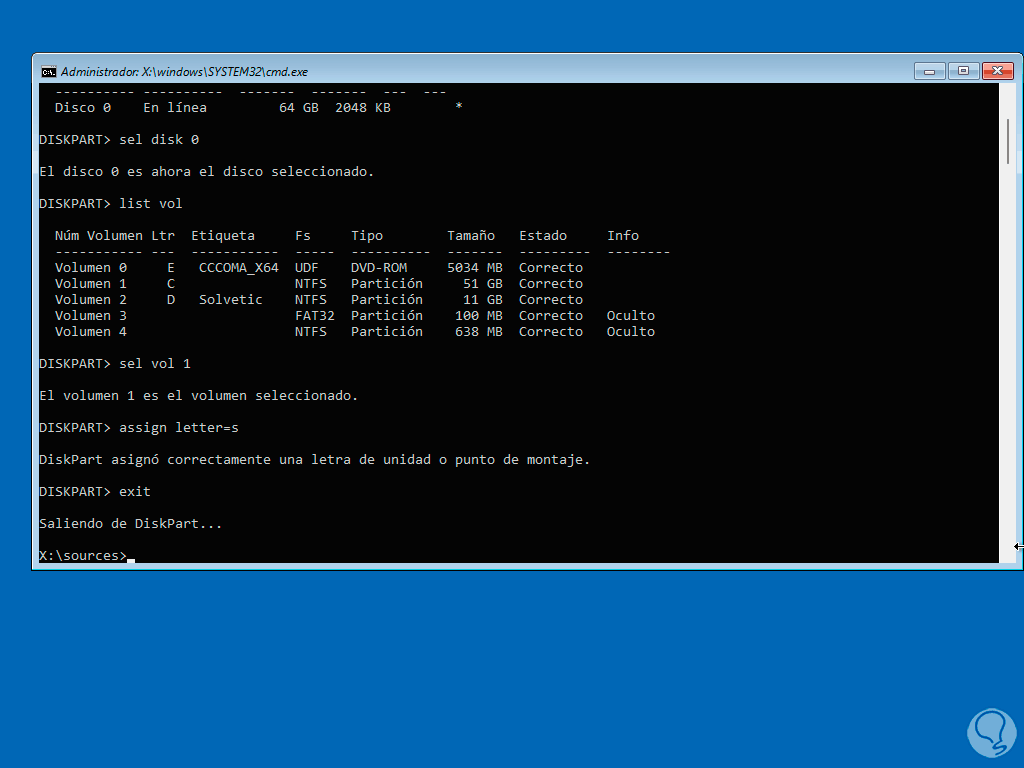
Step 9
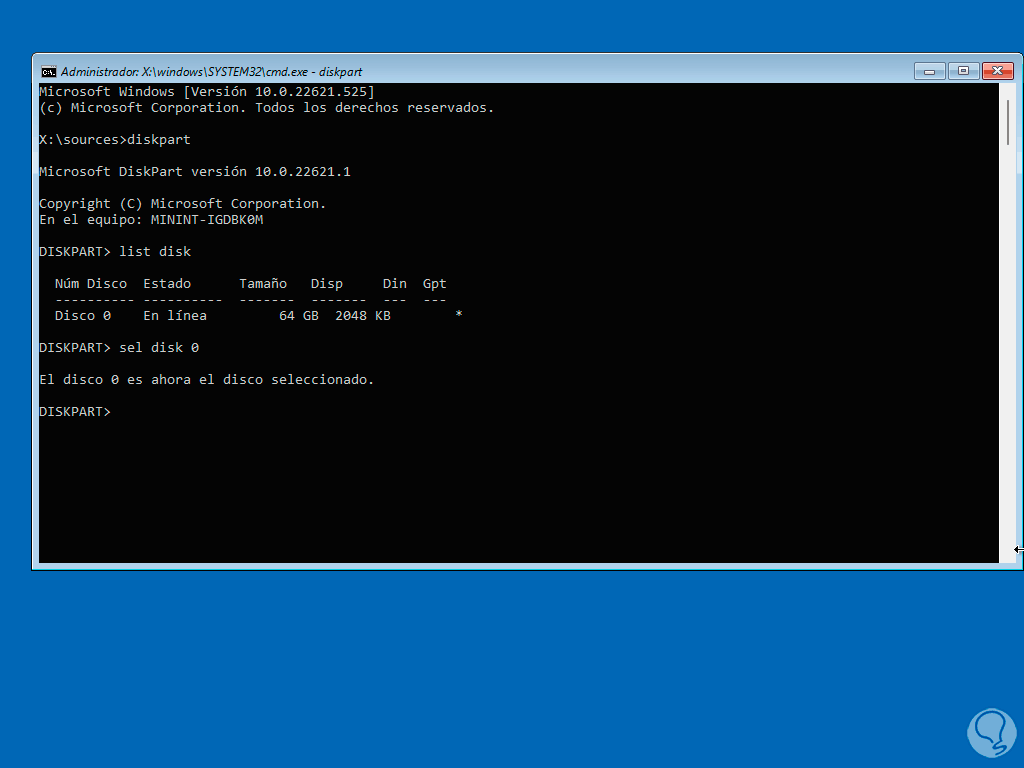
We select the disk using the command:
select disk 0
Step 10
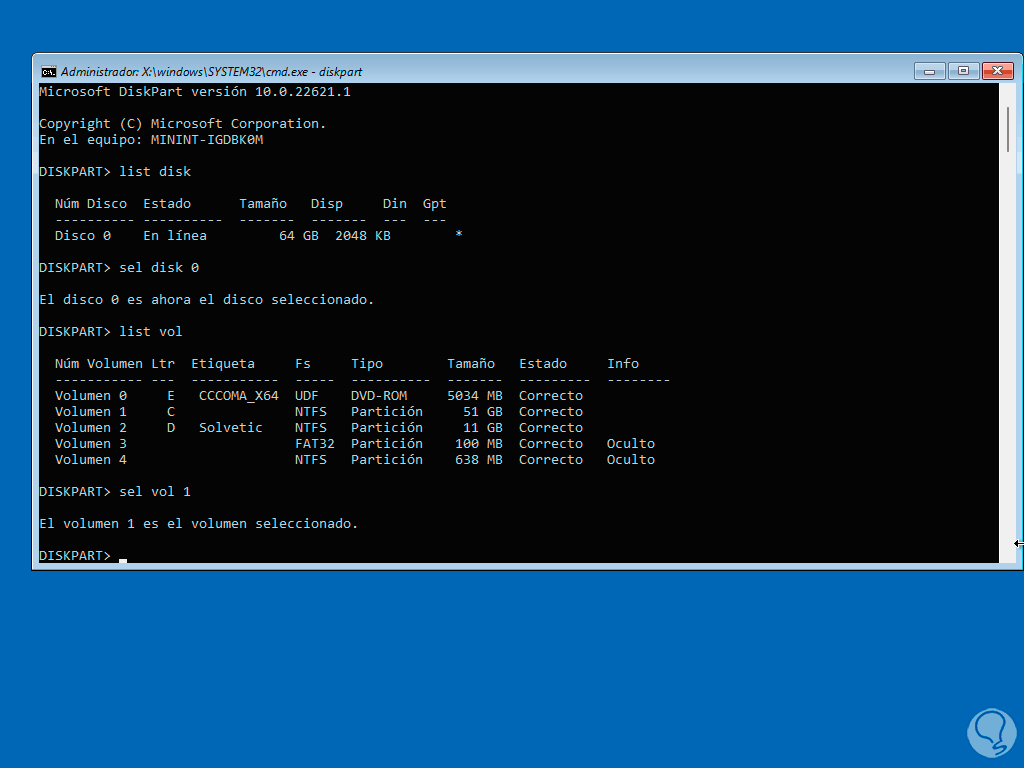
Now we are going to list the available volumes on that disk with the command:
list vol

Step 11
There we detect the volume on which Windows 11 is installed, to do this we must keep in mind the size of the volume, we select it using the command:
select volume #
Step 12
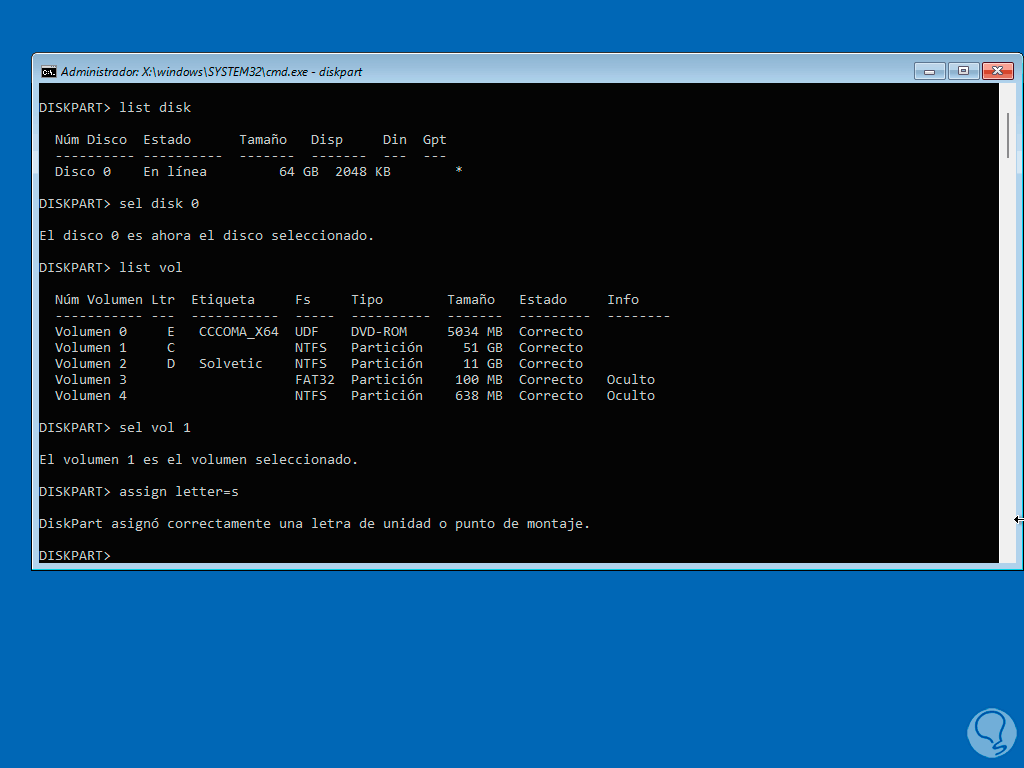
Once the volume is selected, we are going to assign a letter to this drive using the following syntax:
assign letter="letter"
Step 13
We exit the diskpart utility with the “exit” command:
Step 14
After this, we are going to access the volume using the assigned letter and a colon, then with the “dir” command we list its contents:
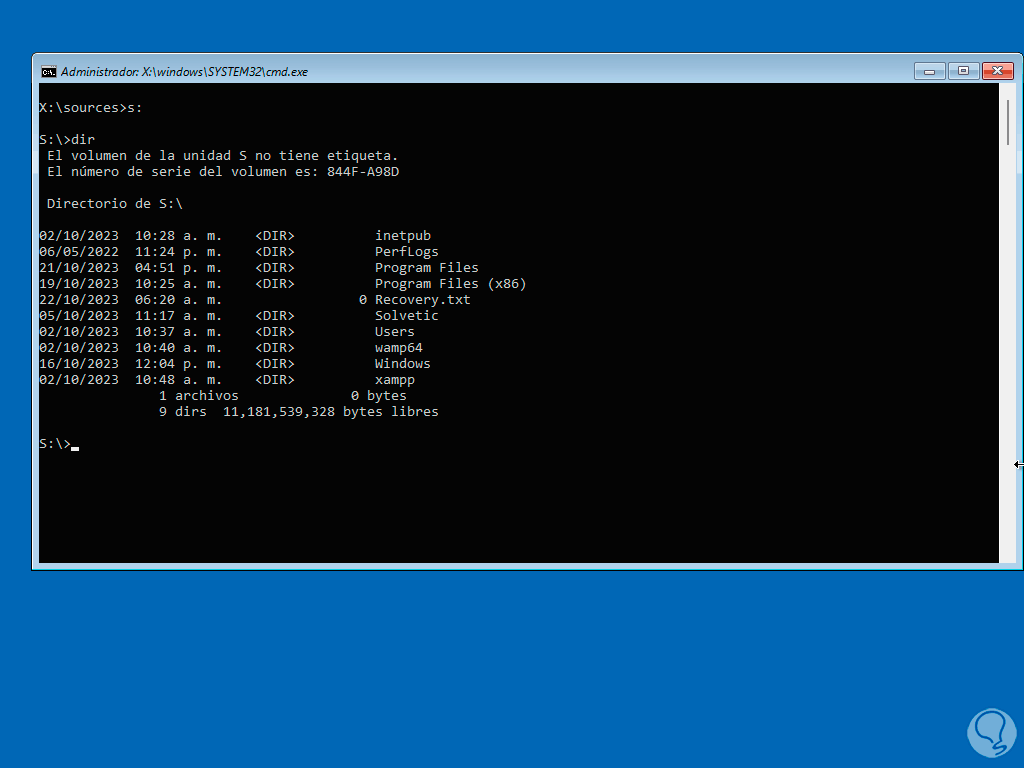
Step 15
It is time to create the boot files, to do this we execute the following syntax:
bcdboot Drive_letter:\Windows /l “ISO language” /s Drive_letter: /f all
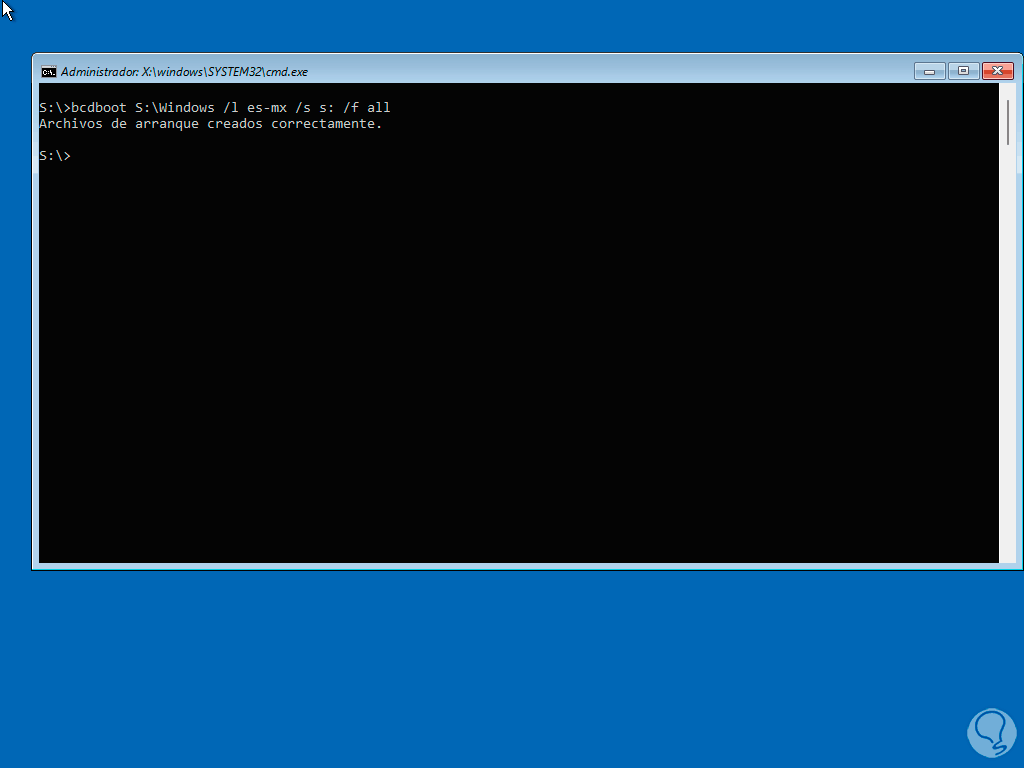
Step 16
The parameters we have used are:
- Bcdboot: It is the utility to execute the series of commands
- Letter:\Windows: is where the Windows directory is located
- /l: indicates “locale” and is where the regional configuration is indicated
- /s <volume letter>: is an optional value, this indicates the volume letter of the system partition
- /f <firmware type>: Specifies the firmware type and accepts values such as UEFI, BIOS, and ALL
We can also use some variables like:
- /m [{OS Loader GUID}] - Combines values from an existing boot entry to a new boot entry
- /addlast: indicates that the Windows boot manager firmware entry will be added last
- /p: teaches that the Windows boot manager firmware entry position should remain in the UEFI boot order
- /C: refers to the fact that the current BCD elements should not be migrated
Step 17
Step 18
We leave the console with the “exit” command to be in the Windows 11 menu:
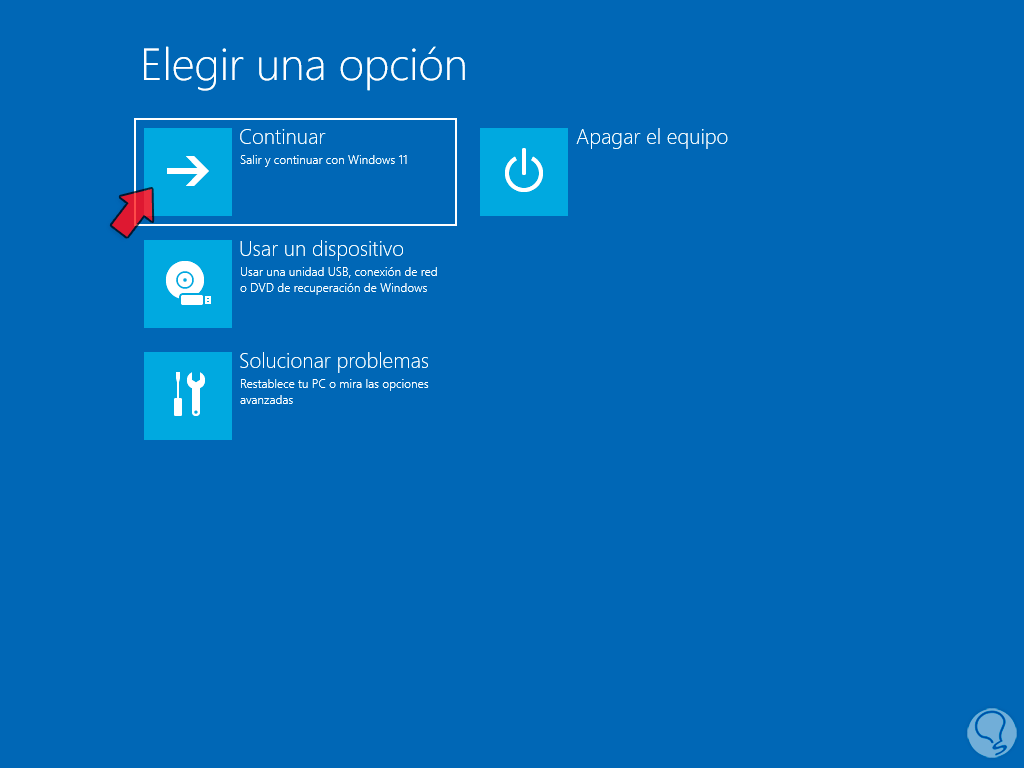
Step 19
We click on “Continue” to load the system:

Step 20
The environment is loaded:

Step 21
You will be logged in:

Step 22
Once we log in, we access the Command Prompt console as administrators:
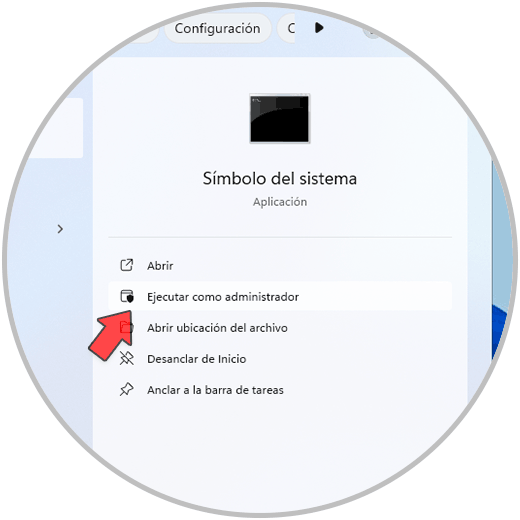
Step 23
We accept UAC permissions:
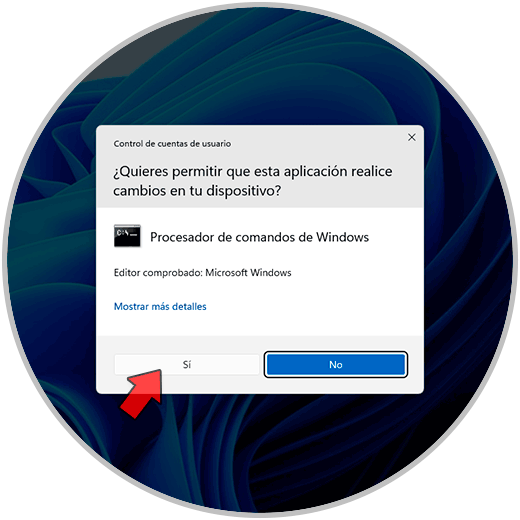
Step 24
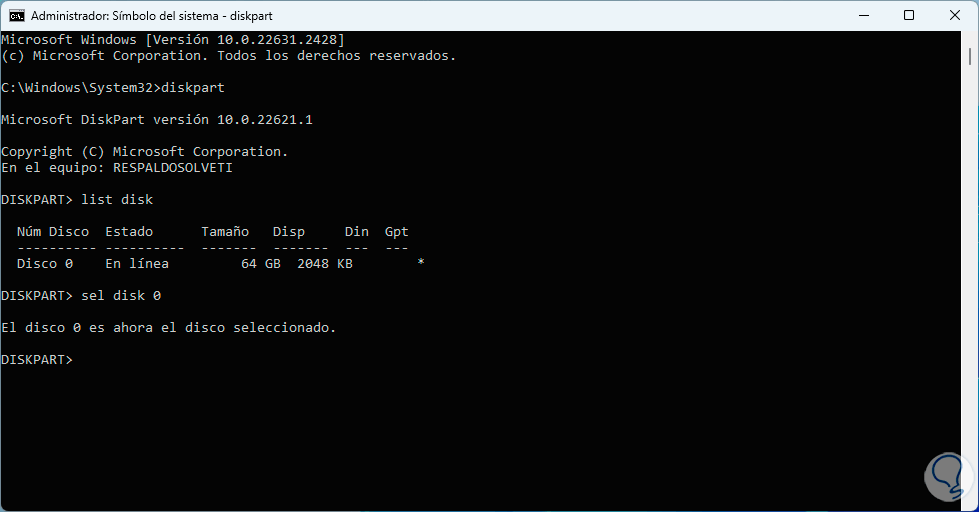
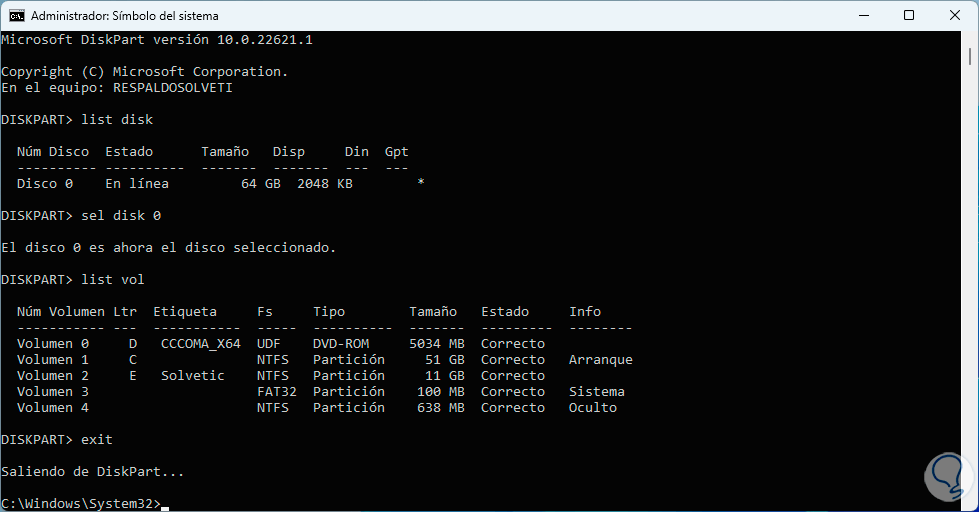
In the terminal, we run “diskpart” to access the utility and list the current disks with the command:
list disk

Step 25
After this, we select the disk:
sel disk 0
Step 26
When selected, we list its volumes:
list vol
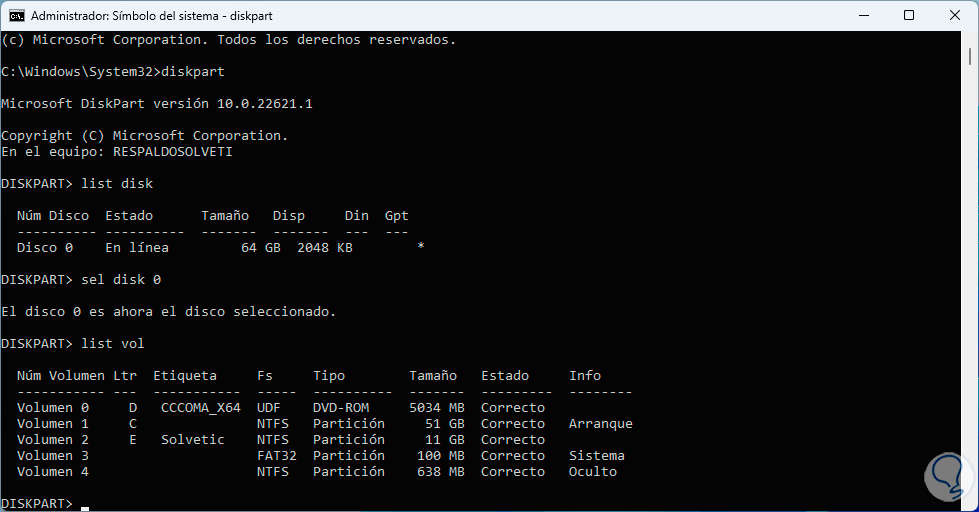
Step 27
In this section we find that the entire Windows boot system is correctly configured, we exit diskpart with the “exit” command:
2 Repair Windows 11 startup from Console
Step 1
For this method we will use BCEDIT, this is a utility to manage Windows boot configuration, to use it, we access the CMD as administrators:
Step 2
We accept permissions:
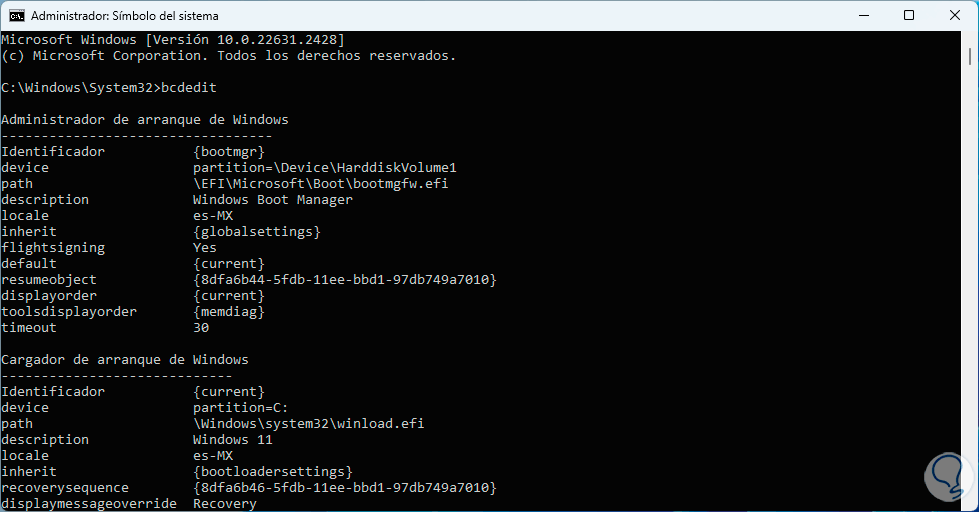
Step 3
In the console, we execute the “bcdedit” command to access the Windows 11 boot structure:
Step 4
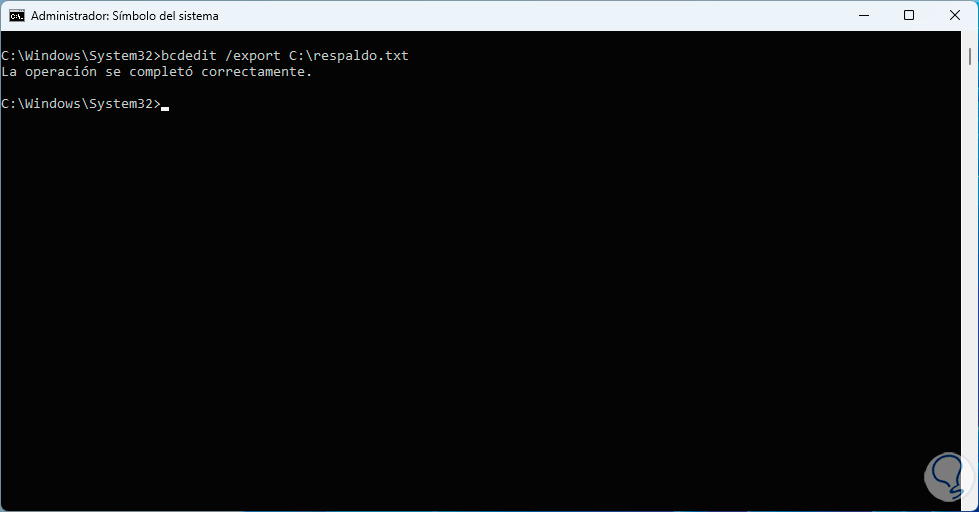
We can export this configuration to have it as a backup, in this case we execute the following:
bcdedit /export C:\file.txt
Step 5
If this file is required to be imported, we execute the following:
bcdedit /import C:\file.txt
Step 6
It will also be possible to carry out other actions with BCDEDIT such as:
- If we want to enable advanced boot options we will use the command:
bcdedit /set {globalsettings} advancedoptions true - If you want to enable Kernel editing, execute the command:
bcdedit /set {globalsettings} optionsedit true - To repair Windows 11 boot configuration data, we execute each of these lines:
bcdedit /store <Boot partition>:\boot\bcd /set {bootmgr} device partition=<boot partition>: bcdedit /store <Boot partition>:\boot\bcd /set {bootmgr} integrityservices enable bcdedit /store <Boot partition >:\boot\bcd /set {<Identifier>} device partition=<Windows partition>: bcdedit /store <Boot partition>:\boot\bcd /set {<Identifier>} integrityservices enable bcdedit /store <Boot partition>: \boot\bcd /set {<identifier>} recoveryenabled Off bcdedit /store <Boot partition>:\boot\bcd /set {<identifier>} osdevice partition=<Windows partition>: bcdedit /store <Boot partition>:\boot \bcd /set {<identifier>} bootstatuspolicy IgnoreAllFailures Parameters
Some extra usage parameters are:
- /createstore – Allows you to create a new empty boot configuration data (BCD) store
- /store: allows us to indicate the store that we will use
- /copy: allows you to make a copy of a boot entry in the same system store
- /create: is responsible for creating a new entry in the boot configuration data store (BCD)
- /delete: deletes an element from an entry that we specify
- /deletevalue – Allows you to delete a specified item from a boot entry in Windows
- /set: sets the value of an input option
- /enum: allows you to list the entries in a store
- /bootsequence: allows us to specify a unique presentation order which will be used at the next system boot
- /timeout: allows us to indicate the waiting time in seconds before the default entry is selected
We see with these methods how to repair the startup in Windows 11..