Hard drives are one of the essential components in any operating system and type of equipment because thanks to them it is possible to perform tasks such as:
- Install the operating system itself and its applications
- Host the information of each user
- Create backups and many more tasks.
In the case of macOS operating systems, in this case macOS High Sierra, hard drives, both SDD and HDD, make use of a technology called SMART (Self-Monitoring, Analysis, and Reporting Technology) which has been designed with the Aim for a self-test to be carried out in search of possible problems and thus take the necessary safety and maintenance measures .
Common mistakes
Some errors that indicate that the hard disk is with some type of failure are:
- Several applications close unexpectedly.
- An external drive does not work properly.
- The equipment does not start.
- It restarts without reason
TechnoWikis will explain how to check the SMART status of the hard disk, and remember that SMART is a mechanism created in order to inform the current and real-time status of the disk, so that the status of SMART gives us clues about whether a unit is failing or you have some other fatal error in the hardware giving us instructions that it will be necessary to execute control tasks there and indicating the need to create backups since a fatal error will make all the information difficult to recover..
Check the SMART status in macOS High Sierra
Step 1
To carry out this check, we will access the disk utility using one of the following options:
- Through Spotlight, entering the term "disks" and selecting the utility.
- Using the “Go / Utilities†path and in the pop-up window select Disk Utility.
- Using the following key combination and there select the utility.
+ ⌘ + U ⇧ + ⌘ + U
Step 2
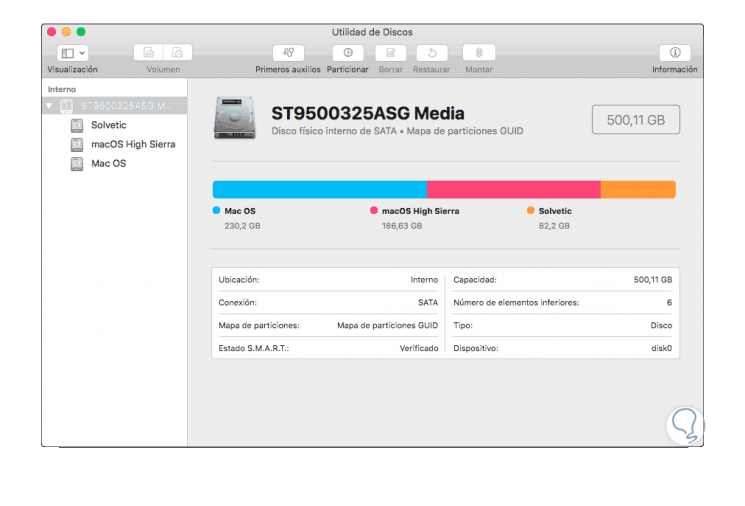
In the window that appears, we select the hard disk on the left side and in the central panel we will see at the bottom the “SMART Status†line:
Step 3
We can see one of the following options:
Verified
Indicates that the hard drive is in optimal condition.
Failed
This option indicates that the hard disk needs to be backed up and replaced urgently.
This last message refers to the hard disk presenting a serious problem or a fatal error in the hardware, hence the need for its change.
Step 4
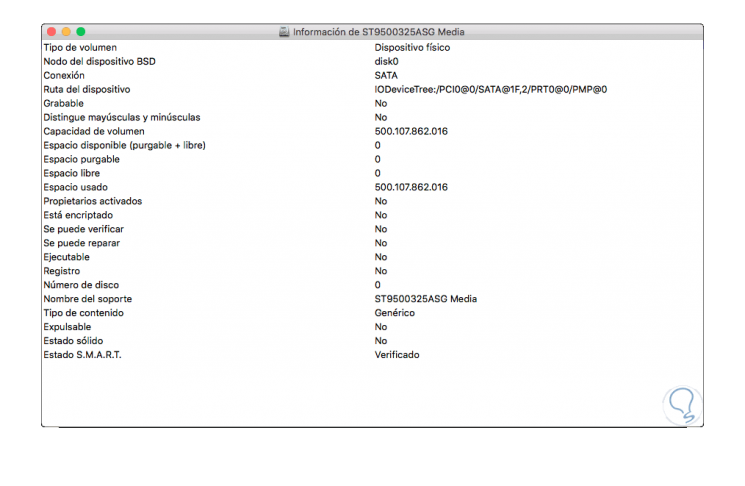
We can check this information by clicking on the "Information" button located at the top of the utility:
In some cases, the SMART status indicates the Verified status but the hard drive itself has some errors that prevent its optimal operation. In this case, one of the most practical solutions is to verify and repair the hard drive using Disk Utility from Recovery mode, or using the fsck command from Single User Mode.
Something to keep in mind is that not all disks support SMART technology. With this technology we have the opportunity to know at what time our hard disk has some kind of failure to take the necessary measures before the problem is much more critical and we no longer have a possible solution.