Windows Server is Microsoft's commitment to offer organizations a reliable, secure, scalable operating system and with the best features both in terms of services, roles and applications.
A server with Windows Server must be able to adapt to the needs of today's world which require systems that are effective to perform multiple processes and have the best resources to meet not only the needs of users but each of the hardware and process requirements that applications request for optimal performance.
In this field we have seen how Microsoft has gradually added significant improvements in Windows Server and with its latest announcement of Windows Server 2019 we will be facing a renewed system that will fully comply with each of the requirements of the thousands of organizations that put their trust in Microsoft.
Although there are more and more Windows Server servers focused on the cloud with Azure , many companies still have them physical, at least some major servers.
Remember that Windows Server 2019 is focused on 4 keys that are:
- Hyperconvergence Infrastructure
In addition to this, Windows Server 2019 will be the first long-term service channel (LTSC), with which support and updates will be secured.
Server functions
Now, it is no secret to anyone that the primary function of a server is to perform different tasks:
- Acting as a domain controller which, according to the organization's design, will allow multiple users and computers to connect to it and this domain can be edited with certain administration and control rules.
- Serve as a DNS server (Domain Name System) which is one of the fundamental tasks because thanks to DNS, network names are resolved, which consists of translating IP addresses into domain names and vice versa .
- Authenticate user access to the system
- Manage third-party software and applications so that they are executed correctly
- Manage and administer all user and equipment policies
Once we have created the Domain Controller with all these steps, we can join computers, and for this we have already created a tutorial that explains in depth how to connect Windows computers to your Active Directory Server. We leave everything here well explained each step so that you have it at hand.
To keep up, remember to subscribe to our YouTube channel! SUBSCRIBE
Through this tutorial we focus on learning how to configure Windows Server 2019 as both a domain controller and a DNS server and thus extend its operating capabilities.
1. Pre-configuration of the server in Windows Server 2019
Before creating the domain controller it will be necessary to perform some basic actions so that everything works in the best way.
In the first place, because the server will be a central team from where applications, roles and services (such as files and printing) will be accessed, having a dynamic IP address will be a problem since it changes periodically and will affect the connectivity between the client computers and the server, for this we must have a static IP address.
Step 1
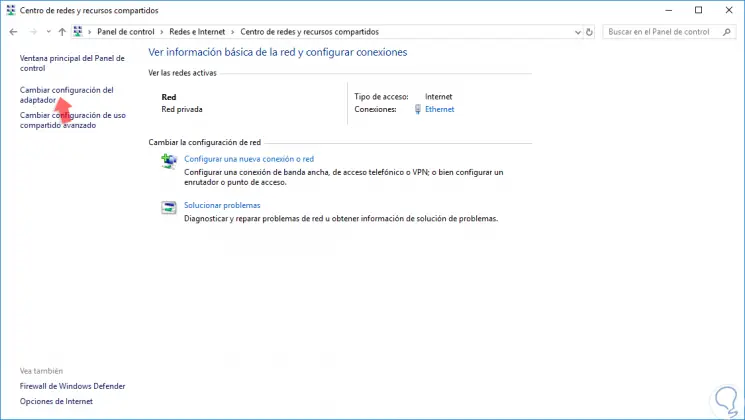
To assign this address, we will go to the next route.
- Center network and sharing
Step 2
There we click on the "Change adapter settings" line located on the left side and in the new window we will right click on the current network adapter and select the "Properties" option: 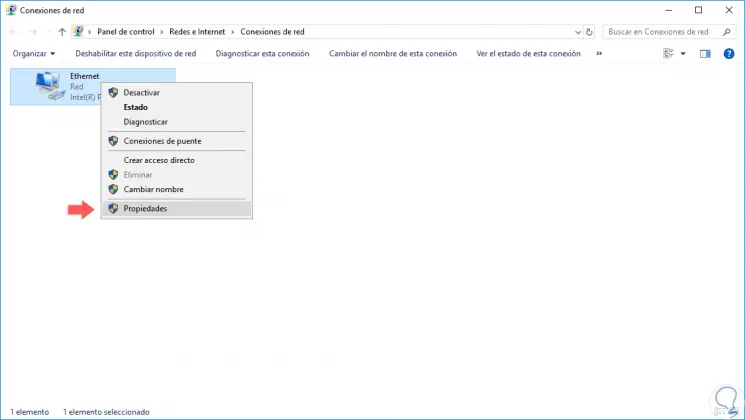
Step 2
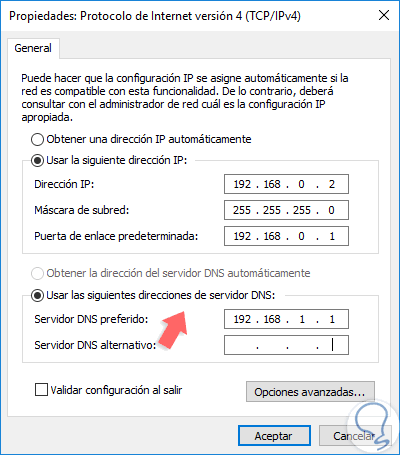
In the new window we select the line "Internet Protocol version 4" and click on the "Properties" button:

Step 3
In the displayed window we activate the "Use the following IP address" box and configure aspects such as:
Step 4
Once this is configured, click on the "Accept" button to save the changes. If we want to verify that the IP address is assigned correctly, we can go to the command prompt and execute the "ipconfig" command: 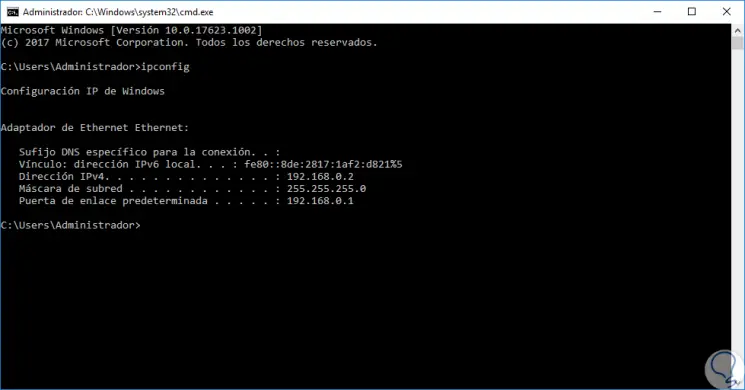
Step 5
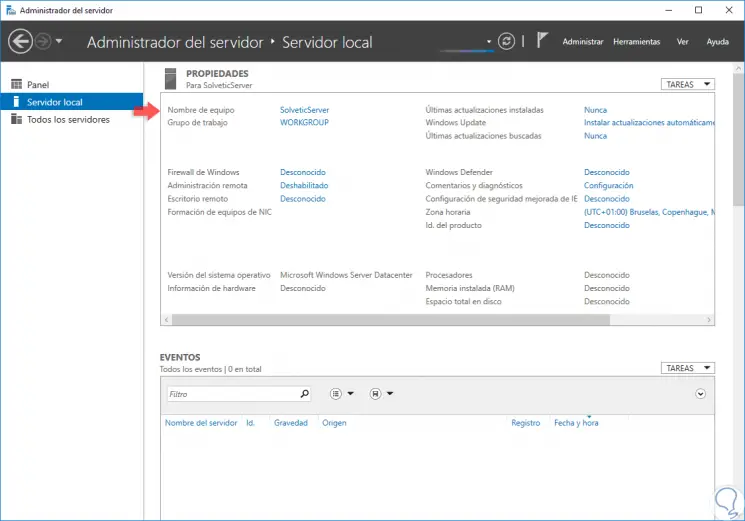
Another point to keep in mind is to modify the name of the server so that its use is much simpler, for this, we go to the Server Administrator and click on the current name of the computer in the line "Computer Name": 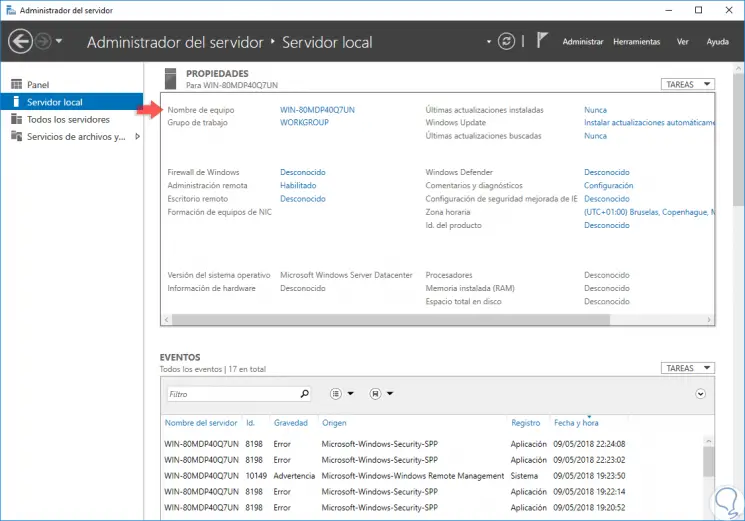
Step 6
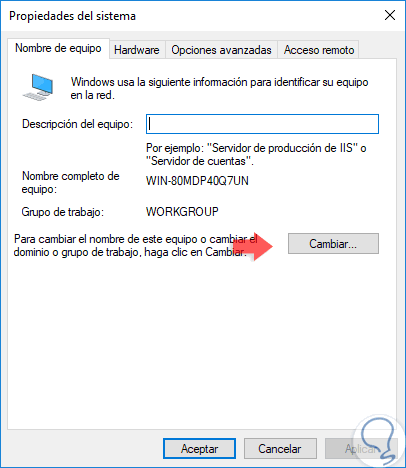
The following window will be displayed where we click on the "Change" button:
Step 7
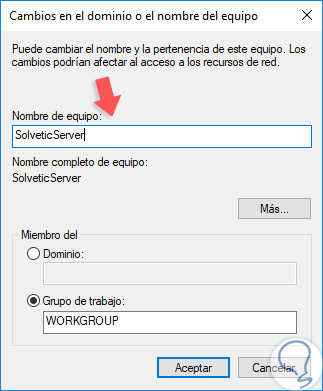
We assign the name of the team in the "Team name" field:
Step 8
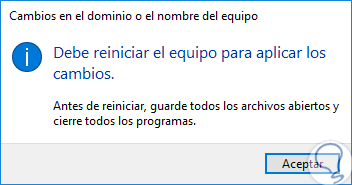
Click on OK and the following message will be displayed:
Step 9
Click on OK and once the device is restarted we will see the new name assigned: