Currently we can see how we have a series of cloud platforms that give us the option to upload multiple files to access them from anywhere and edit, download or perform more actions always ensuring availability and accessibility to them..
A task that must be necessary for reasons of updating and control, is to have the ability to synchronize one or more folders with these resources in the cloud to ensure that all changes we make are updated in real time and thus know that everything will always be in the right way.
Through this tutorial we will learn to synchronize folders in Windows 10 with some of these traditional platforms..
1. How to synchronize folders in Windows 10 with OneDrive
OneDrive is the bet that Microsoft integrates with its mail, Outlook and Hotmail platforms, and which by default is already integrated into Windows 10.
Step 1
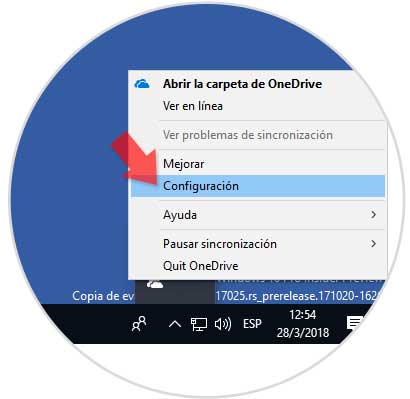
To perform this process in OneDrive, we will go to the OneDrive icon located in the taskbar and there we will right click on it and select the Configuration option:
Step 2
The following window will be displayed where we go to the Autosave tab and there we will be able to see the folders that OneDrive synchronizes by default:
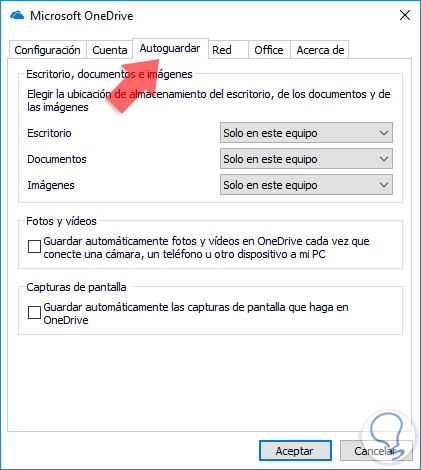
As we see, it only synchronizes three folders that are:
The objective is that we are able to synchronize other folders without the need for them to be moved directly to any of these by default.
Step 3
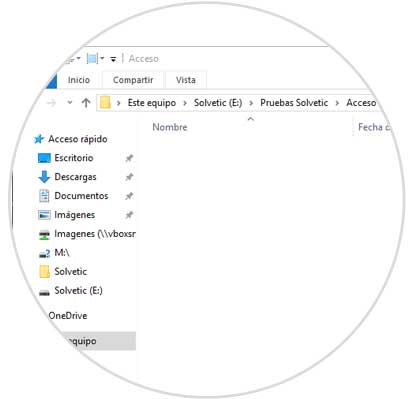
For this example, we have created a folder called Access within another called TechnoWikis Tests on drive E:
Step 4
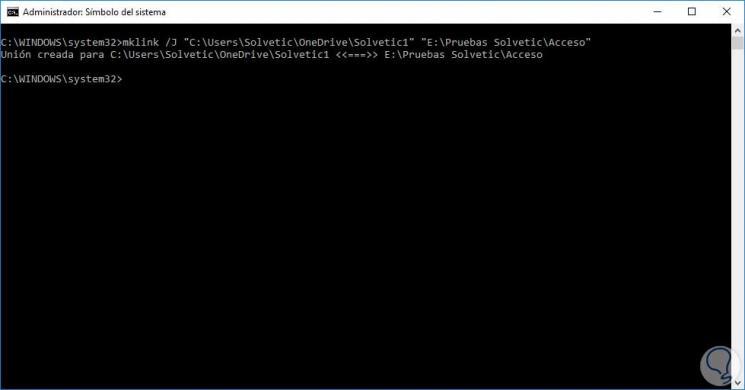
To enable synchronization of this folder without moving it from its original location, we will access the command prompt as administrators and execute the following:
mklink / J "C: \ Users \ TechnoWikis \ OneDrive \ TechnoWikis1" "E: \ TechnoWikis Testing \ Access"
Step 5
With this command a symbolic link (symbolic link) is created through the mklink command where two unique values ​​are counted:
Step 6
When we have executed this command, we can go to the OneDrive folder and we will see that the folder we have created in the command prompt, TechnoWikis1, is already available there:
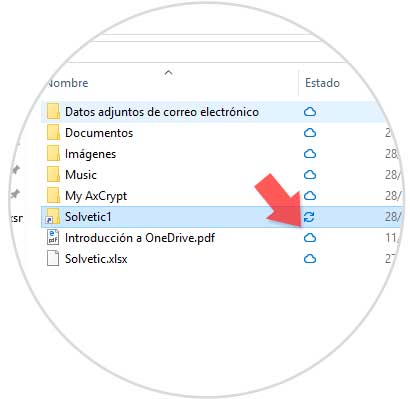
From this moment, everything we edit or store will be synchronized without having moved the folder from its original location..
2. How to sync folders in Windows 10 with Google Drive
Google, known by billions, offers Google Drive which is integrated into its Gmail platform with great benefits when it comes to storage and file synchronization.
Step 1
In the case of Google Drive, there is a free utility called Backup and synchronization which can be downloaded at the following link:
Backup and sync
Step 2
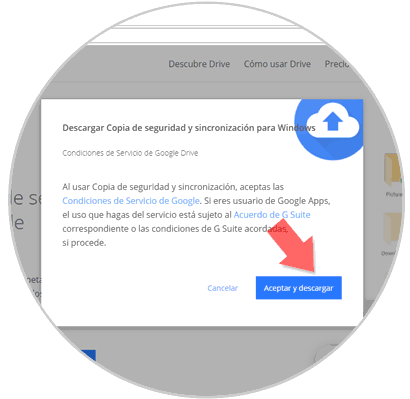
Once we proceed to download we will see the following. There we click on the Accept and download button to start the process.
Step 3
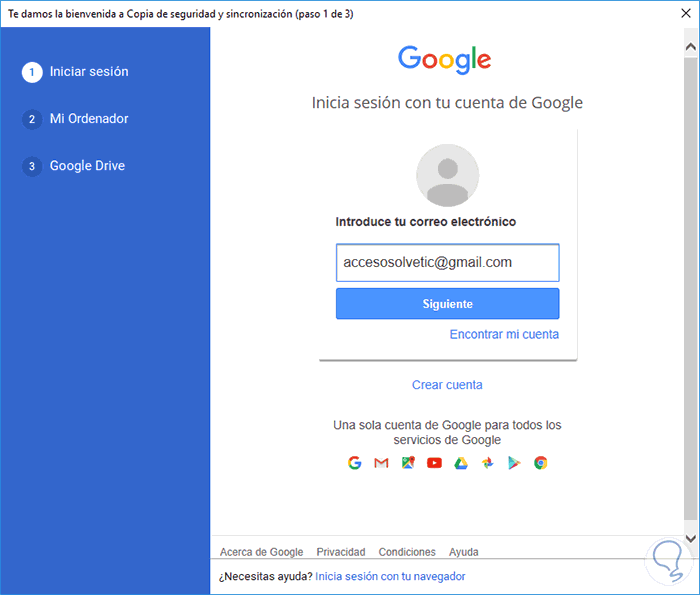
Once downloaded, we proceed to its execution and the following will be displayed:
Step 4
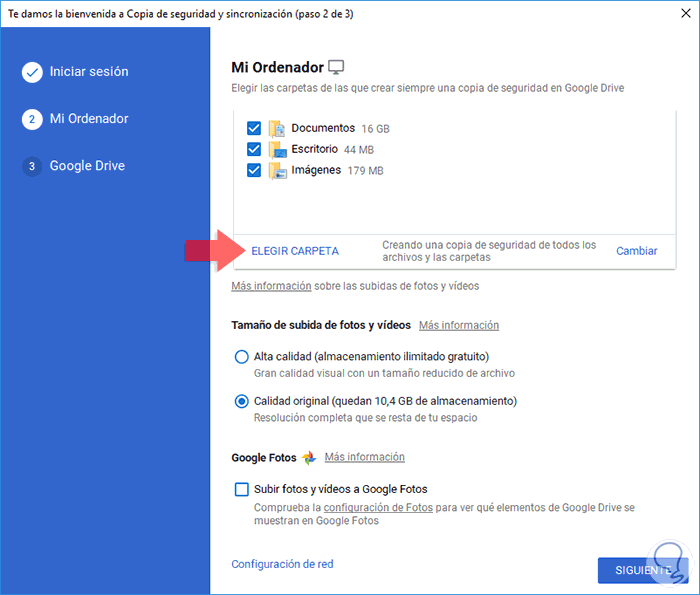
There we will enter our Gmail account to log in and after entering the password, the following will be displayed. There we see that by default the utility will synchronize the Documents, Desktop and Images folders, but we can add many more by clicking on the Choose folder line.
Step 5
Once this is defined, click on Next and we will see this window:
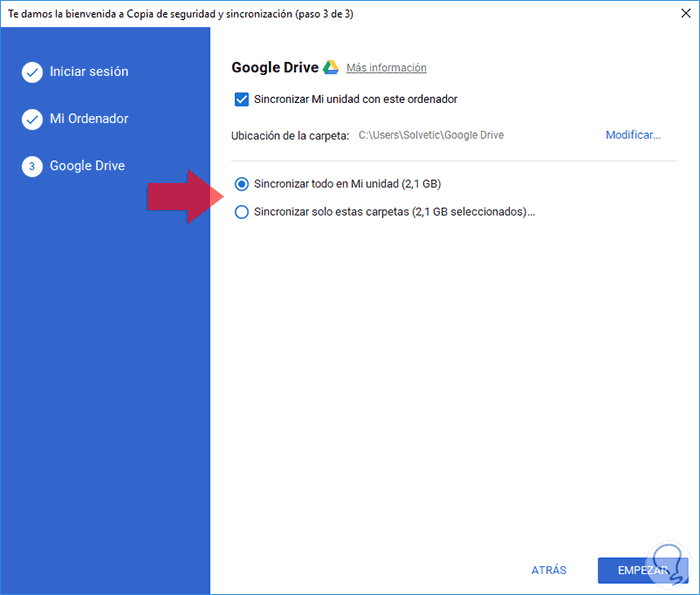
There we can select if everything selected has to be synchronized or only the folders we define, click on Start to start the Google Drive synchronization process.
3. How to synchronize folders in Windows 10 with Dropbox
Dropbox is another cloud storage platform highly recognized for its performance and performance characteristics.
Step 1
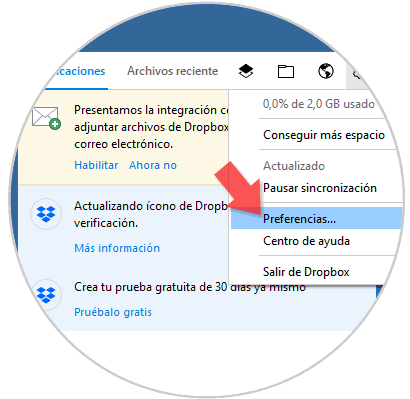
In the case of synchronization in Dropbox we must click on the Dropbox icon located in the taskbar and then click on the gear icon located in the upper right and select the Preferences option:
Step 2
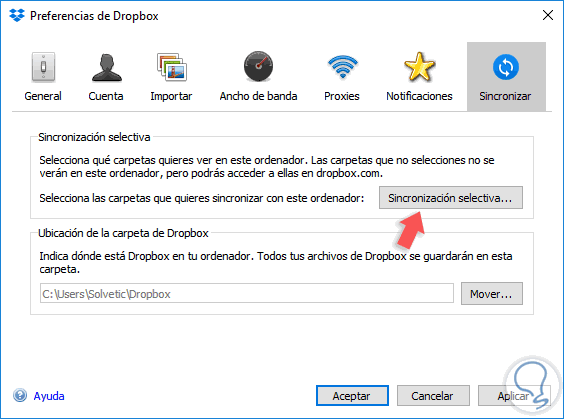
In the window that will be displayed we go to the Synchronize tab and we will see the following:
Step 3
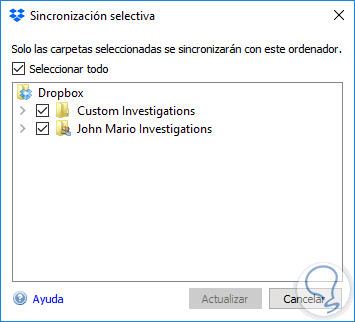
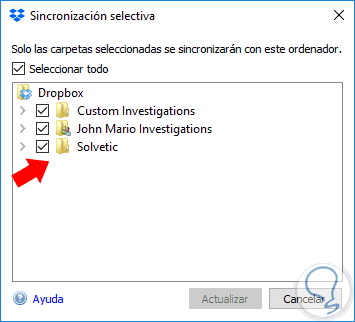
There we click on the Selective Synchronization button and in the displayed window we will see the active Dropbox folders:
Step 4
To add a new folder to this synchronization process, simply move it to the path C: / Users / user / Dropbox to be included in the synchronization process.
We can see that the process to synchronize our files is simple and does not involve much complex process.