One of the most modern advances that will give us the opportunity to scale our equipment to levels not previously thought of is Docker, we have talked a lot about Docker and containers but we really do not know in depth how to use it or how to implement it in our Linux distributions , and we are really missing the opportunity to increase the capabilities of our infrastructure and in the process have the opportunity to perform a much more centralized administration of our role as IT personnel..
TechnoWikis will make a complete analysis about how to install and use Docker in Ubuntu 17 and we will see that, apart from how simple it is, the opportunity to achieve higher levels of reach within the organization will be increased without much effort and without using more resources of the available.
What is docker
Docker has been developed focused on creating an independence between applications and infrastructure and developers and IT operations with the objective of adding greater potential to each task to be carried out and in the process of creating a model for better collaboration and innovation of all the team and processes that are involved there.
The center of all Docker are the containers, where a container image is a lightweight, independent and executable package in which everything necessary to execute it is included:
- System libraries and configurations.
These containers are available for applications based on Linux and Windows, where the software stored in the container will always work the same, regardless of the environment since the containers created are responsible for isolating the software from the environment which creates fewer conflicts and works in a way Independent..
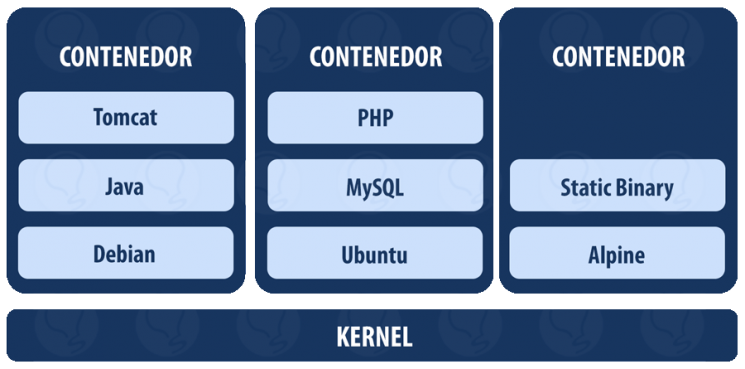
The use of containers in Linux environments, focused today, are used to implement applications and this task is called containerization.
Advantages of using containers
Some of the advantages we have when using and implementing containers are:
- Flexible: Containers are able to host complex applications.
- Lightweight: Containers leverage and share the host kernel increasing its efficiency.
- Interchangeable: When implementing a container it will be possible to implement updates in real time.
- Portable: Thanks to the containers it is possible to build images locally, deploy in the cloud and run anywhere which is useful when we have to perform tasks in different places.
- Scalable: A container can automatically increase and distribute container replicas which adds more levels of administration in the organization.
- Stackable: A container can stack services vertically and in real time.
A container is started by executing an image, where an image is an executable package in which everything necessary to run an application is included as mentioned above. A container is a runtime instance of a specific image, that is, the image becomes memory when it is executed..
When working with containers there are a number of concepts that we should know and familiarize with them since they will be frequent in day to day work of this type, these are:
Container Host
When we talk about the container host we mean the physical or virtual operating system itself which is configured with the Container function. The container host can run one or more Containers of the selected operating system.
Container Image
At the time of carrying out some type of editing in the file system of the container, these changes are captured in a limited environment, that is where this container comes into operation, since once the container stops, it can be converted in a new container image.
Sandbox
The sandbox is responsible for capturing all writing actions where we find some as modifications to the file system software installations or more.
Image of container OS (Container OS Image)
Recall that each container is displayed from an image. This image is responsible for offering the operating system environment and as such it cannot be edited in any way.
Container Repository
When we proceed to create a container image, this image and all its dependencies are stored in a local repository where it can be used again on the container host without affecting any type of available resource.
With these clear concepts we will see how to install and create a container in Ubuntu 17.10.
1. Verify the Ubuntu Operating System
Before installing Docker on Ubuntu, it is ideal to verify the kernel version and the current operating system architecture, for this, we will run the following as root user.
Step 1
Although we can use sudo before each command, it is practical to run this command to set the root user in Ubuntu:
sudo -s
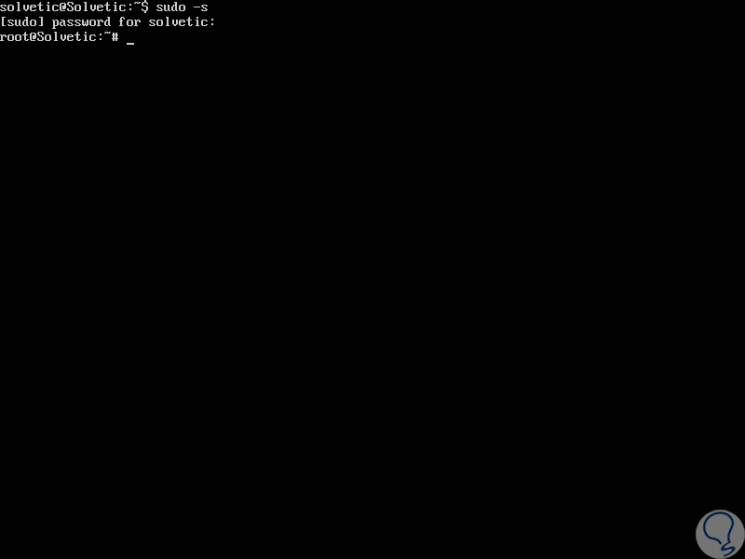
Step 2
There we enter our password and we can execute all commands as root.
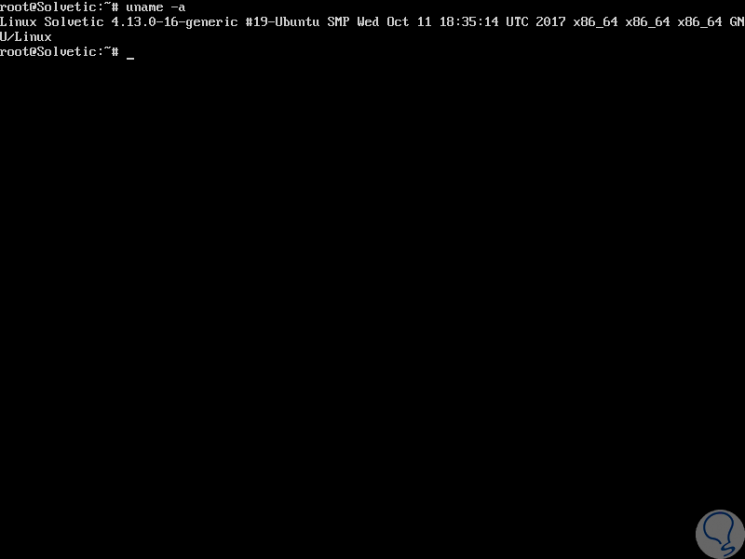
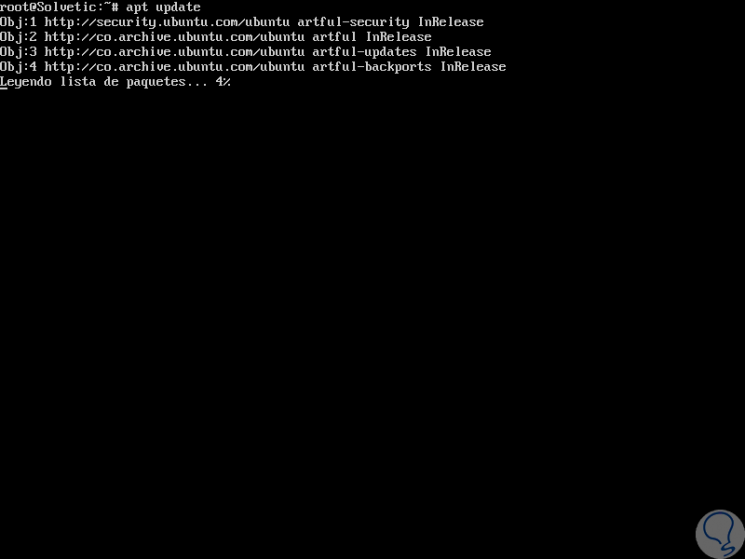
Now, we will check the kernel version of Ubuntu 17 by running the following:
join me
Step 3
Finally, we will verify the Ubuntu version with the execution of the following command:
cat / etc / lsb-release
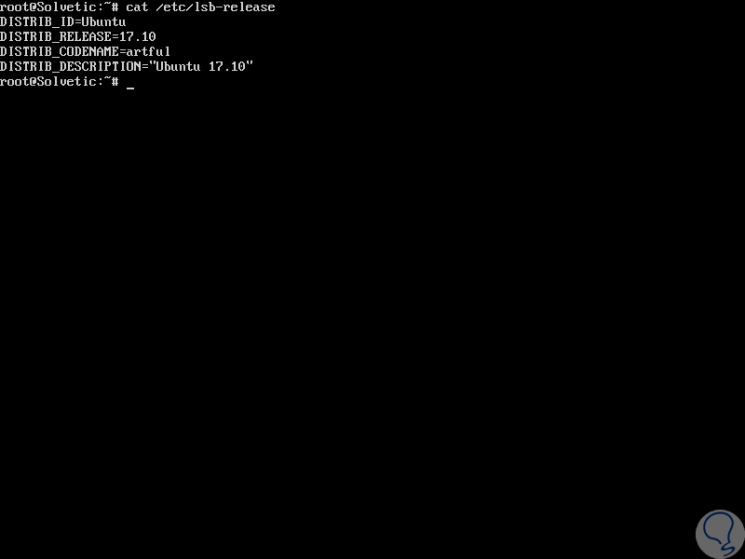
Step 4
We can see specific details of Ubuntu 17.10. Once we have this defined, we proceed to update all the operating system packages with the execution of the following lines:
apt update apt upgrade
2. Install Docker on Ubuntu Linux
Step 1
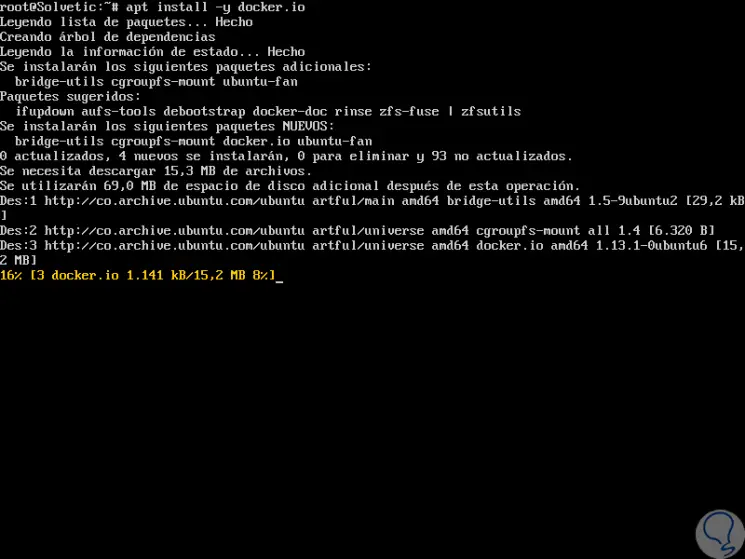
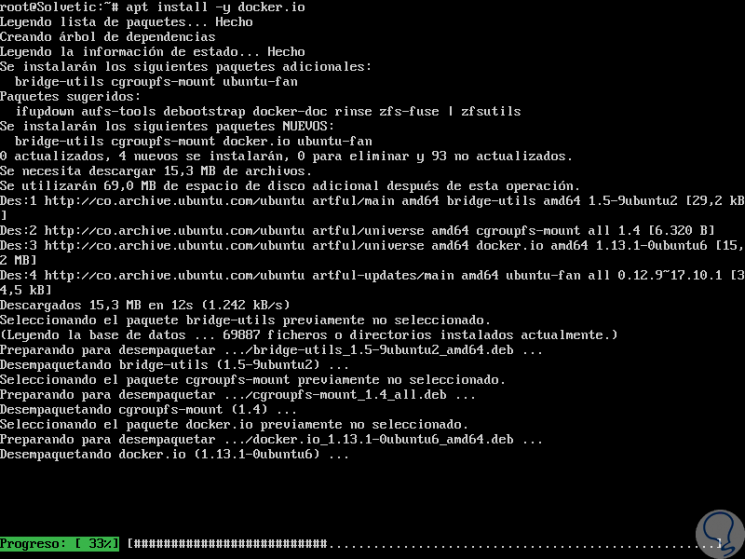
Once the operating system is updated, we will install Docker using the following command:
apt install -y docker.io
Step 2
There we can see that the process of downloading Docker on Ubuntu begins, which will then be automatically installed:
Step 3
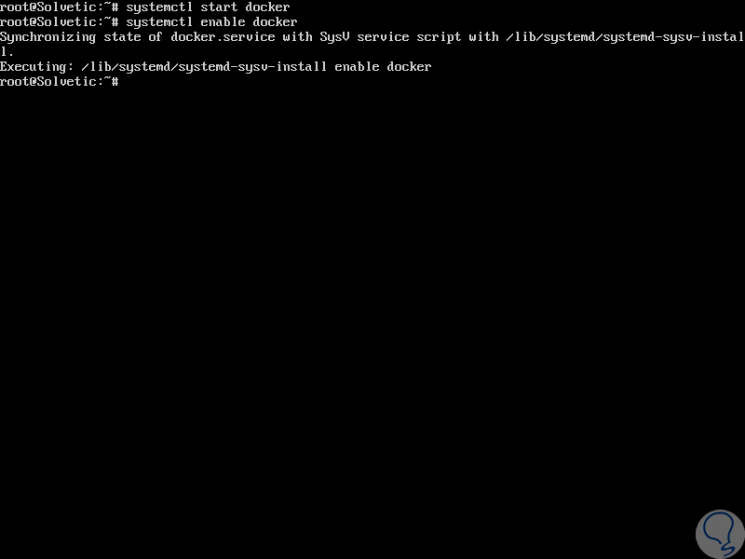
Once Docker has been installed, we will start it using the following line:
systemctl start Docker
Step 4
We enable Docker to be executed on Ubuntu startup:
systemctl enable docker
Step 5
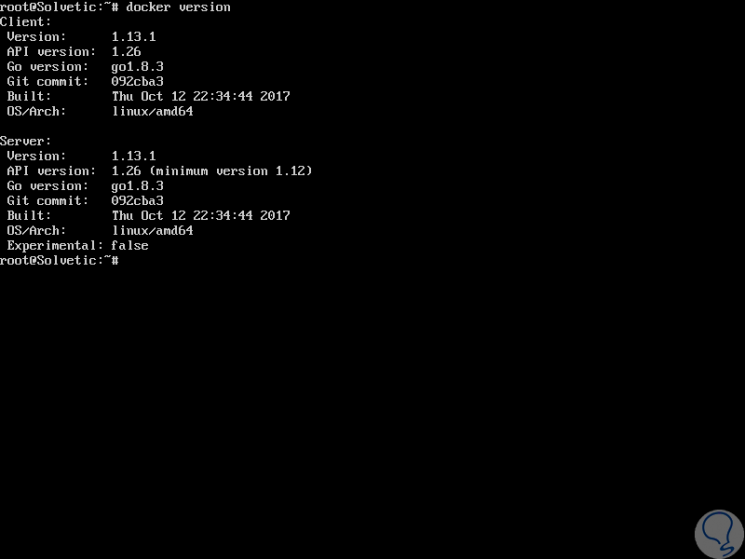
If we want to know the version of Docker that has been installed we will execute the following. There we find the version of both the client and the server.
docker version
3. Use Docker in Ubuntu Linux
To create a new container, we will select a base image with the operating system, that is, we select Ubuntu, CentOS, Fedora, etc.
Step 1
We can find this by using the search command as follows:
docker search “Imageâ€
Step 2
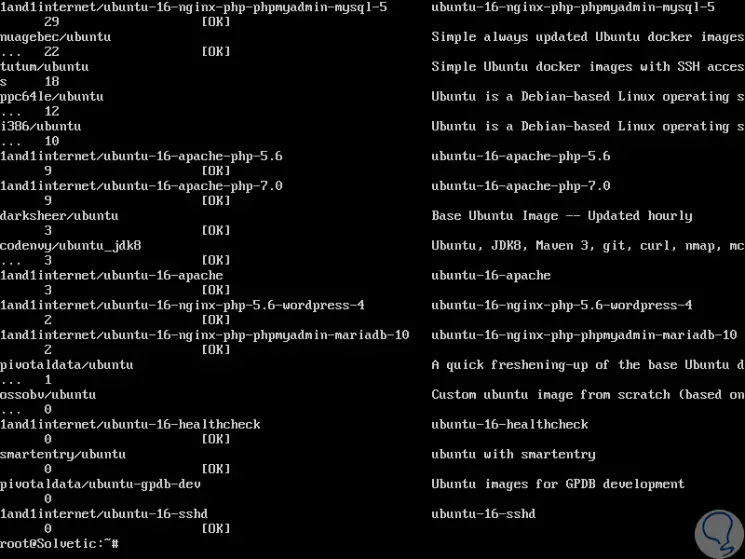
For example, to search all the Ubuntu images, we execute:
docker search Ubuntu
Step 3
The result will be as follows:
Step 4
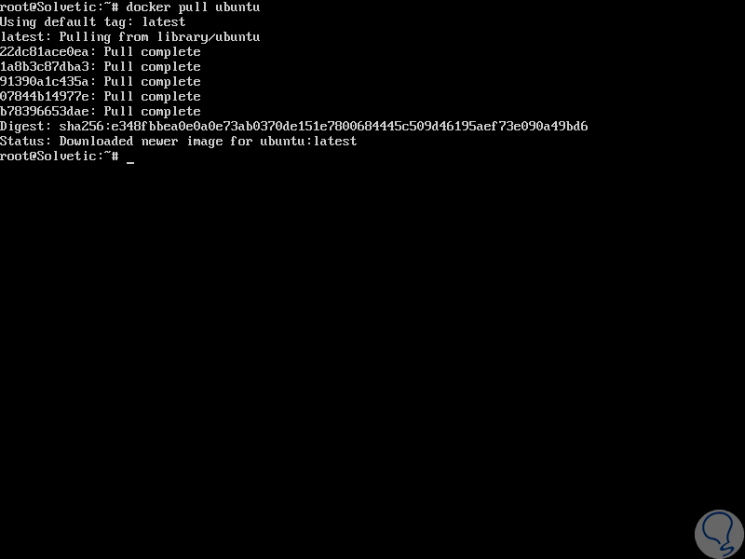
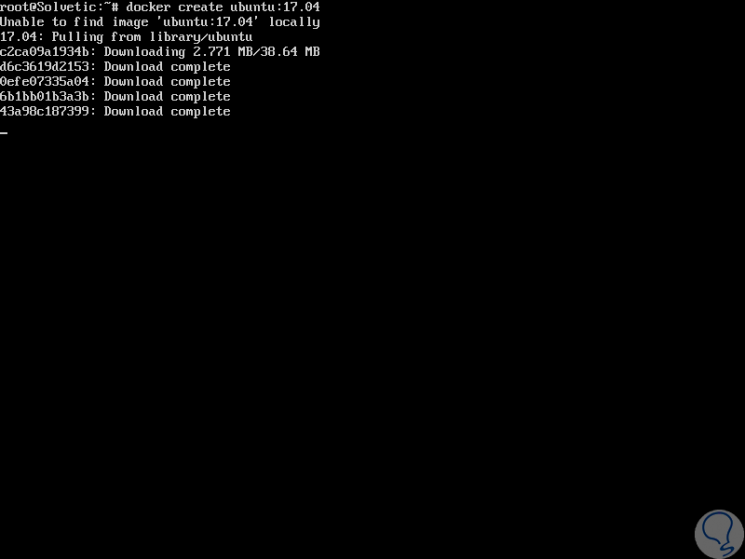
Now we are going to download the base image to our team using the following command:
Ubuntu docker pull
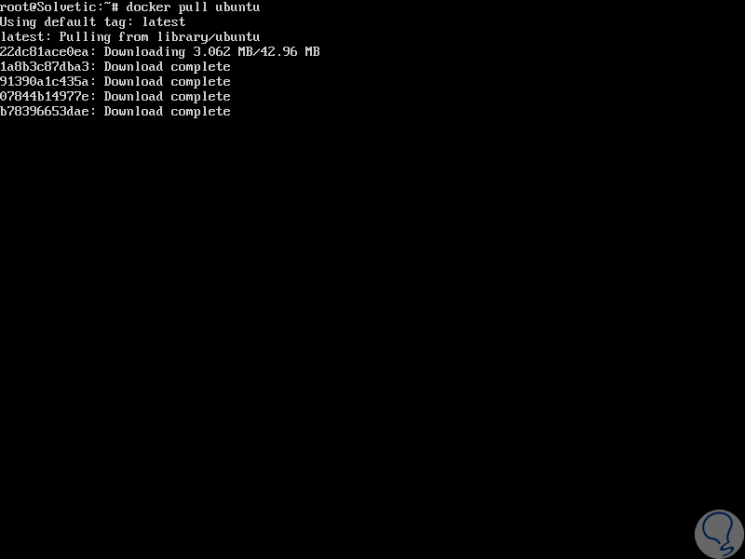
Step 5
There we can see that an image will be downloaded to our server from DockerHub. Once the download is complete we will see the following:
Step 6
To see the downloaded images we will execute the following:
docker images

Step 7
There we find details like:
Step 8
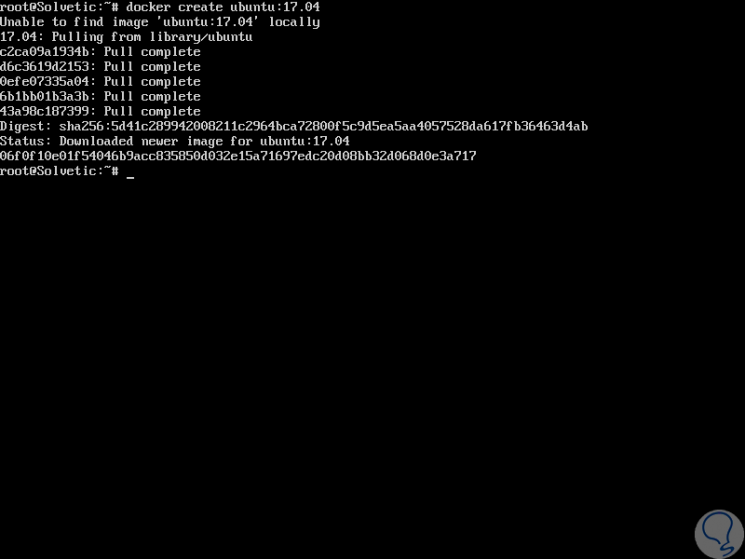
The selected image, from Ubuntu, was downloaded from the DockerHub Registry and now it is time to create a container from this image, for this we will execute the following using docker create or docker run:
docker create ubuntu: 17.04
Step 9
Once this process is finished we will see the following:
Step 10
The docker create command will create a new container but will not start it. For its start, we will use the execution command like this:
docker run -i -t ubuntu: 17.04 / bin / bash
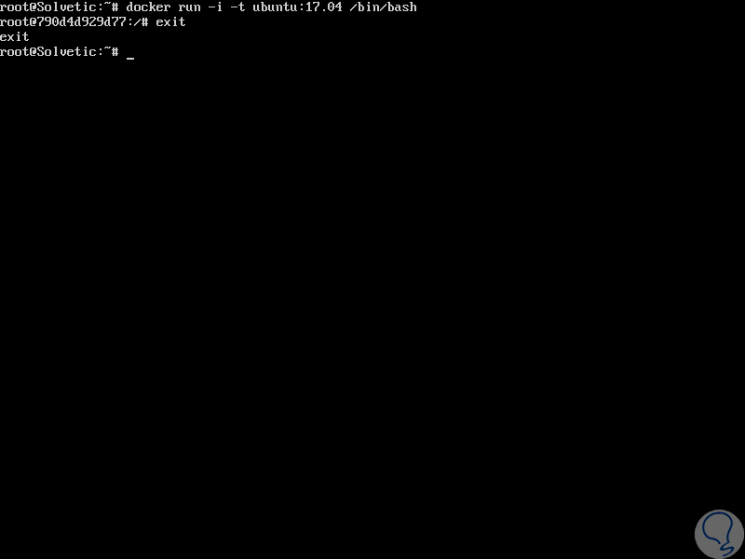
Step 11
The container will stop when we use the exit command, if the goal is to have a container that is executed in the background, we must add the -d option in the command like this:
docker run -i -t -d ubuntu: 17.04 / bin / sh -c "while true; do echo hello world; sleep 1; done"
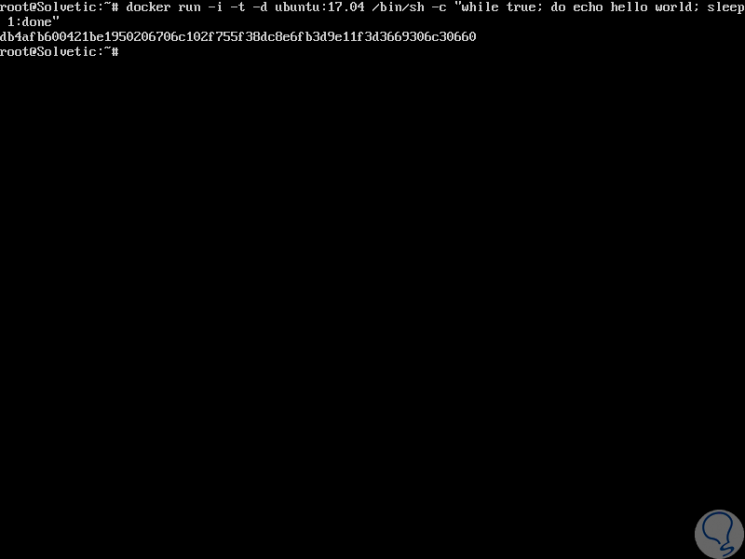
Note
bin / sh -c "while true; echo eco hello world; sleep 1; done"
It is bash script that allows you to repeat "hello world" continuously but logically it is not necessary.
Step 12
We can see the container that is being executed in the background by executing the following:
docker ps
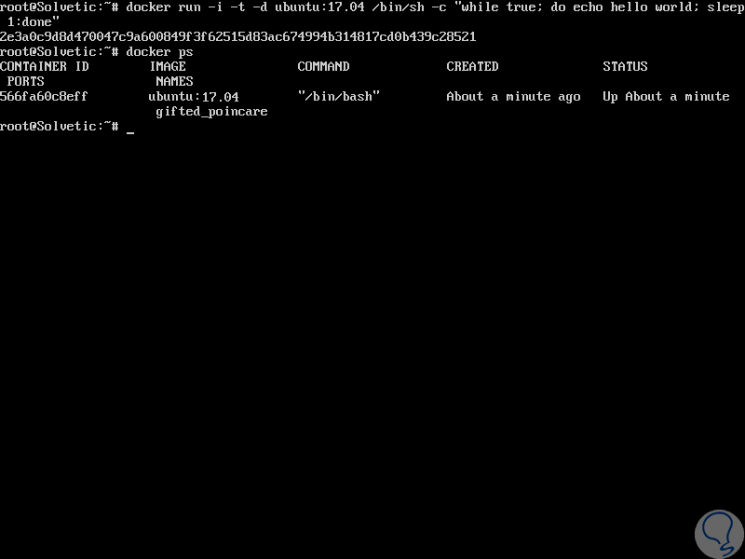
Step 13
As we see, details such as:
Step 14
If you wish to see the events of the image, we will execute the following syntax:
docker logs ContainerID
Step 15
If we want to connect to the created container, we will use the following syntax:
docker exec -i -t ContainerID / bin / bash
Step 16
Once there we can execute multiple commands:
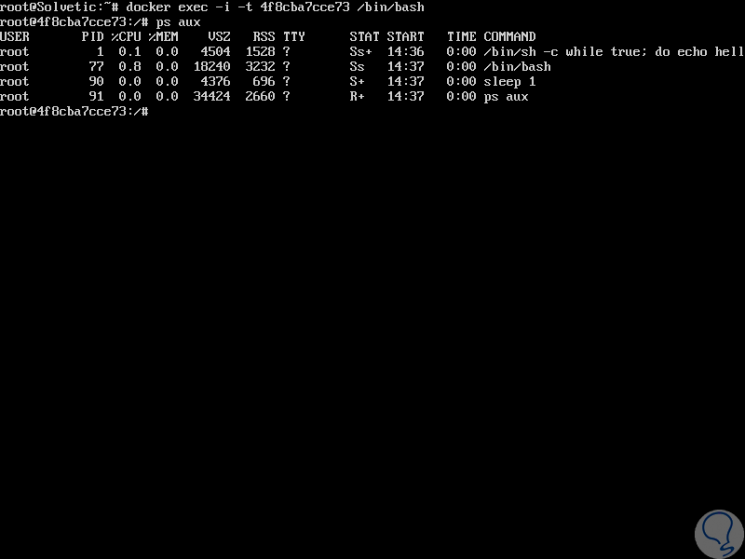
Step 17
We can see that the host name and the ID of the container are the same, this indicates that we are inside the container. When we write exit in that shell, we will leave that shell but the container is still running in the background. Other actions to perform with the container are:
We can see how simple it is to have one or more containers in Ubuntu and thus scale to a higher level of configuration our system.