The storage is an issue that in today 's world has taken very important because based on their abilities can have the availability of data . It is not a secret for any of us that today data moves in astonishing amounts of all kinds (voice, audio, images) and if the storage does not have enough capacity to host this data, we will be at a latent risk of losing it ..
With this in mind, Red Hat has developed Red Hat OpenShift Container Storage which is constituted as a storage defined by integrated software that has been optimized for Red Hat OpenShift Container Platform. In the following link you will find more information about it:
OpenShift Container Storage in version 4.2 is based on Red Hat Ceph® Storage, Rook and NooBaa which allow us to deliver container-focused native storage services that are compatible with block, file and object services. This results in a more comprehensive coverage of storage capacities.
Platforms
Version 4.2, OpenShift Container Storage can be used on platforms such as:
Platform implementation
This platform can be used locally or in a public cloud with improvements such as:
- Integrated Red Hat technology
- Open source development model
Storage
OpenShift Container Storage works seamlessly when receiving popular or cloud native workloads like:
- Object storage for archival, backup, or media storage purposes
- Storage blocks focused on databases and messaging
- Shared file storage for continuous integration and data addition purposes
Type of works
One of the main innovations of OpenShift 4.2, is that its internal structure has been redesigned with the aim of taking full advantage of Kubernetes operators (Kubernetes Operators) and these allow to exploit to the maximum the distribution of Kubernetes at enterprise level when carrying out work. how:
In summary, this allows the user full control over the installation, update and administration of the storage in OpenShift..
To give us a bit of an understanding of operators, these are a simple way to package, deploy, and manage a native Kubernetes application. These applications are implemented in Kubernetes and their management is done through the Kubernetes APIs and the kubectl tools.
To stay up to date, remember to subscribe to our YouTube channel! SUBSCRIBE
Variables for themes
OpenShift Container Storage 4 has a clear vision so that the administrator can work without confusion on each process of the accommodation, regardless of their level of knowledge, since they offer viable solutions for topics such as:
- Deploy storage services on your network
- Expand storage capacities
- Create an alert to users the moment a storage problem occurs
- Integrate dashboards into the OpenShift Administrator Console where you can see the status of the utility and the level of storage.
OpenShift makes use of the Operator framework (Kubernete operator frameworks) which mostly automate the actions of native cloud storage for OpenShift. This gives a global and controlled focus on vital aspects such as scheduling, life cycle, resource management, analysis, monitoring and security of the data hosted in the container..
Implementation
OpenShift Container Storage can be implemented in different scenarios like:
- File storage for CI / CD authoring environments
- Test environments where complex databases, document stores and messaging systems work
- Storage of objects in multiple clouds
We are going to know the process of installation and use of OpenShift Container Storage.
Free meetings with RED HAT experts
Sign up for free webinars taught by RED HAT experts on 100% technology: Containers, Kubernetes, Orchestration, Automation etc.
1. How to Download OpenShift Container Storage Red Hat
Step 1
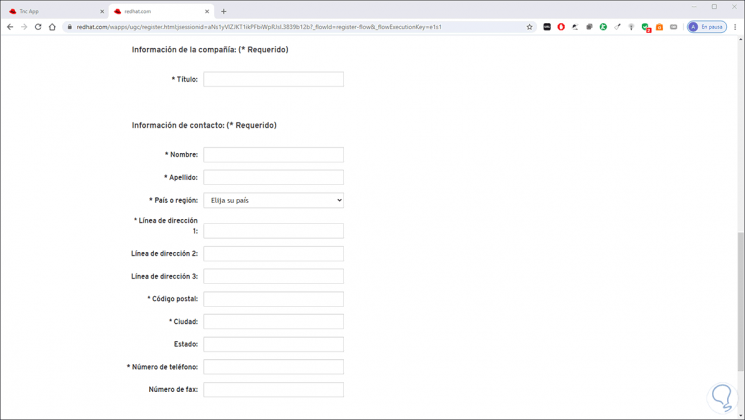
The first step will be to go to the official OpenShift Container Storage link and create our Red Hat account or log in:
OpenShift Container Storage
There we must enter all the data that is requested:
Step 2
After this, the possibility of accessing learning scenarios is offered:

Step 3
With this it is possible to get a global idea of how OpenShift Container Storage works.
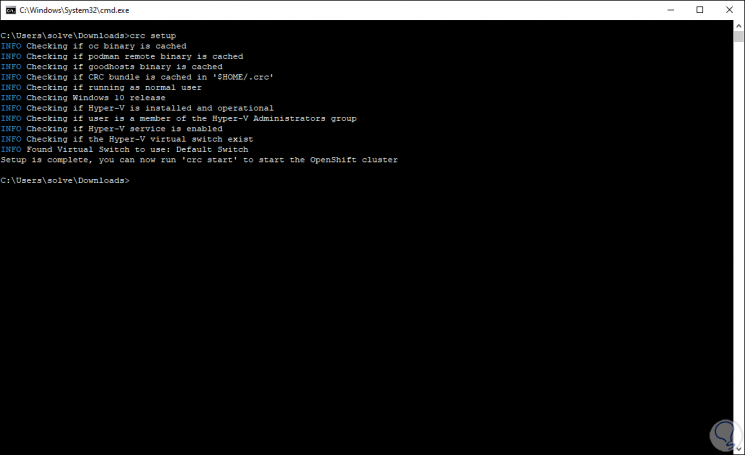
To mount and manage it physically, we must install OpenShift 4 according to the instructions in the above mentioned link and firstly validate that the computer has the minimum requirements, in this case Windows 10, which are:
- Windows 10 Falls Creator version or higher
For this we access the command prompt and go to the path where OpenShift 4 has been extracted and execute:
crc setup
Step 4
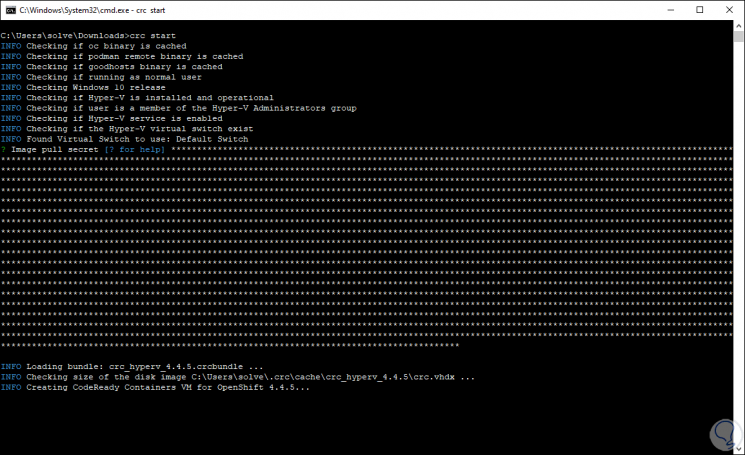
Next we create the cluster that is where OpenShift Container Storage 4 is configured with the following command:
crc start
Note
OpenShift Container Storage is part of OpenShift 4, so you should always have a cluster created for your use.
Step 5
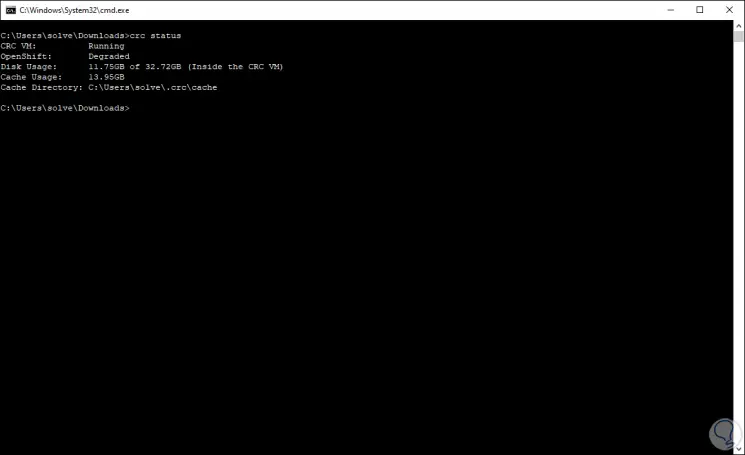
Once this process is finished, we can check its status with:
crc status
Step 6
We must access the cluster by running:
crc console
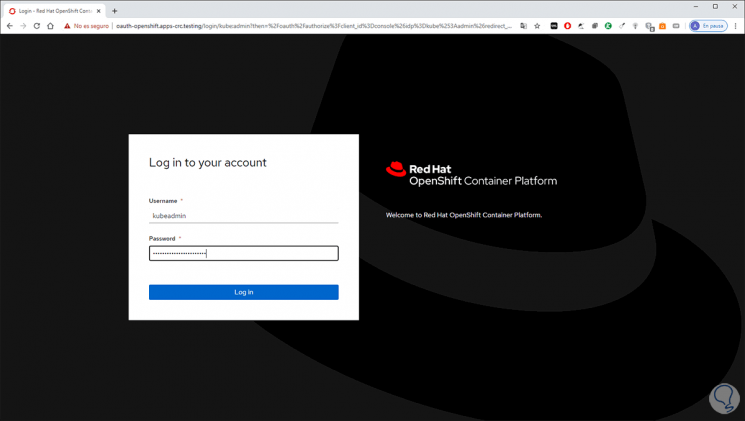
Step 7
There we enter the user data and in the next window we will go to the "Storage" section where we will see the following:
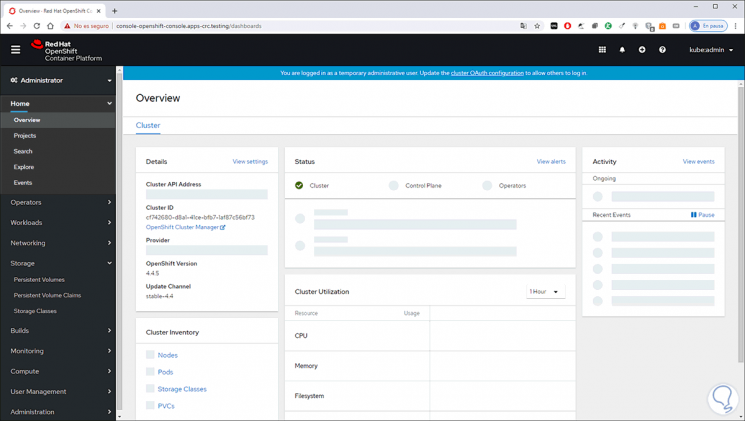
There are three types of storage which are:
Persistent Volumes
This option gives us the opportunity to create a volume with a fixed size and they are resources in the cluster.
Persistent Volumes Claims
They fulfill the same function of the previous one but additional this current one as verification of claims of the resource
Storage Classes
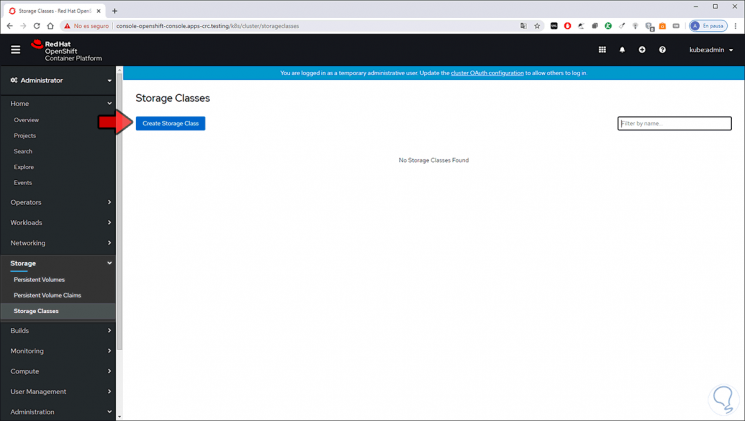
Allows administrators to assign storage classes to use based on services, backup policies, or policies determined by cluster administrators.
Step 8
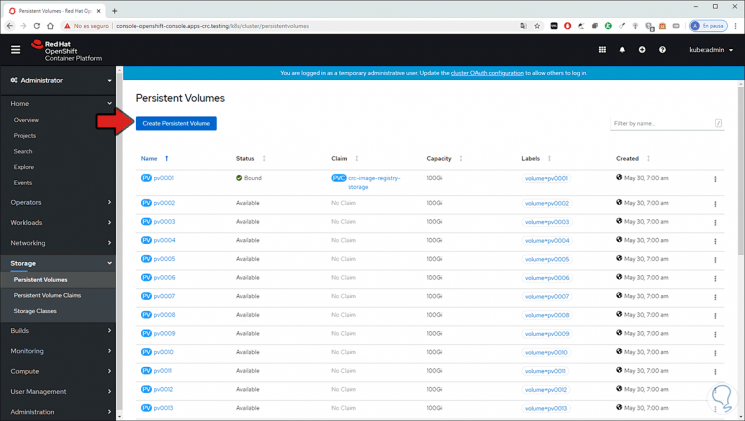
In this case we select Persistent Volumes and we will see the following. There we see the current volumes and OpenShift Container Storage allows us to create the volume by clicking on "Create Persistent Volume"
Step 9
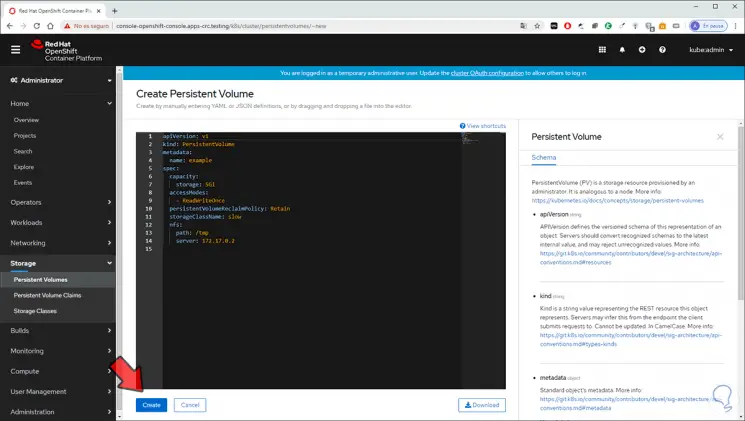
In the console there are a series of predefined values that are:
apiVersion
APIVersion is responsible for assigning the versioned schema of this representation of an object, each server must convert the recognized schemas to the last internal value and be able to not accept the unrecognized values
kind
This is a string value that represents the REST resource that this object represents.
Metadata
These are metadata from the standard object
Spec
This value defines a specification for the persistent volume owned by the cluster, as we see there it determines the default capacity (5 GB) and the access mode
Status
This option indicates the current status of the volume
The capacity and access mode value can be edited directly in the console and then we click "Create" to create the volume thanks to OpenShift Container Storage:
Step 10
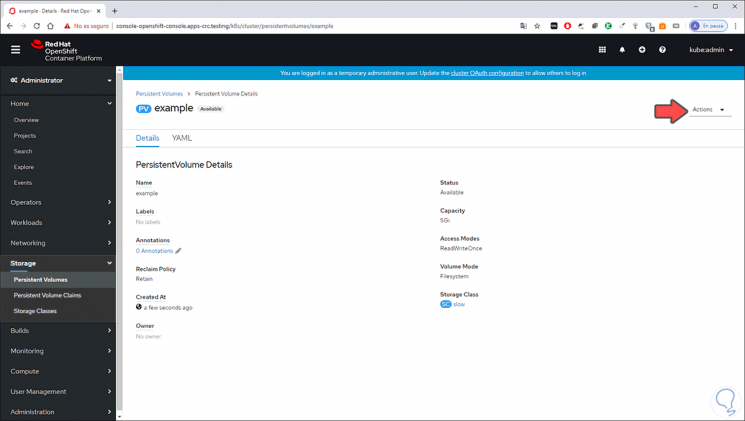
If we want to edit any variable of this created storage volume, we go to the "Actions" button and there we can do the following:
- Delete the persistent volume.
Step 11
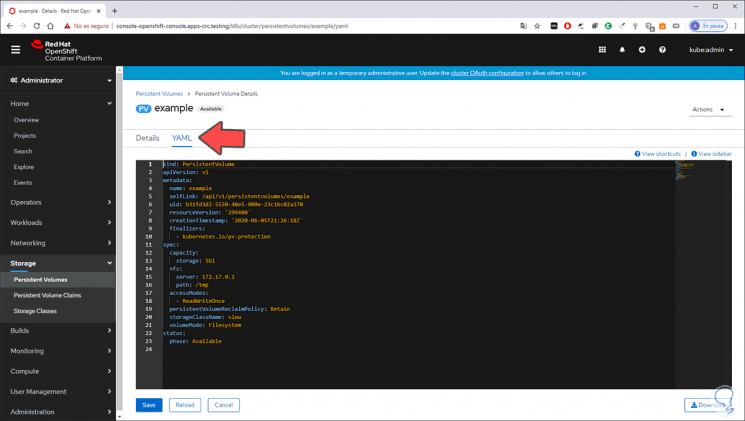
If we go to the YAML tab we will see all the parameters in console mode:
Step 12
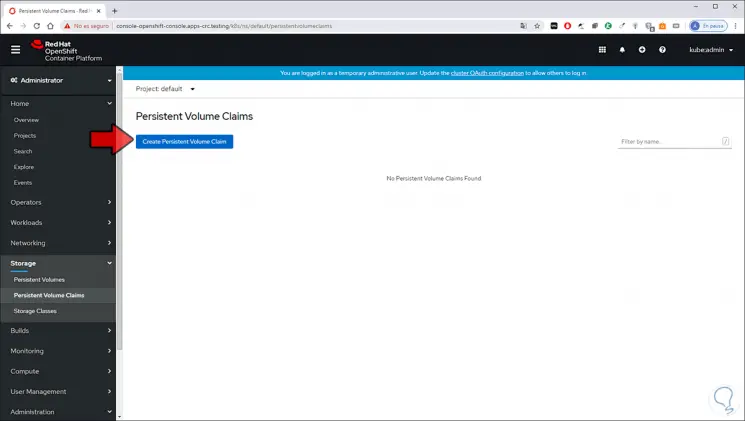
If we want to create a volume of the type “Persistent Volumes Claims” we click there and follow the same steps:
Step 13
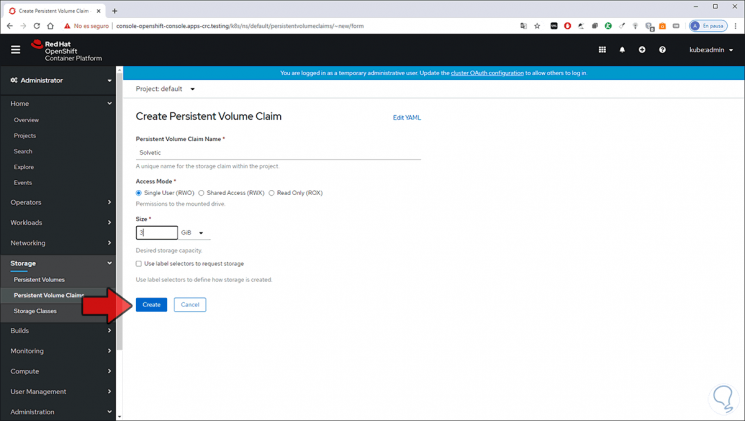
There we click on “Create Persistent Volume Claim” and then enter:
- Access mode, single user (RWO), shared access (RWX) or read only (ROX)
Step 14
We click on “Create” for its creation:
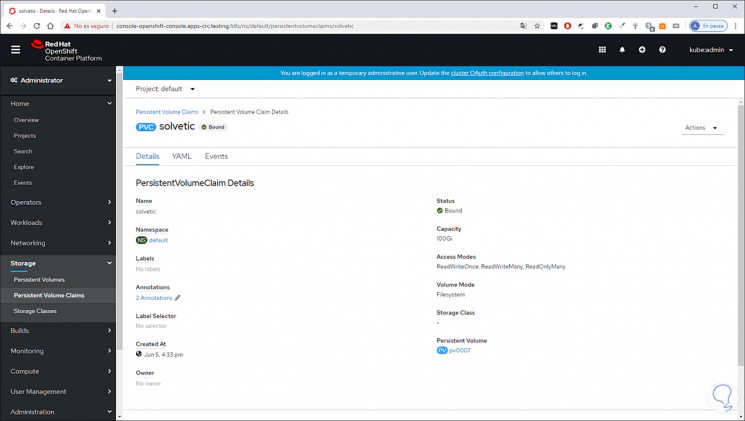
Step 15
Like from YAML we will see the parameters in console:
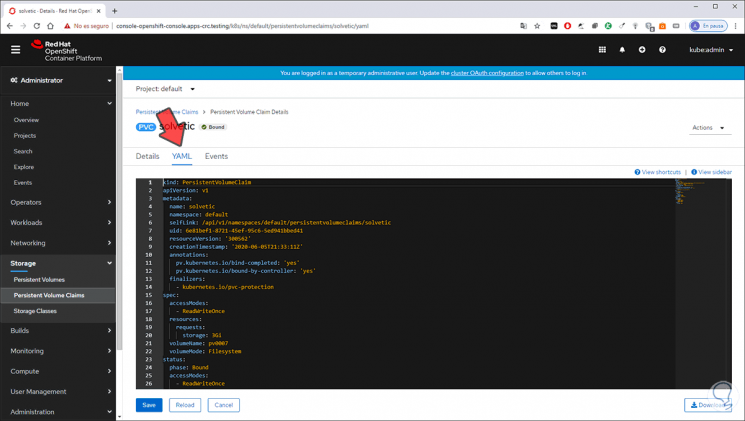
Step 16
We will see it created:
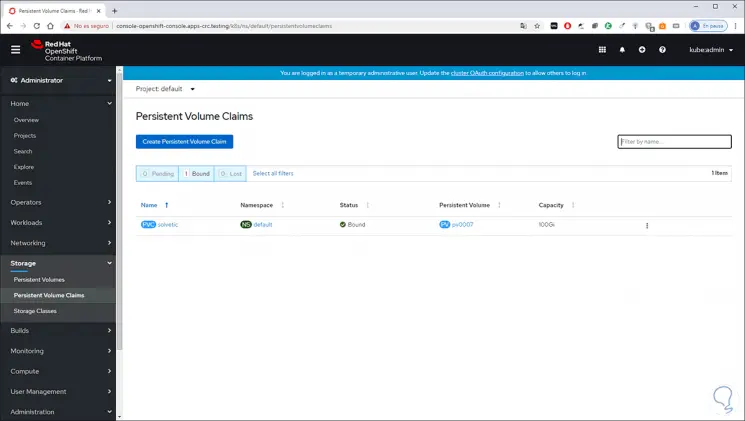
Step 17
In case you want to delete any of the created storage volumes we will always receive a warning:
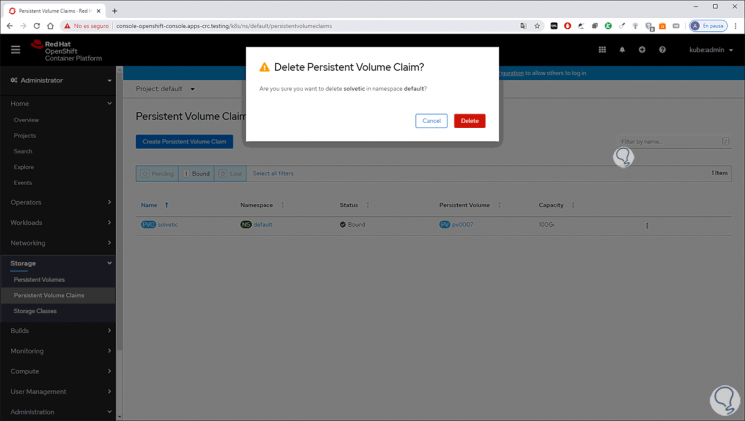
Step 18
Finally, if we choose to use the option “Storage Classes” we click there and we will see the following:
Step 19
By clicking on “Create Storage Classes” you will need:
- Enter name and volume description
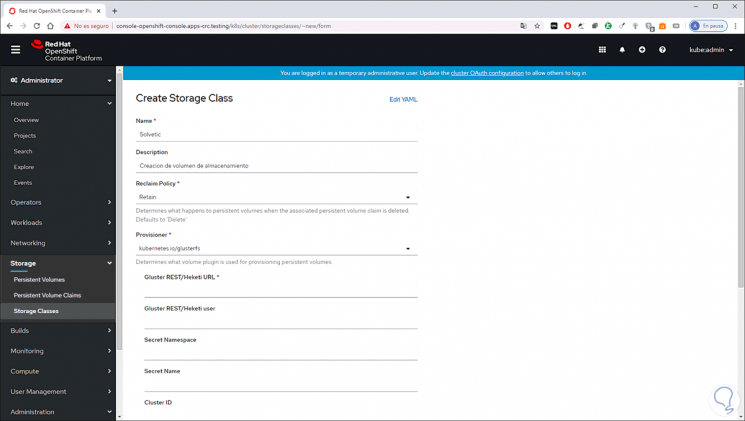
As we can see, thanks to OpenShift Container Storage 4 we have the capabilities to create these types of volumes each with the necessary security measures to be a reliable and comprehensive volume.