One of the applications we use daily and at all times are web browsers which allow us to access websites, educational platforms, business sites and more..
When using the Internet network for all these types of tasks, it is normal that at some point we are faced with multiple connectivity errors which directly affects the optimal navigation and with it the tasks that we must carry out.
In the world of web browsers we frequently find, especially if we are part of the support area, connectivity errors , access or download of elements, in this case, it is ideal to understand that in this area the errors associated with the browser start with "ERR_ "and are multiple of the HTTP (Internet Network) status codes..
One of these frequent errors is ERR_INTERNET_DISCONNECTED which is presented daily on many computers with Google Chrome browsers and it is ideal to pay attention to it since this browser is one of the most traditional and used worldwide.
The ERR_INTERNET_DISCONNECTED error basically means that the Chrome browser is having difficulties accessing the Internet and thus carrying out all the tasks required there..
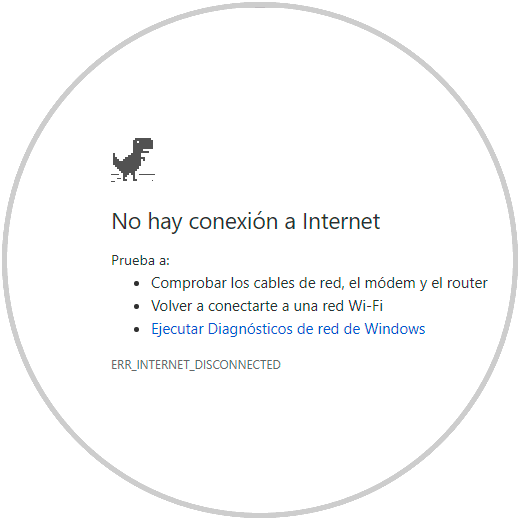
How is the error?
Its syntax is:
ERR: Google Chrome browser error INTERNET: Network or connectivity issues DISCONNECTED: Unable to connect to the network
This error occurs in all types of devices and in any browser such as Linux, Windows or macOS.
For this, today TechnoWikis brings a series of practical solutions to correct this error and have optimal navigation.
1. Check the modem or router connection on Windows or Mac
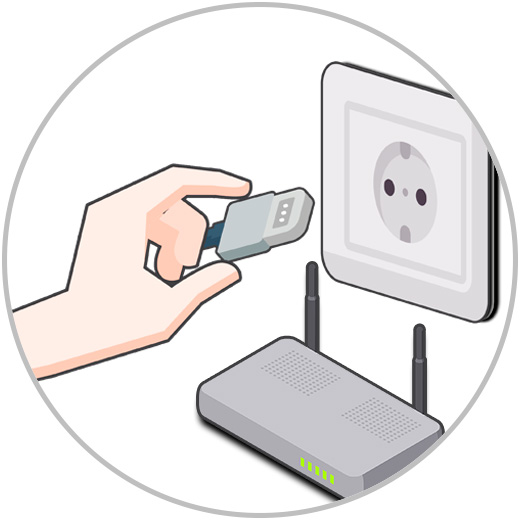
Although I seem somewhat simple or perhaps absurd, in many situations technical support is called and the fault lies in something as basic as the modem or router disconnected from the outlet, this does not allow the device to be on or active to perform the tasks of network connection.
So the basic thing is to go to the point where we have the device and validate that it is connected and that all the bulbs of the device are active.
Within this point we also include validating that the connectivity of the UTP network cable, in Ethernet networks, is correctly connected both to the modem or router and to the network card of the equipment.
2. Check the configuration of VPN networks on Windows or Mac
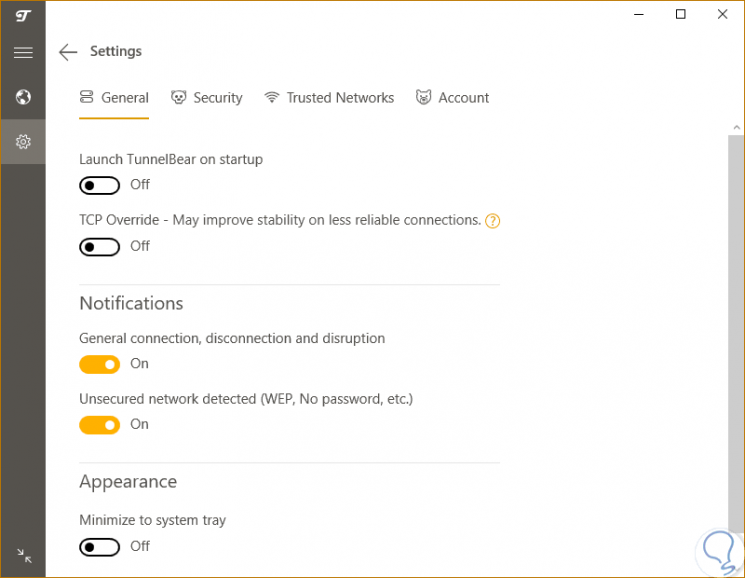
In the case of using VPN networks to connect to the computer, we must validate how the configuration of this is because we remember that the VPN allows us to create an independent private network to access the global network with security and privacy improvements, but this can act in the background restricting the access to the network of our local network and with it the indicated message will be displayed.
To do this we must go to the VPN application and access its configuration and analyze in detail each aspect or call the VPN provider and present the case.
3. Check the Wi-Fi connection on Windows or Mac
The Wi-Fi network is becoming one of the most used networks for its simplicity of use, easy connection and portability, additional, due to the high growth of mobile devices every day is more essential.
However, when using a Wi-Fi network, we may frequently encounter the error ERR_INTERNET_DISCONNECTED for reasons such as:
- Obstacles between the modem and the equipment such as doors, walls, frequencies, etc.
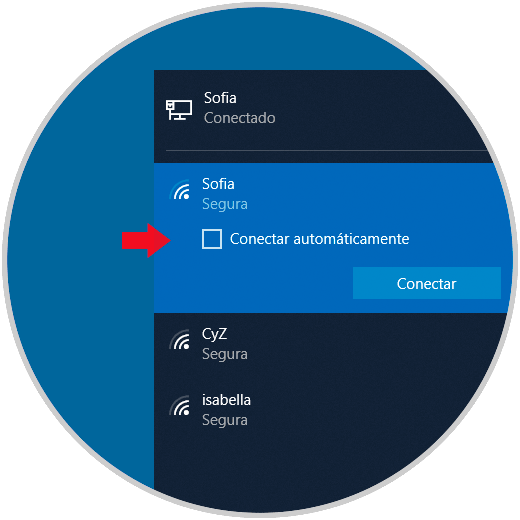
To verify this, first of all, we must verify that we are really connected to the Wi-Fi network by clicking on the network icon in the taskbar and there checking the status of it:
In the event that everything works correctly, we can verify that some other device, such as mobile phones or tablets, has a connection and if this is the case we must perform a more detailed process on the affected equipment. In the event that no device has a connection, the problem lies in the modem, there we can turn it off for 30 seconds and if the fault persists resort to technical support.
4. Check the proxy settings on Windows or Mac
A Proxy server fulfills the same function of a VPN, preventing access to the network using Internet providers, but in some situations its configuration can have a negative effect on the computer network. In this case we must access the proxy configuration and there analyze in detail the way it is configured.
Check proxy settings in macOS
If we use macOS High Sierra, we go to “System Preferences / Network†and we will see the following:
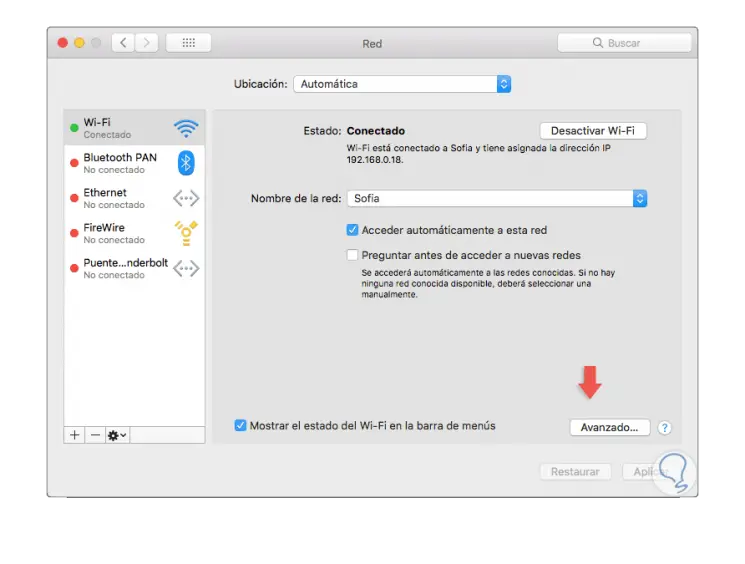
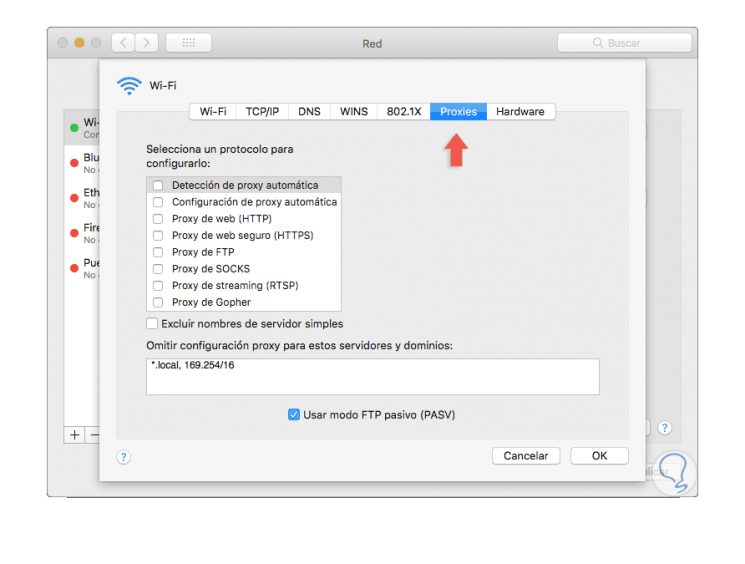
There we click on the "Advanced" button and in the window we will go to the "Proxies" tab. There we will deactivate all the available boxes and click on OK to save the changes.
Check the proxy settings in Windows
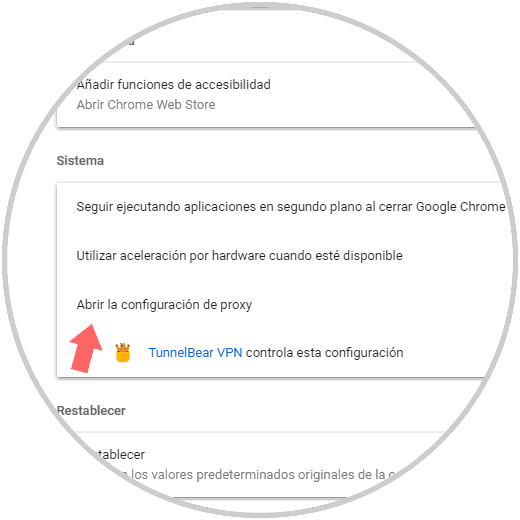
In the case of Windows, we can go to Google Chrome and run the following line in the address bar:
chrome: // settings /
Then, we will go to the "Advanced" line and in the "System" section click on the "Open proxy settings" option:
The following window will be displayed:
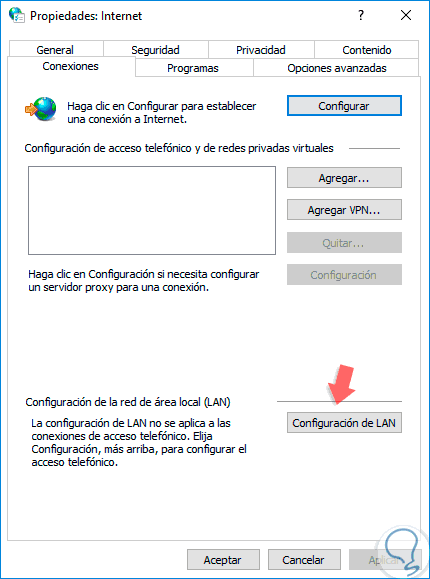
There we click on the "LAN Configuration" button and in the new window displayed we deactivate the "Automatically detect configuration" box:
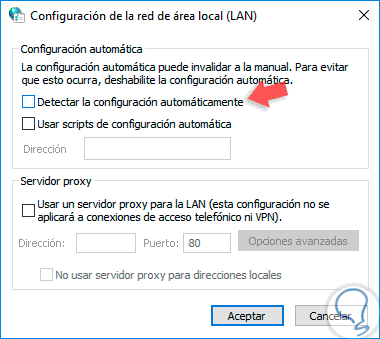
Click on OK to apply the changes. If we use Windows 10, we can disable the proxy by going to the following path:
In the displayed window we will deactivate the option switches:
- Detect settings automatically
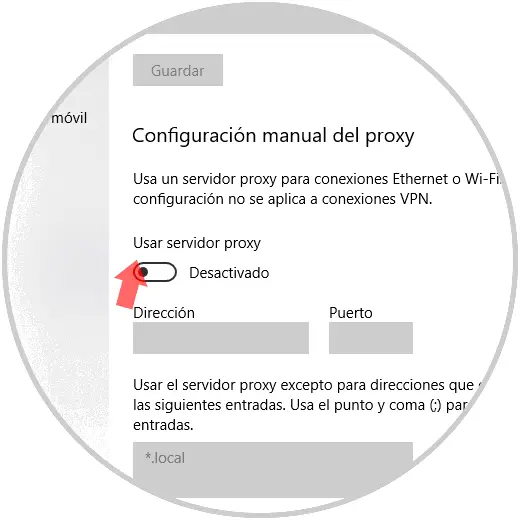
5. Disable the system firewall on Windows or Mac
The basic function of the firewall is to analyze and allow or restrict the passage of packets to and from the network in order to keep the computer safe.
Although it is not ideal that we completely disable the firewall in the system, we can validate that this is the cause of errors temporarily disabling and trying to access the network.
Disable Firewall in Windows 10
For this, on Windows systems, we will go to the following route:
- Windows Defender Firewall
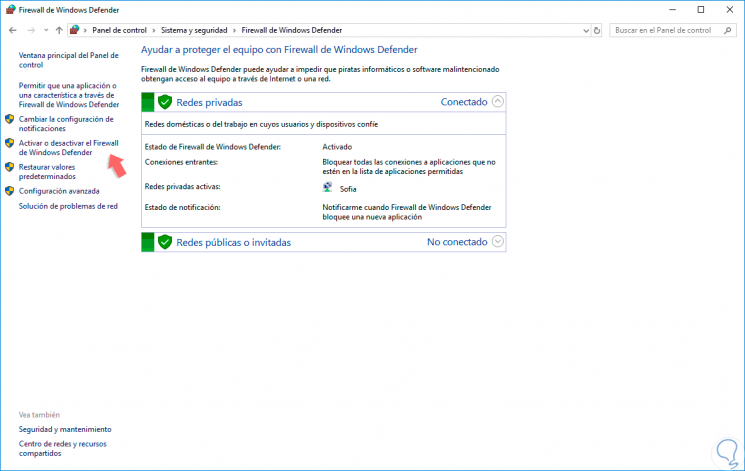
There we will click on the line “Activate or deactivate the Windows Defender Firewall†located on the left side and we will see the following: There we activate the boxes “Deactivate Windows Defender Firewall (not recommended)†in both sections and click on OK to apply the changes.
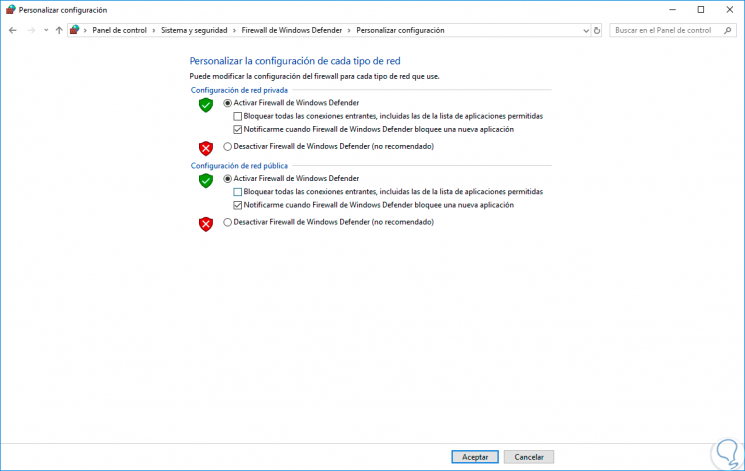
Disable Firewall in macOS
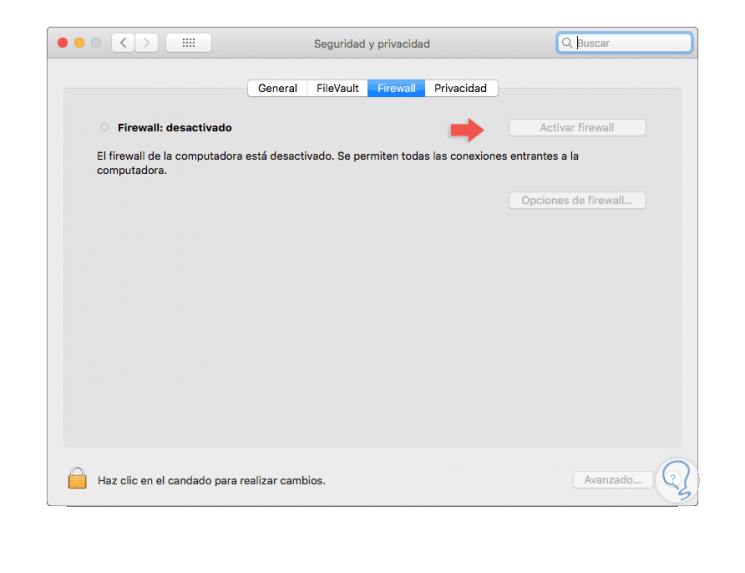
In the case of macOS, we will go to the Preferences system / Security and privacy route and there we go to the “Firewall†tab where we must click on the lock icon to make changes and then click on the “Disable Firewall†button:
6. Clear the DNS cache on Windows or Mac
As we navigate through multiple websites, they create DNS cache memory which allows access to these sites in the future to be much more agile without the need to make the necessary server queries.
The problem with the DNS cache is that there comes a point where it can impact the connection to a website generating the indicated error.
Empty the cache in macOS
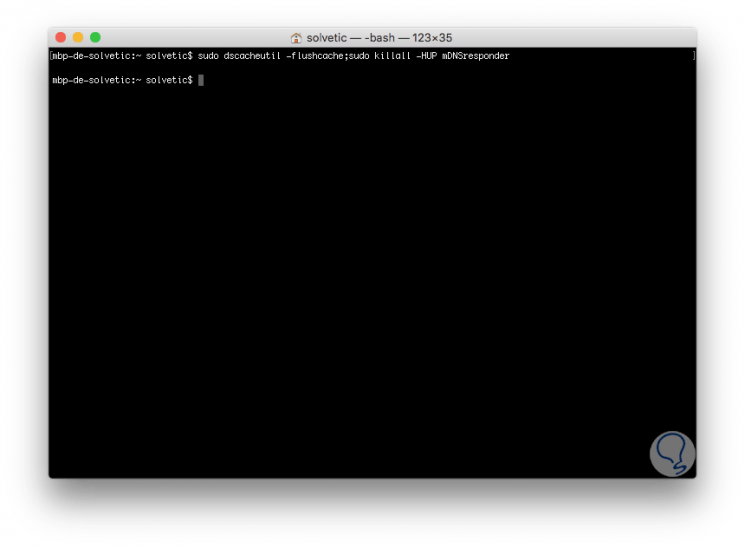
To clear the cache in macOS, we go to the terminal and execute the following:
sudo dscacheutil -flushcache; sudo killall -HUP mDNSResponder
Empty the cache in Windows
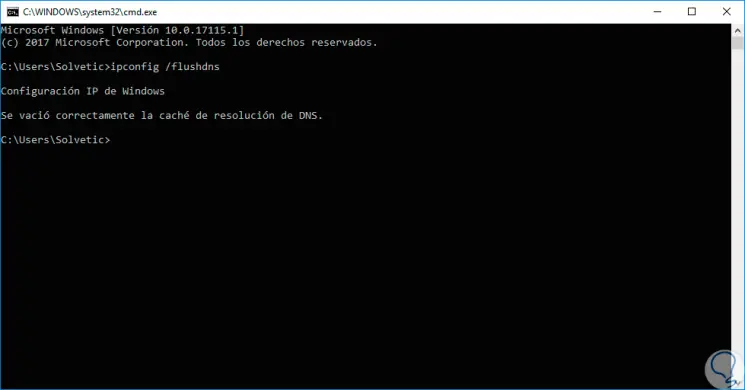
In the case of Windows, we access the command prompt and execute the following:
ipconfig / flushdns
7. Disable antivirus software in Windows
The purpose of antivirus software is to protect the system and everything in the thousands of latent threats on the network, but sometimes it can block access to the network and generate the error ERR_INTERNET_DISCONNECTED.
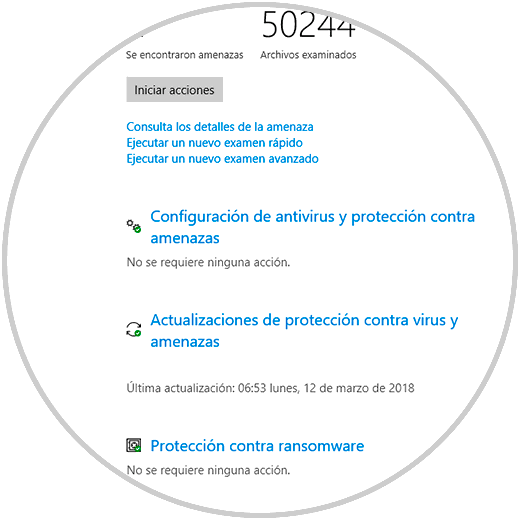
If we have an antivirus installed, we can access its configuration and disable it temporarily or, if we use the Windows integrated antivirus, we can stop it for a moment to verify that the network access is failing due to this.
8. Reset Google Chrome on Windows or Mac
If we are frequent users of Google Chrome, sometimes the browser can be with some type of internal failure which will generate the error of access to the network, and we can resort to various solutions without positive results and in this case the most It is advisable to restore the browser to its original settings.
Step 1
To do this, we will run the following in the Google Chrome address bar.
chrome: // settings /
Step 2
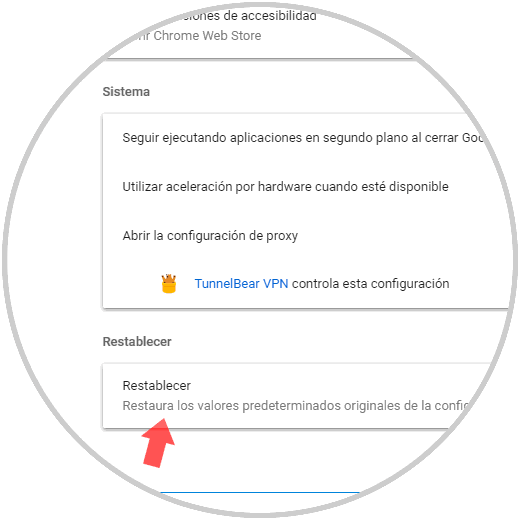
Then we go to the "Advanced" line and in the final part of the browser click on the "Reset" section:
Step 3
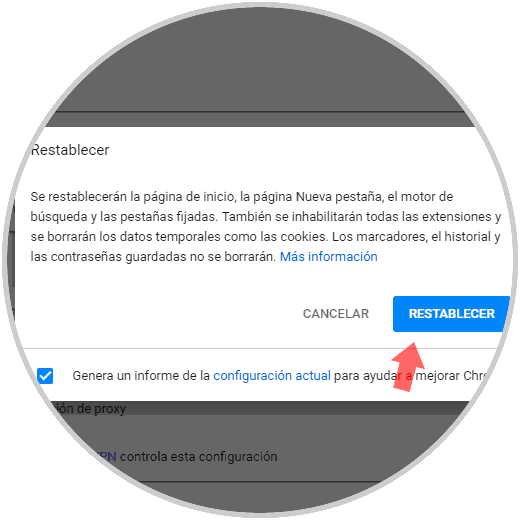
The following message will be displayed. Click on the "Reset" button to confirm the action.
9. Reinstall the network adapter in Windows 10
Any failure presented by the network adapter is synonymous with instability and error generation by not allowing communication to be adequate. In this case, the most practical solution is to reinstall the network adapter, or update it, as follows.
Step 1
We access the device manager using one of the following options:
Device administrator
Step 2
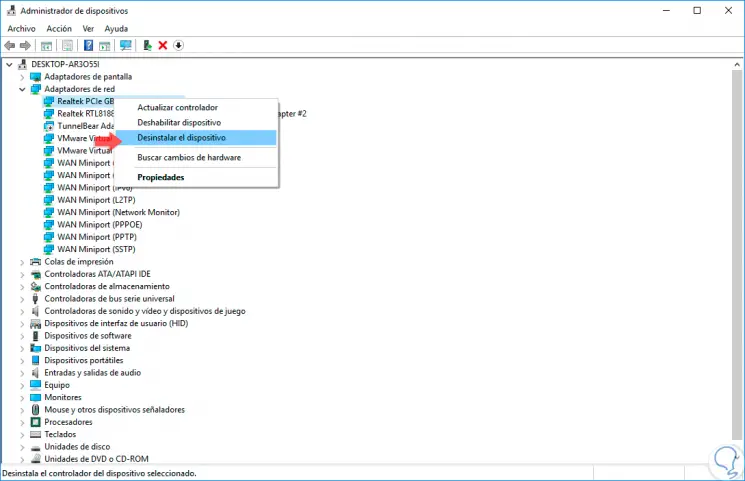
In the displayed window we have two options:
- Click on the “Update driver†line if we want to update the current driver either locally or online.
- Click on “Uninstall device†if we want to remove the adapter and then wait for the system to install it automatically.
10. Forget the Wi-Fi network on Windows or Mac
By default, Windows 10 stores the Wi-Fi networks to which we connect so that when we are close to them the system connects automatically, for example, in our home or office, but in some cases it is possible that the stored network is not available, has been deleted or we no longer have permission to access it.
For this case, it is necessary that we remove it from the list of stored networks in order to no longer connect to it.
Forget the Wi-Fi network in Windows
To achieve this, we will go to the following route:
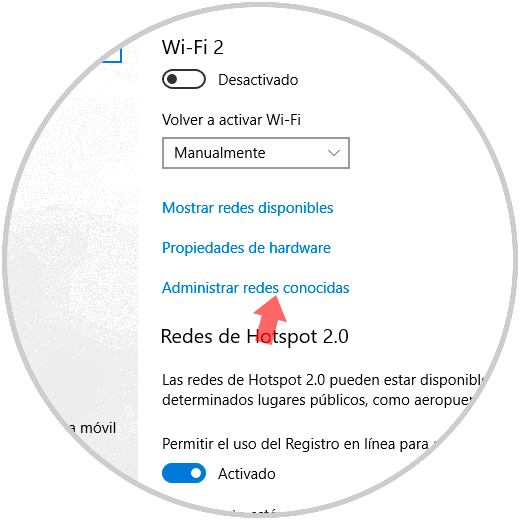
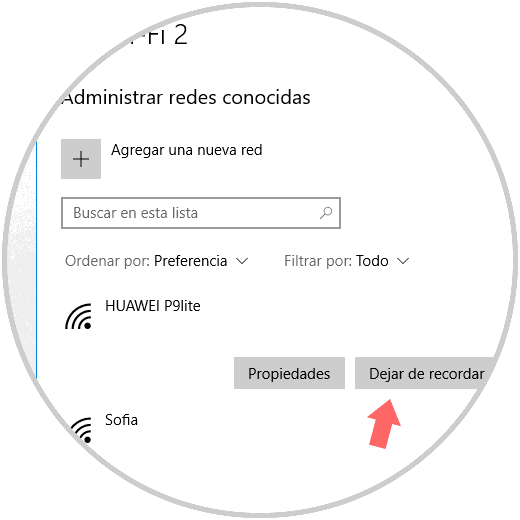
There we click on the “Manage known networks†line and in the new window, we will click on the network to be deleted and click on the “Stop remembering†button:
Forget Wi-Fi network in macOS
In the case of macOS High Sierra, we go to “System / Network Preferencesâ€:
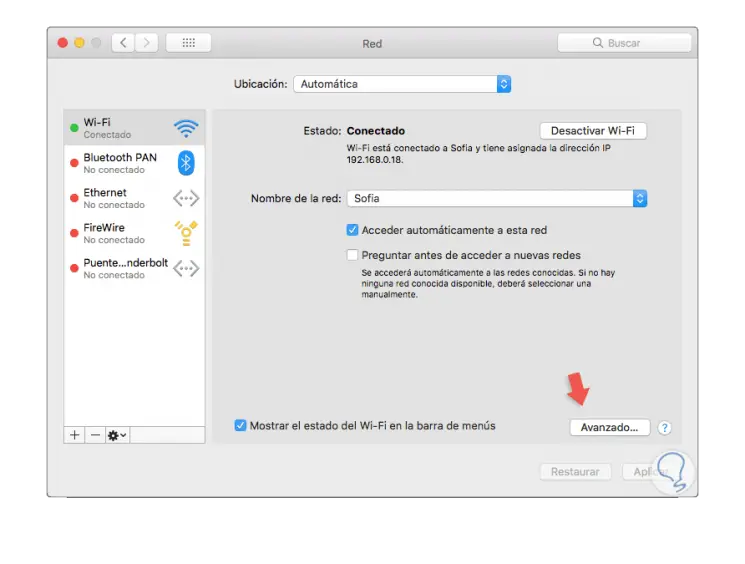
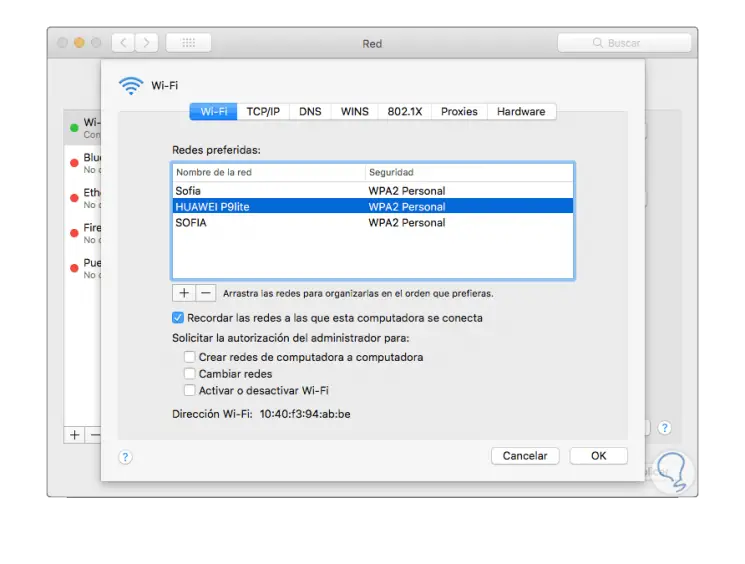
There we click on the “Advanced†button and in the new window we go to the Wi-Fi tab and there we select the Wi-Fi network to be removed and we will click on the sign - located at the bottom:
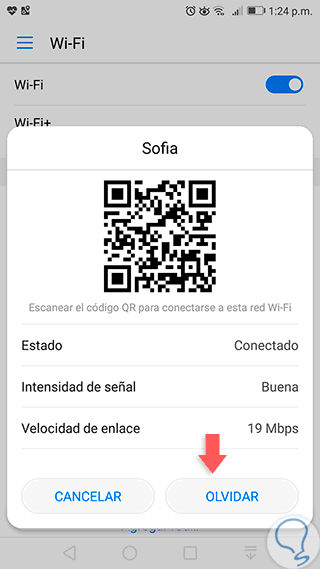
If we see the error in Android, we can go to "Settings / Wi-Fi" and there click on the desired network and in the drop-down menu click on "Forget":
11. Run the Troubleshooter in Windows
On Windows 10 computers, a utility is included that is responsible for analyzing in detail various problems in the system and thus giving or providing a solution for them.
Step 1
To try to correct the error using this method, we go to the following route:
Step 2
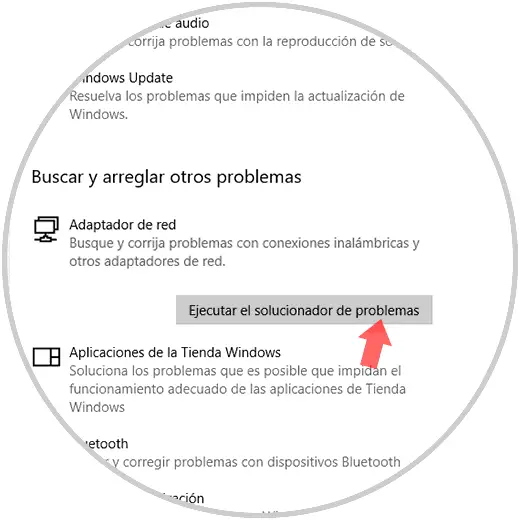
There we will locate the line “Network adapter†and when clicking on it we select the option “Execute the problem solverâ€:
Step 3
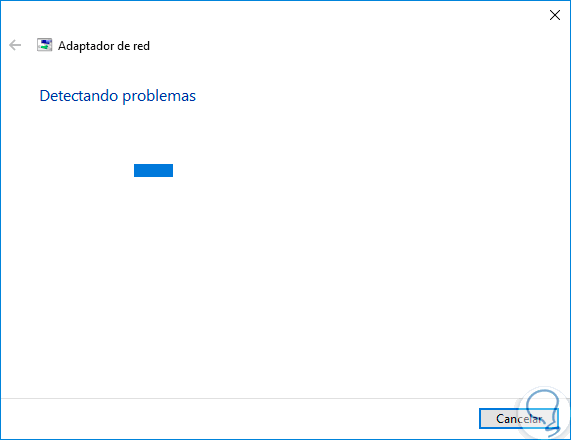
This will start your task:
Step 4
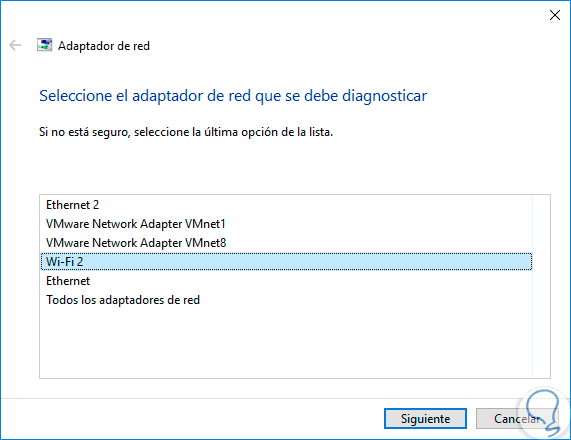
Later we can select the network with error:
Step 5
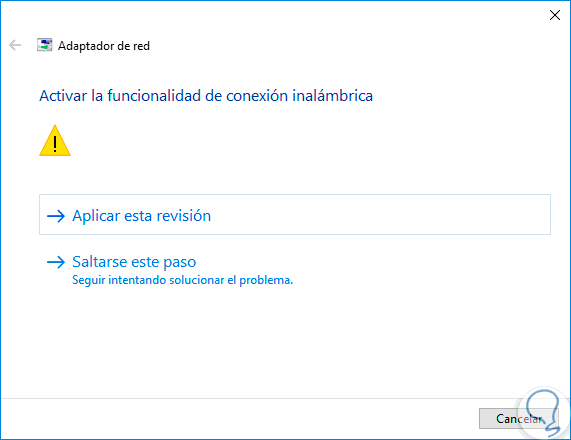
Clicking Next will make an in-depth analysis of said network in search of its errors:
We can see how the solutions to correct this error and enjoy a stable connection are varied and functional, let's use the one that best suits our needs.