One of the administration-level tasks that we carry out constantly is copying files or moving items , such as files or folders, to new locations..
Although in this tutorial we focus on the tutorial of explaining the Xcopy command, we strongly recommend that for this task of copying files and folders completely we use the Robocopy command that is one of the best for this task.
Although we usually do this through the keys Ctrl + C (Copy) and Ctrl + V (Paste) or using the Edit menu, TechnoWikis today brings another practical and much more centralized way of executing this action and is using the terminal with COPY and MOVE commands..
1. Use XCOPY command to copy files in Windows 10, 8, 7
XCOPY (Copy) is a command developed to copy one or more files to another specific location within Windows.
Step 2
The general syntax to use with COPY is as follows:
XCOPY origin [destination] [/ A | / M] [/ D [: date]] [/ P] [/ S [/ E]] [/ V] [/ W] [/ C] [/ I] [/ Q] [/ F] [/ L] [/ H] [/ R] [/ T] [/ U] [/ K] [/ N] [/ O] [/ X] [/ Y] [/ -Y] [/ Z] [/ EXCLUDE: file1 [+ file2] [+ file3] ...]
Step 3
Now, the parameters presented here are the following:
Origin
Indicate the files we are going to copy.
Destination
Specify the location and / or name of the new files.
/TO
Copy only the files with the file attribute set, do not change the current attribute.
/ M
Copy only the files with the file attribute set, disabling the file attribute.
/ D mda
Copy the modified files on the specific date or later, if you do not indicate a date, copy only the files whose origin time is more recent than the destination time.
/ EXCLUDE file1 + file2 + file3
Indicates a list of files that contain strings. When any of the strings matches any part of the absolute path of the file to be copied, that file will be excluded from the copy.
/ EXCLUDE file1 [+ file2] [+ file3]
/ P
Request confirmation before creating each destination file.
/ S
Copy the directories and subdirectories except the gaps.
/AND
Copy directories and subdirectories, including gaps.
/ V
Check the integrity of each new file.
/ W
Request that you press a key before copying.
/C
Keep copying even if errors occur.
/ L
If the destination does not exist and more than one file is copied, the destination is supposed to be a directory.
/ Q
It does not show file names while copying.
/F
Displays the full source and destination file names while copying.
/ L
Shows the files that will be copied.
/ H
Copy also the hidden and system files.
/ R
Overwrite read-only files.
/ T
Create the directory structure, but do not copy the files. It does not include empty directories or subdirectories.
/TEA
It includes empty directories and subdirectories.
/OR
Only copy the files that already exist in the destination.
/ K
Copy the attributes. Normal Xcopy will reset the read-only attributes.
/ N
Copy using the short names generated.
/OR
Copy the information from the ACL and members of the archives.
/ X
Copy the audit configuration (implies / O).
/Y
Delete the message to confirm that you want to overwrite an existing destination file.
/-Y
Display a message to confirm if you want to overwrite an existing destination file.
/ Z
Copy the network files in resettable mode.
Step 4
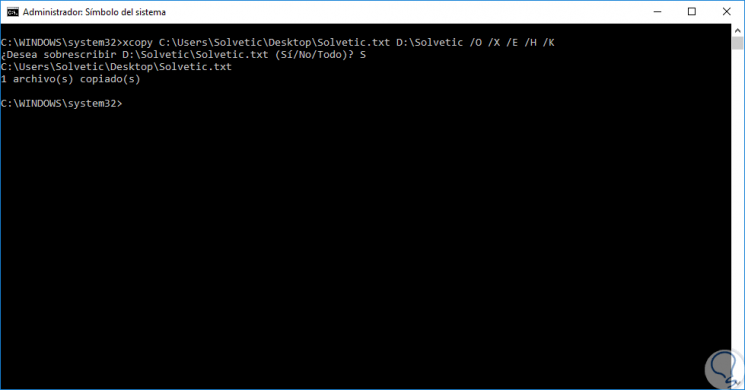
By default, when using XCOPY, you are wondering if we want to overwrite unless the XCOPY command is executed from within a batch script.
Throughout this process of copying files in Windows, when we copy or move files and folders using Windows Explorer, the permissions that are set in the files or folders can be modified, so when we copy a file to a system volume of NTFS files, Windows will treat it as a new file and, being considered a new file, take the permissions of the destination folder and the current user becomes the creator owner.
When using XCOPY, if we use the / O, / X, / E, / H and / K modifiers to copy the files, the following inherited permissions apply:
- The security settings that are assigned directly to files and folders are retained as is.
- Security settings inherited from the main source folder will be lost.
- The security settings of the destination folders will be inherited.
- When files or folders are moved to FAT volumes, folders and files lose their NTFS permissions because FAT volumes do not support NTFS permissions.
Step 5
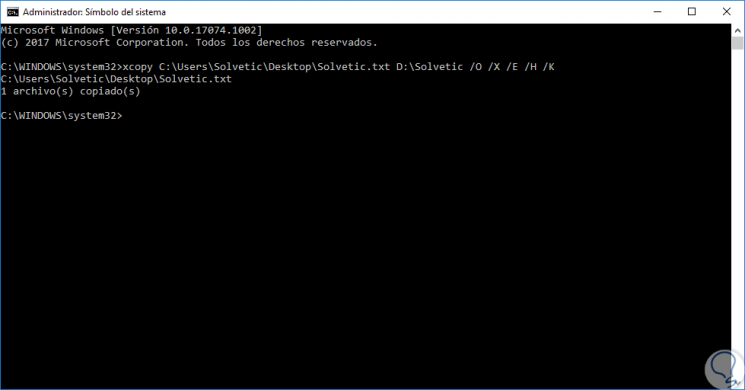
For example, we are going to copy a file that is on the desktop to partition D keeping its permissions:
xcopy C: \ Users \ TechnoWikis \ Desktop \ TechnoWikis.txt D: \ TechnoWikis / O / X / E / H / K
Step 6
This must be executed at the command prompt with administrator permissions:
Step 7
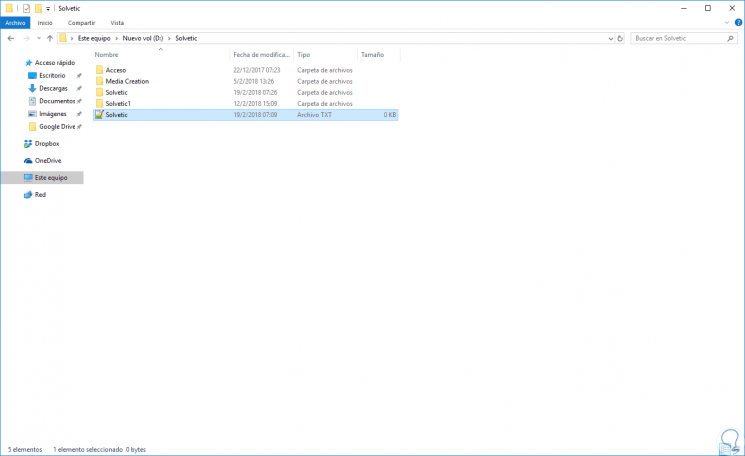
We can see in the destination path that our file has been copied correctly:
Step 8
If the file exists in the destination path, we will see the following message where it is indicated if we want to overwrite it:
2. Use MOVE command to move files in Windows 10, 8, 7
MOVE (Move), is a command developed to move files and rename files and directories on Windows systems.
Move one or more files
To move one or more files we will use the following syntax:
MOVE [/ Y | / -Y] [drive:] [path] file [, ...] destination
Rename Directory
To change the name of a directory in Windows we will use the following syntax:
MOVA [/ Y | / -Y] [unit:] [path] dir1 dir2
Step 3
The parameters used are:
drive: path file1
Specify the location and name of the file or files we want to move.
[unit:] [path] File1
Destination
Specify the new location of the file, the destination can be composed of a drive letter and a colon, a directory name or a combination of both.
unit: path path dir1
Specify the directory whose name we want to change.
[unit:] [path] dir1
dir2
Specify the new directory name.
/Y
Delete the message to confirm that we want to overwrite an existing destination file.
/-Y
Display a message to confirm if we want to overwrite an existing destination file.
Step 4
Some practical examples when using MOVE are:
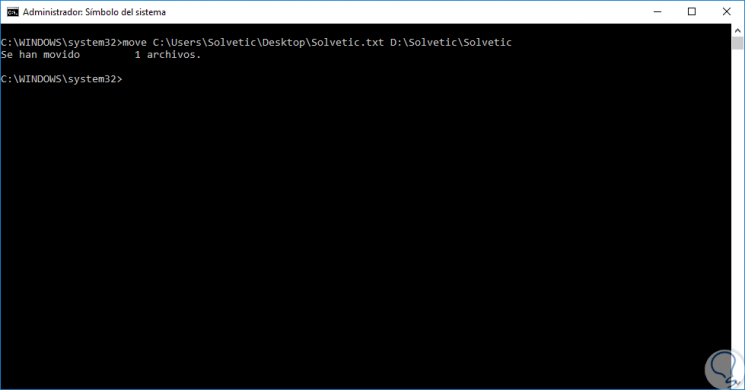
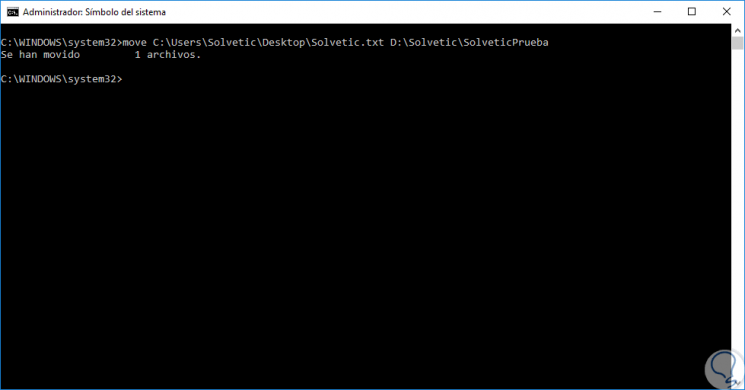
Move files to another directory
move File Destination
Edit the name of the file to move
In this process it will be possible to rename the source file for this we execute the following syntax:
move target file / new name
Use of wild cards
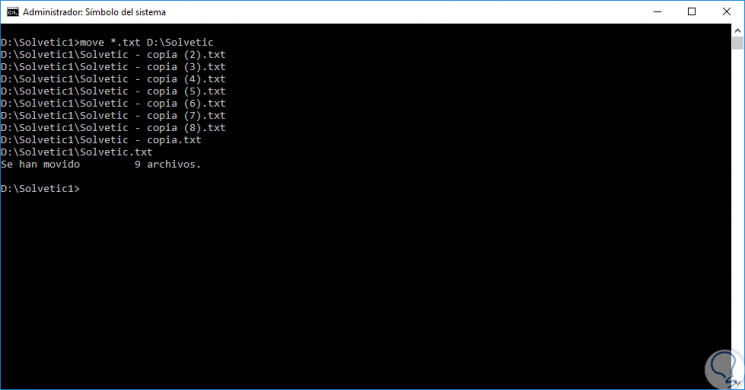
The use of wildcards gives us the opportunity to move multiple files with a certain extension to a specific destination. The syntax to use is:
move *. (extension) Destination_directory
Note
In this case we must go to the folder where the files to be moved are housed.
Move directories
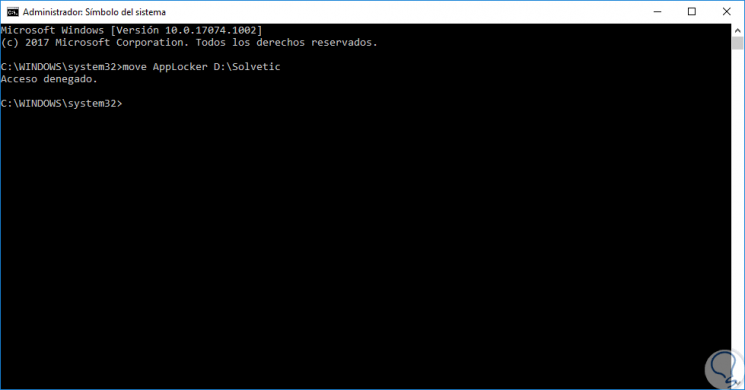
The syntax to use is as follows. In case of not having the appropriate permissions we will see the following error. It will be necessary to access the properties of the directory and define the respective permissions.
move directory New route
Thus, we have seen how to move or copy multiple elements from the Windows console in a practical and simple way..