Windows 10 has been developed with various functions that allow us to perform tasks in a much more practical and simple way and one of these, already known in all editions of Windows, is the taskbar in which we have access by default to certain applications , but we can anchor many others based on our need , so, with a single click, we will go to them..
In some specific cases, it may happen that we enter so many accesses in the taskbar that we run out of space or in other cases, we want to order the accesses differently, for both cases, we have the option of adding another taskbar in Windows 10 and thus have two taskbars to simplify access and order tasks.
TechnoWikis will teach you how to do it easily..
What is Linkbar?
For this process, we will use an open source tool called Linkbar which we can download at the following link:
Linkbar
Linkbar features
Within its characteristics we have:
- File Explorer context menus
- Supports AeroGlass for Windows 8 or 8.1
- Support for multiple panels
- Compatible with 64-bit architectures
- Available in English, Simplified Chinese, French, German, Greek, Japanese, Korean, Polish, Russian
1. Create taskbar using Linkbar in Windows 10
Step 1
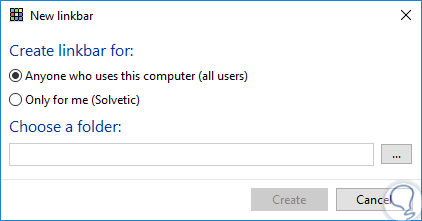
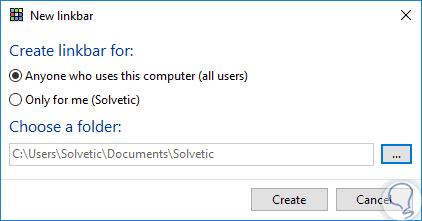
Once we download it, we extract its content and execute the .exe and the following window will be displayed. There we can define whether the bar will be applied to all users of the system or only for the current user.
Step 2
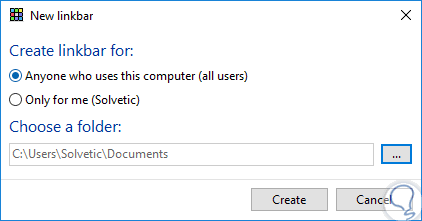
Then, in the “Choose a folder†field, we must select a local folder which will be linked to the toolbar and the folder we select will be the main folder for the shortcuts that we place in that bar. The main folder will not be accessible through this taskbar for security.
Step 3
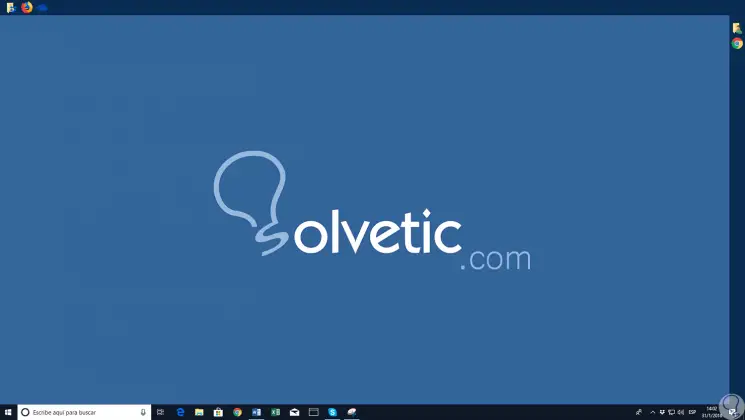
Click on the "Create" button to continue the process. This will create a clean taskbar which will be located at the top of the Windows 10 desktop:
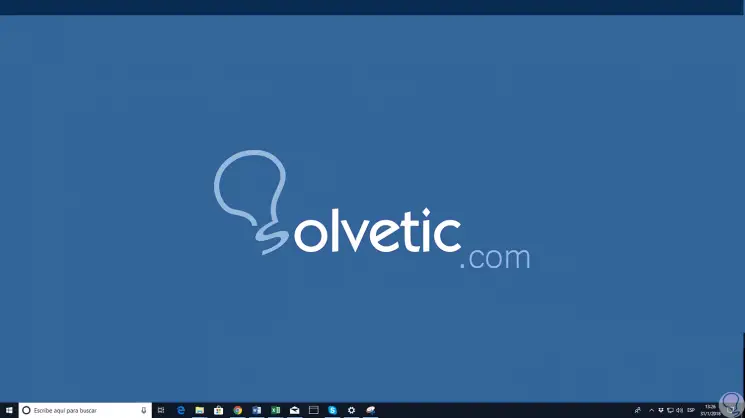
From this point we can use this taskbar.
2. Add shortcuts to the taskbar with Linkbar in Windows 10
Step 1
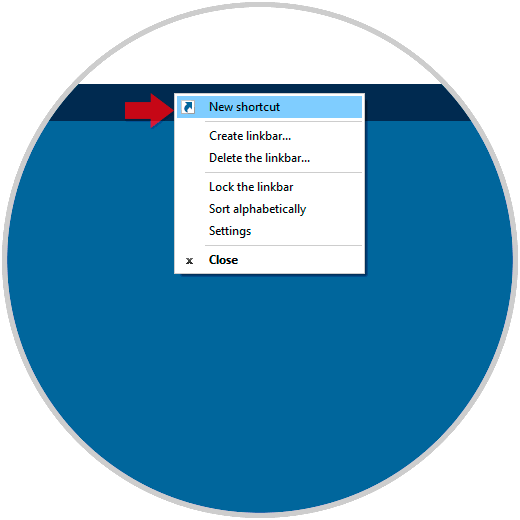
This process is imple, just right click on the taskbar and select the option “New shortcutâ€:
Step 2
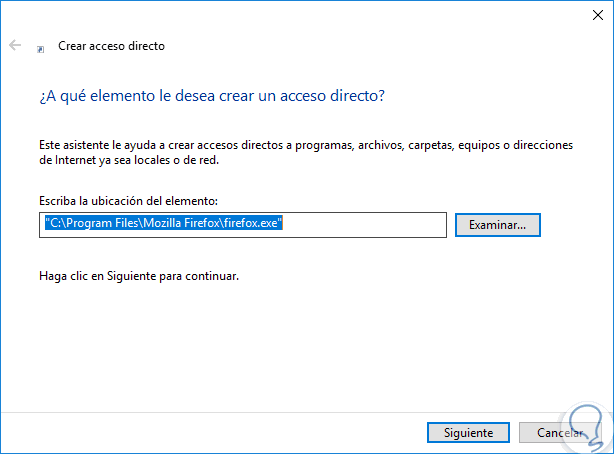
The following window will be displayed where we will assign the path of the element to be added:
Step 3
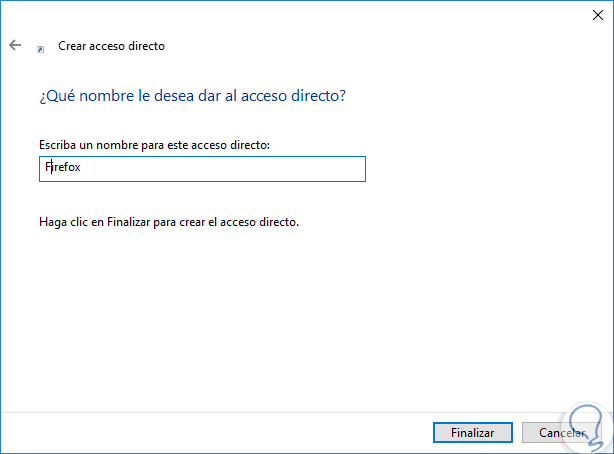
Click on Next and assign a name and conclude by clicking on Finish.
Step 4
We will see the shortcut created:
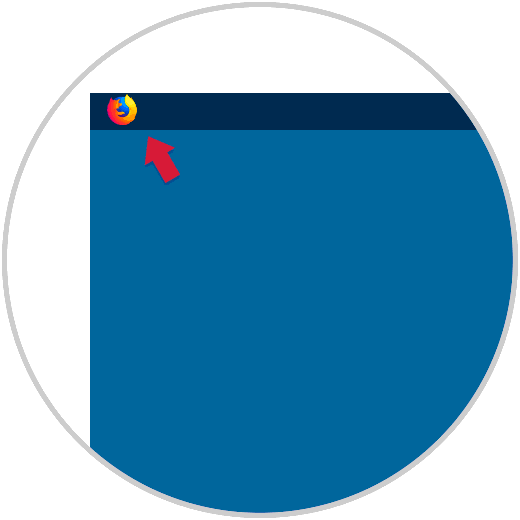
In this way we can add all the desired accesses..
3. Add multiple taskbars with Linkbar in Windows 10
Step 1
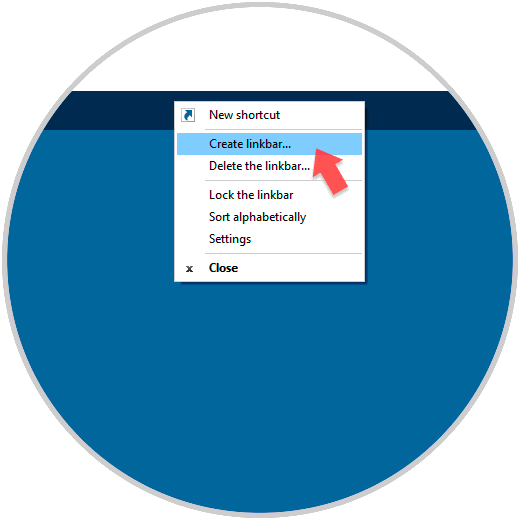
As we have mentioned, this tool allows us to add more taskbar, in this case we have the default Windows 10 taskbar plus an additional bar, now, if we want to add a bar we will right click on the top bar and select the “Create linkbar†option:
Step 2
This will display the initial window where we define for which users this bar will be displayed and in which folder the configuration will be saved:
Step 3
Once we create it we can see it on the side of Windows 10 and perform the process of adding shortcuts:
4. Delete a taskbar with Linkbar in Windows 10
Step 1
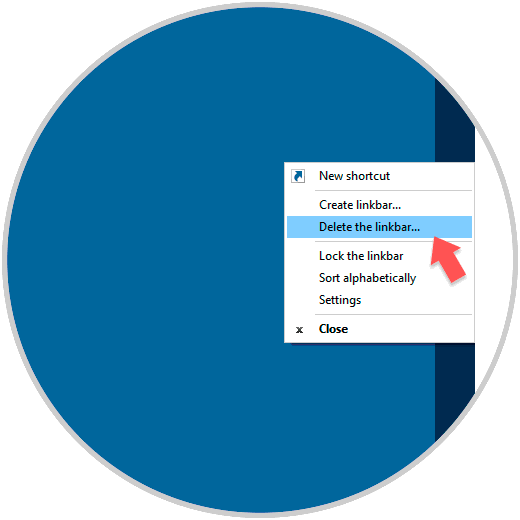
The process is simple, just right click on the bar to be deleted and select the option “Delete the linkbarâ€:
Step 2
The following message will be displayed that we must confirm to remove this bar:

5. Configure taskbar with Linkbar in Windows 10
Step 1
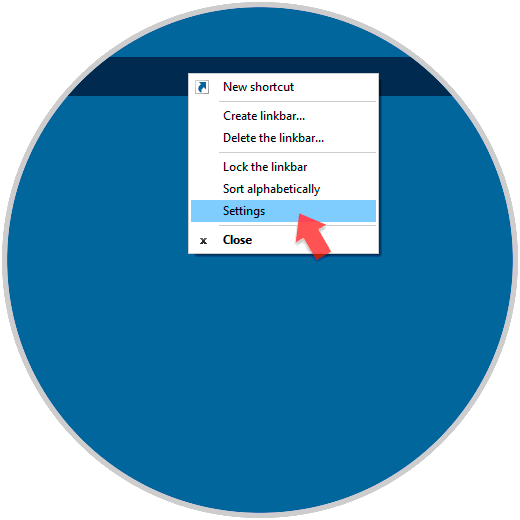
To access the configuration options of the taskbar, we will right click on it and select the “Settings†option:
Step 2
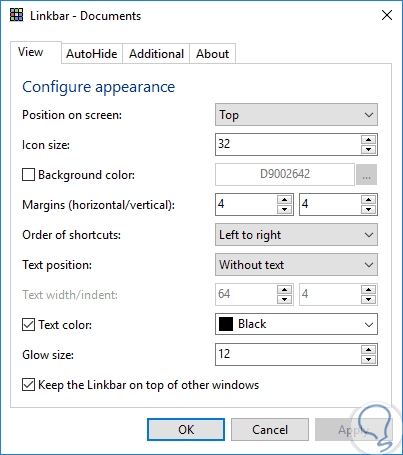
The following window will be displayed:
Step 3
There we can define parameters such as:
- Define the position of the taskbar at 4 available points: Top, Right, Left or Bottom.
- Set the size of the shortcut icon. The maximum icon size can be set at 256 pixels.
- Change the background color of the taskbar.
- Set the margin of the taskbar.
- Establish the order of shortcuts by alphabet.
- Show or hide the text of the shortcut name.
- Change the color of the text.
- Add brightness to the taskbar.
- Automatically hide the taskbar and set auto-hide properties.
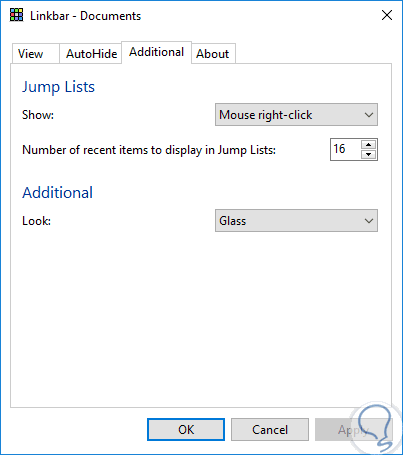
With this useful tool we can establish one or more taskbars in Windows 10 with the aim of a better order of the accesses to use since this will simplify many actions without getting confused and all in a simple environment.