If we talk about the operating systems most used and preferred by users, one of the first and not to mention the first that comes to mind is Windows 10. Windows 10 is a versatile and modern operating system which includes many features and integrated applications and that is available for both desktops and laptops and mobile devices..
To keep up, remember to subscribe to our YouTube channel! SUBSCRIBE
Justly; In the case of portable equipment, although it is a practical way to take our information to many places, it is true that it becomes somewhat complex with the detail of the battery. No matter its capacity or charging speed, on many occasions we run out of battery when it is most needed affecting our productivity and with it access to everything that is necessary, an issue that can be too unpleasant depending on the situation.
Although it is true that much has been said about how to preserve the battery life in portable computers, (activate the power saving mode , turn off the disks or the screen, hibernate , do not leave the equipment connected to the current and a long etcetera are some of those that we can cite). In spite of carrying out measures like this many times in a silent way the battery is spent without us noticing, and in many cases it is the applications that run in the background that are responsible for this, since they create a high consumption of the Battery power in our laptops..
It is for this reason that today TechnoWikis will explain how we can detect what applications are doing this type of consumption and thus determine whether or not they are a priority so that this does not affect both the life of the battery and the charging time of the equipment step by step.
Step 1
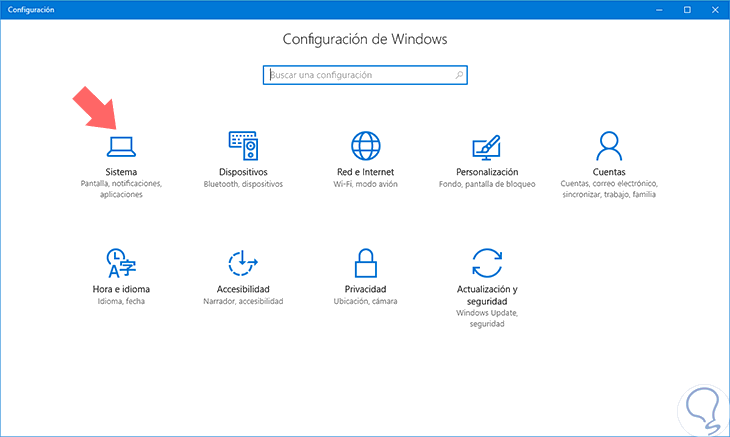
To start, we will go to the "Start" menu and there we will select the "Configuration" utility and we will see the following. There we click on the "System" category.
Note
The equipment must not be connected to the electric current for this process.
Step 2
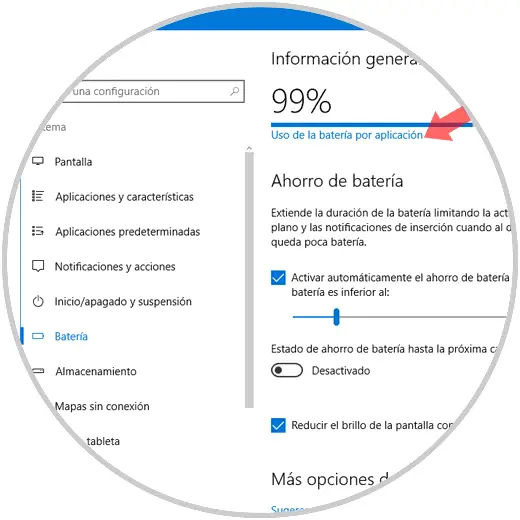
In the new window we will go to the "Battery" section. There we must click on the Battery use by application line located under the total percentage of charge.
Step 3
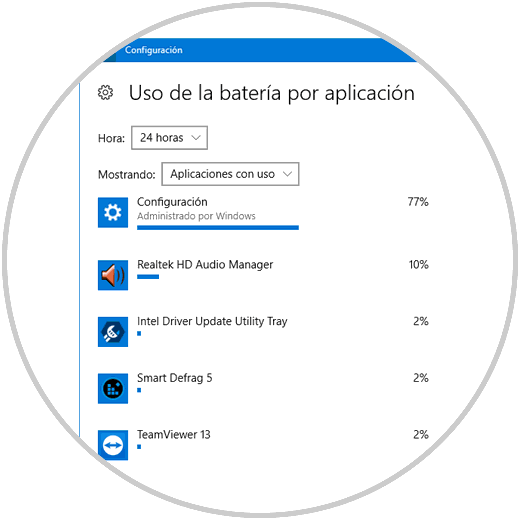
In the next window we will see the consumption of applications for periods of 6 hours, 24 hours or a week. Each application has its respective percentage of use.
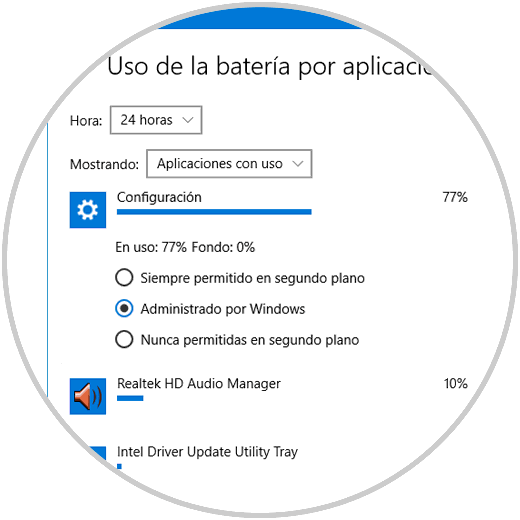
We can click on one of the applications to see in detail aspects such as:
- Current use and background use
- Possibility to configure Windows to manage this use or disable this application in the background
Step 4
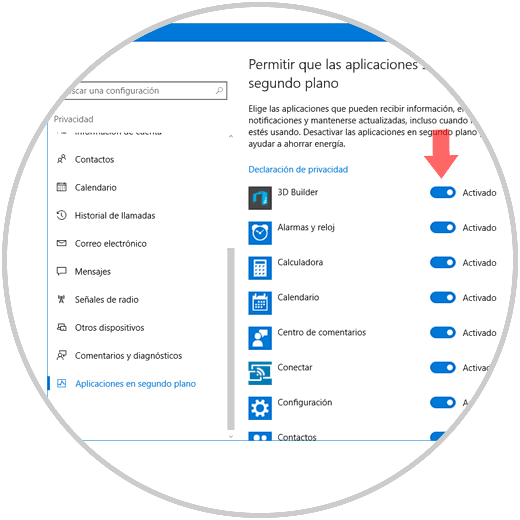
Now, we will go to the next route;
There it will be possible to define which applications will have the permissions to run in the background in Windows 10. Just press on the application switch to deactivate it, remember that battery usage will depend on the function of each application..
In this way we have learned to find what applications are using our battery in Windows 10 and from there define whether or not it is necessary to disable it to improve battery optimization.