By default, Windows 10 is responsible for indexing files by taking libraries such as the Start menu, File Explorer and Cortana so that access to them is as fast as possible. Indexing tasks are executed in the background, but if it is large amounts of data it can have a negative impact on system performance..
To prevent this, Windows 10 has released compilation 18267 in which a special section for searching the system has been dedicated thanks to the Enhanced Mode which is responsible for creating a database of persistent files for all stored files and folders On the drive, this results in Windows 10 being able to search all folders and drives without limiting the search to the documents, images, videos and desktop libraries which are defined by default.
Now, within this improved mode we have the option to add or exclude folders from the search process which translates into more concrete results and better analysis times. TechnoWikis will explain how we can add or remove a folder from the indexing process in Windows 10..
To keep up, remember to subscribe to our YouTube channel! SUBSCRIBE
1. Add or remove folders through Enhanced Mode in Windows 10
Step 1
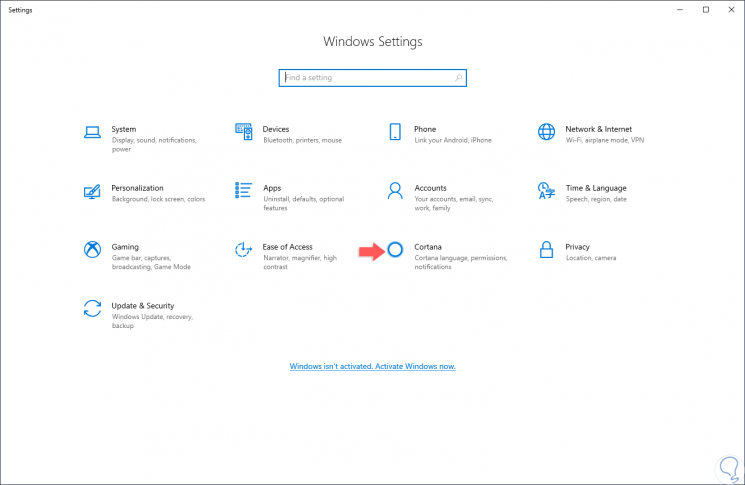
To start this process we will go to the Start menu and there we select the “Configuration†utility where we will see the following:
Step 2
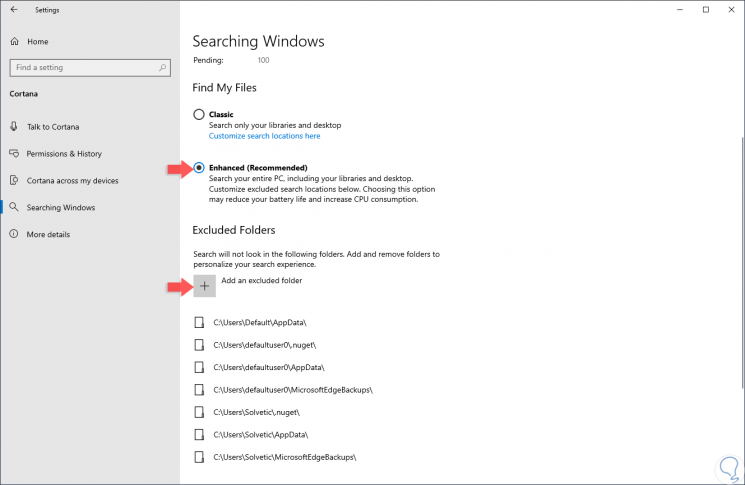
There we go to the “Cortana†section and go to the “Searching Windows†option and we must check that the “Enhanced†box is active:
Step 3
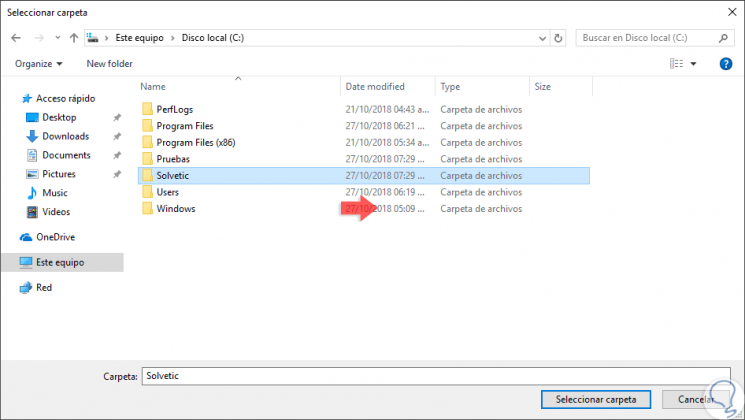
To add a new excluded folder, click on the “Add an excluded folder†button and in the pop-up window we will select the desired folder. Click on the "Select folder" button once the folder to be added is selected.
Step 4
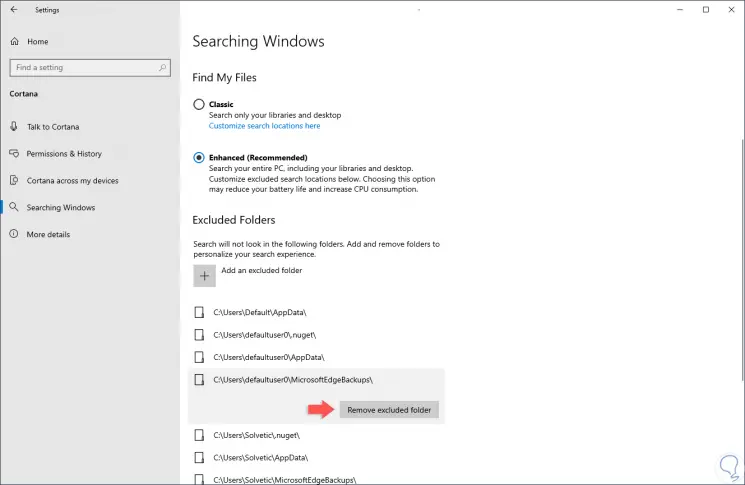
Now, if we want to exclude a folder, we simply have to click on it and the “Remove excluded folder†button will be displayed. We must click on that button to execute the exclusion of that folder.
2. Add or remove folders using the traditional method in Windows 10
Step 1
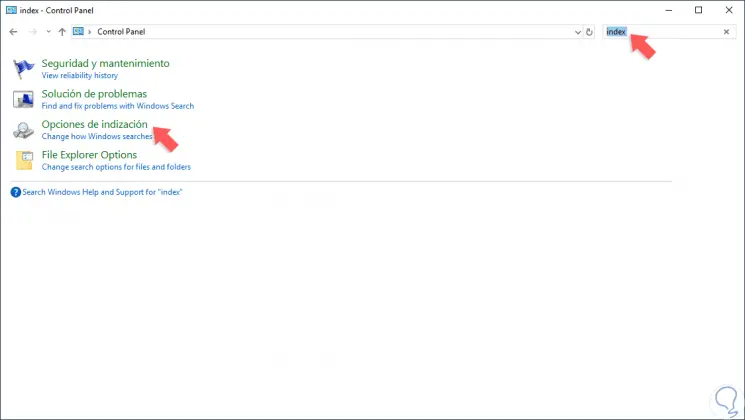
To use this method, we must go to the control panel and enter the term "index" in the search box located in the upper right and the following options will be displayed:
Step 2
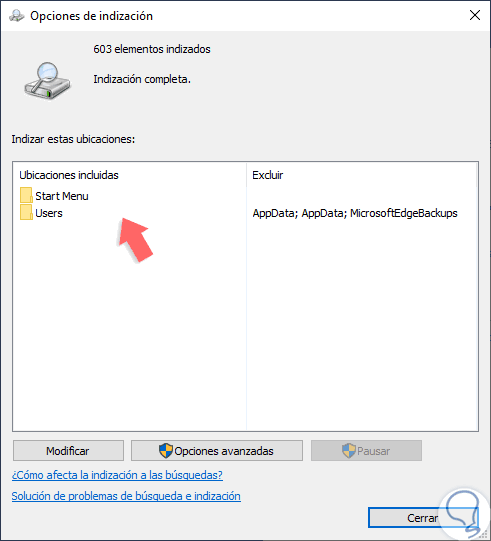
We click on the “Indexing options†line and the following window will be displayed:
Step 3
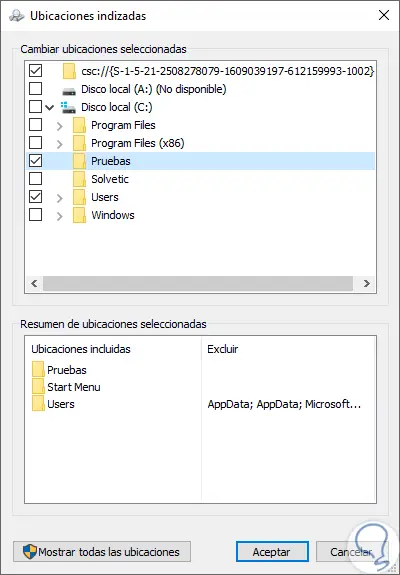
There we can see the locations that are added within the search, now we click on the “Modify†button and the following window will be displayed where we activate the folders we want to be added or uncheck the boxes of the folders that will be excluded:
Step 4
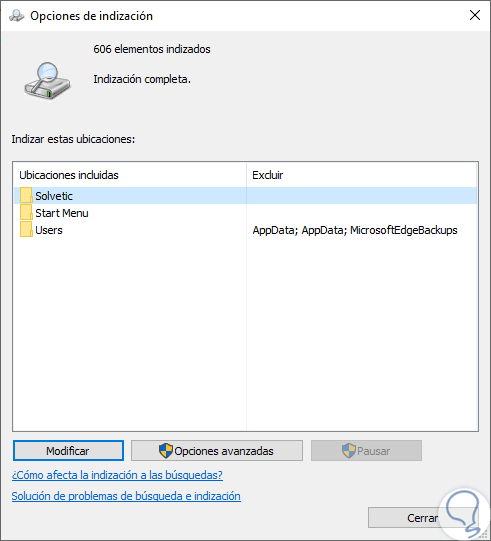
Click on the Accept button to apply the changes and we will see the new folders added or deleted depending on the choice. Click on Close to exit the assistant.
Using any of the methods indicated it will be possible to add or delete folders from the search process in Windows 10.