Windows 10 offers several practical utilities to perform daily tasks in a much simpler way, one of these tasks is implemented in the context menu , right click, which gives us various alternatives of use and one of the most striking is the Send to option through which the selected item, folder or file, can be compressed, sent to the desktop as a shortcut, send to other applications or send it to other units within the same local computer:
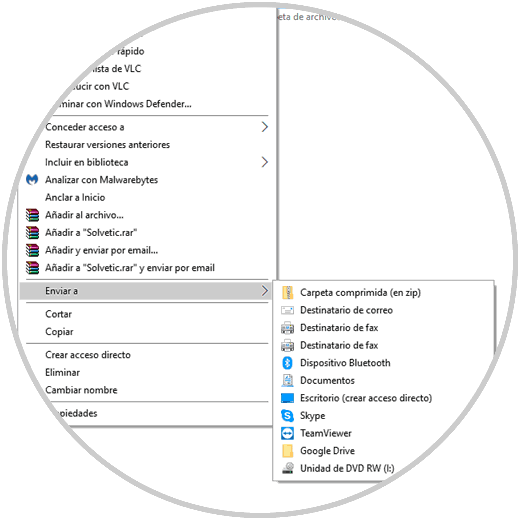
One of the advantages that Windows 10 offers us is the possibility of customizing this Send menu by adding folders or applications and thus having much more efficient access when carrying out this type of actions. Through this tutorial, TechnoWikis will give the instructions to add folders or applications to the context menu Send to in a fully functional and practical way..
Step 1
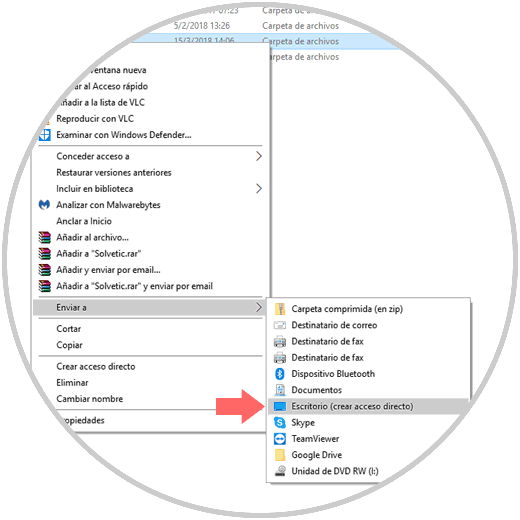
To start this process, we go to the folder we want to add to the context menu, right click on it and select the Send to / Desktop option (create shortcut):
Step 2
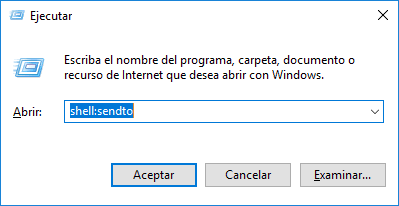
Now, we will use the Windows + R key combination and run the following line:
+ R
shell: sendto
Step 3
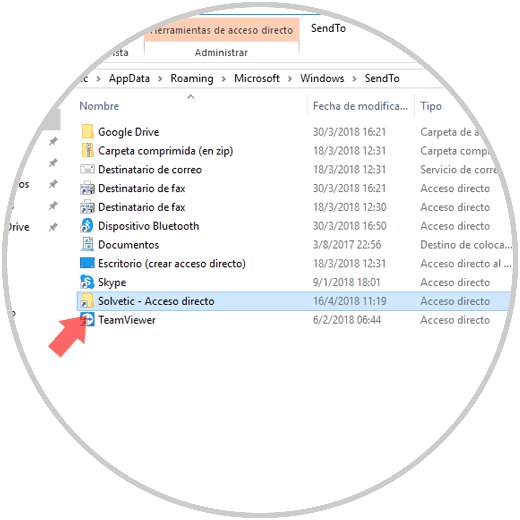
Press Enter or Accept and in the window that will be displayed we will paste the shortcut that we have created previously:
Step 4
Now, when we right click on some element we will see this new option added:
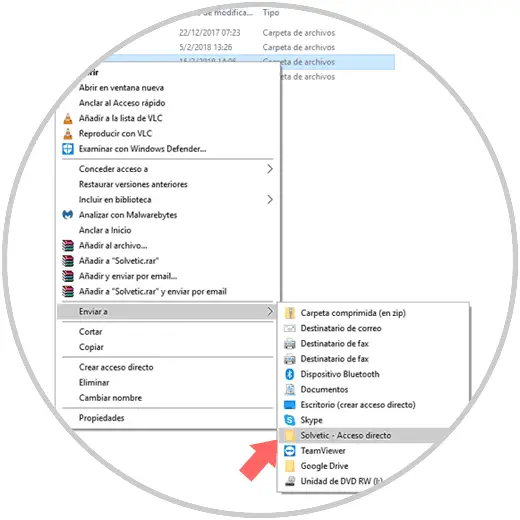
If we want to edit its name, it is necessary to go back to the shell path: sendto and there edit the name of the shortcut as necessary and at the moment you do not love this access we can remove it and so it will not be further deployed in the contextual menu.
It's that simple to add folders or applications to the Send to Windows 10 menu and have better alternatives for use..
To keep up, remember to subscribe to our YouTube channel! SUBSCRIBE