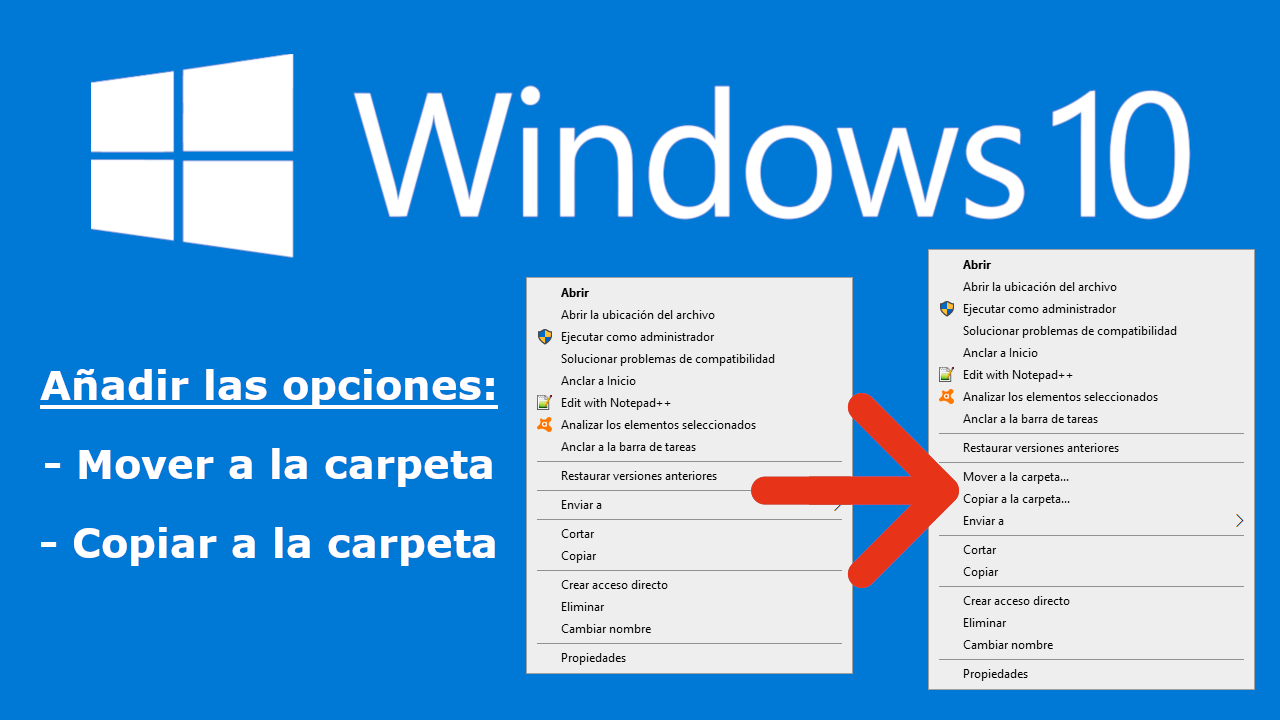
If you are a Windows 10 user, surely you are familiar with the context menu. The context menu is the menu that appears when we right-click on a blank space, on a Windows 10 file or folder. Here the user has access to various functions such as copy or paste, however you can add others such as: Copy to or Move to.
Related: How to add folders and programs to the -Send to- menu in Windows 10.
The functions “Copy to folder” or “Move to folder” allow you to copy or move a Windows 10 item without having to navigate to the folder where you want to do it. Usually we copy or cut a file or folder, go to the destination location and finally paste it in that folder..
However, in the event that we do not want to go to the destination location, there is the possibility of carrying out the entire operation from the location where the file, folder or item that we want to copy or move is located. Unfortunately these functions are hidden and you can only enjoy them if you activate them previously and include them in the context menu of Windows 10.
Having said that, we show you step by step how to activate and add the functions 'copy to folder' and 'move to folder' in the context menu of Windows 10 when you right-click:
How to activate and add the "Copy to folder" function in the context menu of Windows 10.
1. Open Windows 10 Registry Editor
2. Once here go to the following path / key:
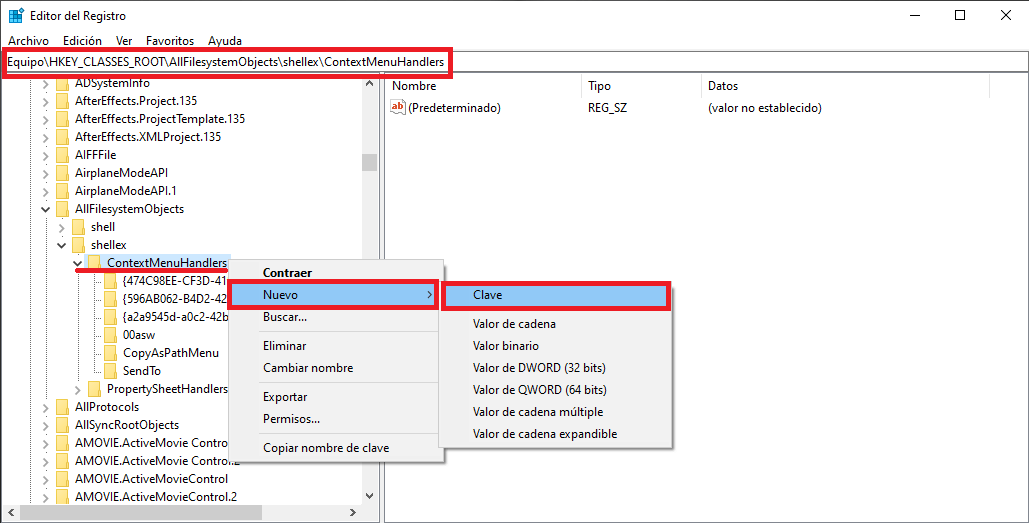
HKEY_CLASSES_ROOT \ AllFilesystemObjects \ shellex \ ContextMenuHandlers
3. In the left part of the window (in the keys menu) you will have to right-click on the key: ContextMenuHandlers
4. Select the option: New> Password
5. Now you will have to offer a name to this new key that you are creating, in our case: Copy to
6. After pressing Enter and creating the key, you will have to double left click on the key with name (Default) shown in the right part of the window. This will open a configuration window..
7. In the Value data field you will have to enter the following text:
{C2FBB631-2971-11D1-A18C-00C04FD75D13} 8. Click on the Accept button to save the changes made.
9. Finally, restart your computer from that moment on when you right-click with the mouse, the contextual menu will be displayed and the option “Copy to folder” will be available for use..

How to activate and add the function “Move to folder” in the context menu of Windows 10.
The procedure is very similar to the one shown above with the difference of the name that we will have to give the key.
1. Open Windows Registry Editor and go to the following path: HKEY_CLASSES_ROOT \ AllFilesystemObjects \ shellex \ ContextMenuHandlers
2. Right click on the ContextMenuHandlers key and select: New> Key

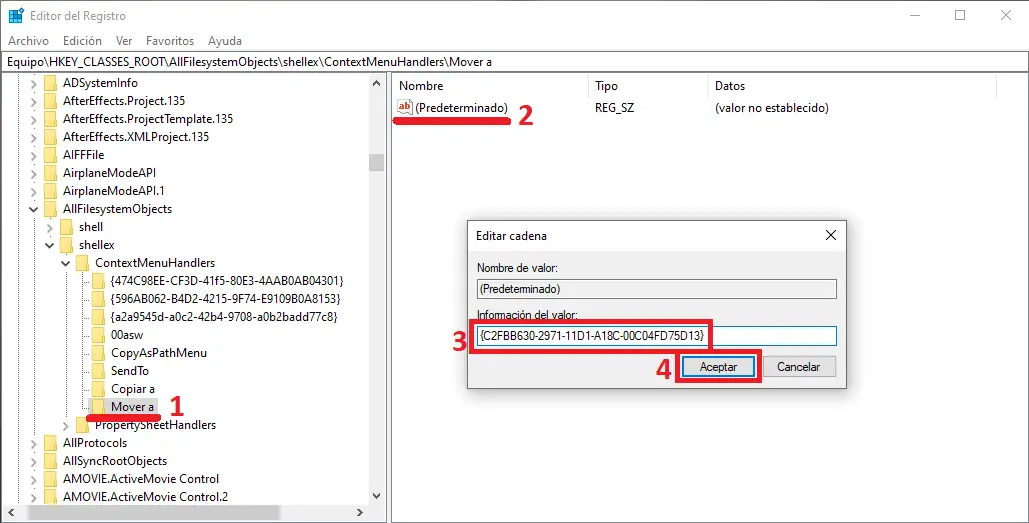
3. Name the created key as: Move to
4. In the key (Default) shown on the right side of the Registry Editor window you will have to double-click when a window is displayed in the Value data field you will have to enter the following:
{C2FBB630-2971-11D1-A18C-00C04FD75D13} 5. Finally click on the OK button to confirm the new configuration.
6. Now the function “ Move to folder ” is available in the context menu when clicking on a file or folder.