Windows 10 operating systems have a feature called indexing that speeds up the process of searching for items such as files or folders in all storage units , but this process only takes into account some parameters such as Internet Explorer history, the menu Startup and the entire user folder in the operating system partition which leaves other items that can play an important role in the search process ..
One of these elements is the folders we have shared to access them through the local network and in which it is possible to find valuable information.
Today in TechnoWikis we will see how to add a folder of this type to the Windows 10 index..
1. Share the network folder in Windows 10
Step 1
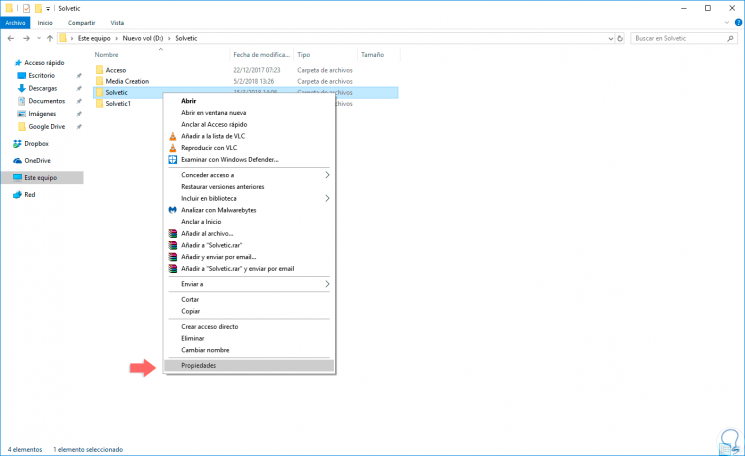
The first step to take is to add to the network folder the files that we want to share and proceed to share that folder, for this we right click on it and select “Propertiesâ€:
Step 2
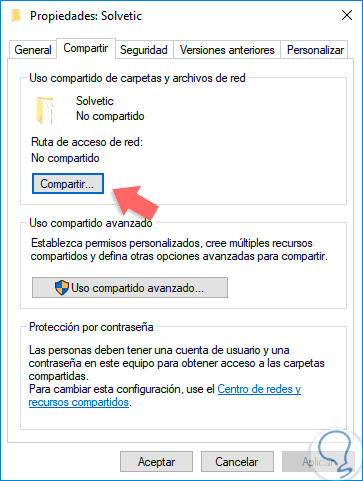
In the displayed window we go to the “Share†tab where we will see the following:
Step 3
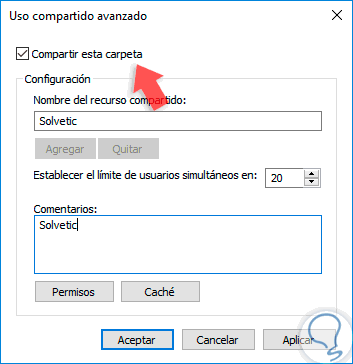
There we click on the "Advanced sharing" option and in the new window we activate the "Share this folder" box and enter a name for that shared resource:
Step 4
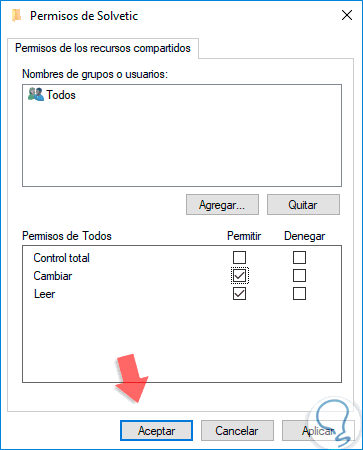
Now, click on the "Permissions" button and assign the permissions as necessary. Click on Apply and then OK to save the changes in both windows.
2. Map the network drive in Windows 10
The next step to take is to assign the selected folder as a drive in Windows 10.
Step 1
To do this, we go to the file explorer and there we go to the “Network†section where we will see the shared resources in the local network, once we agree, we will see the name of the computer or resource where the shared folder is located, we will right click on the folder to connect and select the option "Connect to network drive":
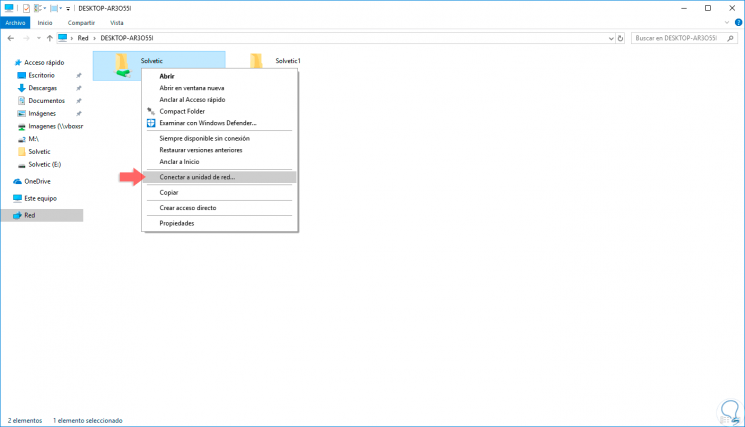
Step 2
When selecting this option, the following window will be displayed where we will select:
- Check the box to automatically connect to the login
- Use other credentials to access that folder

Step 3
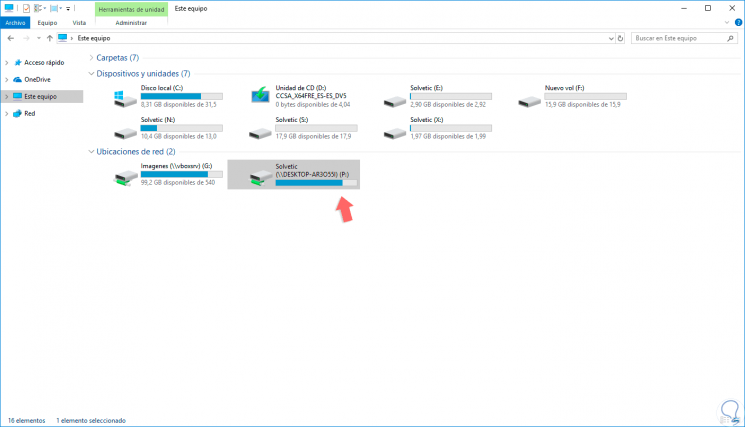
By clicking on the "Finish" button, the folder will be connected correctly and we will see it available from the "Network locations" option with the letter we have assigned:
Step 4
Next, we will right click on the folder that we have connected and go to the “Properties†option, there we will activate the “Allow files from this unit to have indexed content in addition to file properties†box:
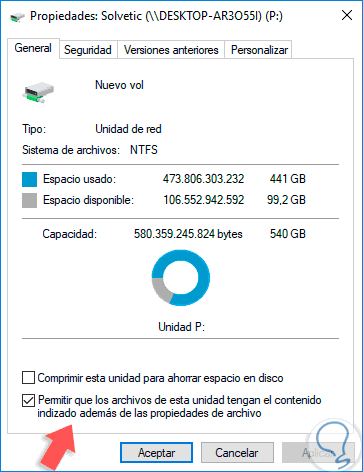
Step 5
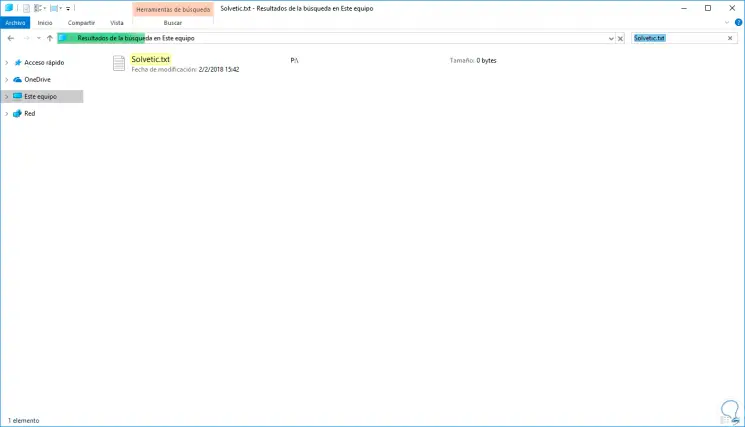
Click on OK to close the dialog box. Once this is done, we can execute a search and the new folder will be included in the index of Windows 10. In this case we see the unit where the result was generated is the P, which we have created previously.
With this method, it is possible to add the network folders to the Windows 10 search process for the best results.