It is unknown to anyone that every day the form of access to the network increases, where millions of sensitive data are moved which, if they fall into the wrong hands, can have delicate consequences both at a personal and corporate level..
The attacks are the order of the day, network-level attacks, attacks from USB devices, password attacks and many more, make our information sensitive and that is why, not only as system administrators but as users in general We must take the necessary measures to prevent an attacker from accessing our system and violating, stealing or editing the information stored there.
There are several ways we can protect ourselves and one of the most important is encrypting sensitive files, and it is worth clarifying that, although we use Linux, which in itself is a secure system , as the days go by the attackers manage to violate it and thus access in an environment that we consider safe ..
As we have mentioned, file encryption is an effective method to increase data security, but we must be aware of the way it is encrypted and what tool to use and that is why in TechnoWikis we will focus attention on the utility Tomb
For this analysis we will use Ubuntu 17.10.
What is Tomb?
Tomb (Tomb), is a free and open source encryption system which is used to carry out file encryption tasks in GNU / Linux environments, thus facilitating the backup of the most personal and delicate files in the system.
Tomb has been written in an easy-to-analyze code and links commonly shared components thereby increasing its reach capabilities..
On a security level, Tomb makes use of the encryption standard, the same Veracrypt encryption, AES-256, so the data will be really safe.
Its use is simple, Tomb will create encrypted storage folders which can be opened and closed using the associated key files, which are also protected with a password that we define at the time of configuration.
Tomb is a practical tool for management and everything related to encrypted storage in Linux operating systems, this is because it makes use of the hash of the dyne: bolic nesting mechanism, and additional to this, when we use Tomb, it will be possible to move our locked folder and hide it securely in a compatible file system, so the keys can be separated, for example, the file created by Tomb can be on the hard drive and the key files on a USB stick or external drive, as well we avoid that the keys are in the same place where the protected files are increasing the security.
Tomb is only compatible with GNU / Linux systems.
Tomb's goal is to provide military level security using:
- A minimalist design which has been created as a small and easy-to-read code for administrators and developers
- Use of good practices at the security level
- Adoption of new standard implementations
At the development level, Tomb consists of a simple shell script (Zsh) which uses the standard tools of the GNU file system and the Linux kernel cryptographic API (cryptsetup and LUKS). Tomb is able to generate a team analyzable output to facilitate its use in graphic applications or GUI.
Tomb operation
The Tomb tool can be used to "dig", ie hide, files. tomb, called LUKS volumes, create password-protected keys, using GnuPG encryption and use the keys to block the keys we have created. "Tombs" are unique files where their content is inaccessible by not having the password with which it is locked and also by knowing your password.
Once opened with the correct key, the "graves" are normal folders and can contain different files, where we can carry out advanced tasks such as execution and quick search, or they can be closed with a single click.
The keys that are generated by Tomb, can be stored in independent media, as we have mentioned, such as USB sticks, NFC, online SSH servers or bluetooth devices thus allowing data transport to be more secure and not in the same location of protected files.
The Tomb script has functions such as:
- Protects writing against keylogger password attacks (keyboard attacks).
- It allows you to hide keys within images thus creating a new security technique.
- Indexa and look for the contents of a "grave."
- You can mount directories.
- List open "tombs" and selectively close them as appropriate.
- It warns the user about the free space and the use of the last time, thus allowing a better control over the data.
1. Install Tomb on Ubuntu 17.10
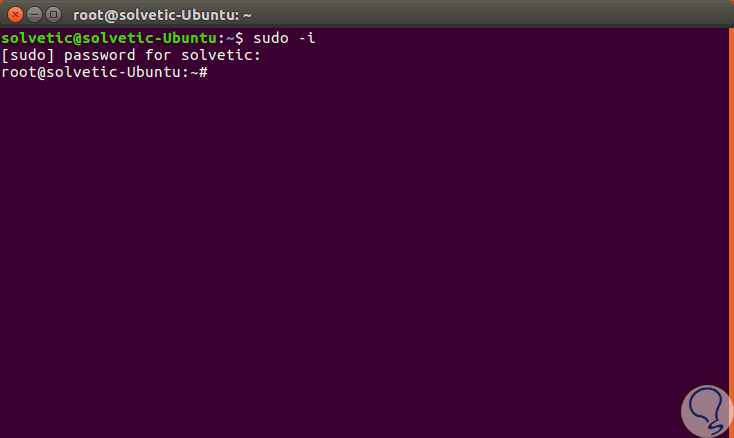
Step 1
To run the Tomb script we must be root users, in the case of Ubuntu we can execute the following command to access as said user:
sudo -i
Step 2
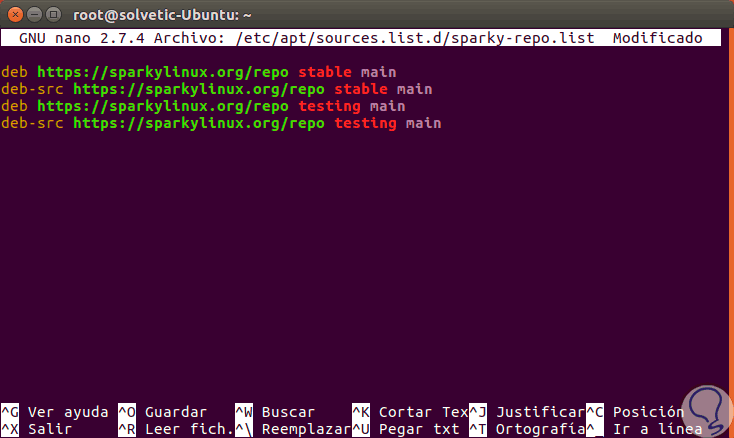
Once we are as root users, we will execute the following line with our desired editor:
nano /etc/apt/sources.list.d/sparky-repo.list
Step 3
This will create a new file where we will paste the following lines:
deb https://sparkylinux.org/repo stable main deb-src https://sparkylinux.org/repo stable main deb https://sparkylinux.org/repo testing main deb-src https://sparkylinux.org/repo testing main
Step 3
We save the changes using the following key combination:
+ O Ctrl + O
We leave the editor using:
+ X Ctrl + X
2. Install Sparky's public key in Ubuntu 17.10
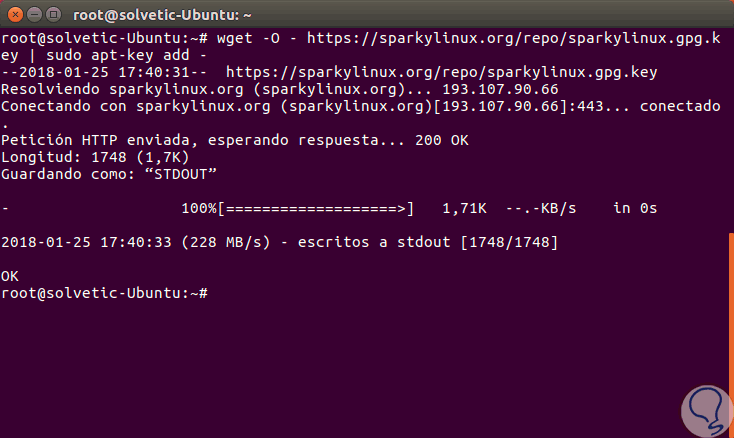
Step 1
Once we add these lines, we can execute any of the following options:
apt-get install sparky-keyring wget -O - https://sparkylinux.org/repo/sparkylinux.gpg.key | sudo apt-key add -
Step 2
We proceed to update the system packages:
apt-get update Tomb installation
Step 3
Once the packages are updated, we will execute the following line for the installation of Tomb:
apt-get install tomb
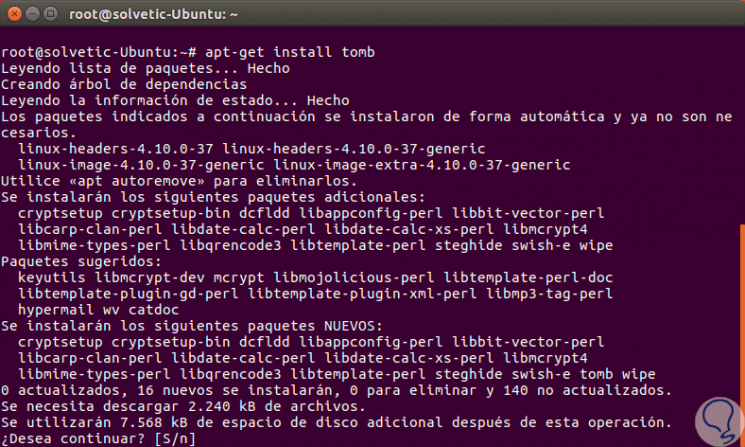
Step 4
There we enter the letter S to confirm the download and installation and in some cases we will see the following message during the installation process:
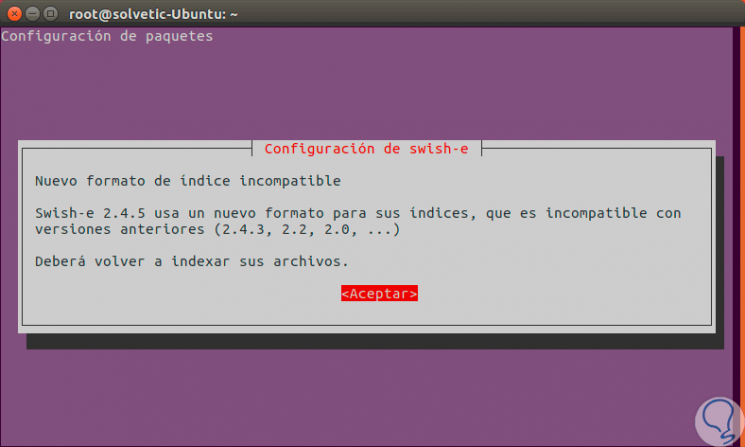
Step 5
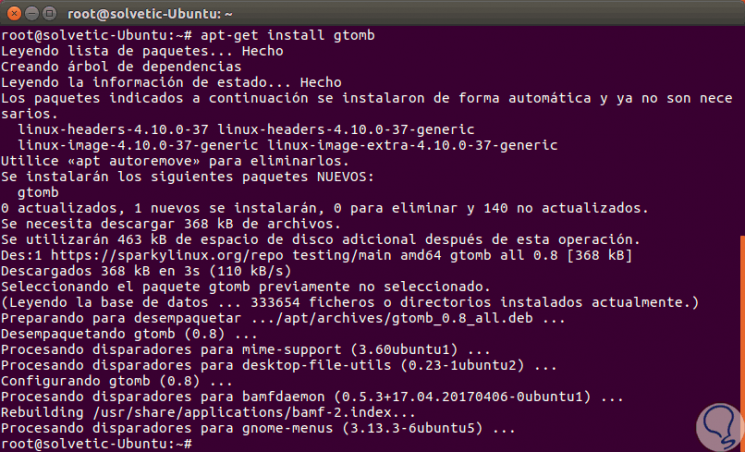
Click on Accept to conclude the process. If we want to install the graphic version of Tomb we must execute the following line:
apt-get install gtomb
3. Use Tomb in Ubuntu 17.10
First, we will analyze the use of Tomb as a console line, which is the default value in the creation of the utility.
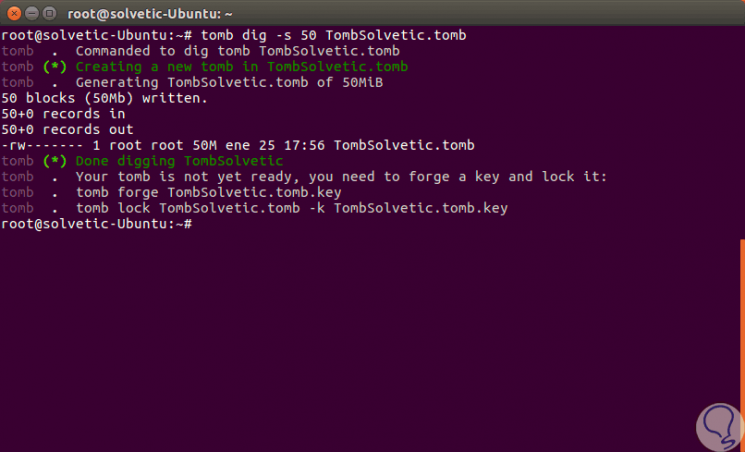
Step 1
The first step to take is to create the "grave" and assign the size of it, in this case we will assign 50 MB, we execute the following:
tomb dig -s 50 TombTechnoWikis.tomb
Step 2
The next step is to create a key file to block the tomb created, for this we execute the following:
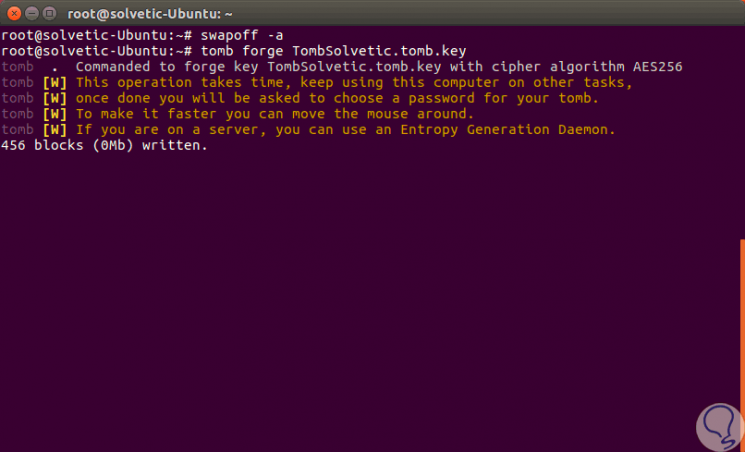
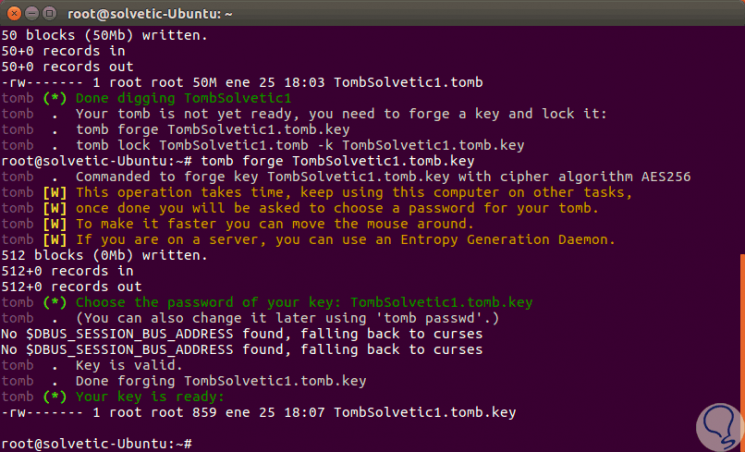
tomb forge TombTechnoWikis.tomb.key
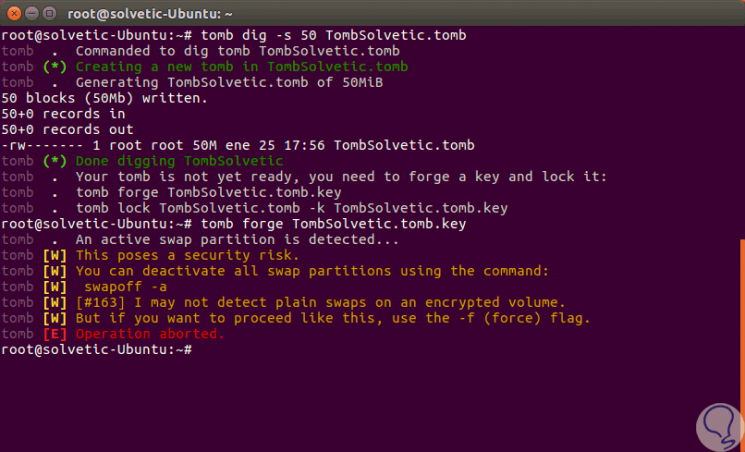
Step 3
We can see that an “an active swap partition†error is generated, this is corrected by deactivating all swap or swap partitions using the following command:
swapoff -a
Step 4
Then we execute again the line "tomb forge TombTechnoWikis.tomb.key" and we will see that the block writing process begins:
Step 5
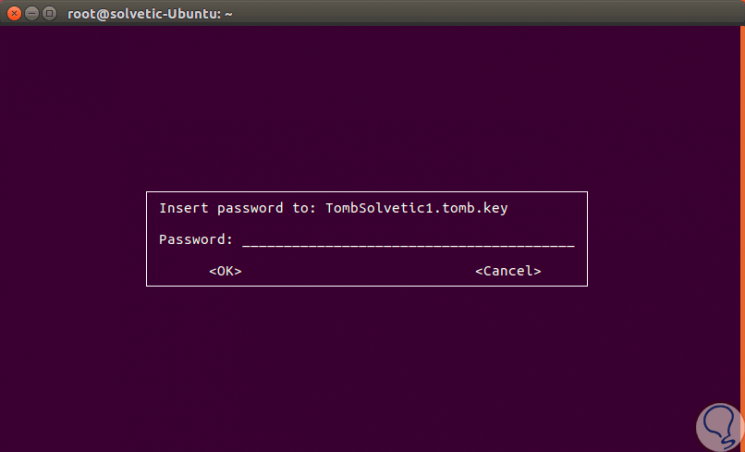
Once this process is complete, the following window will be displayed where we will enter the key of the created grave:
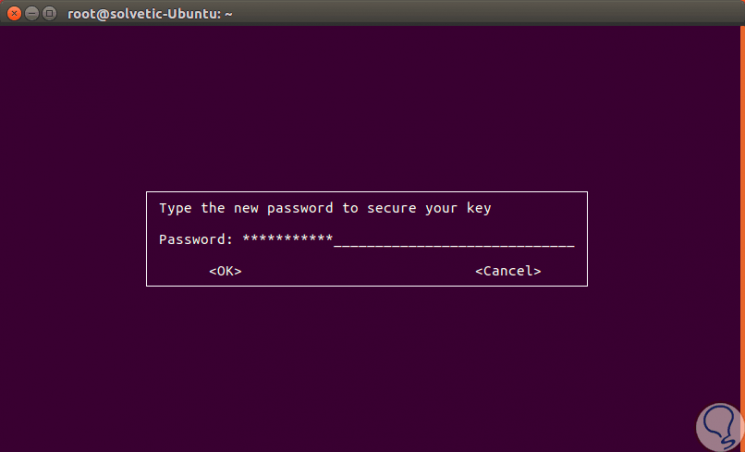
Step 6
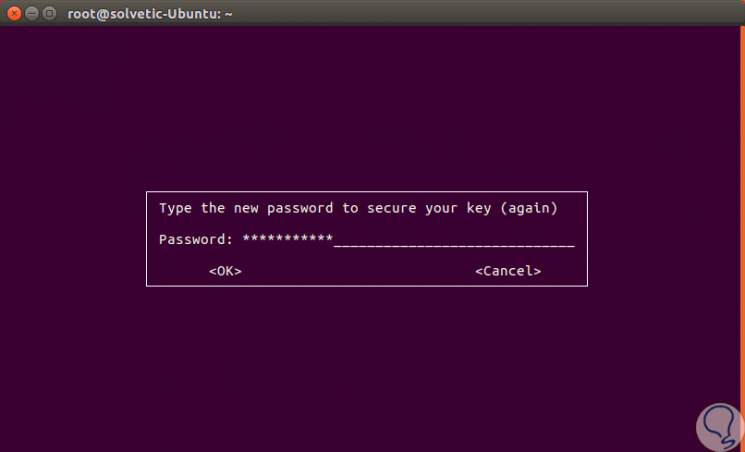
Click OK and we must confirm the password again:
Important note
In case of not entering the password in time, the process will be aborted and we must create a new grave, in this case we have created the new grave called "TombTechnoWikis1.tomb".
Step 7
When we click OK again we can see that the new key for this grave has been created:
Step 8
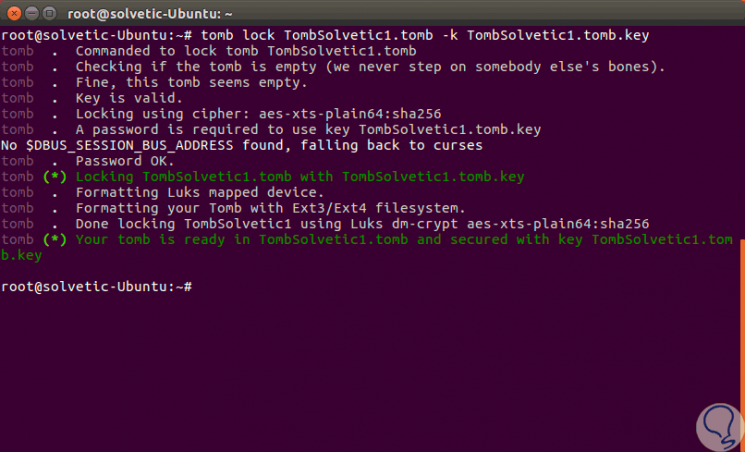
Now, it will be necessary to block the grave with the new key created, for this we execute:
tomb lock TombTechnoWikis1.tomb -k TombTechnoWikis1.tomb.key
Step 9
When executing this it will be necessary to enter the created password:
Step 10
Click on OK and we will see that the password has been correctly linked:
Step 11
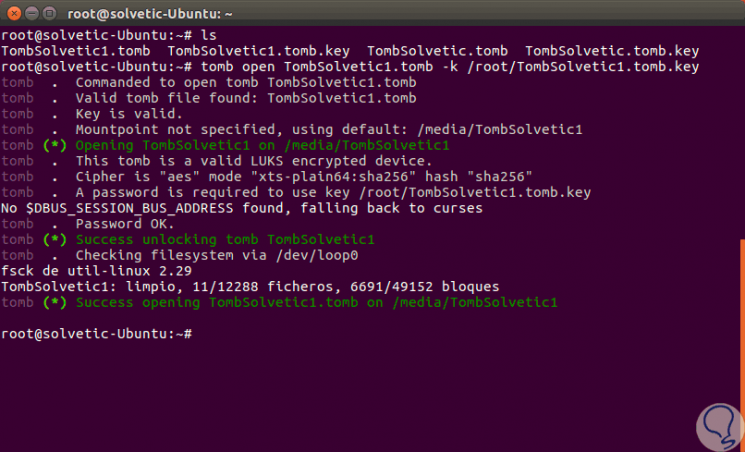
At this point Tomb has been configured and we can make use of the tomb created. To remember where the key was stored we can execute the following line:
tomb open TombTechnoWikis1.tomb -k /path/TombTechnoWikis1.tomb.key
Step 12
When executing this command it will be necessary to enter the password again:
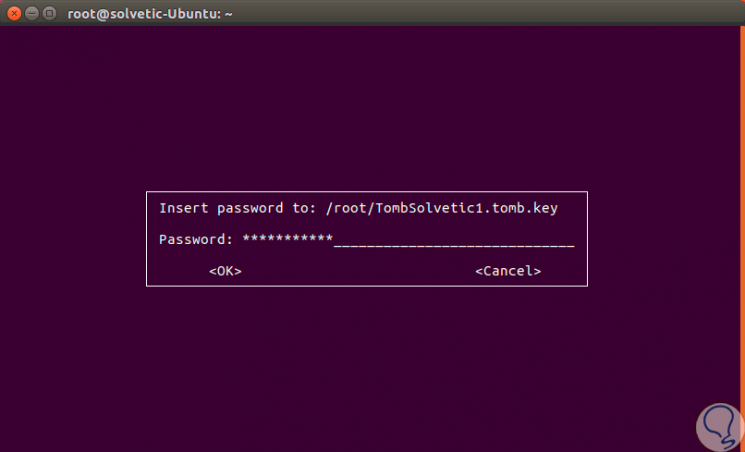
Step 13
Click on OK and we will see that the tomb created has been opened:
Step 14
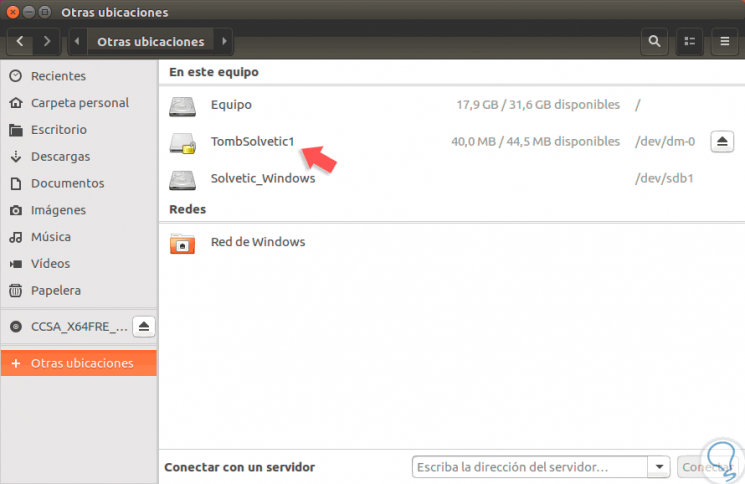
We can access the Ubuntu browser and there we will see the tomb mounted where we can access and store the information to be protected:
Step 15
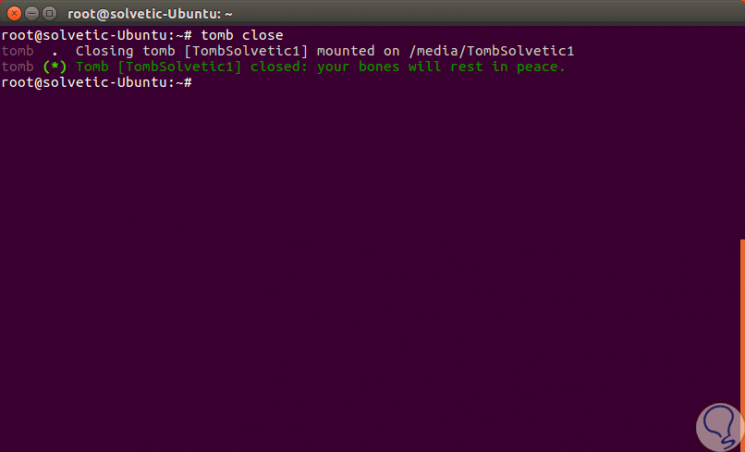
To close the grave just run the following:
tomb close
Step 16
As we see, the message is very satisfying, "Our bones can rest in peace":
Step 17
If we wish to force the closure of all graves, it will be necessary to execute the following:
tomb slam all
4. Use Tomb in graphical environment in Ubuntu 17.10
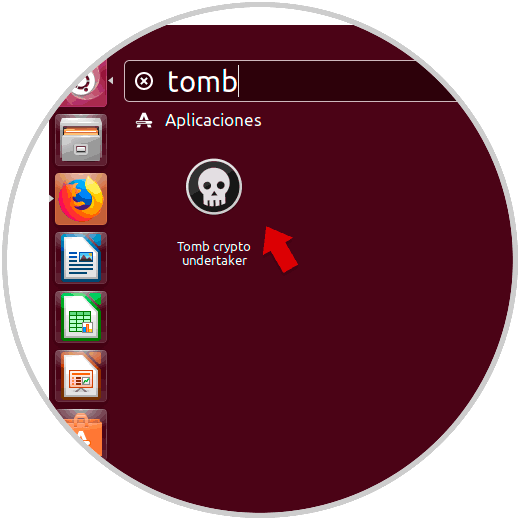
Step 1
As we have installed the Tomb graphic environment, we can access it directly from the Ubuntu 17 search engine by entering the word tomb:
Step 2
When selecting the utility we will see the following:
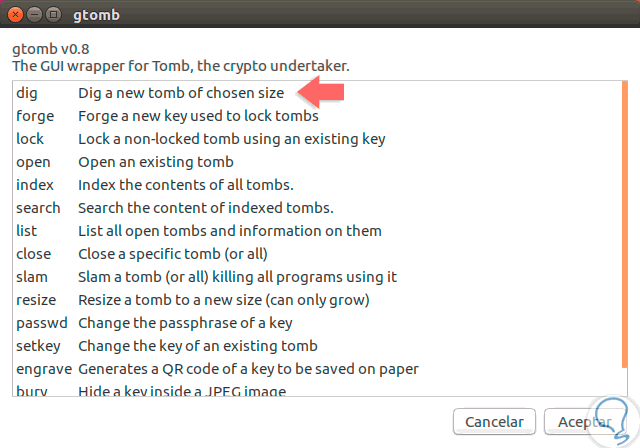
Step 3
There we can select the task to be executed, in this case to create a new tomb we select dig and click OK, we will see the following window where we will select the route where the tomb will be stored and in the upper part we will enter the name of it:
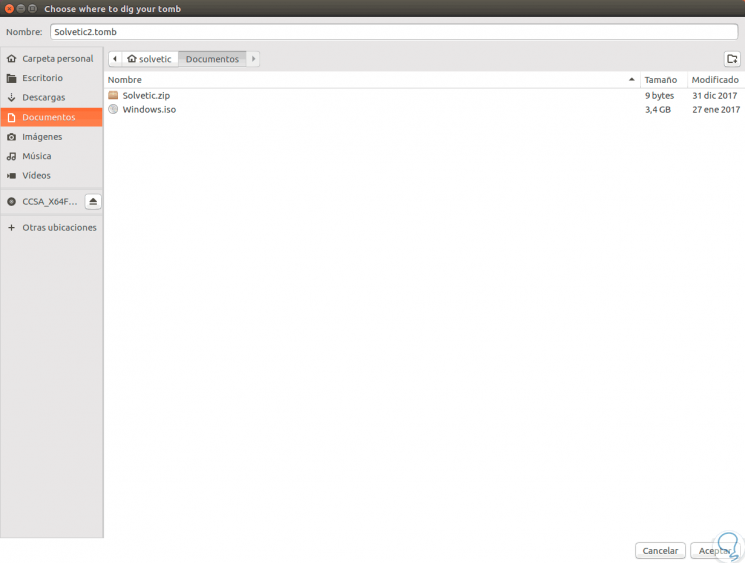
Step 4
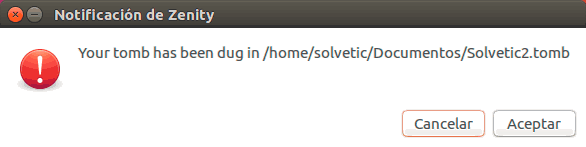
Once defined, click on Accept and then define the size of this tomb:
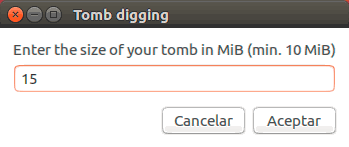
Step 5
We assign the size and click on Accept and we will see a confirmation message of the creation of this new tomb. To close the grave click on the Forge option.
Note
The volumes that are used and created in Tomb fully comply with the FIPS 197 advanced encryption standards published by NIST and with the following current standards.
- Information technology - Security techniques - Encryption algorithms:
ISO / IEC 18033-1: 2015 - Part 1: General ISO / IEC 18033-3: 2010 - Part 3: Block encryption
- Information technology - Security techniques - Key management
ISO / IEC 11770-1: 2010 - Part 1: Framework ISO / IEC 11770-2: 2008 - Part 2: Mechanisms that use symmetric techniques
We can see how a great security solution is to use Tomb for all encryption with high levels of encryption in Ubuntu 17 and thus be sure of our data.