Security is something essential in any operating system and in Windows 11 this is not far behind since it is well known the number of threats that the system receives daily, and obviously the user's data, where the privacy of the person and there are several ways to optimize security in Windows 11 and one of them is by encrypting the folder (in which the files are stored)..
This encryption is linked to the Windows account and this allows that when logging in with the user that encrypted the folder, the operating system will automatically decrypt the files to access them, with this scenario another person using a different account will not have access to encrypted files directly with our username.
TechnoWikis will explain the way to encrypt a folder in Windows 11..
To stay up to date, remember to subscribe to our YouTube channel!
SUBSCRIBE ON YOUTUBE
How to encrypt files and folders in Windows 11
Step 1
We open the File Explorer to see the current elements:

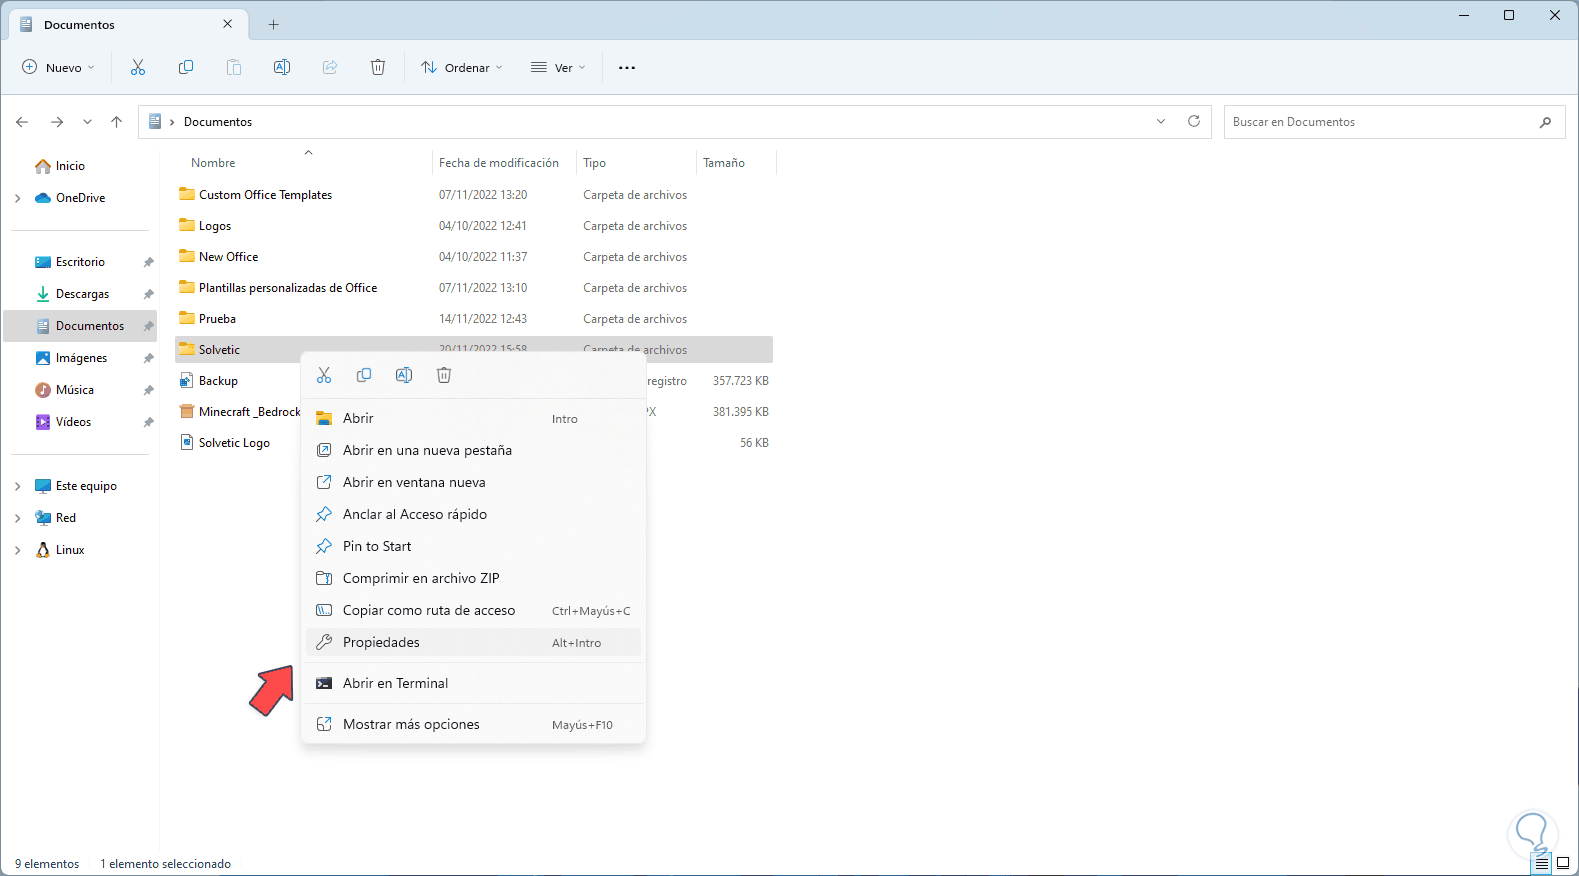
Step 2
We right click on the folder to encrypt and select the "Properties" option:
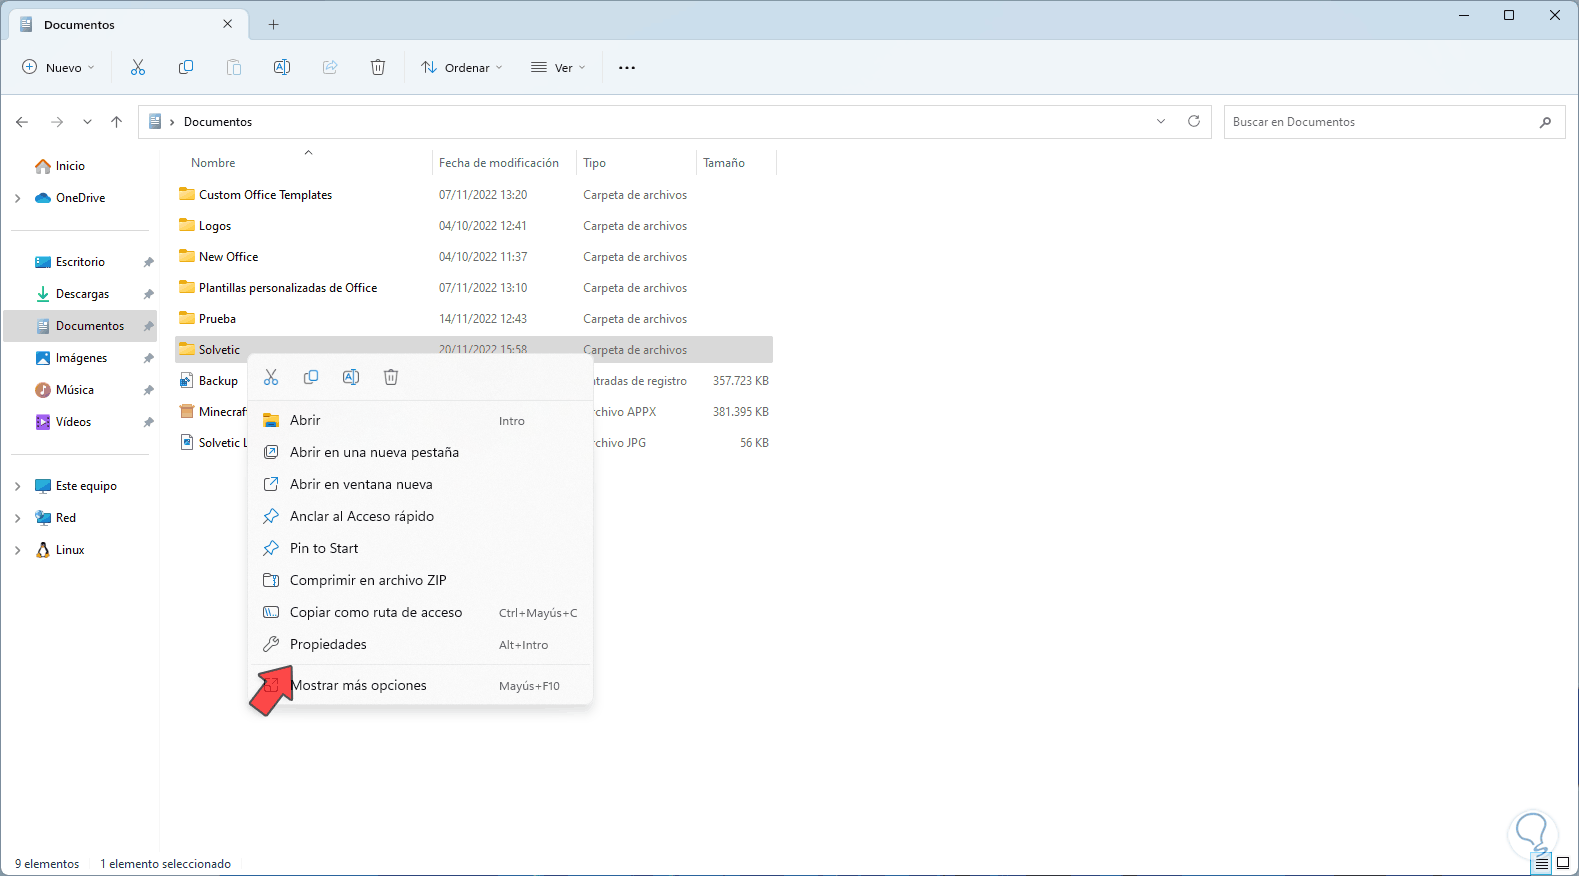
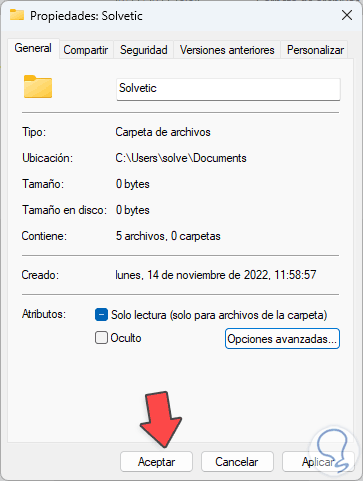
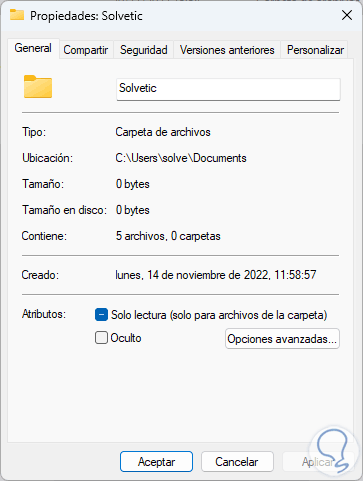
Step 3
The following window will open:
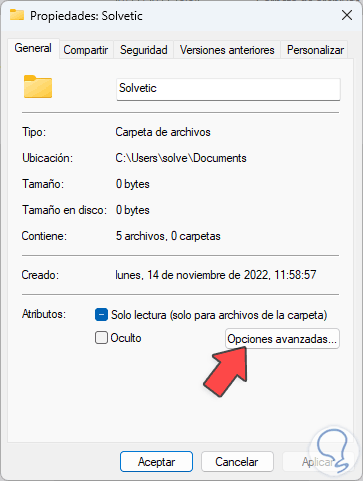
Step 4
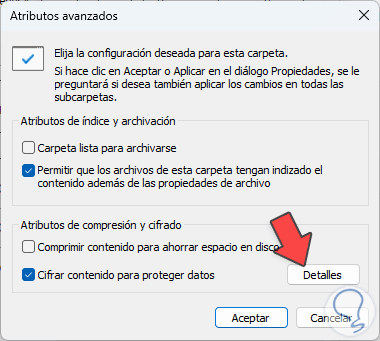
We click on "Advanced options" to see the following:
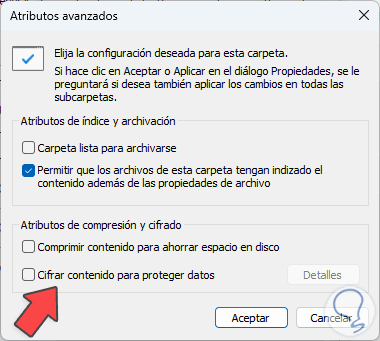
step 5
We activate the "Encrypt content to protect data" box:
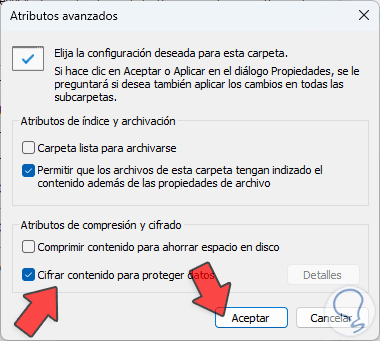
step 6
We click OK to return to the main window:
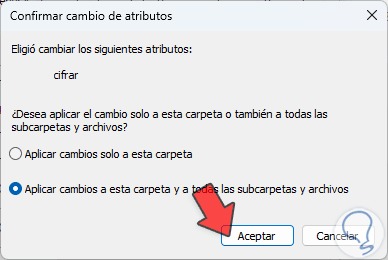
step 7
We apply the changes and confirm where the encryption will be applied:
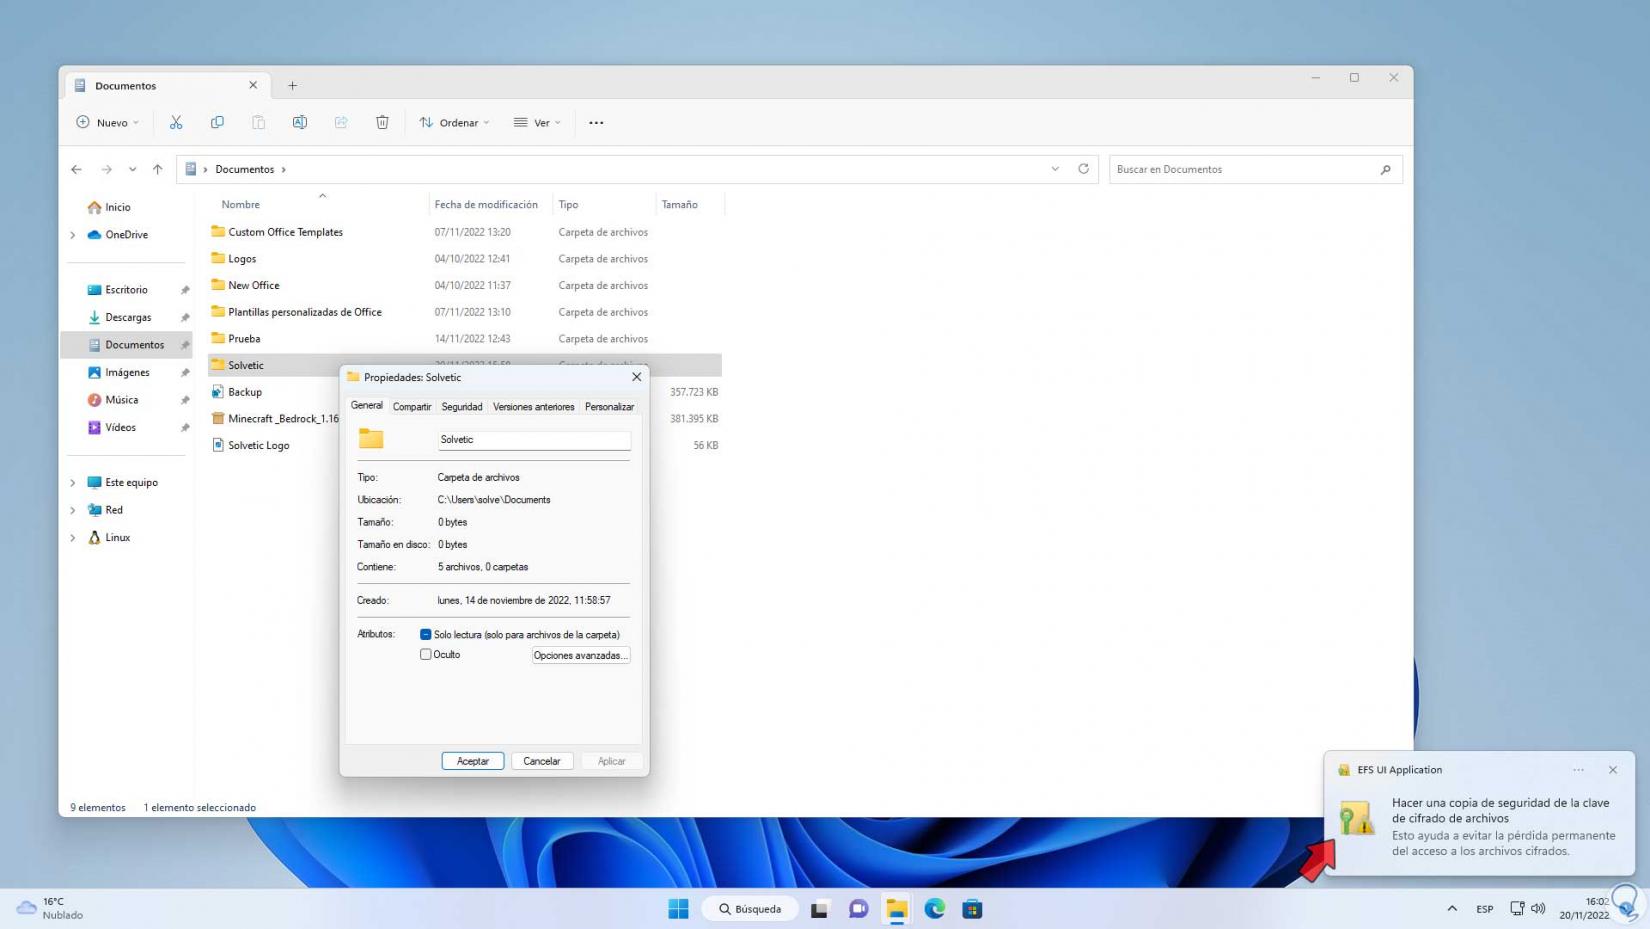
step 8
When doing this we will see a message in the Notification Center indicating that it has been encrypted:
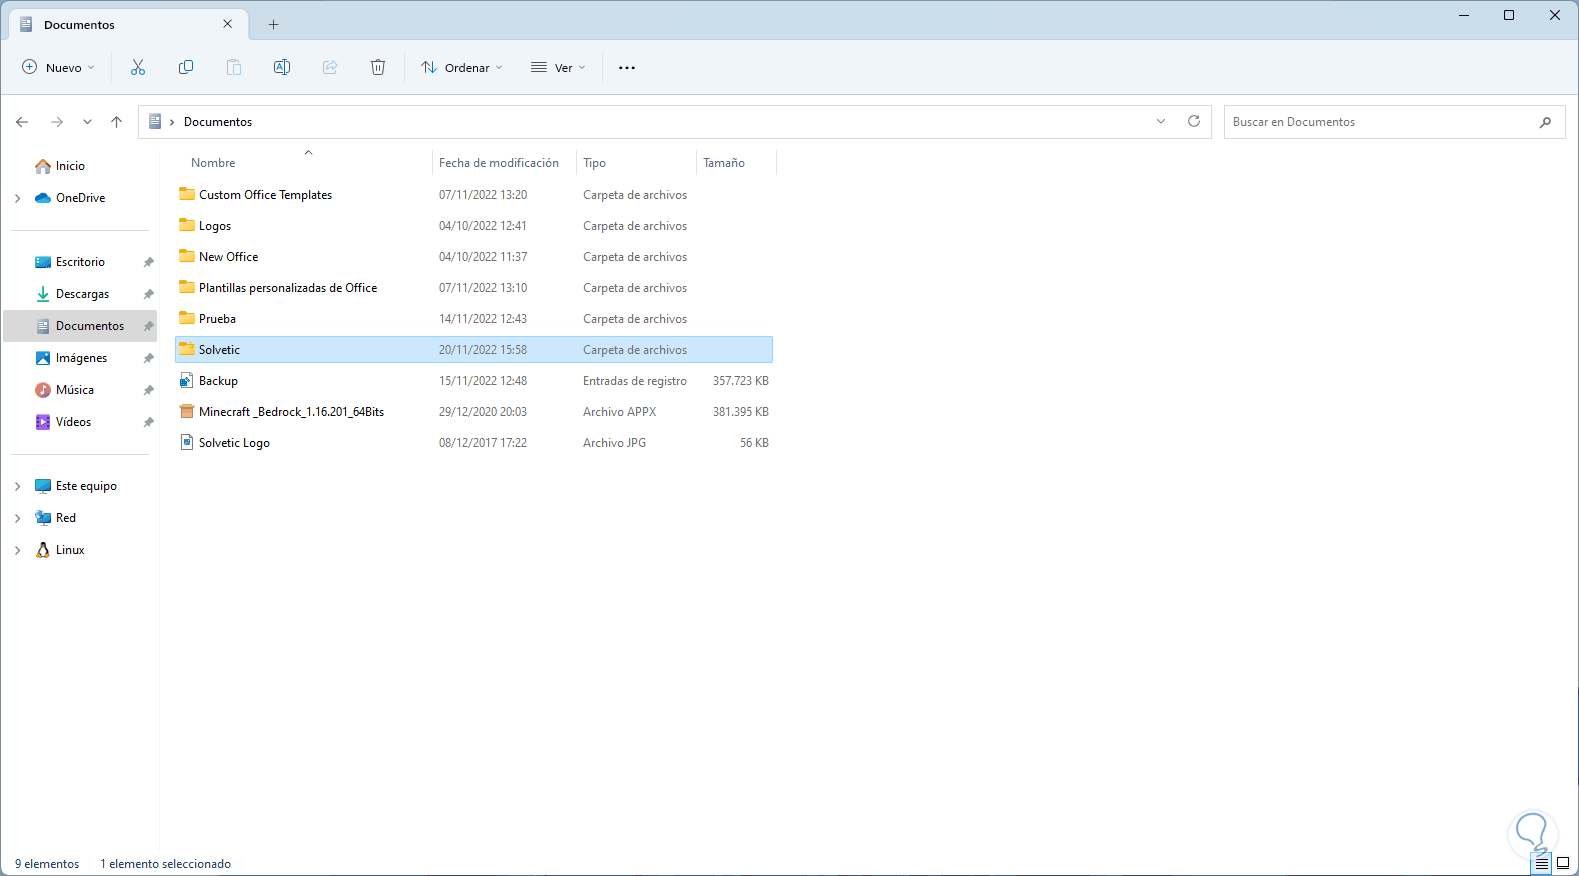
step 9
We can see that the folder icon now has a small symbol indicating that it is encrypted:
step 10
We right click on the folder to encrypt and select "Properties":
step 11
We will see the following window:
step 12
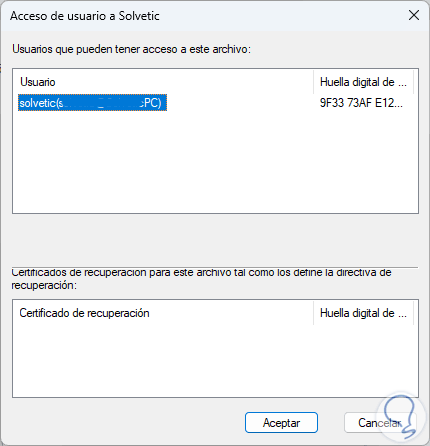
We click on "Advanced options" and then click on "Details" to see the detail of the certificate:
step 13
We will observe the following. There we find the user associated with the certificate as well as the fingerprint.
step 14
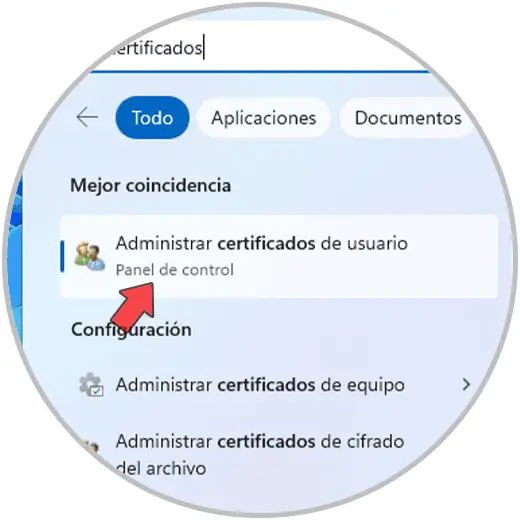
After this we open Certificates from Start:
step 15
In the window we will go to "Personal - Certificates":
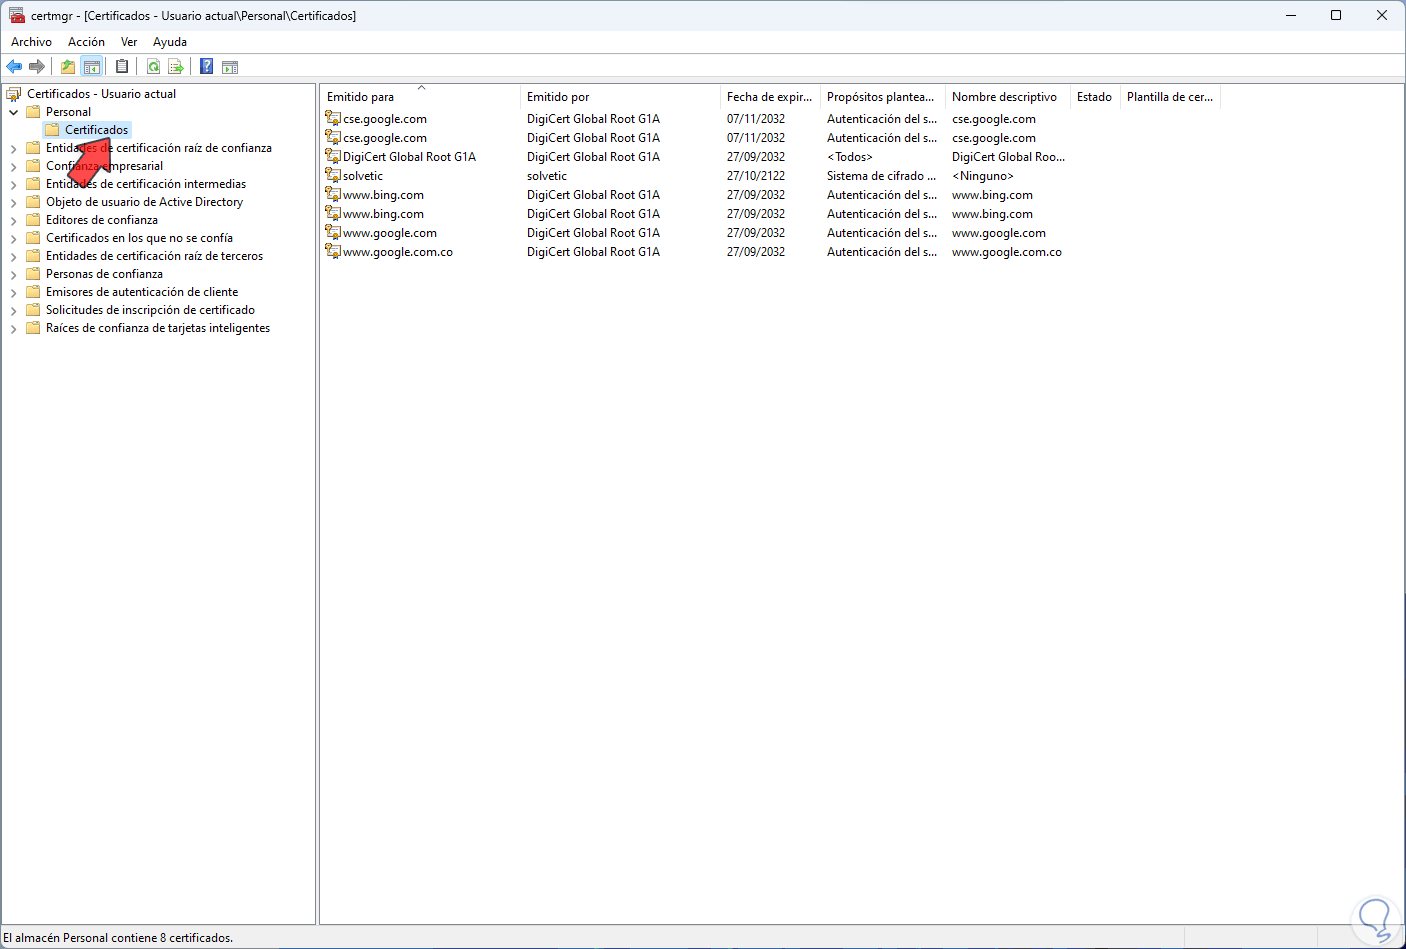
step 16
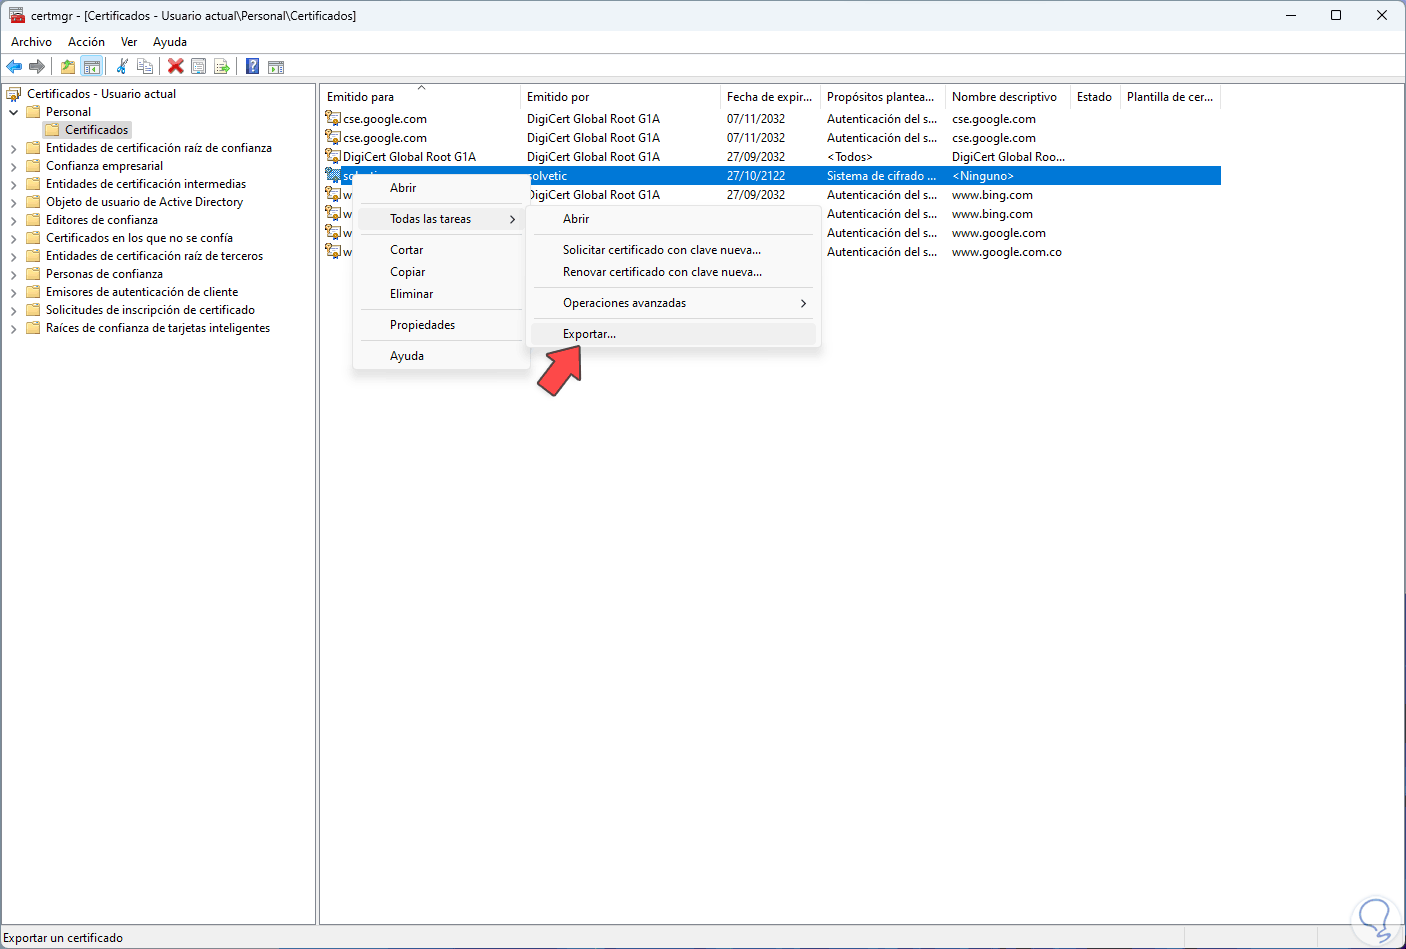
Locate the certificate of the encrypted folder, right click on it and go to "All tasks - Export":
step 17
The following will open:
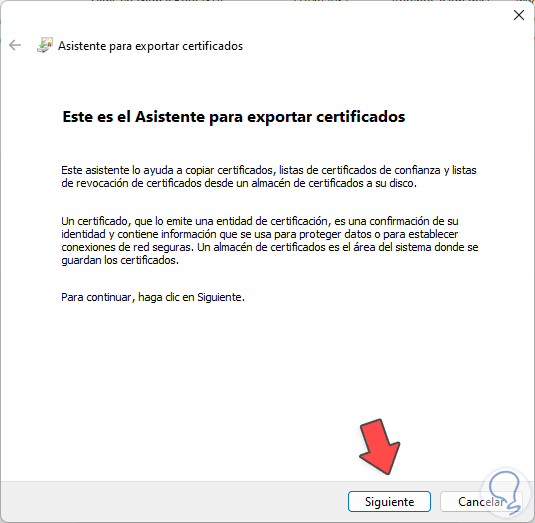
step 18
We click Next and activate the "Export the private key" box:
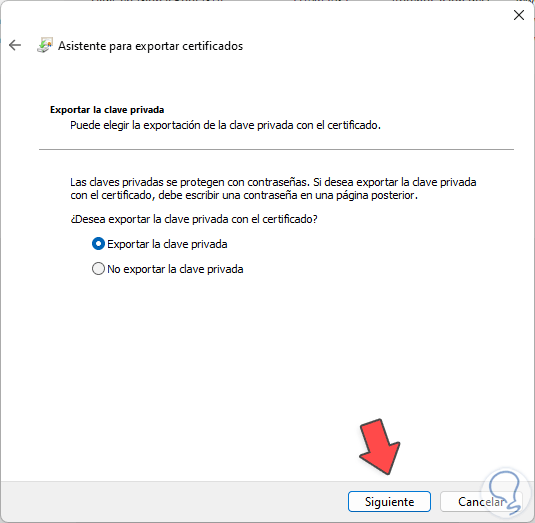
step 19
Then we select the data to export:
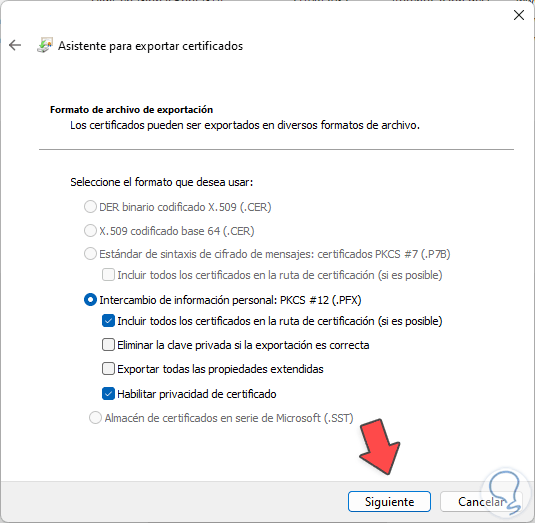
step 20
There a single use format is established but we can activate the desired boxes, click Next and activate the "Password" box and assign a password:
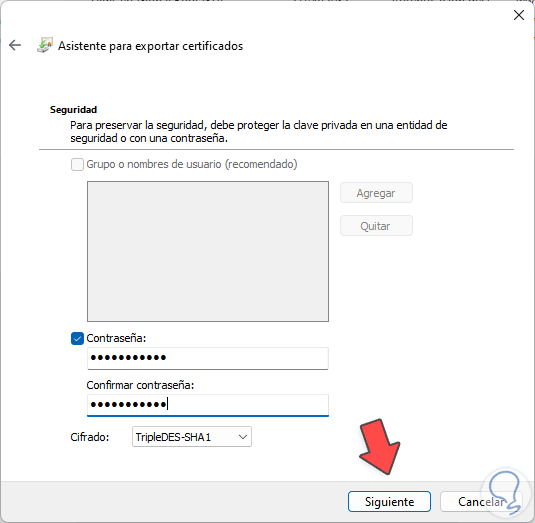
step 21
It is possible to change the type of encryption if necessary, we click Next to see this:
step 22
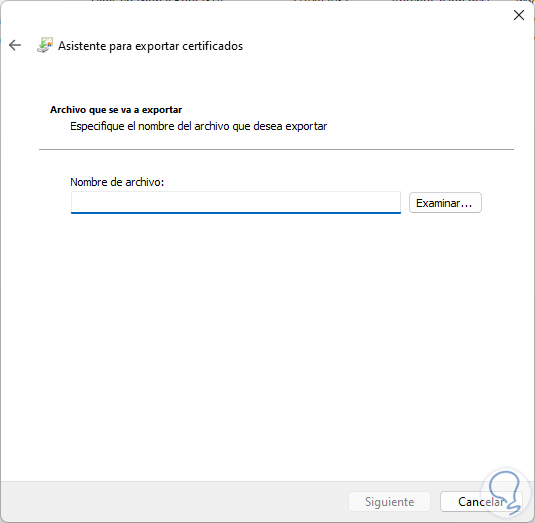
We click on Browse to define the name and path where the certificate will be hosted:
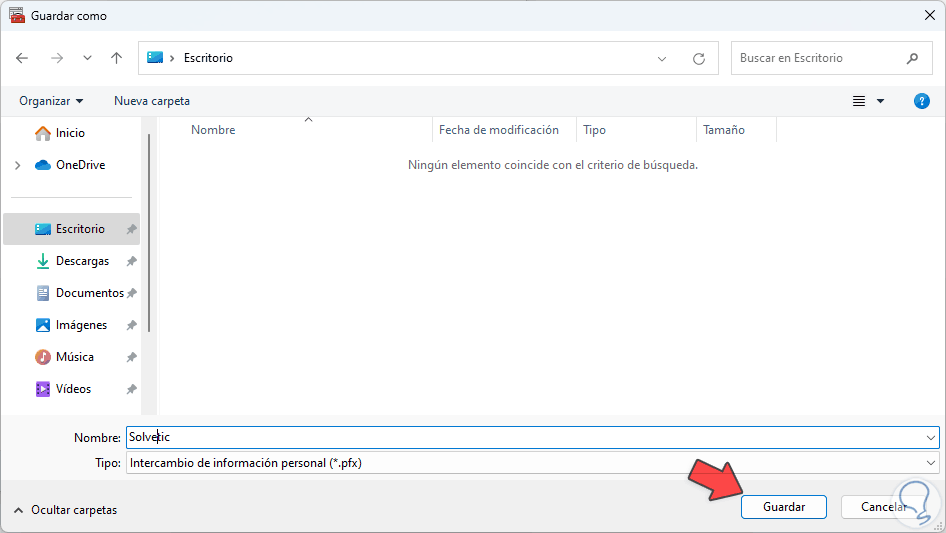
Step 23
We click Save:
step 24
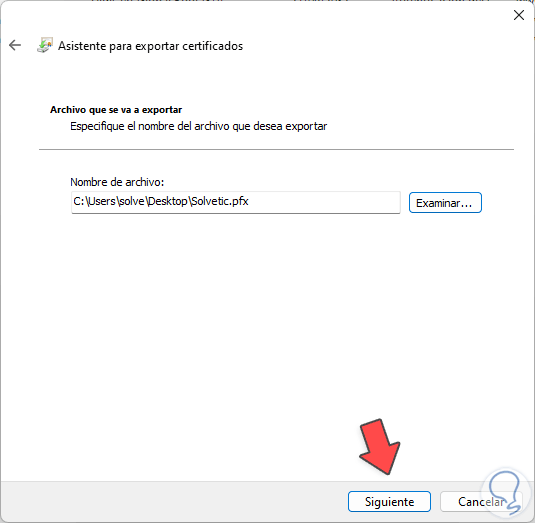
We click Next to see a summary:
step 25
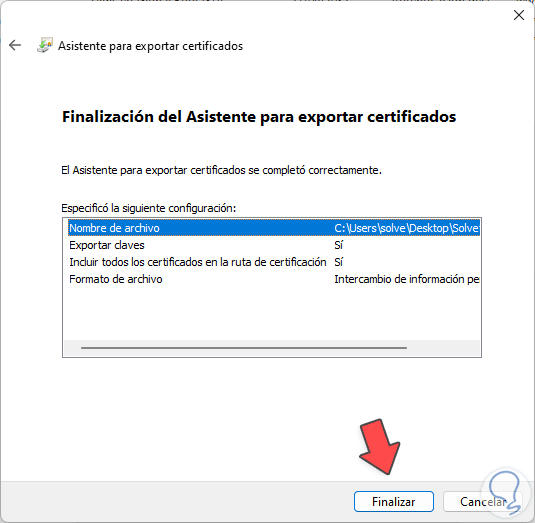
We click "Finish" to complete the process:
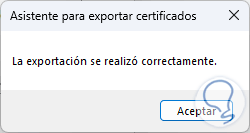
So we have managed to encrypt a folder and export its certificate in Windows 11.