Databases are a fundamental element when working with large amounts of data thanks to their dynamism, hierarchy, parameter configuration and simplicity of management..
Today we have the opportunity to select various databases such as MySQL, MariaDB , etc., and each one has its advantages and its adjustments based on the number of users and parameters to work, but today we will talk about one in particular called Cassandra the which can be very useful when working with a database and for this we will use CentOS 7.
What is Cassandra?
Cassandra is an open source database designed for scalability and high availability without compromising overall system performance.
Cassandra has factors such as linear scalability and fault tolerance in basic hardware or cloud infrastructure which make it the perfect platform for mission-critical data. Cassandra's support for replicating in multiple data centers is the best in its category, which ensures less latency for users, improving overall performance levels..
Cassandra is a database that supports local replication and multiple data center replication for redundancy, failover and disaster recovery .
Cassandra Features
Some of its features are:
- Availability: The Cassandra database is recognized for its reliability to the point that it is used by more than 1000 companies worldwide, among which we can highlight Instagram, GitHub, Netflix with which we can use Cassandra with full confidence.
- Fault tolerance: A critical point in any database is the availability of information and in this regard Cassandra has a wide fault tolerance, in which we are all exposed to suffer, by allowing all data housed in it to have the ability to be automatically replicated in other nodes guaranteeing both the integrity and availability of these. Additionally, when a node presents some type of error, it can be replaced without shutting down the database, which affects the operability and productivity of the users.
- Performance: A point in favor of Cassandra is its high performance through which it is possible to go to a higher level of the already known NoSQL platforms both at the management and applications level.
- Decentralized: Another of the characteristics that stand out in Cassandra is its decentralized administration thanks to which each node involved in the database is unique thus avoiding massive failures.
- Scalable: A point to consider in a database is its scalability because it allows the company to grow as the database is not limited in its action, which is why Cassandra is one of the best options since, according to its statistics, it has the capacity to support up to more than 2000 nodes, more than 400 TB of data and about 1 billion, or more, of day-to-day requests, which ensures its wide range.
- Durable: Another aspect to consider when selecting the database to work is its durability, this implies that the database must have the ability to allow critical data to remain available regardless of the type of failure that is presented, this guarantees the optimal and correct management of each data hosted there.
- Control options: With the Cassandra database we have several administration options such as synchronous or asynchronous replication, in case of using the asynchronous management option we will have a database that supports additional functions such as Hinted Handoff and Read Repair to expand Its usage capabilities.
Now, we will see how to install Cassandra on CentOS 7.
1. Update the system and install Java on CentOS 7
Step 1
The first step to take is to update the operating system, this can be done by running the following command:
sudo yum update -y
Step 2
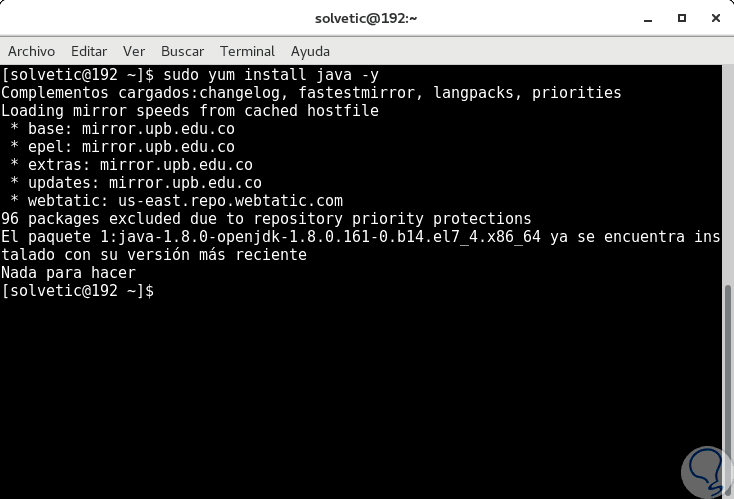
Cassandra is written in Java, so it will be necessary to install Java in CentOS 7 by running the following command:
sudo yum install java -y
Step 3
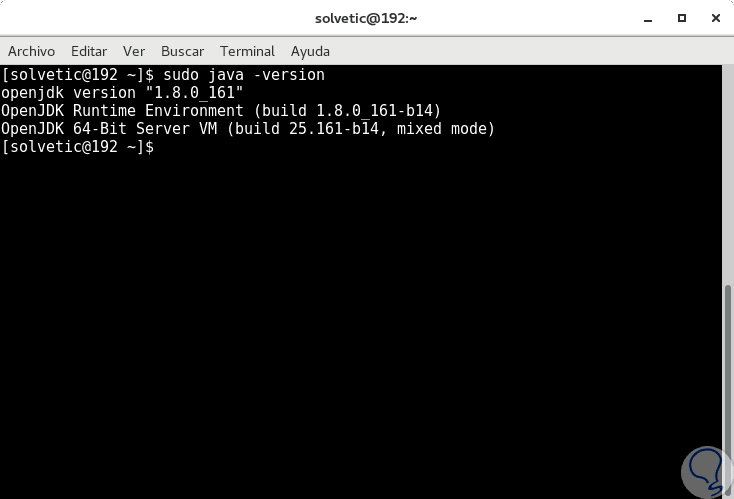
We can check the version of Java installed by executing the following command:
sudo java -version
2. Install Cassandra on CentOS 7
Step 1
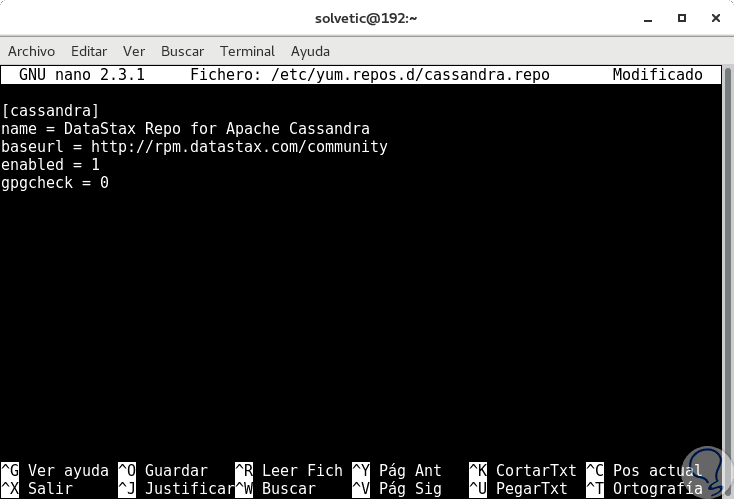
By default, the Cassandra database is not available in the CentOS 7 default repository for this reason, it will be necessary to add the official Apache Software Foundation repositories to CentOS 7, and this is achieved by creating the
cassandra.repo file within the
/etc/yum.repos.d directory as follows:
sudo nano /etc/yum.repos.d/cassandra.repo
Step 2
In this new file created we will add the following:
[cassandra] name = DataStax Repo for Apache Cassandra baseurl = http://rpm.datastax.com/community enabled = 1 gpgcheck = 0
Step 3
We save the changes using the key combination
+ O Ctrl + O
and we leave the editor using the keys
+ X Ctrl + X
Step 4
Now, it will be necessary to update the repository packages by running the following:
sudo yum update -y
Step 5
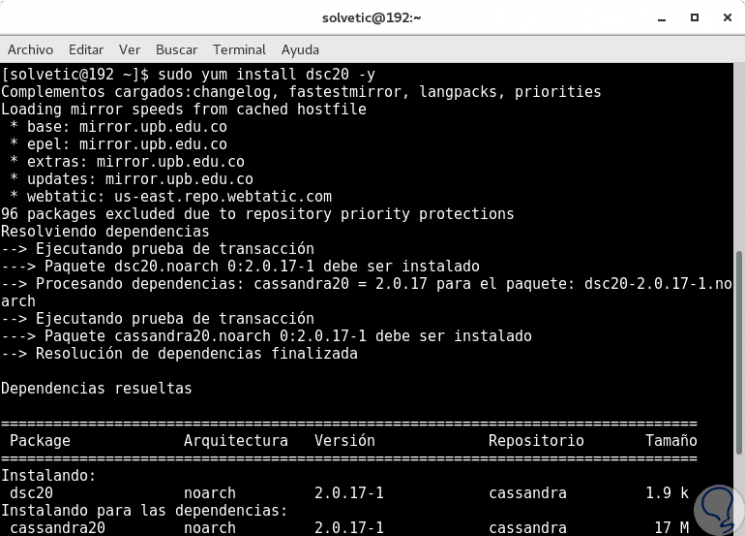
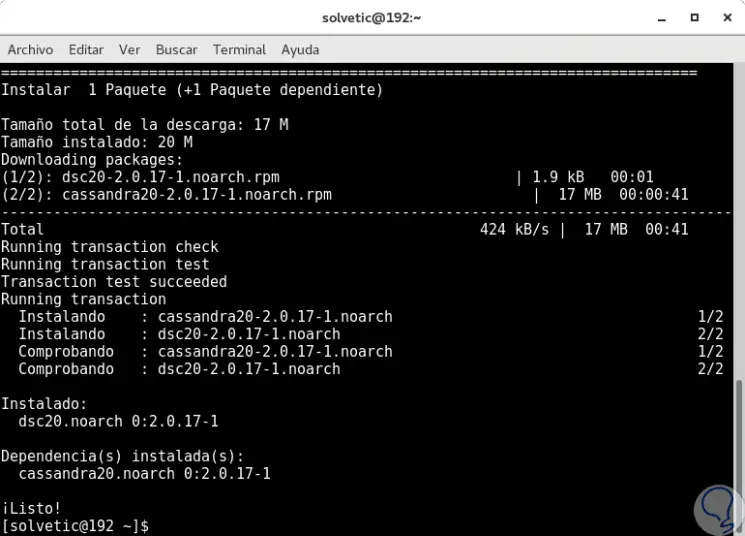
Now we can install Cassandra by running the following command:
sudo yum install dsc20 -y
Step 6
Once downloaded and installed we will see the following:
Step 7
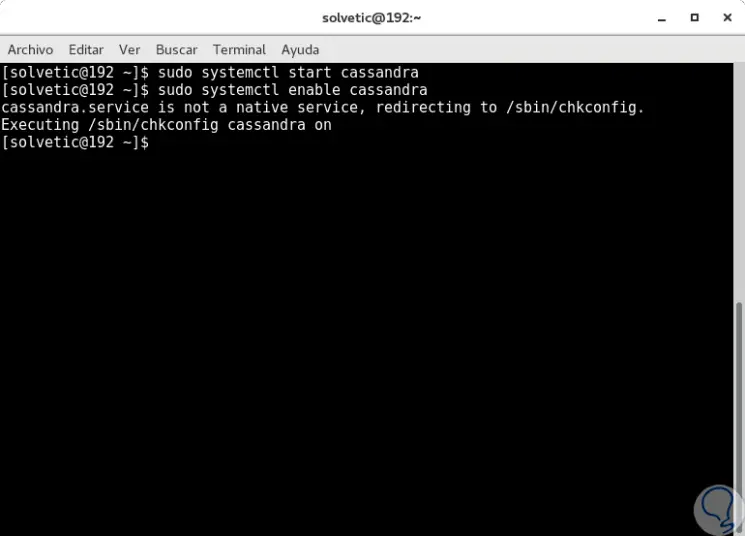
Once Cassandra is installed, we proceed to execute the following commands:
sudo systemctl start cassandra (Cassandra service start) sudo systemctl enable cassandra (Enabling the Cassandra service at system startup)
Step 8
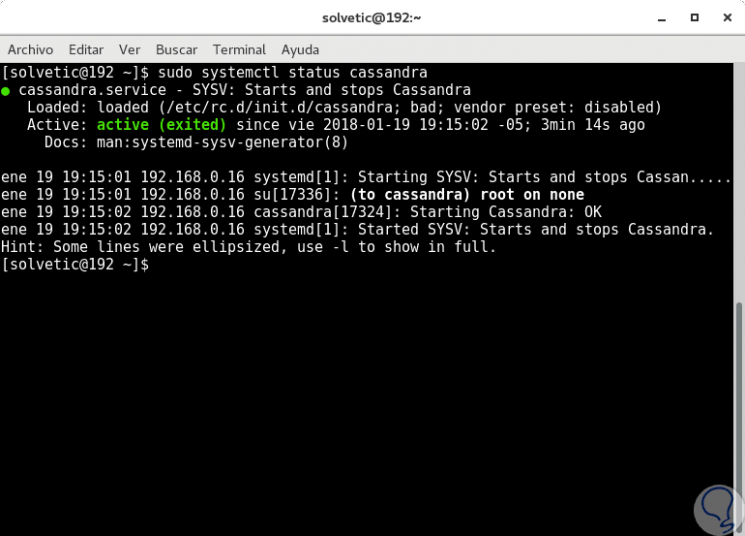
Finally, we can see the status of Cassandra by executing the following command:
sudo systemctl status cassandra
3. Connect and verify the Cassandra cluster in CenTOS 7
Step 1
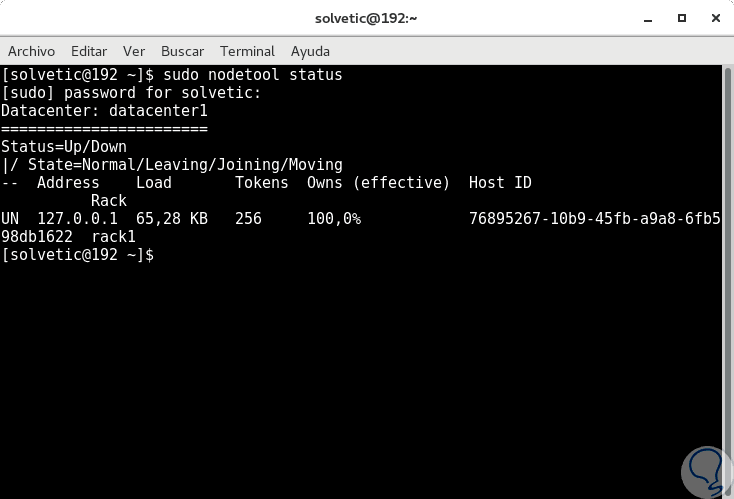
At this point Cassandra is working, so we will verify and connect Cassandra Cluster, for this, first, we will verify the status of the Cassandra Cluster with the following command:
sudo nodetool status
Step 2
We can see that the state of connection with a cluster is correct. At this point TechnoWikis wants to add a solution point because in many cases when executing this command the following error is displayed:
Error: Failed to connect to '127.0.0.1:7199': Connection refused (Cassandra)
Step 3
To solve this error and access correctly we must go to the following directory using the desired editor:
sudo nano /etc/cassandra/default.conf/cassandra-env.sh
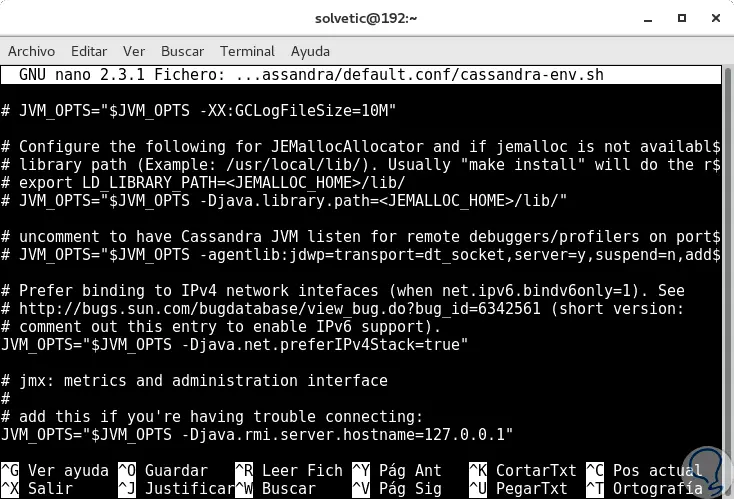
Step 4
There we must locate the following line:
JVM_OPTS = "$ JVM_OPTS -Djava.rmi.server.hostname =
Step 5
The appearance should be similar to the following text:
# add this if you're having trouble connecting: # JVM_OPTS = â€$ JVM_OPTS -Djava.rmi.server.hostname = <public name>â€
Step 6
There we must uncomment the second line and replace the public name line with the IP address 127.0.0.1:
Step 7
We save the changes using the following key combination:
+ O Ctrl + O
We leave the editor using:
+ X Ctrl + X
Step 8
We proceed to restart the service by executing the following:
systemctl restart cassandra
Step 9
In some cases it is recommended to restart the computer, this way we will correct this error.
Now we can connect to the Cassandra cluster by running the following command:
cqlsh
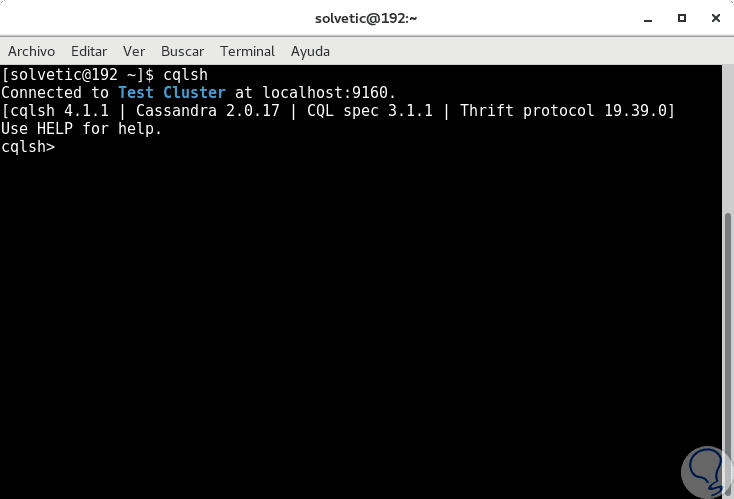
Step 10
We can see the respective connection to start working on this database. To exit we will use the term
exit
In this way we have seen how to install and access Cassandra in CentOS 7.