Windows 10 is a system that is made up of numerous services that have the task of allowing all system parameters and variables to function properly, but on some occasions some of them can trigger failures that affect the expected performance of Windows 10..
One of the services created to optimize the operation of Windows 10 is the Error Report service (WerSvc), which is enabled by default and its basic task is to create and host a series of records where the operation events of Each of the different Windows 10 devices and drivers, this will facilitate support and administration tasks later .
Error Reporting Functions
This service will send the errors detected to a Microsoft database so that developers can launch security patches and offer each user a specific solution, so this error will be launched in situations such as:
- Operating system failures.
- Locks in applications and programs.
- Errors in the Windows 10 file system.
Details Bug Report
When a report is generated, aspects such as:
- Place where the problem was generated either at the software or hardware level.
- Type or severity of the problem presented.
- Files available to help describe the problem generated.
- Information of the affected software and hardware.
With this, the Microsoft error reporting service generates a globally unique identifier (GUID) which is hosted on the computer and sent with error reports directly specifying our equipment. Although TechnoWikis does not recommend disabling the Error Report service in Windows 10, if you want to do it for a performance or administration issue, we will show you how to do it in a practical way in Windows 10..
To keep up, remember to subscribe to our YouTube channel! SUBSCRIBE
1. How to disable the Error Reporting service in Windows 10 using the Services Console
Windows 10 integrates a section from where we can access the administration of the system services and be able to start them, stop them or configure the way they act.
Step 1
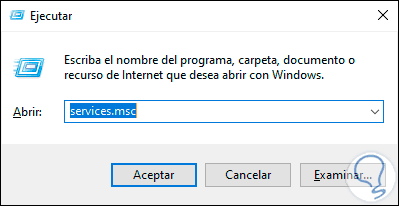
To do this, we will use the following key combination and execute the “services.msc†command:
+ R
Step 2
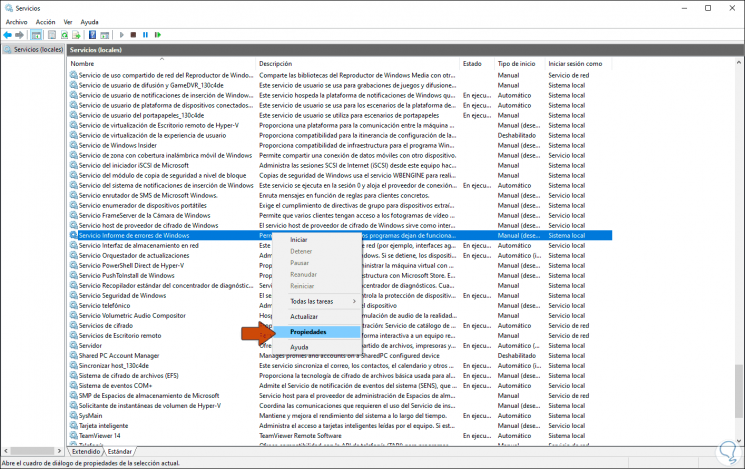
Press Enter or click on Accept and in the pop-up window we locate the service called “Windows Error Report Serviceâ€, double click on it or right click / Properties:
Step 3
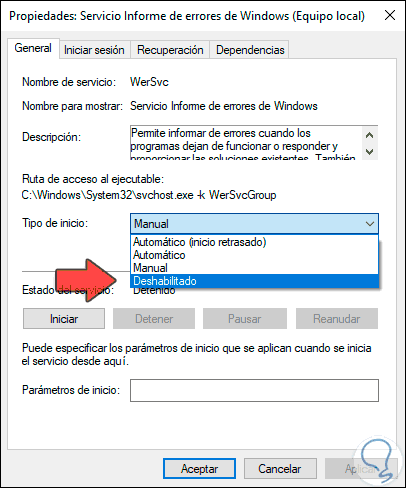
In the pop-up window that will be displayed, we will go to the “Startup type†field and there we will display the options available to select “Disabledâ€:
Step 4
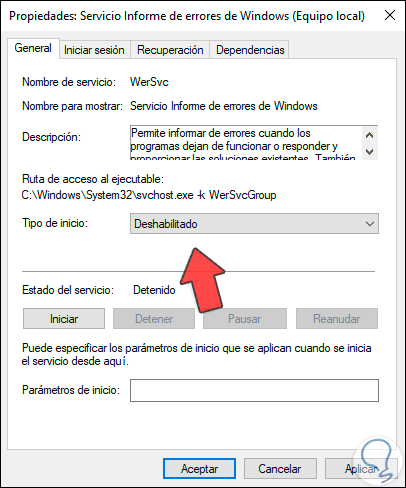
Once we select this option, click on Apply and then click on OK to apply the changes:
2. How to disable the Error Reporting service in Windows 10 using the Windows 10 Registry Editor
Before using this method, TechnoWikis recommends that you create a backup or a restore point in case something fails.
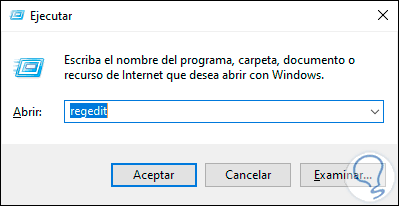
Step 1
After this we will combine the following keys and execute the regedit command:
+ R
Step 2
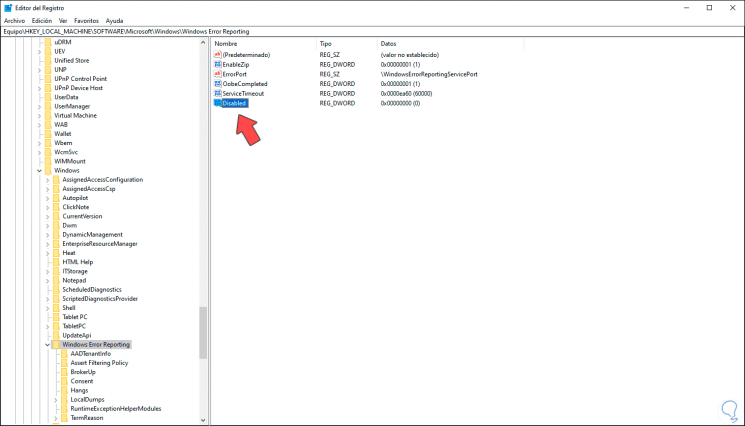
Press Enter or Accept and in the console of the deployed editor we will go to the following route:
HKEY_LOCAL_MACHINE \ SOFTWARE \ Microsoft \ Windows \ Windows Error Reporting
Step 3
There we must find the DWORD value called "Disabled":
Note
If it is not found, we can create it by right clicking somewhere blank and select New / DWORD Value (32 bits) and assign the name Disabled.
Step 4
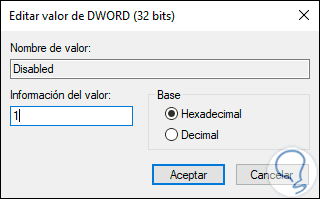
We double-click on this value and enter the number one (1) in the "Value information" field. Click OK to save the changes and we can exit the editor.
Note
if we want to enable it again we must change the number 1 to 0.
3. How to disable the Error Reporting service in Windows 10 using the Windows 10 Command Prompt
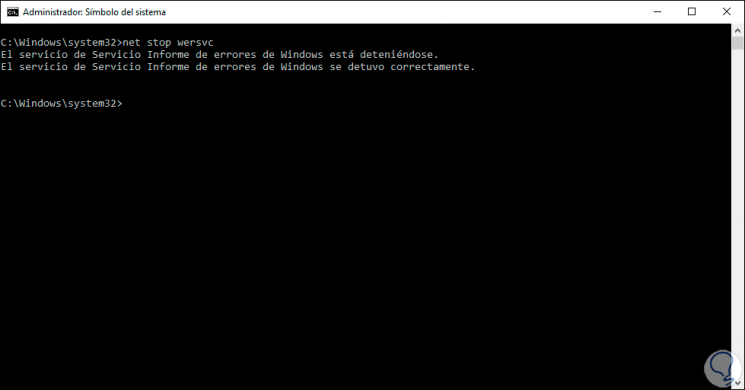
This is a method that allows you to stop the associated Error Report service which is the “wersvc†service, for this, we access the command prompt console as administrators and execute the following:
net stop wersvc
Note
For activation, we must execute the following:
net start wersvc
With any of the methods indicated, it will be possible to deactivate or activate the Error Reporting service, which provides key information for support tasks in Windows 10.