Windows operating systems are based on processes and services which allow each application , program and system element to function properly without any problem..
But as in any operating system, at specific times some error can be generated and a very common one is that the operating system is not able to connect to a service which can cause us a serious error to run an application or it will take Out some process:
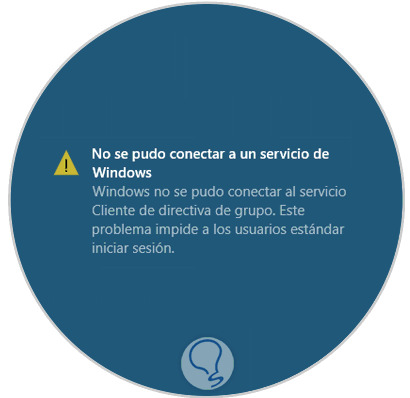
TechnoWikis will give a series of guidelines to correct these errors in an integral way.
1. Reset netsh winsock in Windows 10
Winsock is responsible for providing all TCP / IP services in the system, so one of the most viable solutions can be reset to validate that the services can be connected again as expected.
Step 1
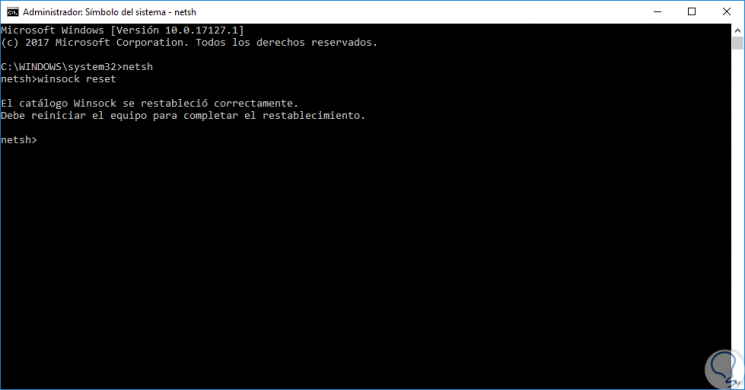
To carry out this process, we will access the command prompt as administrator and execute the following line first:
Netsh
Step 2
Then, we will execute the following. There we must restart the computer to apply the changes.
winsock reset
2. Use the Registry Editor in Windows 10
Registration in Windows allows us to carry out a wide range of control, support and administration actions, so we must be careful in the way we manage it.
Step 1
To access the registry editor in Windows we will use the following key combination and execute the regedit command, press Enter or Accept.
+ R
regedit
Step 2
There, we will go to the following route:
HKEY_LOCAL_MACHINE \ SOFTWARE \ Microsoft \ Windows NT \ CurrentVersion \ Svchost
Step 3
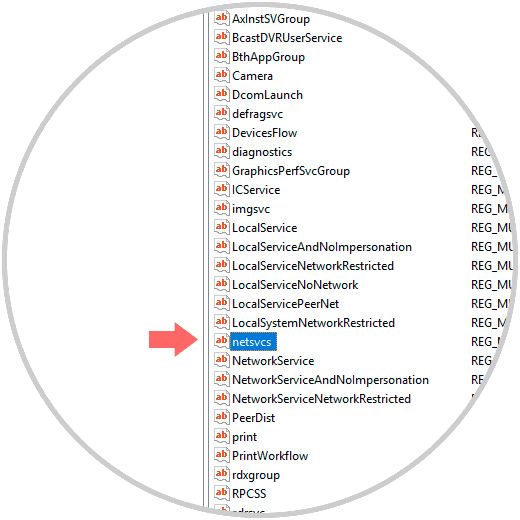
In the displayed window we will locate the “ntesvc†line in the right panel:
Step 4
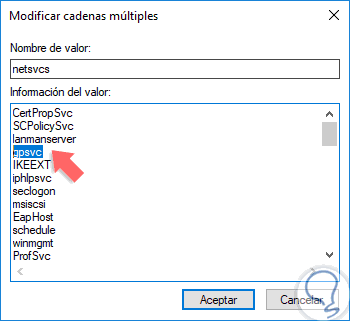
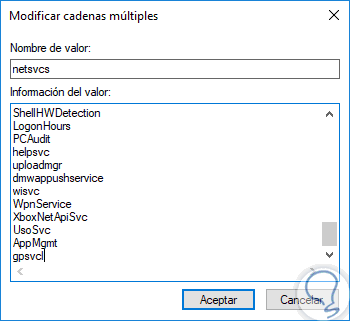
We will double click on this value and in the displayed window we will check that the “gpsvcl†value is available there:
Step 5
In case this value is not there, we will simply go to the end of that window, enter the text “gpsvcl†and click on Accept:
Step 6
Now we will go to the following route:
HKEY_LOCAL_MACHINE \ SOFTWARE \ Microsoft \ Windows NT \ CurrentVersion \ Svchost \ netsvcs
Step 7
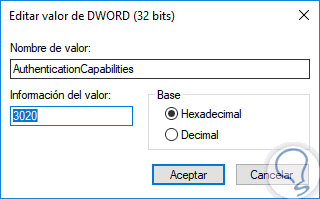
There we must change the following values. Click OK to save the changes and we can exit the registry editor.
- CoInitializeSecurityAllowLowBox: We set its value to 1.
- AuthenticationCapabilities: We set its value to 3020.
3. Disable quick start in Windows 10
The quick start is a new functionality in Windows 10 that allows to improve the system boot time, but this can affect the connectivity of the system services.
Step 1
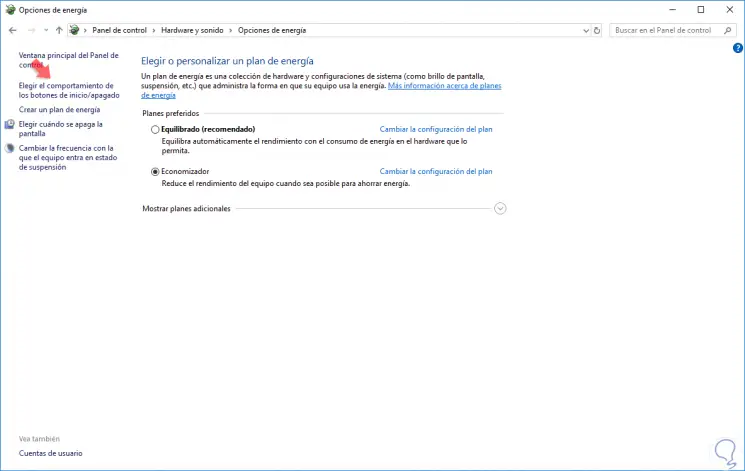
To disable it we go to the following route:
Step 2
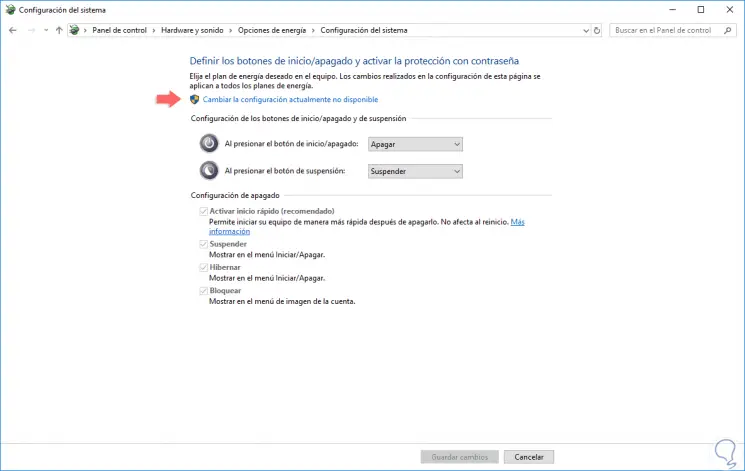
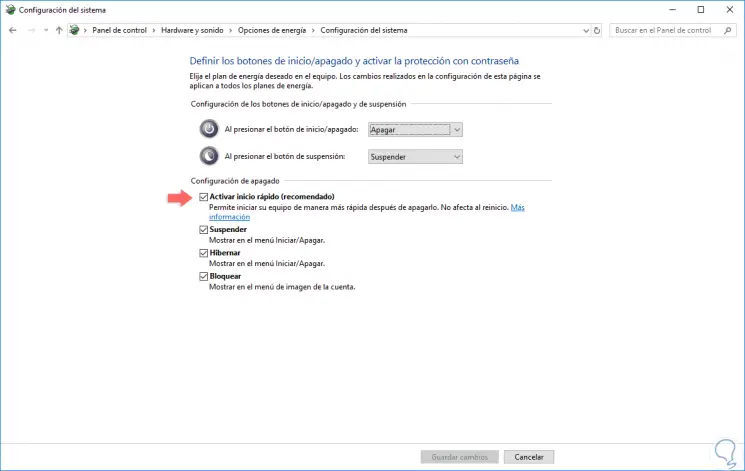
There we will click on the line “Choose the behavior of the start / shutdown buttons†located on the left side and the following will be displayed:
Step 3
Click on the “Change currently unavailable settings†line and now we have the opportunity to deactivate the “Activate quick start (recommended)†box. Once we deactivate it, click on the “Save changes†button for the changes to take effect.
4. Disable the cache font service in Windows 10
This is a service whose function is to improve the performance of applications by copying data from the most used sources into the cache, but this can lead to a conflict in the system resulting in the service connection error.
Step 1
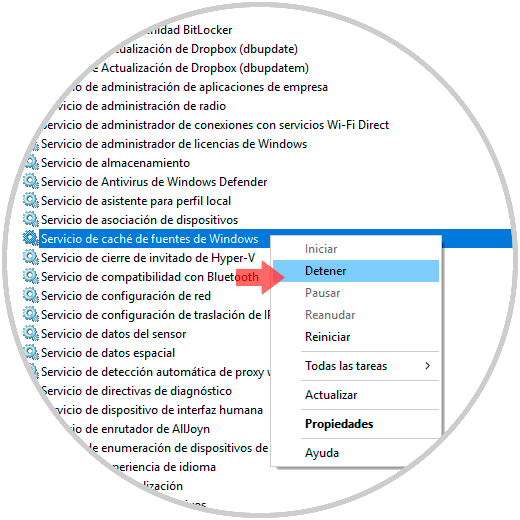
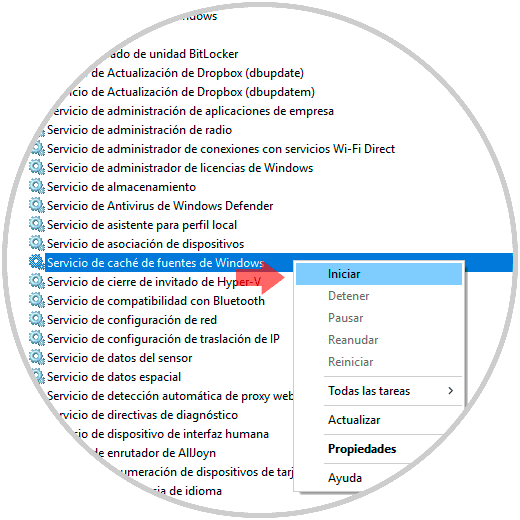
For this, we will use the following key combination and execute the services.msc command and there we will locate the Windows cache font service, right click on it and select the “Stop†option:
+ R
services.msc
Step 2
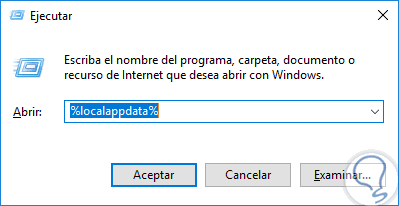
Now, we will use the following keys again and execute the following:
+ R
% localappdata%
Step 3
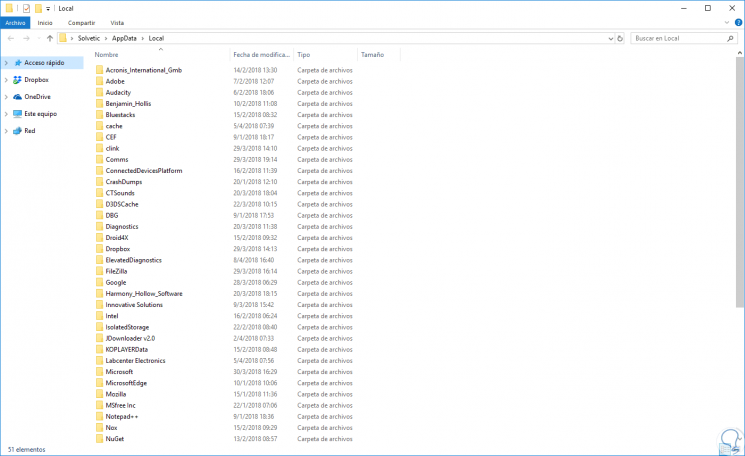
We will access the following route:
Step 4
If we see a font cache folder we must delete it, then go back to the service and select the "Start" option:
5. Disable user account control (UAC) in Windows 10
In some cases, UAC prevents a service from connecting properly in Windows for reasons of extreme security and although UAC plays a vital role in terms of system security, it can be the root of this problem.
Step 1
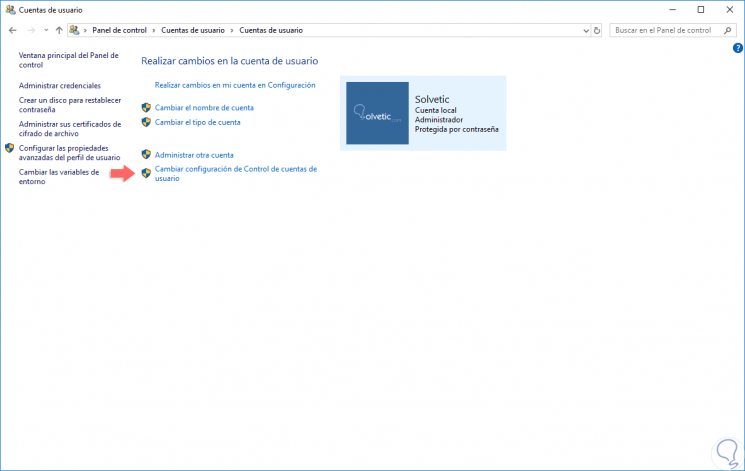
We can check if UAC causes the connection failure by disabling it and for this we will go to the next route.
Step 2
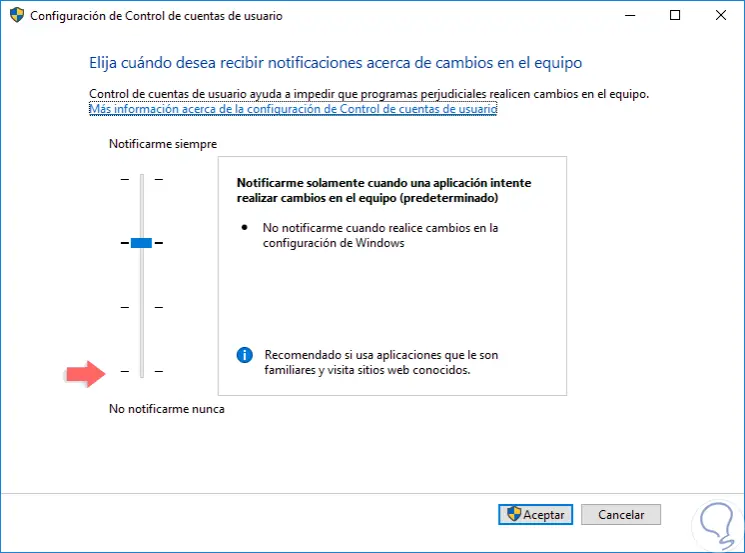
There we click on the line “Change User Account Control Settings†and we will be redirected to the following:
Step 3
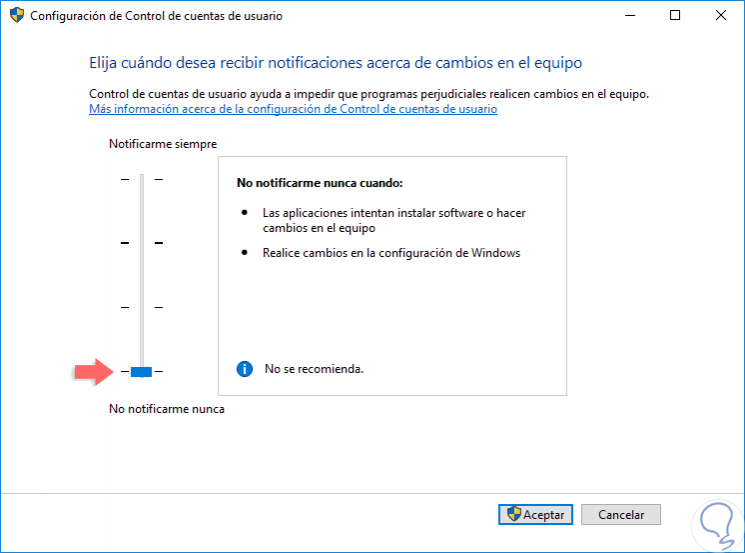
There we will slide the bar to the bottom for its disablement. Click on the Accept button to save the changes.
6. Start Windows in safe mode in Windows 10
Running the system in safe mode is one of the most practical options to validate some solutions to correct this error.
Step 1
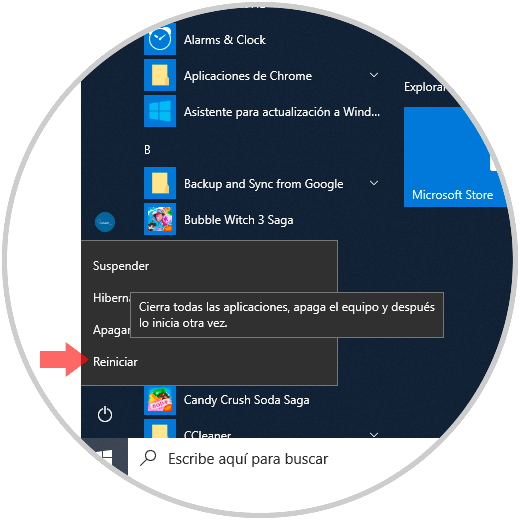
To start in this mode, we go to the Start menu, press the shutdown button and press the Shift key and click on "Restart":
Step 2
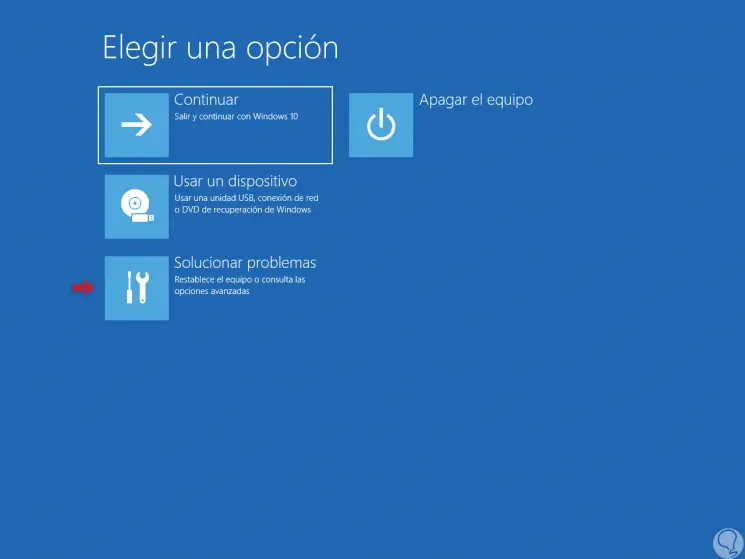
Once the system is restarted we will see the following:
Step 3
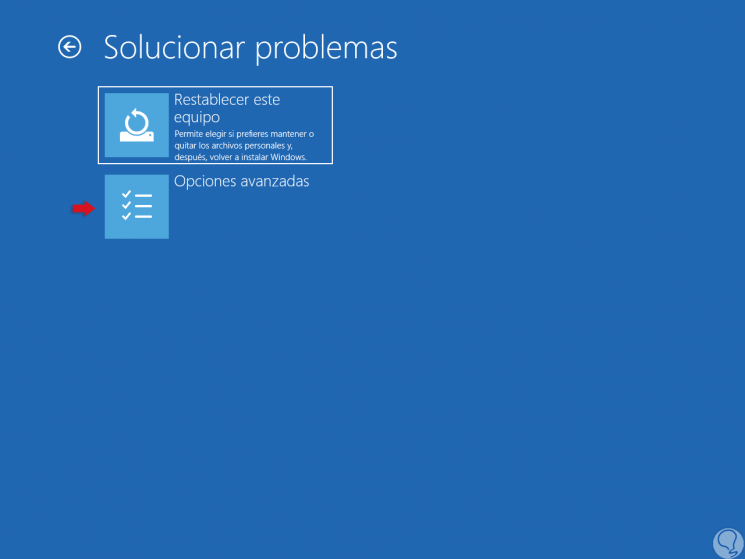
We click on the "Troubleshoot" option and we will see this:
Step 4
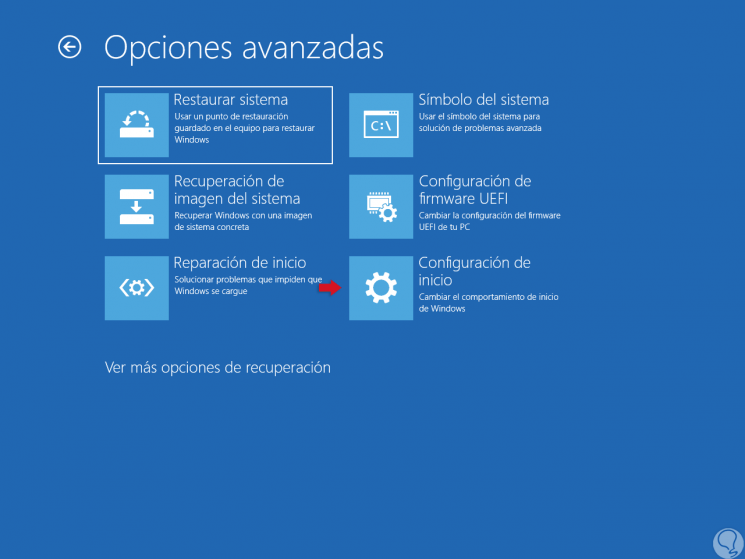
Select "Advanced Options":
Step 5
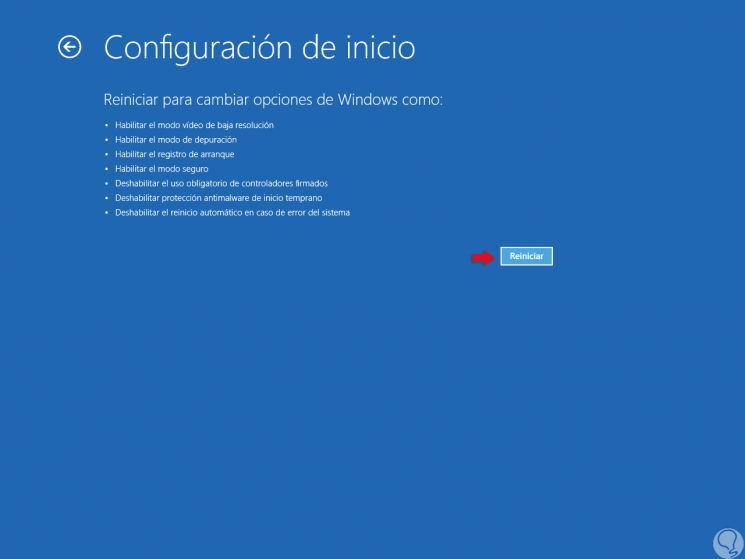
Select "Startup Settings" and we will see the following:
Step 6
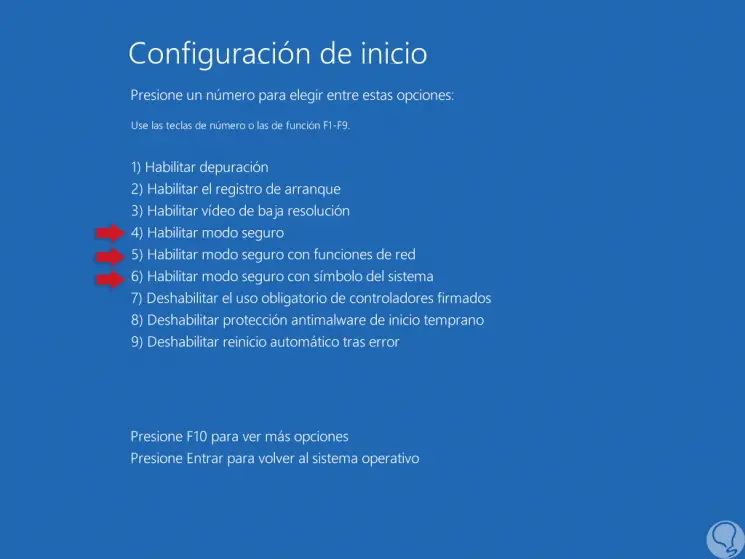
There we click on the "Restart" button and then we will see the following options. There we enter the number 4, 5 or 6 to access the most appropriate secure mode.
We have seen how the options to correct this error are varied and each one focuses on a different aspect of the system, but they are doubtful that they are a reliable source to correct this error and allow services to be connected as expected and as It must be on Windows..