The scripts in Windows 10 are automation tools that give us the opportunity to execute tasks in a simple way thanks to the code that has been created within the file..
For the execution of these scripts, we have Windows PowerShell which is Microsoft's commitment to be established as the terminal platform from now on for its development and security benefits since, as we know, many scripts can contain some type of malicious code that is installed on the computer and can lead to the execution of unauthorized tasks, virus spread or more.
Therefore, to run scripts in Windows PowerShell we must edit the execution policies or right click on each script and thus authorize its execution, but if this script is within a scheduled task we cannot always be there to right click, for this reason Today TechnoWikis will explain how to program and execute this type of scripts automatically in Windows 10..
1. Use and configure Batch Script in Windows 10
Next, we will see the batch script that will be required to automatically run PowerShell scripts in Windows 10 and it is important to clarify that each script will require its own batch script.
Step 1
The syntax is as follows:
@ECHO OFF PowerShell.exe -Command "Script Path" PAUSE
Step 2
For example, we will use the following script:
@ECHO OFF PowerShell.exe -Command "C: \ Users \ TechnoWikis \ Desktop \ CreateCloudSSA.ps1" PAUSE
Step 3
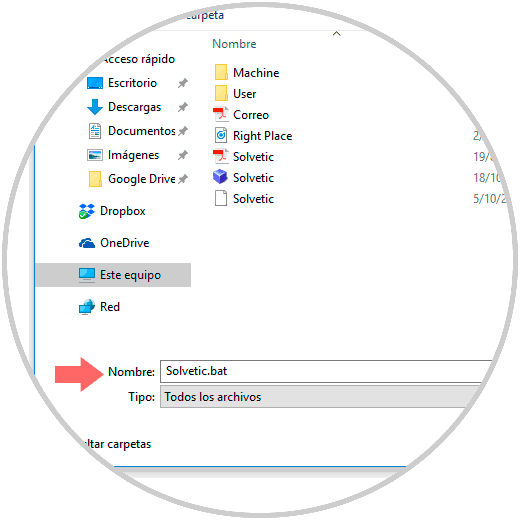
This script can be copied into a notebook and saved with the extension .bat which is the extension associated with the scripts:
Step 3
Click on Save to apply the script changes.
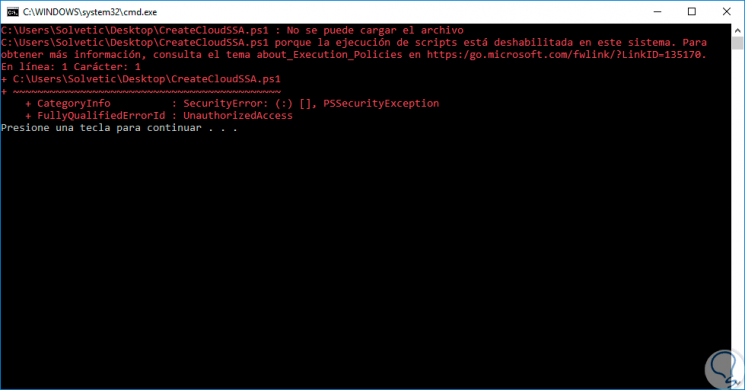
This file will be responsible for opening Windows PowerShell and running the script mentioned there. If we double-click on the script, the following command prompt window will be displayed and we will see two things, firstly, the scrip security policy in Windows 10 and, secondly, that it will be necessary to press any key to continue:
Step 4
If we want the keystroke to be omitted, we must eliminate the word PAUSE in the script, being as follows:
@ECHO OFF PowerShell.exe -Command "C: \ Users \ TechnoWikis \ Desktop \ CreateCloudSSA.ps1"
2. Use the task scheduler next to the script in Windows 10
To create our scheduled task correctly, first, we must create the .bat batch file. as indicated at the top and then create the task in the Windows 10 task scheduler as well.
Step 1
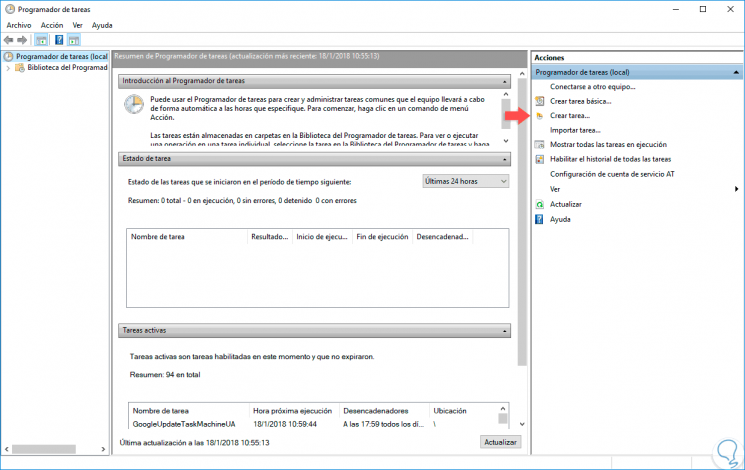
Open the task scheduler and select the "Create task" option:
Step 2
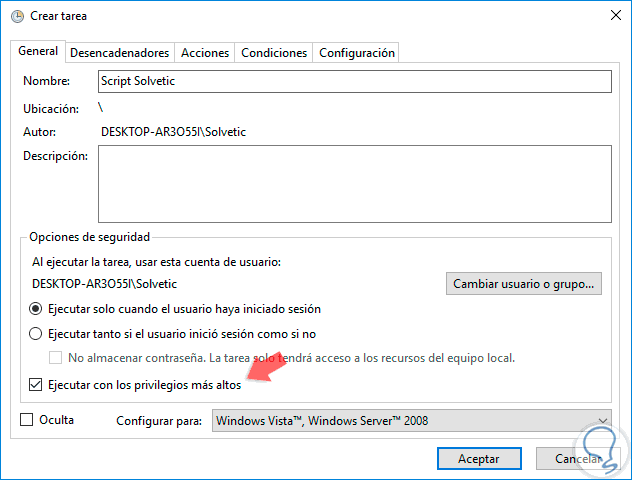
In the first window displayed enter the name of the task and check the box "Run with the highest privileges":
Step 3
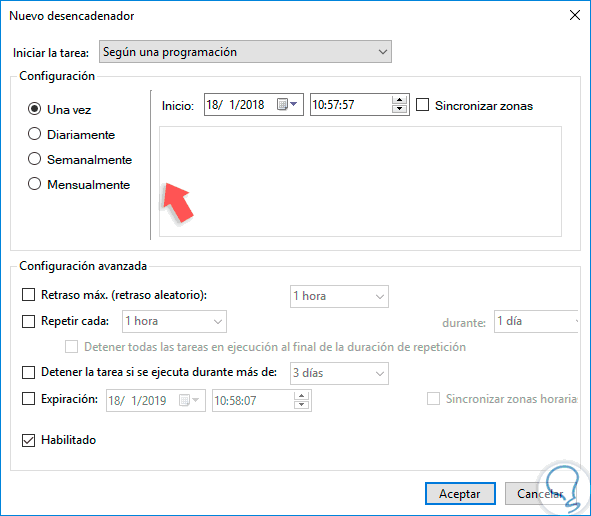
Now, in the “Triggers†tab, click on New and define the frequency of the task:
Step 4
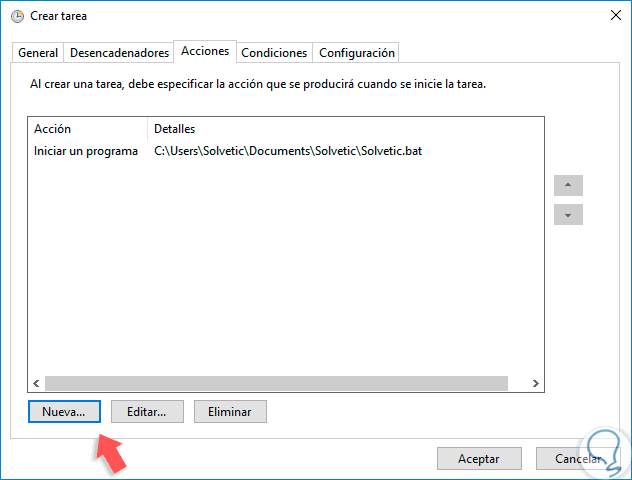
Then, in the “Actions†tab we must click on New and go to the path where we have stored the previously created .bat file:
Finally we can create the execution conditions and click on OK to create the scheduled task with the script developed..
Thus, we have seen how to program and execute a script in Windows 10 in a simple way.