Frequently we can use Windows and macOS operating systems alternately for some reasons such as the execution of certain programs or compatibility of certain services..
It may be necessary to share certain Windows data on macOS, or vice versa, and in this case it is useful and practical to resort to sharing a folder in Windows 10 and access it from macOS, in this case High Sierra, and although for some It can be a complex task today TechnoWikis will analyze how to achieve it in a simple way and thus access the resources that we host in that folder.
1. Share a folder in Windows 10
The first step to take is to share the folder and for this we will follow the next steps.
Step 1
For this, we will right click on the folder to share and select the option "Properties":
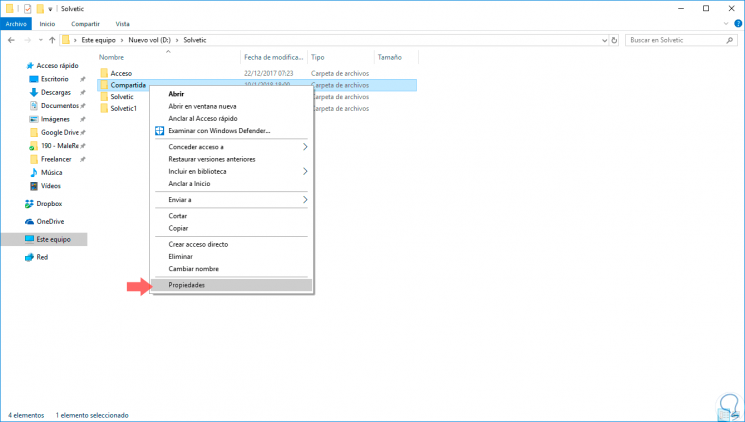
Step 2
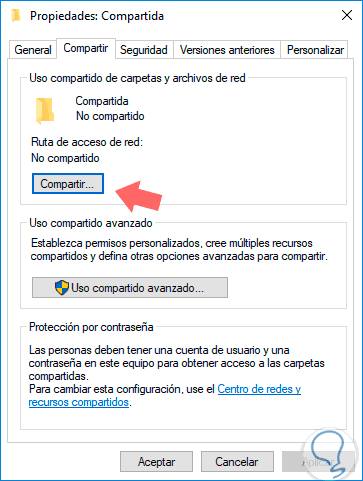
The following window will be displayed where we will go to the “Share†tab and see the following
: 
Step 3
In the displayed window we activate the “Share this folder†box. Now, click on the "Permissions" button and we will see the following.
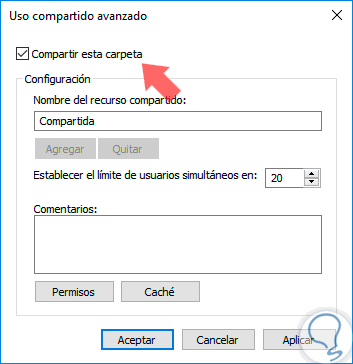
Step 4
The following window will be displayed with the user ALL by default, there we will activate the “Total control†box. Click on Apply and Accept.
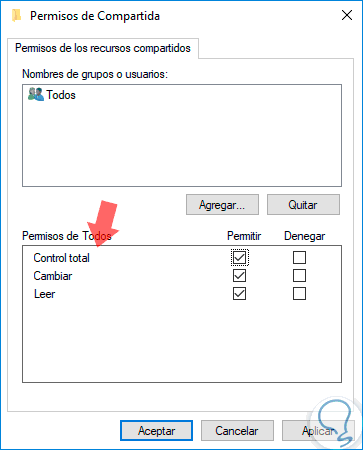
Step 5
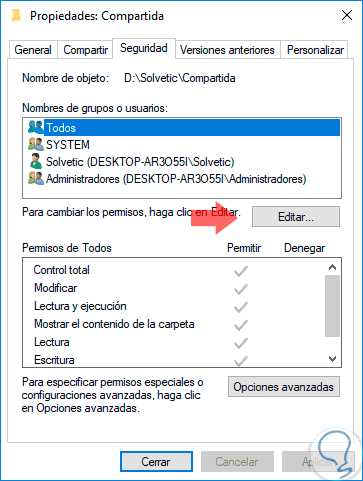
Now, we will go to the “Security†tab and see the following:
Step 6
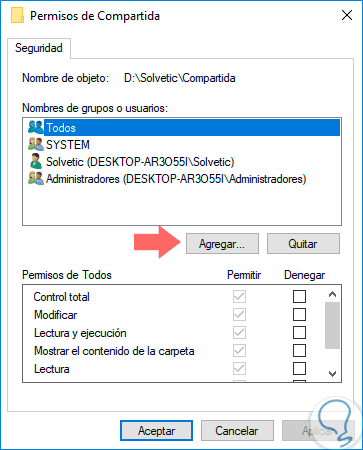
Click on the "Edit" button and the following will be displayed:
Step 7
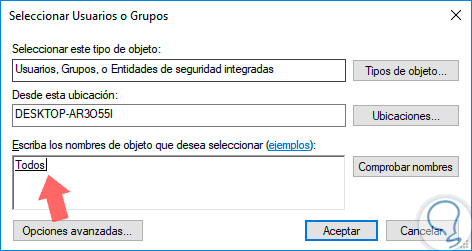
Click on the "Add" button and in the pop-up window we will enter the name "All":
Step 8
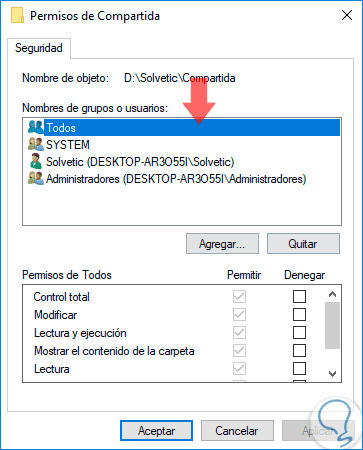
Click OK and we must validate that Everyone has full control over the folder:
Step 9
Click on OK to save the changes and we can exit the properties of the folder.
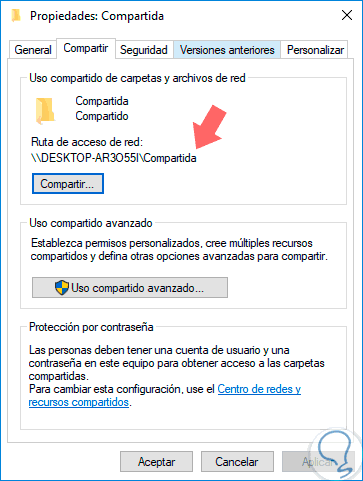
Now we can see the path assigned to the shared folder. So we have shared the folder in Windows 10.
2. Connect Windows 10 drive on macOS High Sierra
Step 1
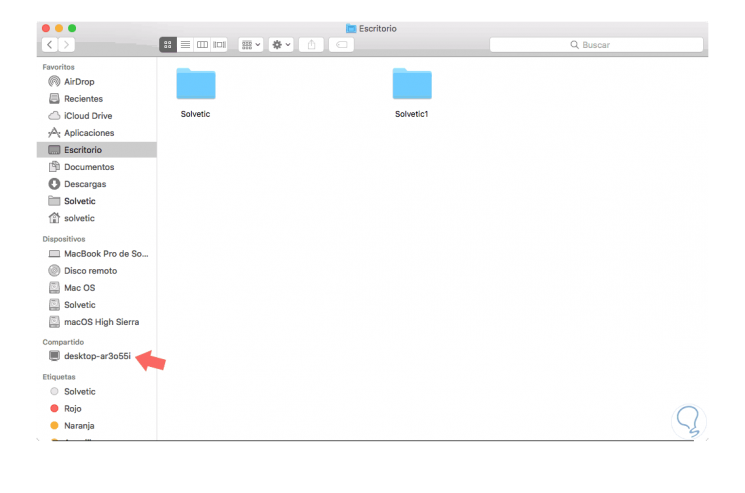
Once the folder is shared, we go to macOS High Sierra and there we open the Finder, we can see in the sidebar the option “Shared†where the Windows 10 computer will be reflected:
Step 2
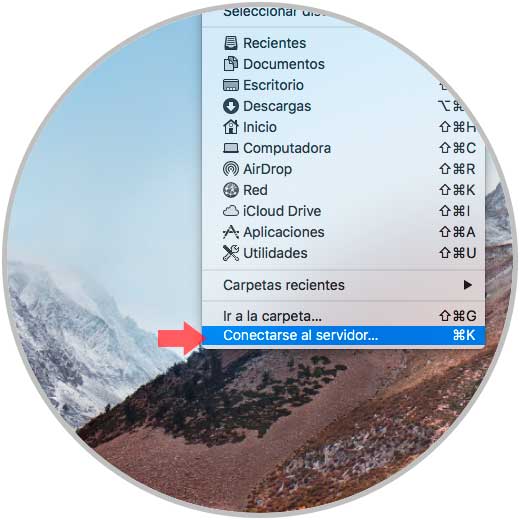
In case we do not see the equipment available there, we can go to the "Go" menu and select the "Connect to server" option, or use the following key combination:
+ K ⌘ + K
Step 3
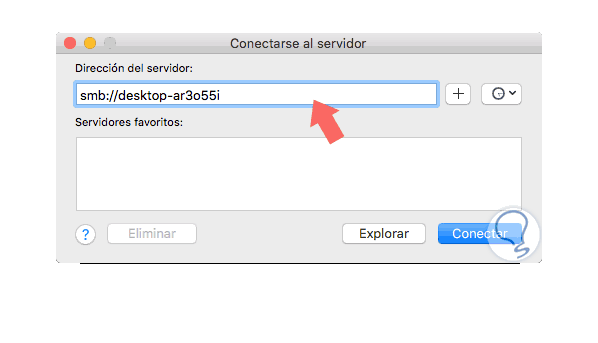
Pressing this option will display the following window where we must enter the following syntax:
smb: // Name: _PC
Step 4
Alternatively, in case of not knowing the name of the equipment, we can use the IP address, to know it we can execute the ipconfig command in Windows 10. Click on the "Connect" button and the connection process will begin:

Step 5
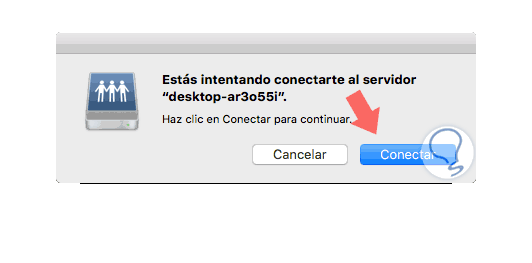
Once finished, the following will be displayed:
Step 6
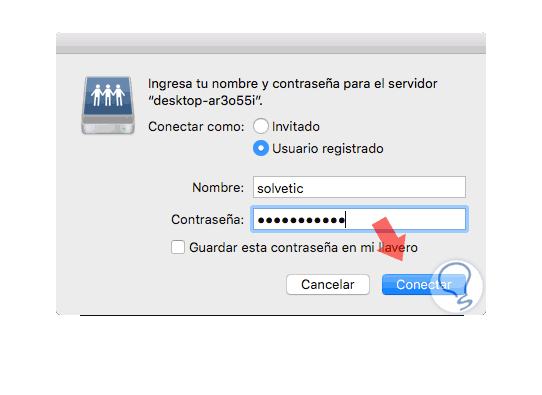
If we are sure to establish the connection, click on the “Connect†button and in the next window we will enter the credentials of the user with whom we will connect:
Step 7
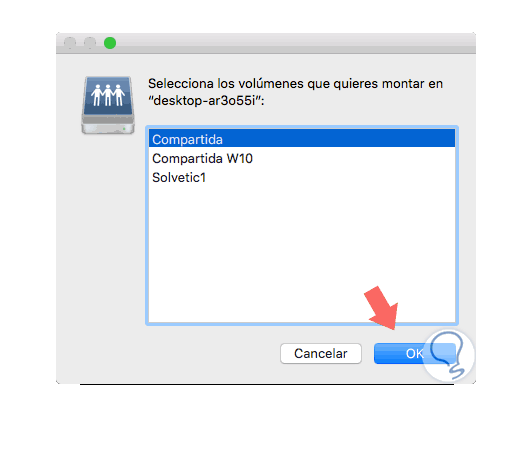
By clicking on the "Connect" button we will see the folders that are currently shared in Windows 10:
Step 8
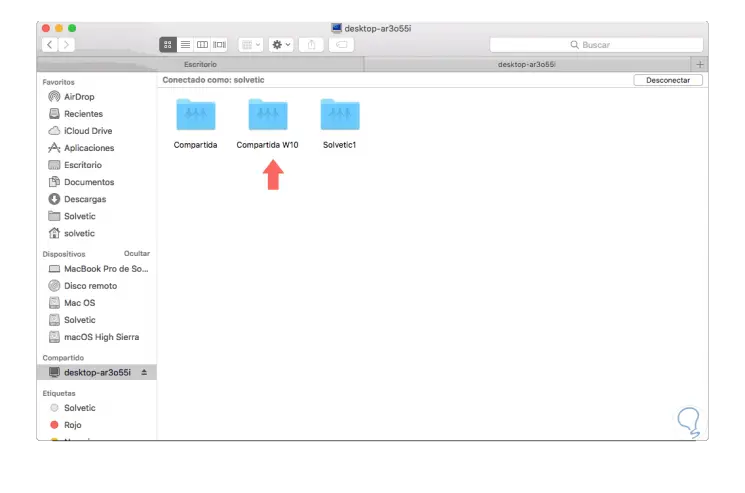
There we can select the folders we want to mount and press the Ok button. Now, from the Finder, just select the Windows 10 computer and there we will see the selected folders:
Step 9
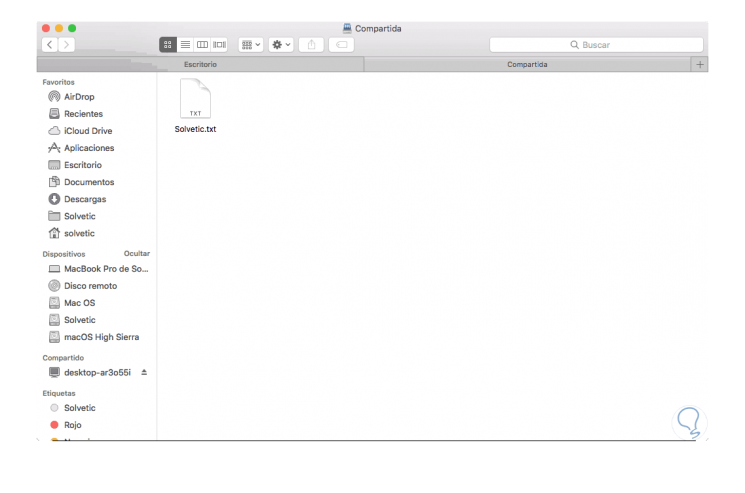
We can create or add what you want in Windows 10 and we can automatically see it in macOS High Sierra:
3. Access a shared folder from system boot on macOS High Sierra
Step 1
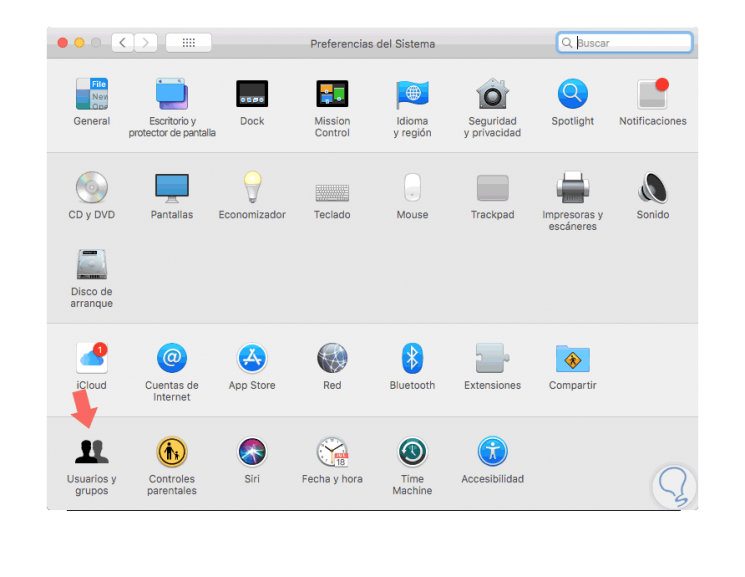
The previous process will be necessary to execute it every time we have to access the shared folder in Windows 10, but if we want this folder to be available constantly in macOS High Sierra we can do the following. Let's go to "System Preferences":
Step 2
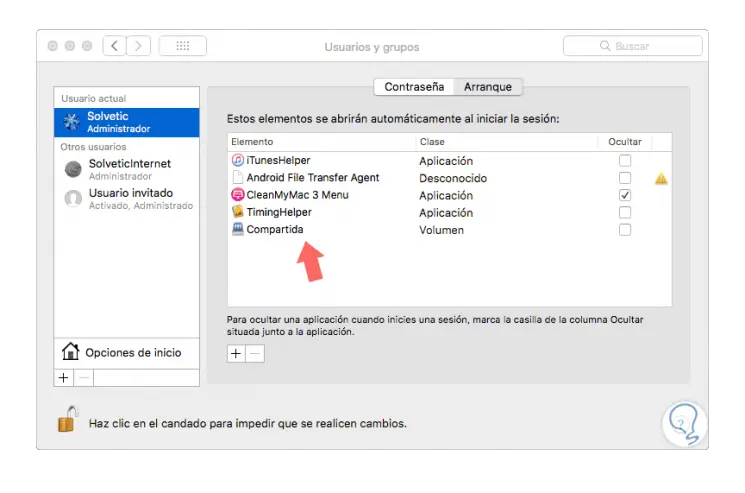
Click on the "Users and groups" option and in the window displayed we must click on the lock icon to make changes, then select the user to whom the shared folder will be applied and go to the "Start" tab located on the side straight; Then, it is enough to drag the shared folder from the Finder to there being as follows:
Step 3
Press the lock icon again to prevent changes from being altered. In this way, each macOS High Sierra boot will connect this folder as long as the Windows 10 computer is available and with the network active.
It's that simple we can mount and share files between Windows 10 and macOS High Sierra..