Today we are in a world where connectivity is something natural and frequent, whether due to personal, work and other issues, and in this connectivity it is often necessary to share data between several users and although we are within the same local network there is an impediment that is the use of different operating systems..
A traditional method to pass information from one site to another is using USB devices but if we do this, for example, we copy files in Windows 10 where your file system is NTFS and we will copy them to macOS Mojave where your file system is APFS , a read and write error will be generated since both file systems are not compatible.
To solve this, the easiest and most useful way is to create a shared folder in Windows and allow access to other systems and this helps improve both security and time in transferring files. TechnoWikis will explain how to mount and connect a network drive in Windows 10 and access it from macOS Mojave..
1. How to share a folder from Windows 10
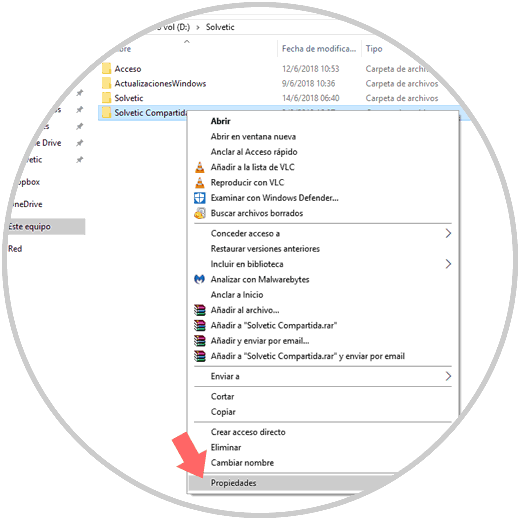
Step 1
The first step is to share the folder in Windows 10, for this we create a new folder and right click to select the Properties option:
Step 2
The following window will be displayed and there we go to the Sharing tab where we will see the following:
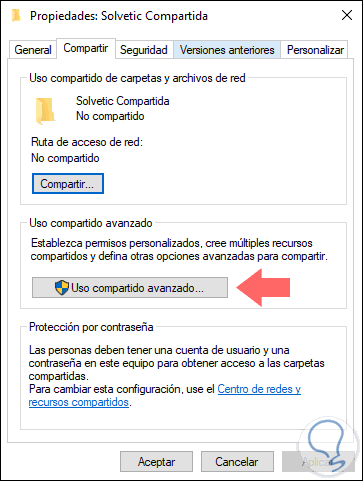
Step 3
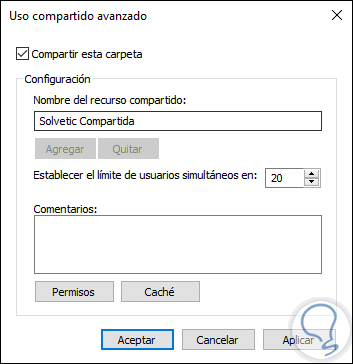
There we click on the Advanced Sharing button and in the displayed window we do the following:
- Check the Share this folder box to enable this access
- We assign the desired name which will be displayed on the network
- We define the limit of users who will have access, by default it is 20
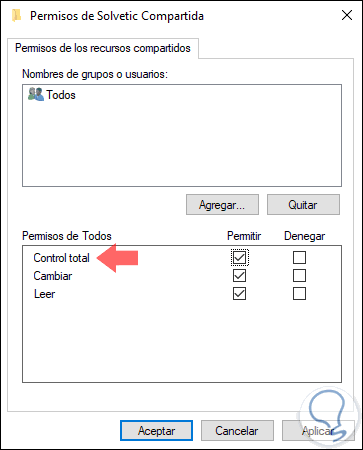
Step 4
Now, click on the Permissions button and there we select All and activate the Total control box. Click on the Apply and Accept button to save the changes.
Step 5
Once this is done, we access the Security tab where we will see the following:
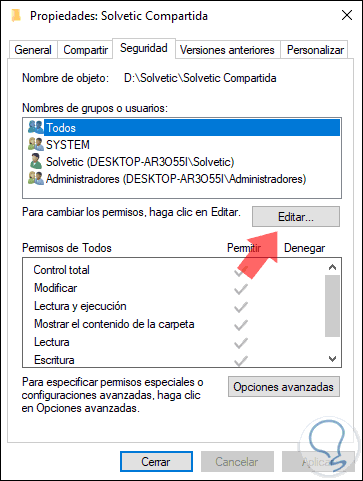
Step 6
There we click on the Edit button and the following will be displayed:
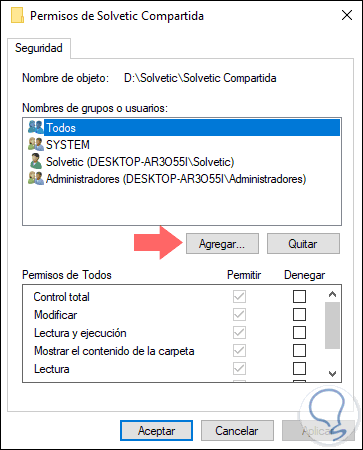
Step 7
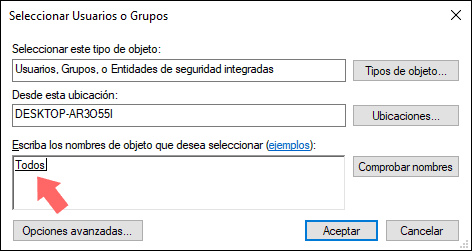
We must validate that the All user is found and that he has the Full Control permissions, if not, click on the Add button and in the pop-up box enter All. Click on Accept and assign the respective permission.
Step 8
We save the changes by clicking on OK and we will see that the network path has been assigned:
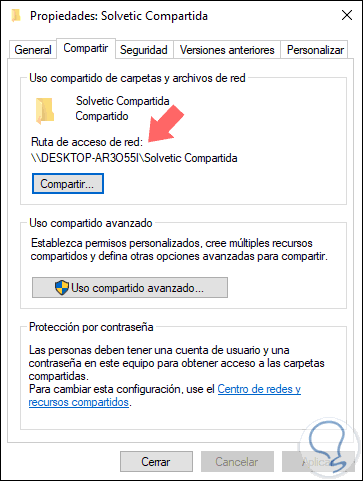
Up to this point we have created and configured the folder to share in Windows 10.
2. How to access macOS Mojave to Windows network drive
Step 1
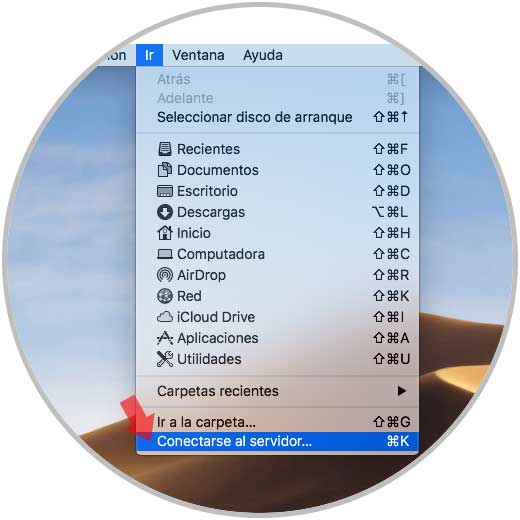
Now we access macOS Mojave and from the Finder we go to the Go menu and select the option Connect to the server or we can use the key combination Command + K:
+ K ⌘ + K
Step 2
The following window will be displayed where we will enter the name of the device using the following syntax:
smb: // Equipoo smb: // IP
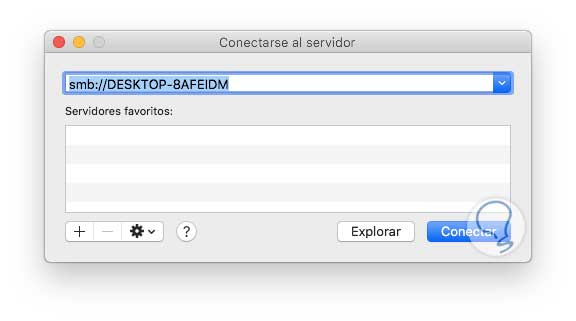
Step 3
Click on the Connect button and the following message will be displayed:
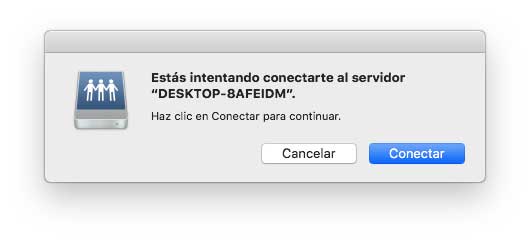
Step 4
Click on Connect again and now we must enter the credentials of authorized user for access to said equipment:
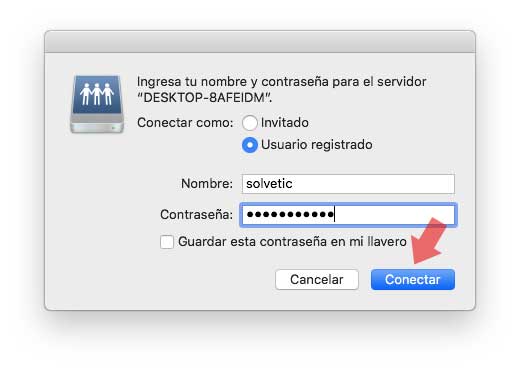
Step 5
Once registered click on Connect and the following window will be displayed where we will see the shared folders on the Windows 10 computer:
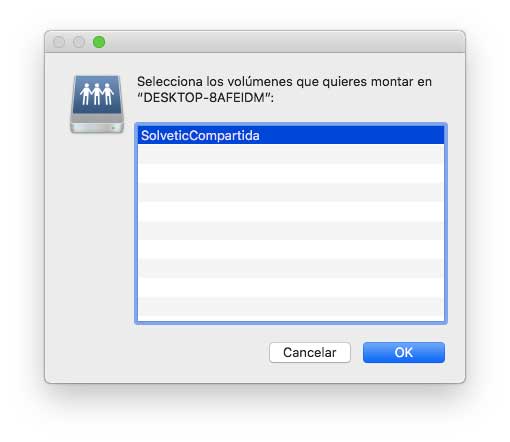
Step 6
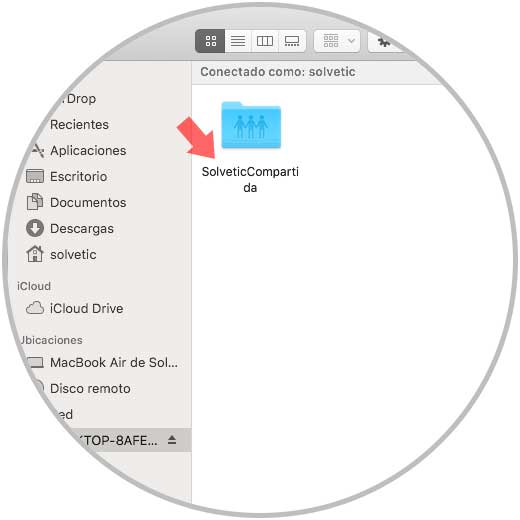
Select the desired folder and click on the Mount button so that macOS Mojave will proceed to this action and once complete we will access its contents:
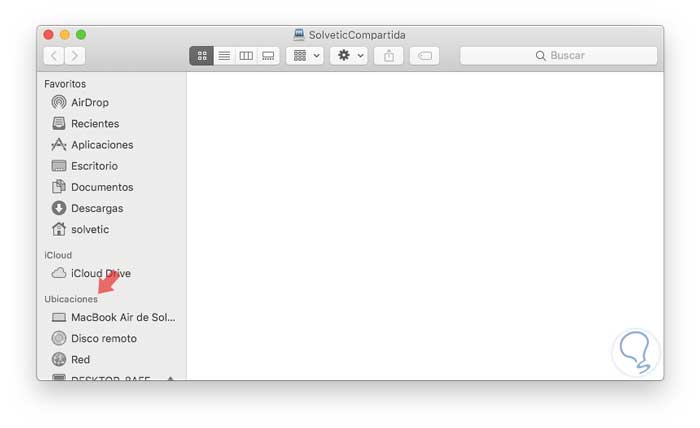
Step 7
From the Locations section in the Finder it will be possible to access said remote equipment:
Step 8
Now, in a bidirectional way we can create and add items in that folder so that they are available on both systems, if we create any item in Windows 10 it will be automatically reflected in macOS Mojave:
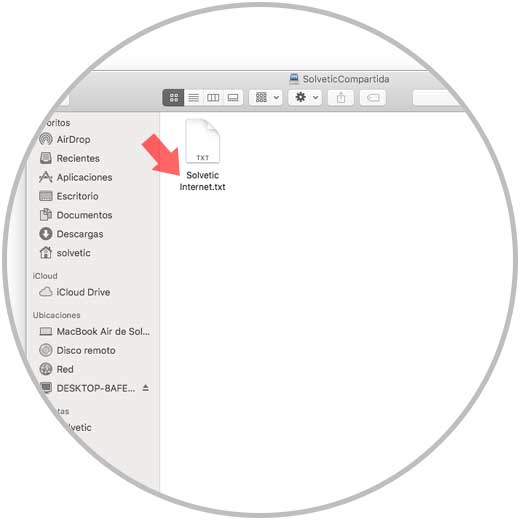
Thus it will be possible to transfer data between both systems..
3. How to mount the folder automatically on macOS Mojave
Step 1
We may want this folder to be available automatically at each macOS Mojave login, for this we must go to System Preferences where we will see the following:
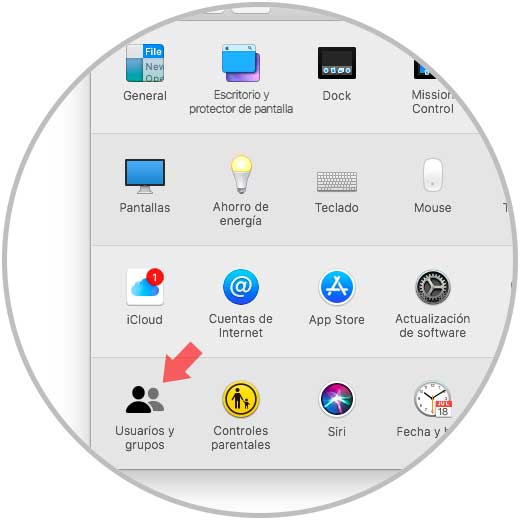
Step 2
There we select the category Users and groups and then we must click on the lock icon at the bottom to enable the changes and we will enter our password:
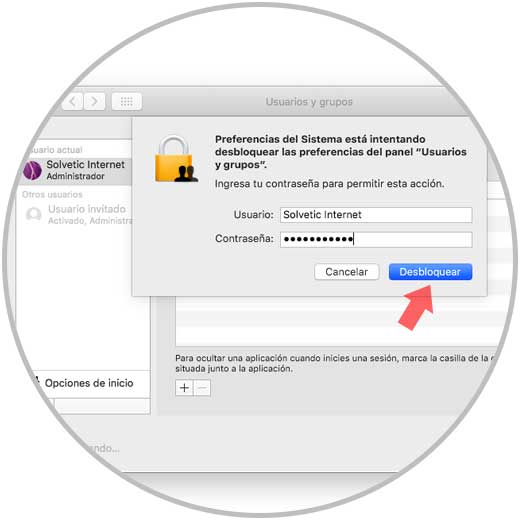
Step 3
Click on Unlock and now go to the Startup tab and simply drag the shared folder from the Finder to this location so that it is available from boot:
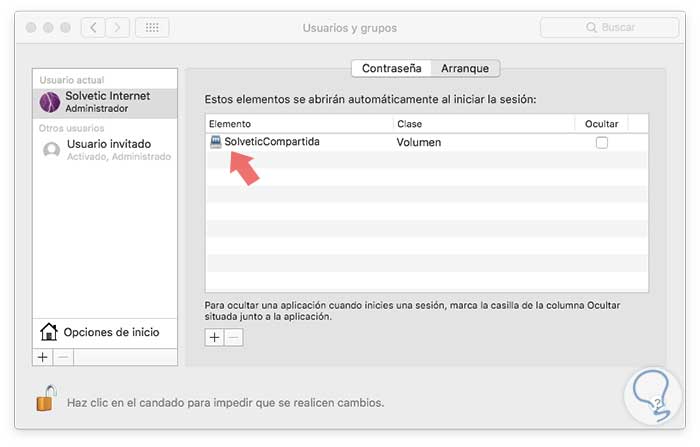
Again click on the lock icon to prevent changes.
In this way we have managed to mount and connect a shared folder in Windows 10 and that is accessible from macOS Mojave without having difficulty of file systems or any other configuration that affects the optimal possibility of sharing elements between them.