There is no doubt that the internet connection has allowed communication and traffic of information a great step, since today we can communicate through instant messaging , chats, video calls or send all kinds of documents and data to through the network, simply and quickly. This can be done thanks to the internet connection through the network or WiFi connections ..
Wi-Fi connectivity is a task that we carry out constantly. In macOS we have different ways to connect to an already known or registered Wi-Fi network , as well as new available networks. In this way we can decide where and how to connect, so that our computer can work taking advantage of all its possibilities.
Next we will see how to connect to a WiFi network from Mac in different ways, but all of them in a simple and functional way..
Note
For this case we will use macOS Catalina but the process applies equally to the other versions of macOS.
1. How to connect WiFi network on Mac using the list of networks in the menu
In the macOS menu bar we have some useful features to manage the equipment and one of them is the wireless connection.
Step 1
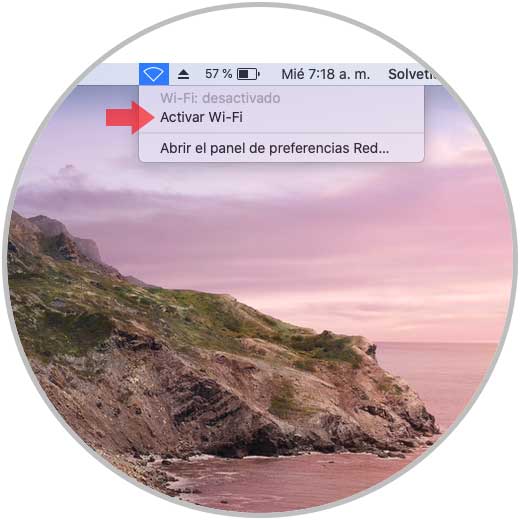
For this we click on the Wi-Fi icon in the menu bar and it is possible that the network is turned off. We click on Turn on Wi-Fi
Step 2
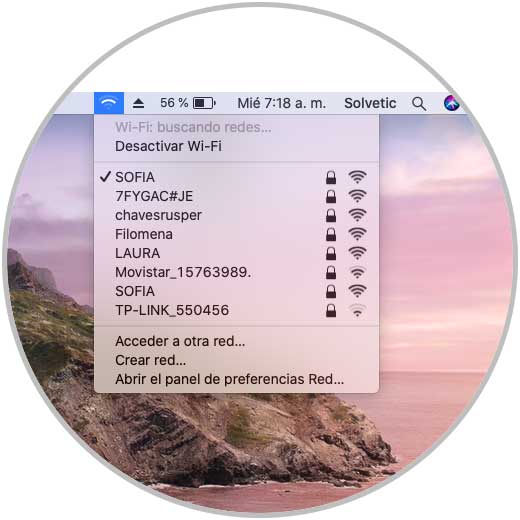
Then we will select the Wi-Fi network in which we want to connect:
Step 3
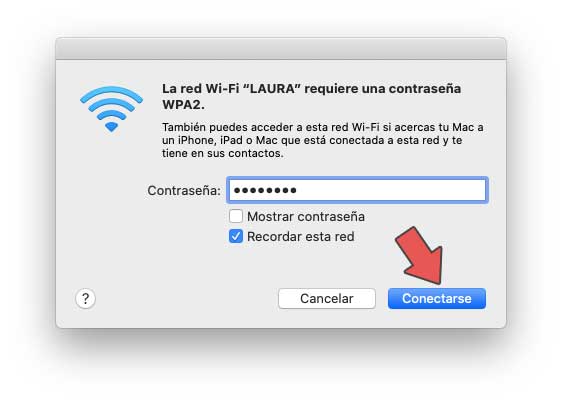
Clicking on an unregistered network will require (if applicable) enter the password to access it:
Note
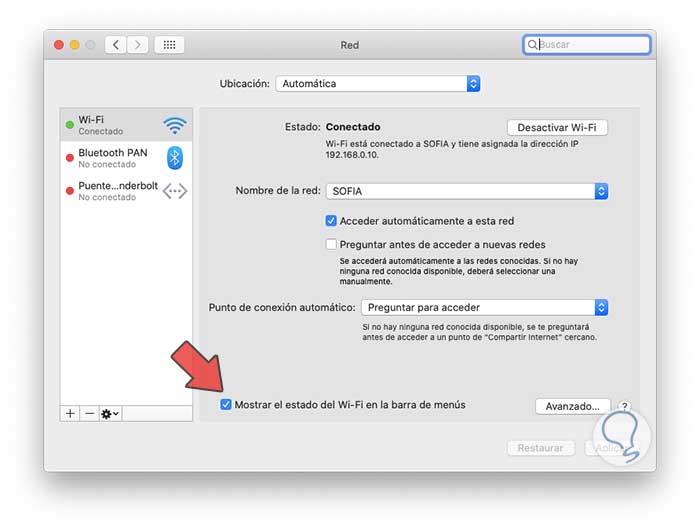
If the Wi-Fi network icon is not visible in the menu bar we must go to System Preferences / Network and there check the box "Show Wi-Fi status in the menu bar":
2. How to connect WiFi on Mac using System Preferences
Step 1
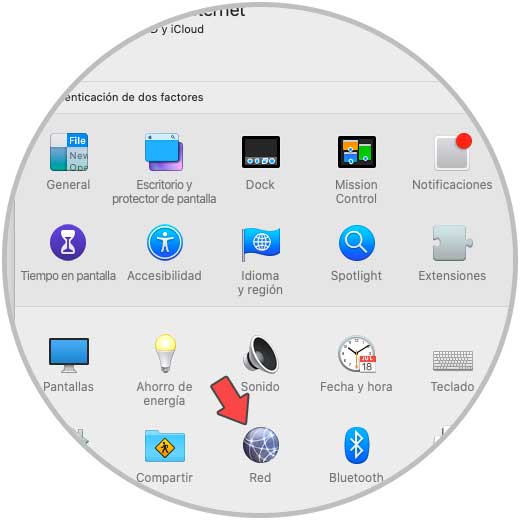
This option is ideal because it allows not only to connect but to make adjustments in the selected network, for this access we have the following options:
- Click on the System Preferences icon in the Dock
- From the Apple menu / System Preferences
- By clicking on the Wi-Fi icon in the menu bar and then selecting “Open the Network preferences panelâ€
Step 2
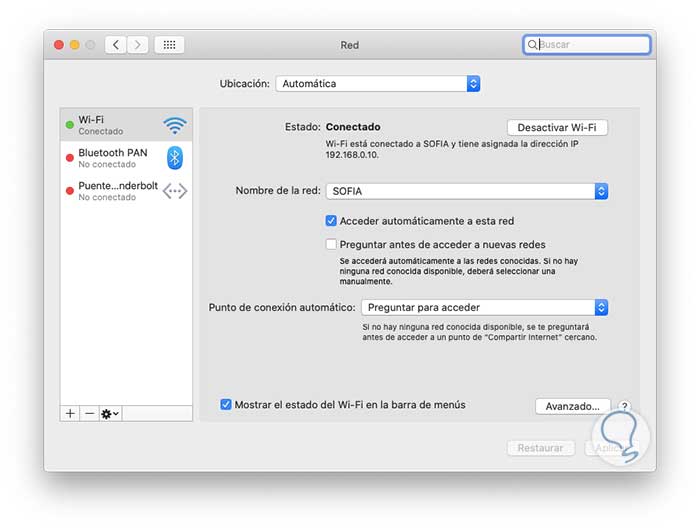
We go to the Network category and there we will go to the Wi-Fi section where we will see the following:
- Network to which we are connected
- Option to disable Wi-Fi network, etc.
Step 3
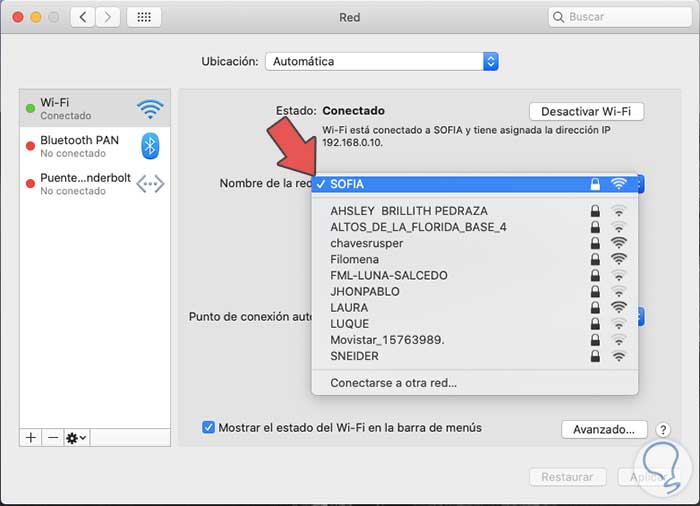
There we can choose a new network that is available by clicking on the "Network Name" field and selecting the desired one from the list. Then we can define whether we connect to that network automatically or not.
3. How to connect WiFi on Mac using advanced network options
Step 1
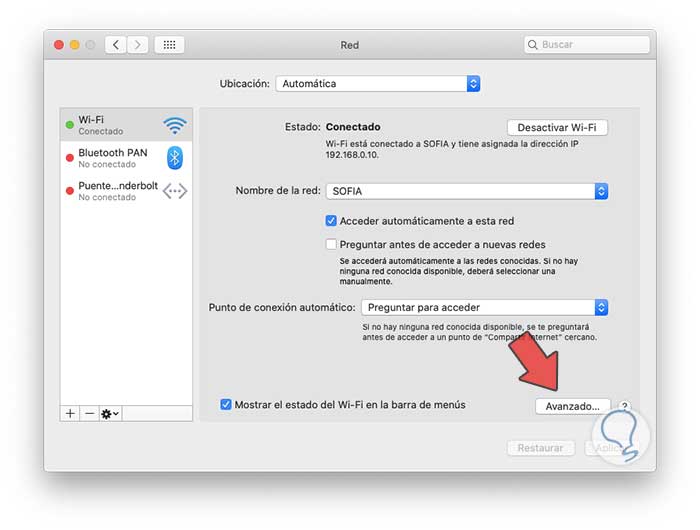
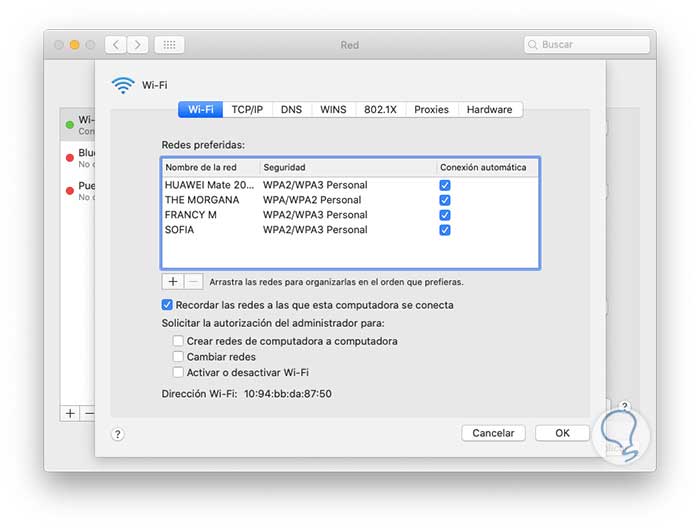
To use this method, we must access System Preferences / Network and go to the Wi-Fi section. We click on the Advanced button. The networks to which we have connected frequently will be listed:
Step 2
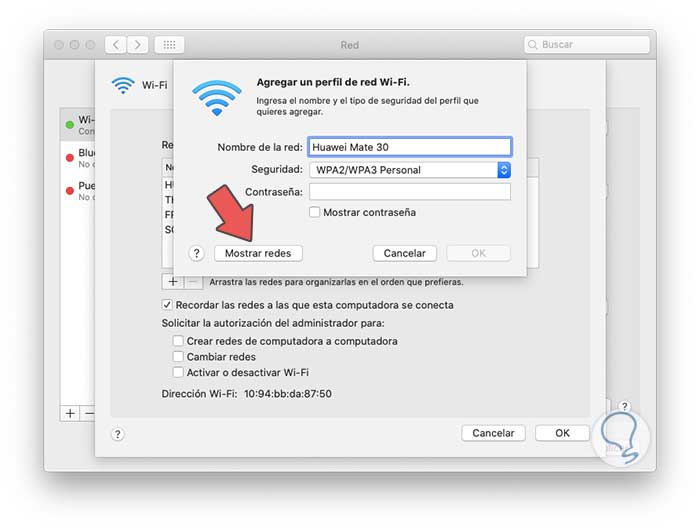
It is possible to add a new Wi-Fi network by clicking on the + sign located at the bottom and entering the network name, security type and password if applicable:
Step 3
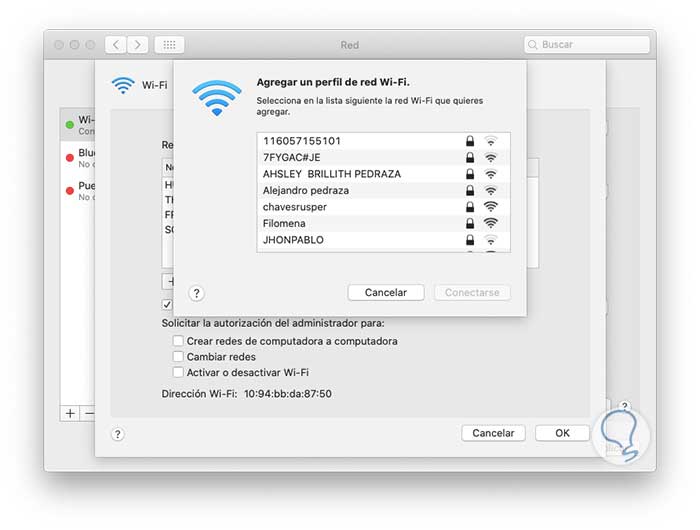
Now, it is possible to click on the “Show networks†button to display the networks in the coverage:
Step 4
There we can select the desired network and connect as we have seen in the previous point.
With any of these methods it will be very easy to establish a connection with the desired Wi-Fi network and thus enjoy everything that the Internet offers us.