One of the fundamental elements in any operating system, regardless of its developer, are the users thanks to which we have the opportunity to access the system and carry out daily tasks. Each user can have a different level of permissions, from administrator to guest, which gives a centralized management level to the administrator or team owner..
We know that when we are the only users of a team we can have a local administrator account which allows us to perform actions such as modifying certain files, installing or removing software, updating the system. But this does not mean that all possible tasks can be executed as it would imply a security and integrity risk of the operating system.
For this there is the root user account which has the full power of all system parameters including actions such as viewing, editing or deleting files from other users of the system or preventing external attacks by falsifying the root user account, in this case it will be necessary enable it
By default in macOS High Sierra we have the opportunity to enable this root user for specific management tasks and today TechnoWikis will analyze how we can carry out this process in a simple way..
Access to system preferences
To carry out this task we must access System Preferences in macOS High Sierra using one of the following options:
- By clicking on the icon located in the macOS High Sierra Dock
- By clicking on the Apple icon and selecting the System Preferences option
- Using Spotlight by entering the term preferences and select the desired option.
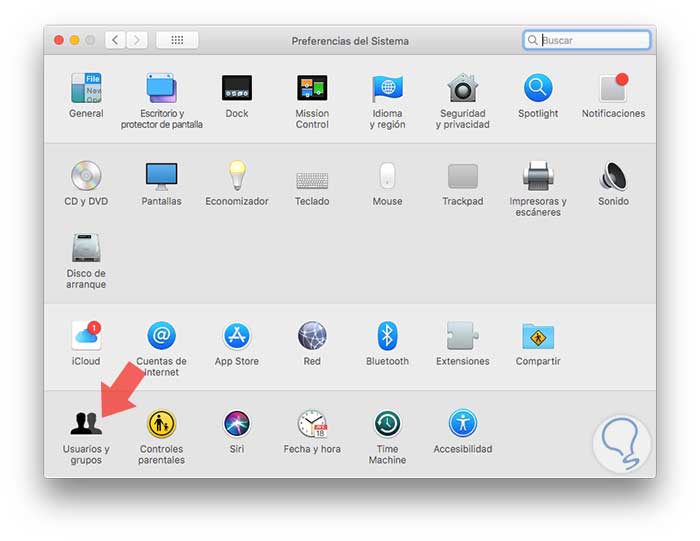
We will see the following:
1. How to enable root user in macOS High Sierra
Step 1
Once we access, we will click on the Users and groups option and the following window will be displayed:
Step 2
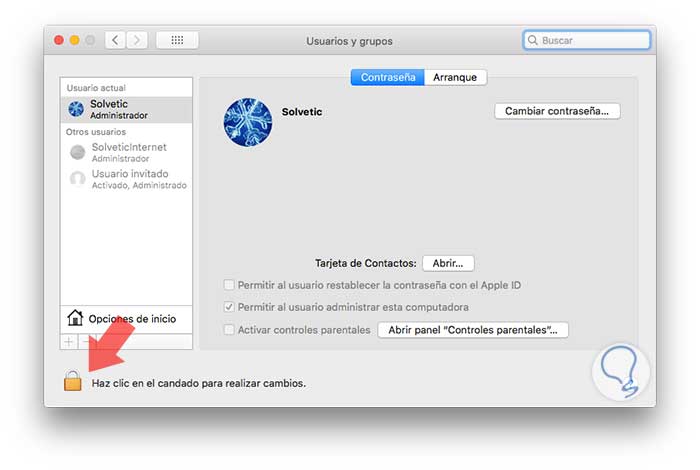
There we click on the lock icon and enter our administrator password to make changes and click on the Start Options line and the following will be displayed:
Step 3
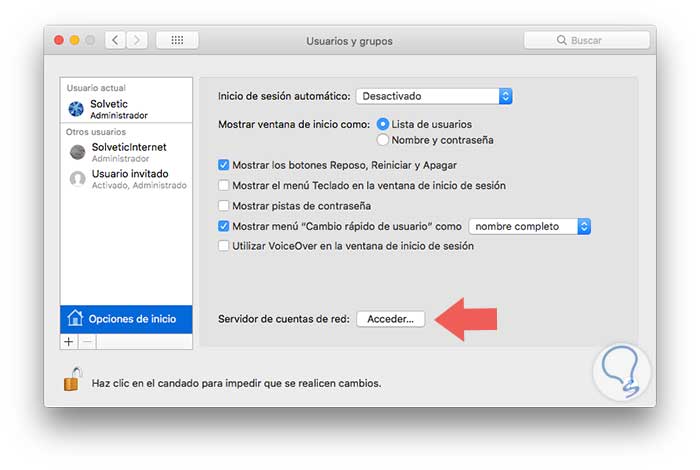
There we click on the Access button located in the Network account server section and we will see the following:
Step 4
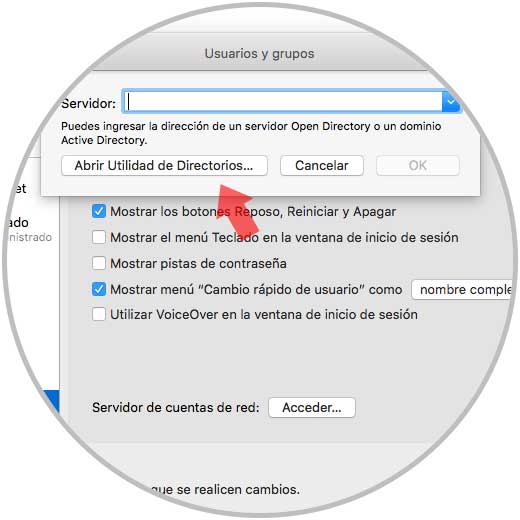
In the pop-up window, click on the Open Directory Utilities button and the following will be displayed:
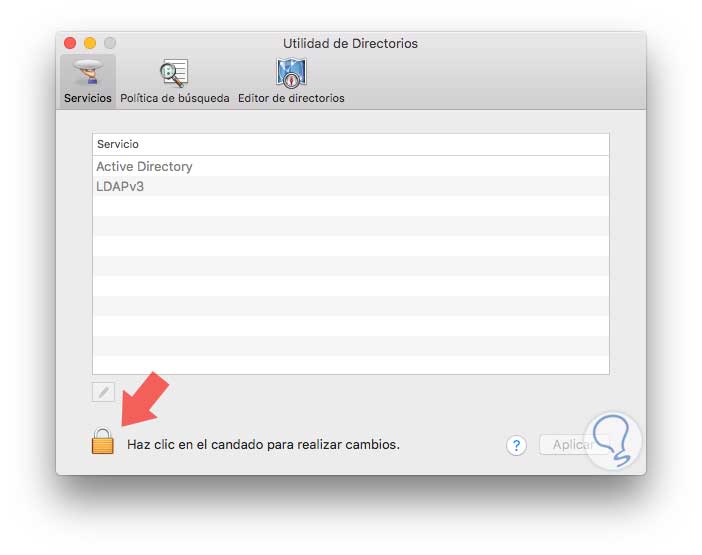
Step 5
Again click on the lock icon and enter the password to make changes. Now, we go to the Edit menu of the Directory Utility and there we select the option Activate root user:
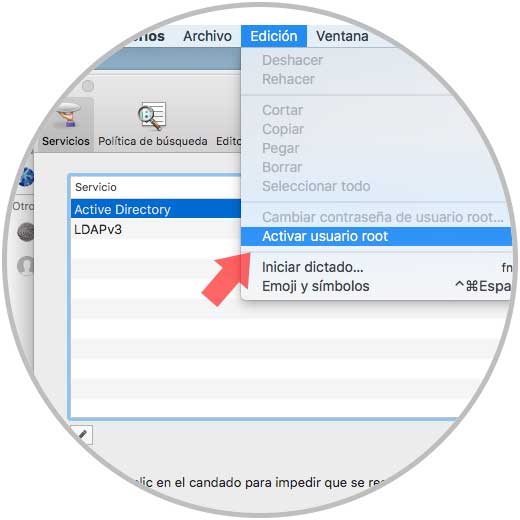
Step 6
Pressing there will be necessary to define the password for that user with which you will access the system. Click on Ok and in this way we have enabled the root user in macOS High Sierra.
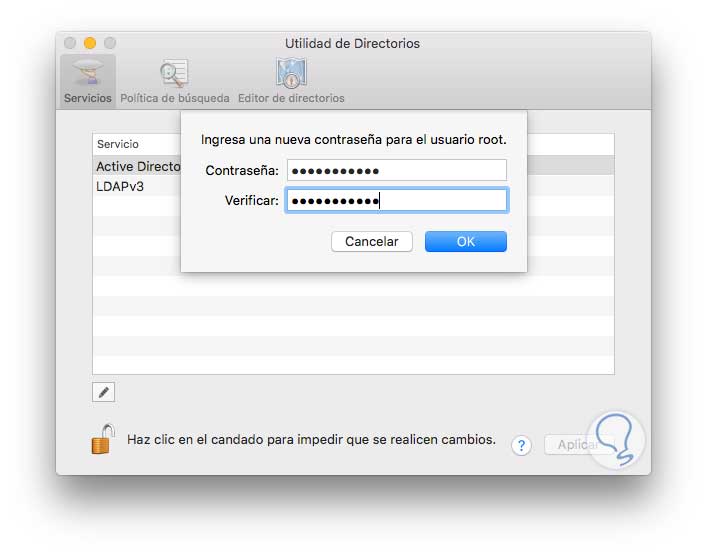
2. How to log in with the Mac root user
Once the user is enabled, we proceed to close the current session and see this:
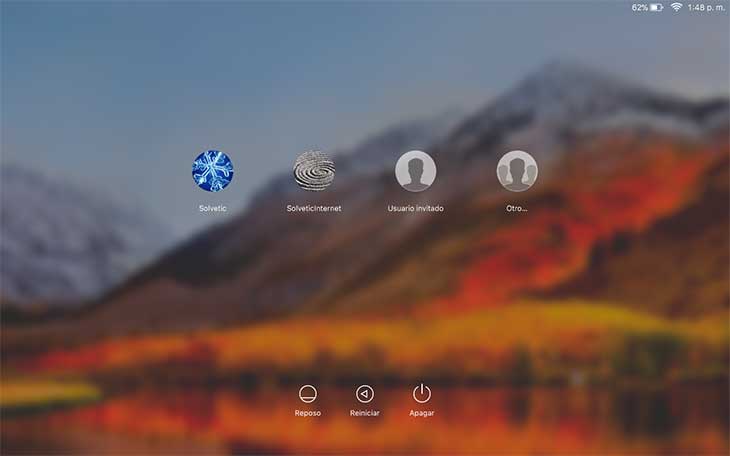
There we click on the Other option and enter the name of the root user with the password we have set. Once we press Enter, the system will be configured as it is a new user.

3. How to disable or change the password of the root Mac user
At the moment in which we do not want to use the root user anymore for some security or management issue, its disabling process is simple, or if we want to establish a new password.
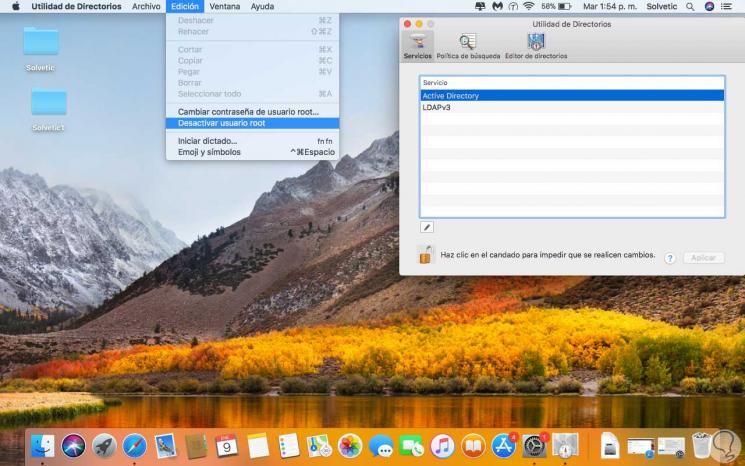
To do this we go back to the System Preferences / Users and Groups / Startup Options / Directories Utility route, already mentioned in the previous step, and from the Edit menu we can change the password or deactivate the root user in macOS High Sierra:
We have seen how simple it is to enable or disable this valuable user in macOS High Sierra, but we must be cautious in the way we use it in system tasks..