In a world where information security is most vulnerable by the various types of attack techniques, we must always ensure the best privacy options such as passwords , two-factor authentication and some more..
Now, in any operating system one of the fundamental elements is the users since without them there would be no way to carry out the tasks in the system but we must keep in mind, in this case talking promptly about macOS Mojave, that every system includes a user root (super user) which has full control over all aspects of the system such as installation or uninstallation of programs, creation of objects, modification of records and more.
The root user is an essential security element because if it is activated and we do not have access measures in mind we can be victims of unauthorized changes in the system and its applications, ultimately affecting the general integrity. The "root" user account is a superuser that has read and write privileges in all areas of the system, including the files of the other user accounts in macOS Mojave..
This root user is disabled by default by security, so that we can log in with an administrator account , activate the root user and then log in as root user to perform the task that is required but it is ideal after this to disable it again. A safer option than enabling the root user is to use the sudo command in the terminal, with the root user it will be possible to perform actions such as:
- Carry out troubleshooting of both the system and its applications
- Perform administrative tasks
- Execute permission assignment for other users and more
To enable the root user in macOS Mojave we must access as administrators.
1. How to enable root user in macOS Mojave through the directories utility
The Directory Utility in macOS Mojave has been developed to add and configure advanced connections to directory servers, so that the team can access directory servers in order to obtain user information and other administrative data that are hosted in the Directory domain of directory servers.
Step 1
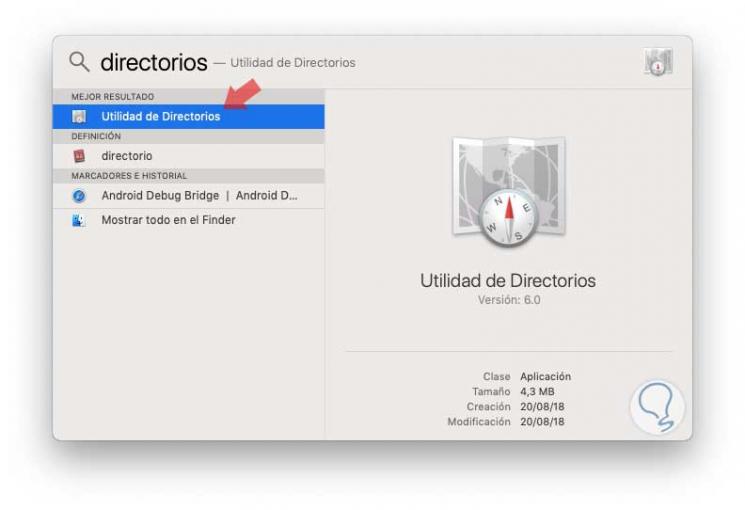
It will be possible to connect to Open Directory, Active Directory or to an LDAP directory server. To make use of this option, we enter Spotlight and type the word directory and the following will be displayed.
Step 2
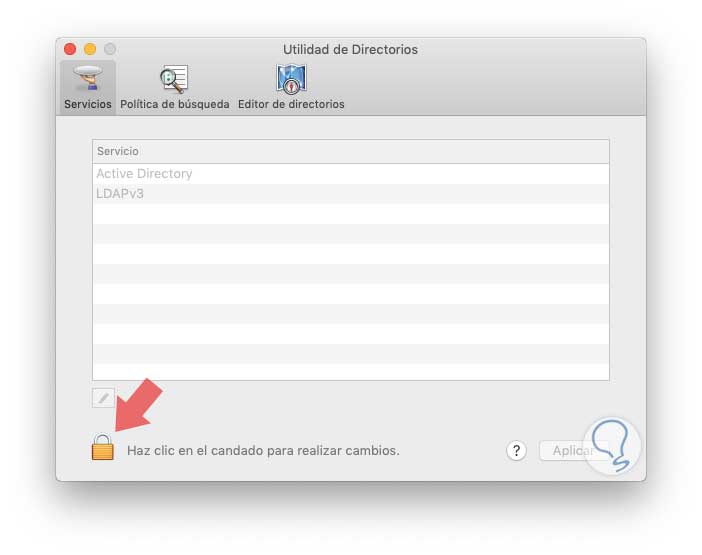
Double click on the Directory Utility line and the following window will be displayed:
Step 3
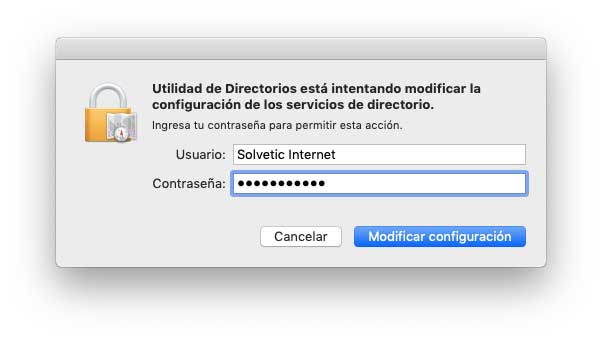
There we must click on the lock icon located at the bottom to apply changes and it will be necessary to enter the administrator password:
Step 4
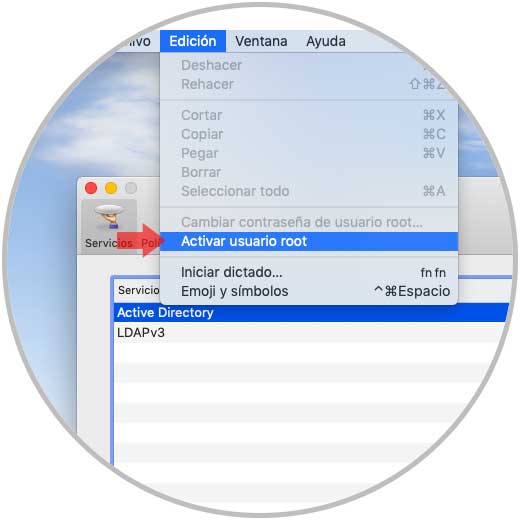
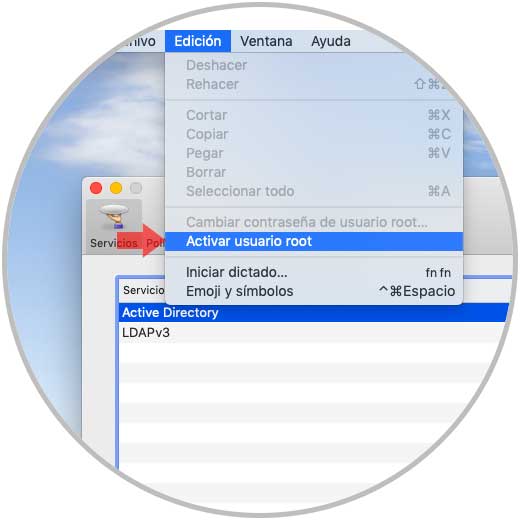
Click on the Modify configuration button and now we go to the Edit menu and there we select the option Activate root user:
Step 5
Now we will enter and confirm the user password of the root user enabled. Click on Ok to save the changes.
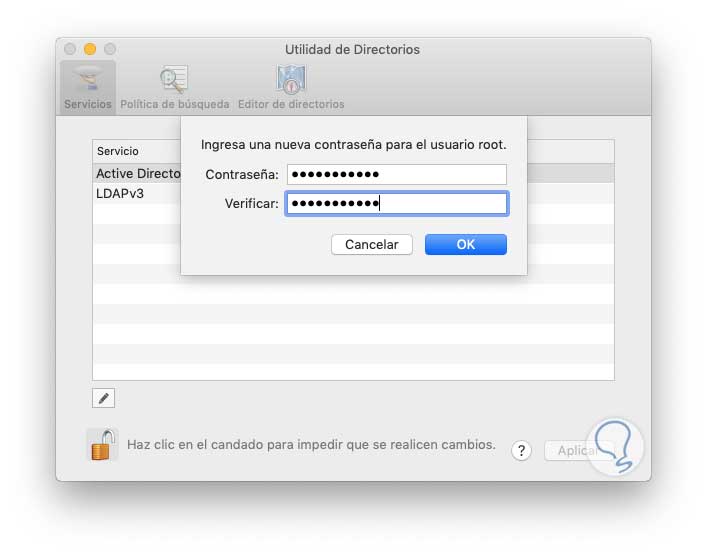
Step 6
Now, from the Edit menu it will be possible to execute any of the following tasks:
- Change the root user's password
- Disable it for security reasons
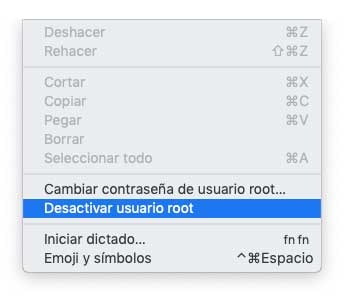
Thus, through the Directory Utility we can manage the root user in macOS Mojave..
2. How to enable root user in macOS Mojave through system preferences
Step 1
The next option to use is to use the System Preferences for this enablement, for this we must access using one of the following options:
- By clicking on the Apple icon and selecting the System Preferences option
- Clicking on the icon located in the Dock
- Through Spotlight entering the term preferences and selecting the respective option
The following will be displayed:
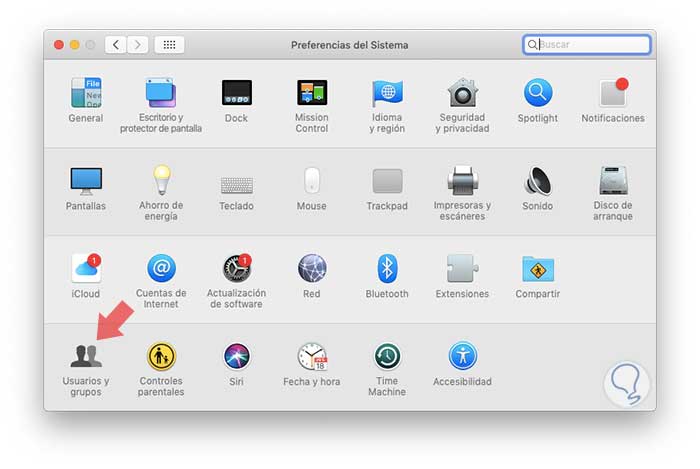
Step 2
There we select the option Users and groups and it will be necessary to click again on the lock icon to make changes, after this, we go to the Login Options section and we will see the following:
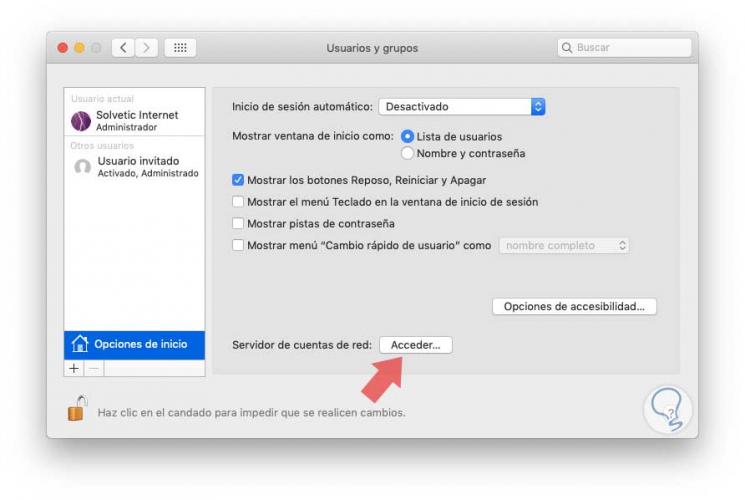
Step 3
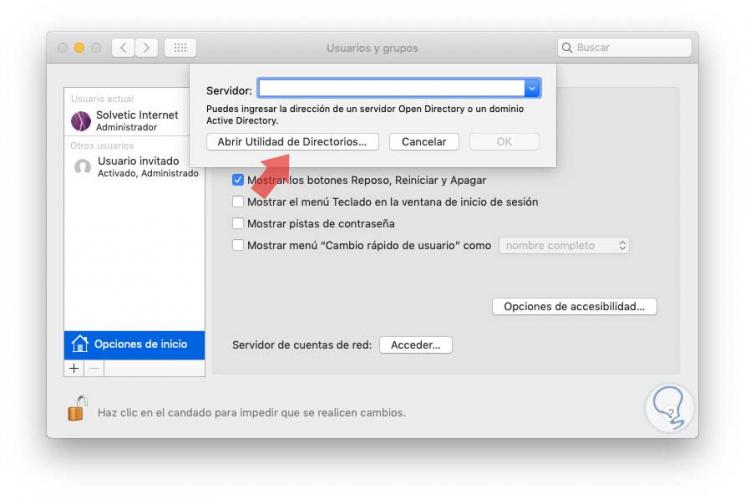
There we click on the Access button located in the Network account server section and the following window will be displayed:
Step 4
There we click on the Open Directory Utility button and follow the steps indicated in the previous process:
3. How to enable root user in macOS Mojave through the terminal
Step 1
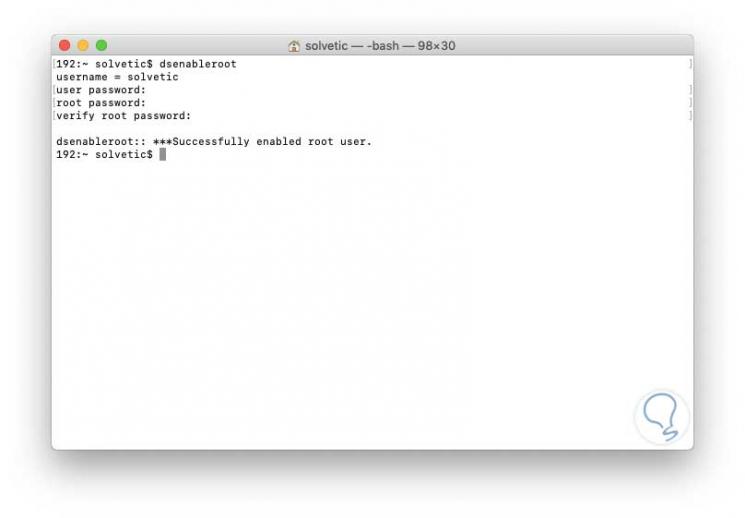
Finally, the terminal becomes another useful option to execute the process of enabling or disabling the root user, for this we access the terminal and there we must execute the following command to activate the root user:
dsenableroot
Step 2
There we must enter the password of the administrator user and then assign the password for the root user, after this we will receive a message indicating that the user has been activated correctly:
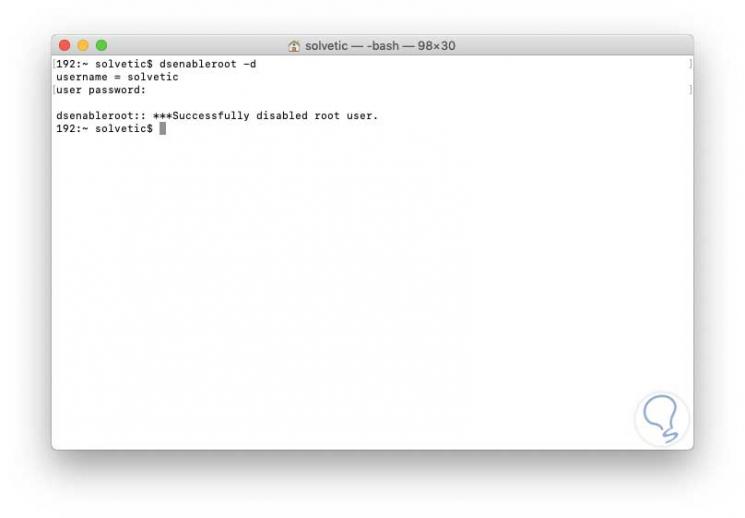
Now, to disable the root user from the terminal we will execute the following:
dsenableroot -d
Step 3
We re-enter the administrator password and validate that the root user has been disabled:
We can simply log out and log in now with the root user and the password defined in any of the previous steps.
TechnoWikis recommends that this user is only enabled by support issues and by reliable personnel and it is more than necessary that once the tasks to be completed are completed, proceed with the root user disabling to avoid undue changes in macOS Mojave.