The fundamental element in any current operating system is the user , whether administrator or not, since it gives us access to the operating system environment and its various functionalities both at the configuration and design levels. In general we have two types of users (or more in some systems), a standard user and an administrator user. But beyond these two users and even if you have administrator roles, there is more hidden an administrator who has more privileges and with which you can carry out hundreds of administrative and support tasks in the system and many areas associated with this . We talk about the famous root user or also known as super user..
Important, never forget it, this root user is deactivated because it is a type of user who has read and write privileges throughout the system, This covers both the local account and all those registered there, so we activate it as a temporary and without any better function think about it since someone with bad intentions can arrive and make unauthorized changes as it is an account that will not ask for passwords.
From this point of view, it will be possible to log in to macOS Catalina with our administrator user, activate the root user and then log in with that root user to execute the action, especially support to perform in macOS Catalina..
If this user makes undue changes we may be talking about a total system restoration which is not a very good idea.
Let's see how to activate this user in macOS Catalina..
To keep up, remember to subscribe to our YouTube channel! SUBSCRIBE
1. How to enable root user in macOS Catalina using the directories utility
As the name implies, the macOS Catalina Directory Utility is an integrated function with which it is possible to add, edit and configure advanced connections focused on directory servers, it does not necessarily require a domain, in this way, the team will be in capabilities to access directory servers to obtain user information and many more administrative data which are available in the directory domain of macOS directory servers.
Step 1
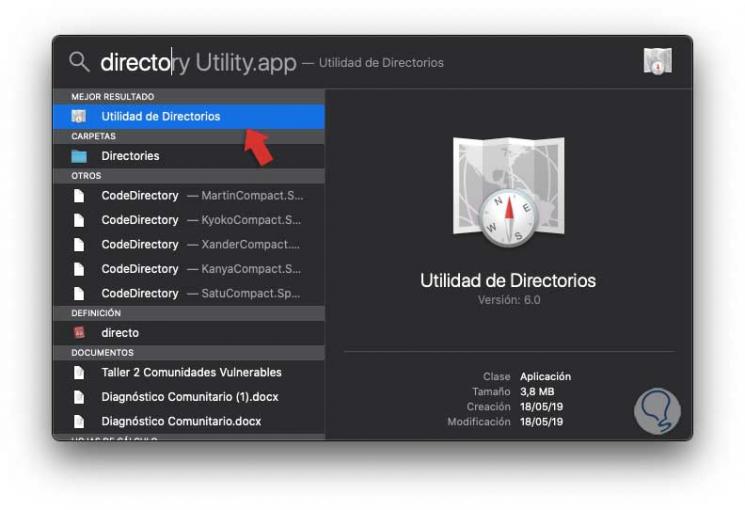
To use this method, we access Spotlight and when typing the term directory we will see the following:
Step 2
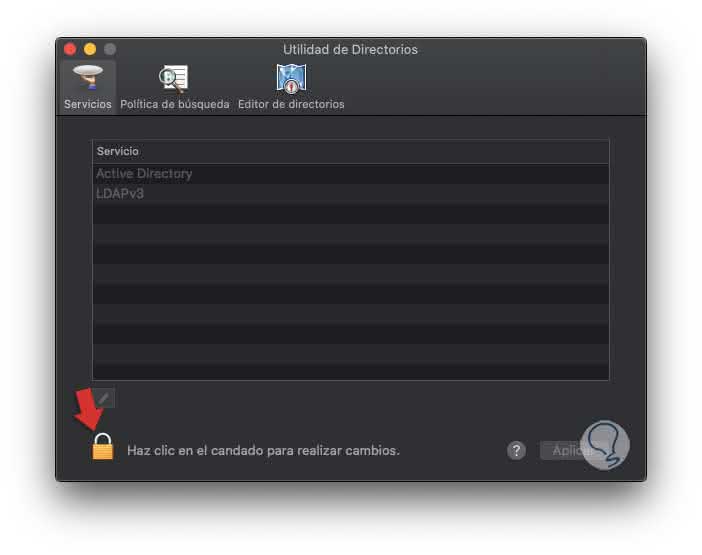
We click on the Directory Utility option and with it it will be possible to establish a connection to Open Directory, Active Directory or to an LDAP directory server. Once opened we will see the following:
Step 3
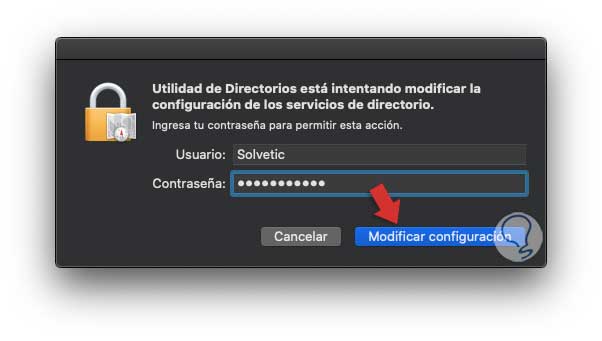
We will click on the lock icon located at the bottom in order to make changes to the task and it will be necessary to enter the macOS Catalina administrator password:
Step 4
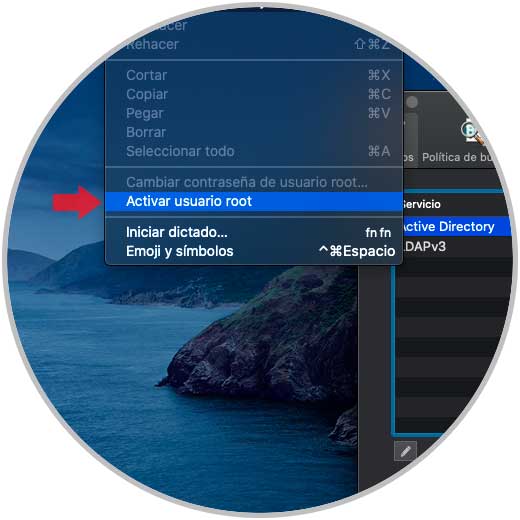
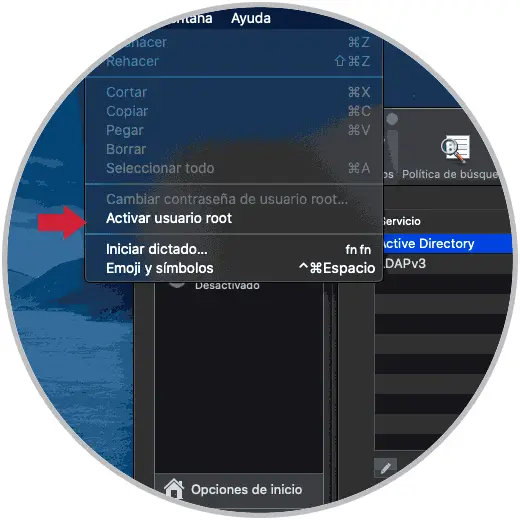
We click on the “Modify configuration†button to apply the changes and now we go to the Edit menu and there we select the option “Activate root user†in the options displayed:
Step 5
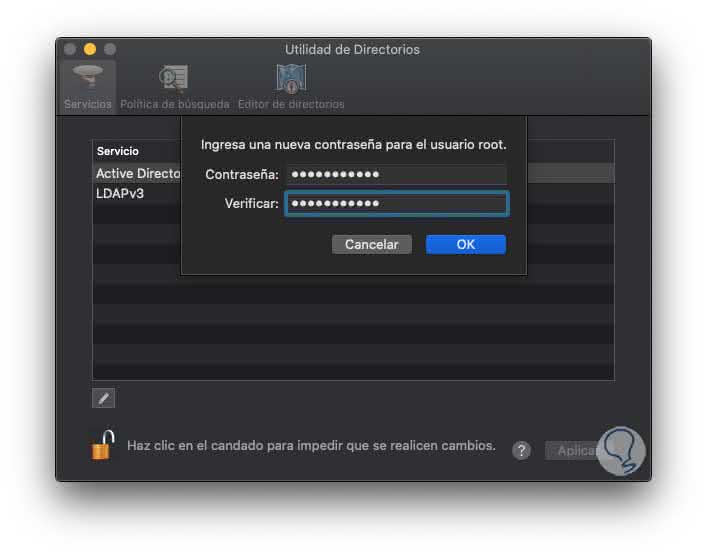
When doing this, we must enter and confirm the password for the root user to be enabled:
Step 6
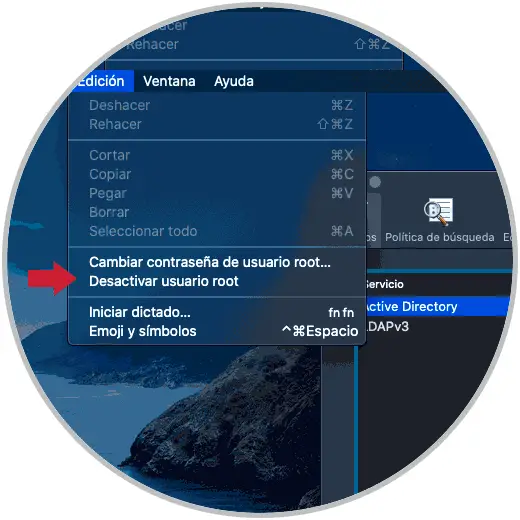
We click OK to save the changes, and from the same Edit menu we have some actions to perform on the root user as they are. To deactivate it, click on the option “Deactivate root user†and this will be carried out automatically.
- Change the password of the root user.
- Disable the user for security reasons as mentioned.
2. How to enable root user in macOS Catalina the system preferences panel
Step 1
The "System Preferences" panel is a console from which it will be possible to access multiple system functions, to access it we have the following options:
- By clicking on the Apple icon and selecting the "System Preferences" option.
- Using Spotlight and entering the term preferences and there select the appropriate option.
- Clicking on the icon located in the Dock.
Step 2
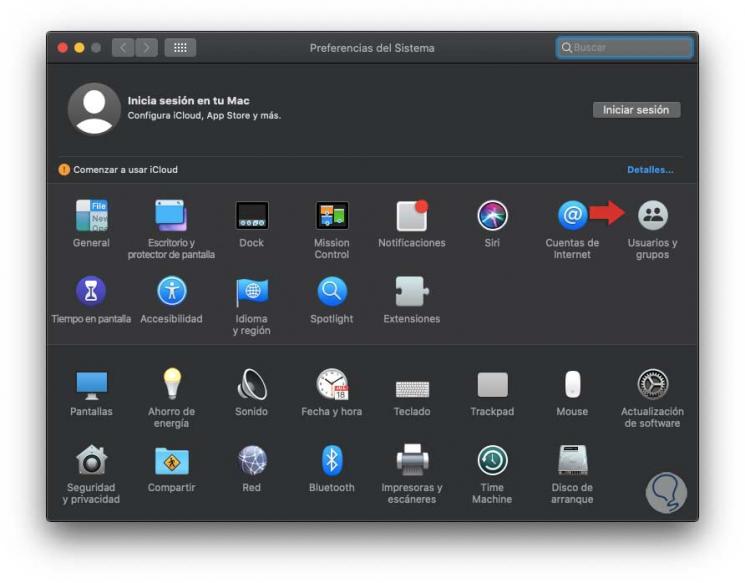
We will see this:
Step 3
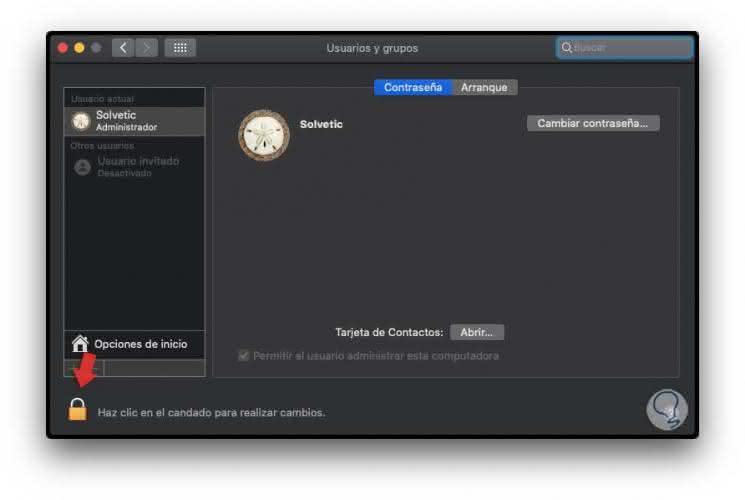
We click on the category “Users and groupsâ€, the following will be displayed:
Step 4
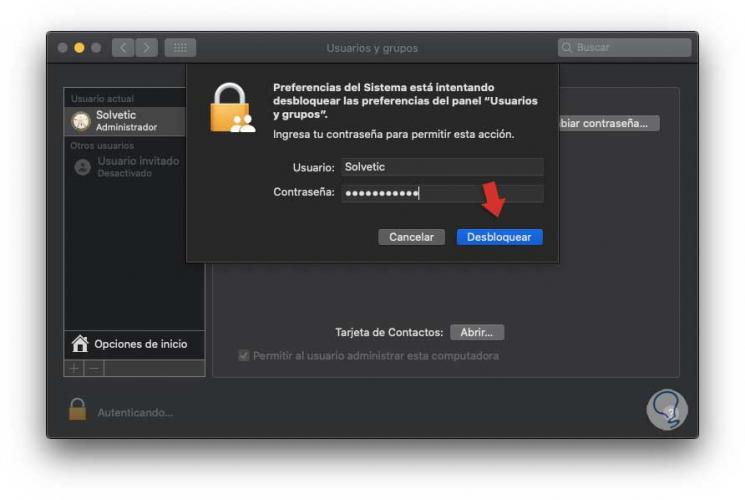
After this it will be necessary to press again on the lock icon at the bottom to be able to make changes:
Step 5
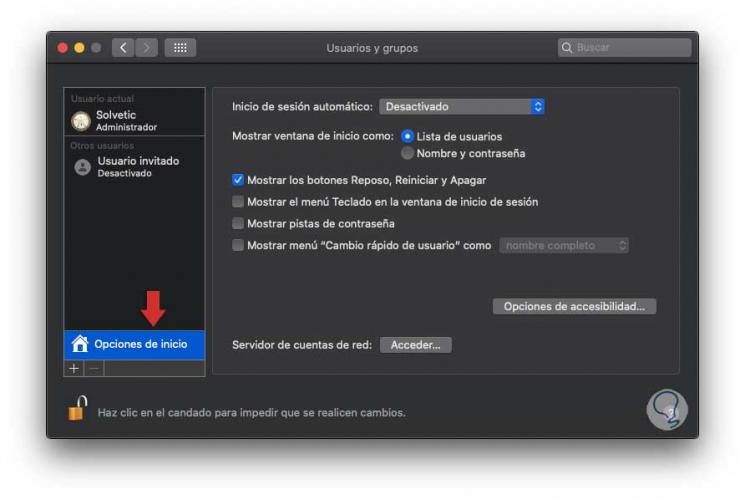
We click on "Unlock" and done this, we will go to the section "Login Options" where the following options will be displayed:
Step 6
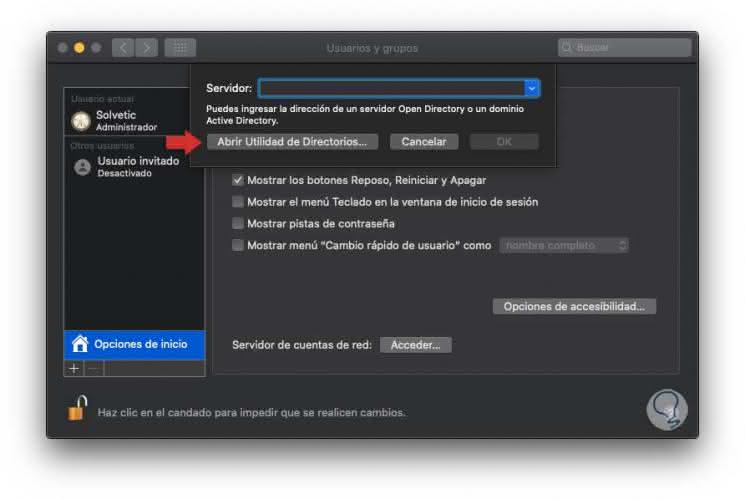
We click on the "Access" button located in the "Network account server" section and we will be redirected to the following window:
Step 7
We click on the "Open Directory Utility" button and repeat the process that we have seen in the first point of this tutorial.
3. How to enable root user in macOS Catalina using the terminal
Step 1
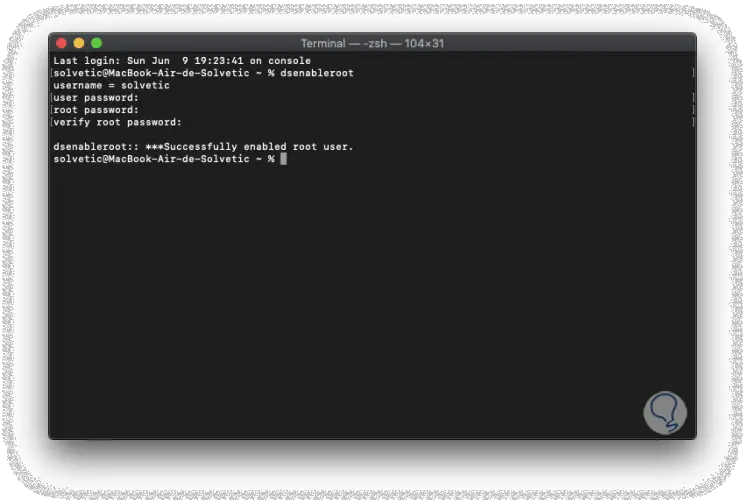
Finally, and in a much simpler way, we have the terminal to carry out the activation or deactivation process of the root user in macOS Catalina, if our goal is to activate it, we access the terminal and execute the following command:
Dsenableroot
Step 2
By pressing Enter it will be necessary to enter the password of the administrator user and after this assign the password to the root user, when we execute it, we will see a message confirming that the user has been correctly activated in macOS Catalina:
Step 3
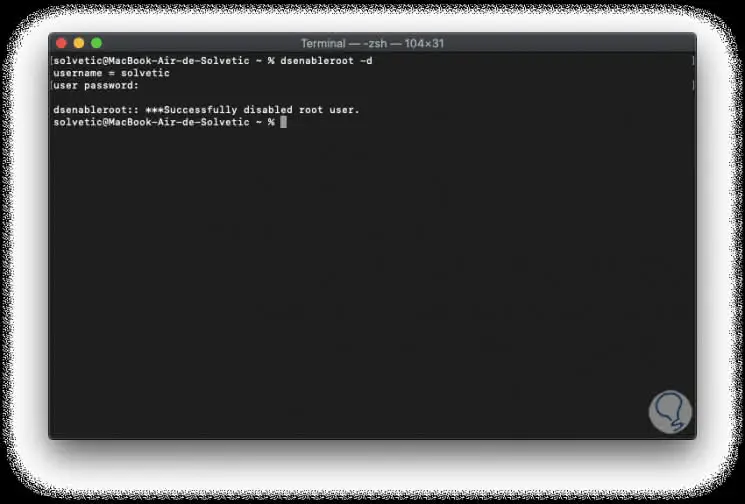
Now, to deactivate the root user, we must execute the following command:
dsenableroot -d
With any of the options that TechnoWikis has taught you, you will be able to activate or not the root user and thus perform in a much more complete way the tasks that are required.