Users are an essential part of macOS since when creating it, a profile is assigned that determines the permissions and scope that this user has in the system, we can create an administrator user who has permissions to perform administrative tasks in macOS or an administrator user which will have limitations such as configuring other users, installing or uninstalling programs, etc. This is done for security reasons, but there is a user with permissions greater than the administrator and it is the root user..
The root user, which is also known as superuser, has been developed as a special user account for UNIX-based operating systems (macOS or Linux) and its main attribute or characteristic is that it has unrestricted read and write privileges for each user. one of the areas of the file system, for security reasons since the macOS X 10.11 version, root user access has been restricted to certain areas of the file system so that instability is not created in the event of misconfiguration.
This root user is deactivated by default in macOS and that is why in TechnoWikis we will explain how to activate it, warning of the risks of its misuse in the system..
To stay up to date, remember to subscribe to our YouTube channel!
SUBSCRIBE ON YOUTUBE
1 How to activate root user on Mac from Terminal
Step 1
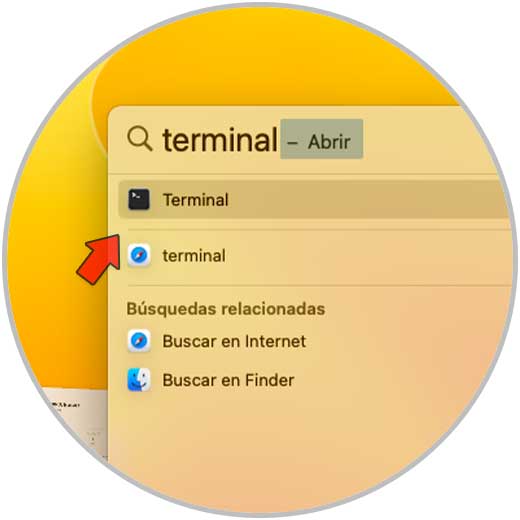
This is one of the easiest methods to activate the root user in macOS, in this case open the terminal:
Step 2
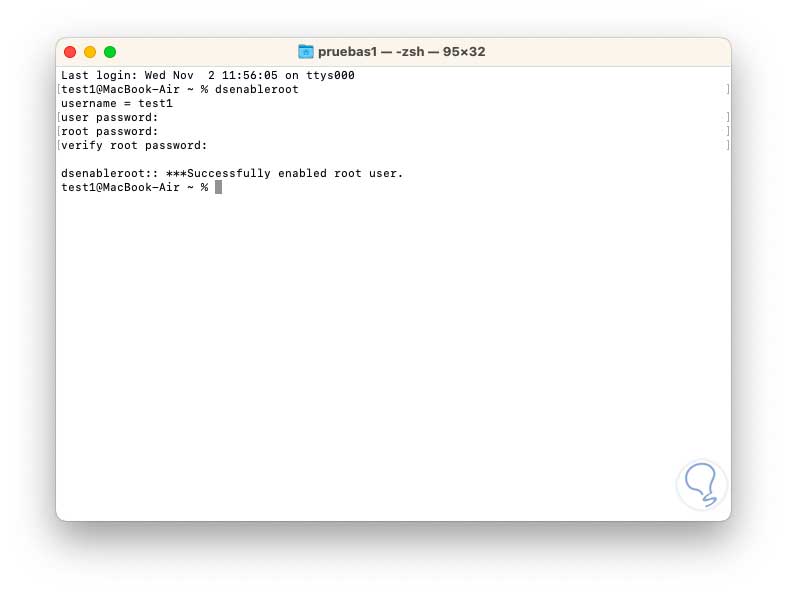
We execute the command:
Dsenableroot
Step 3
Confirm the password of both the current user and the password that will be assigned to the root user (this must be confirmed):
We see that it has been enabled.
2 How to activate Root user on Mac from Directories
Step 1
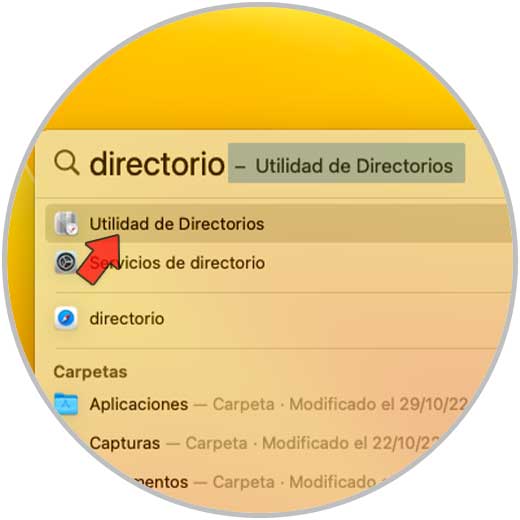
Directories in macOS are used in order to add and edit advanced connections to directory servers, the computer accesses the directory servers in order to have user information and other administrative data that is hosted in the directory domain, for Using this method we open the Directories utility from Spotlight:
Step 2
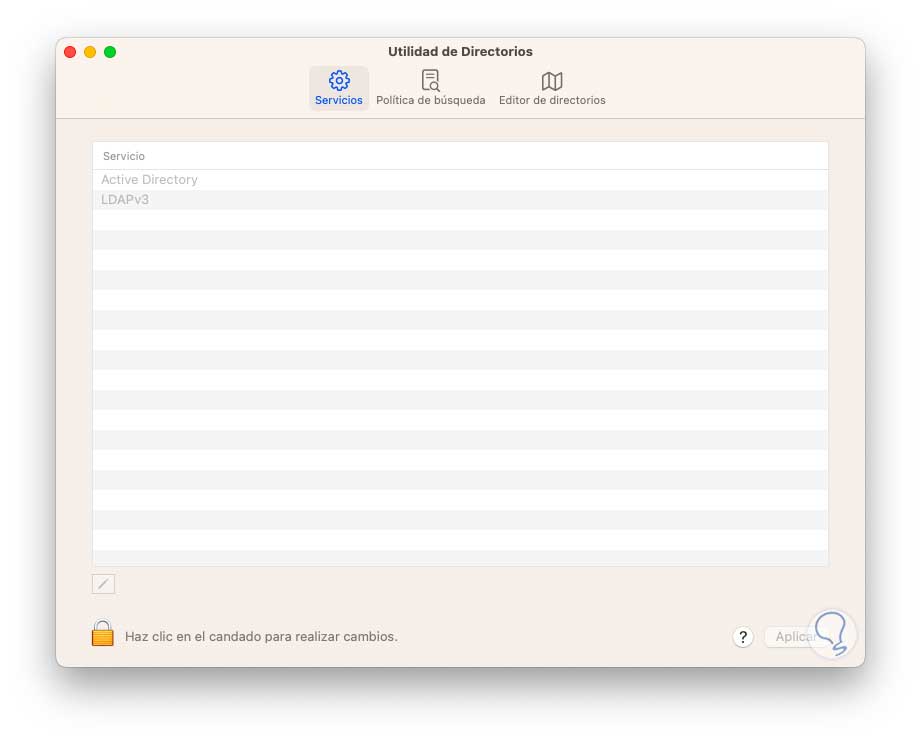
We will see the following:
Step 3
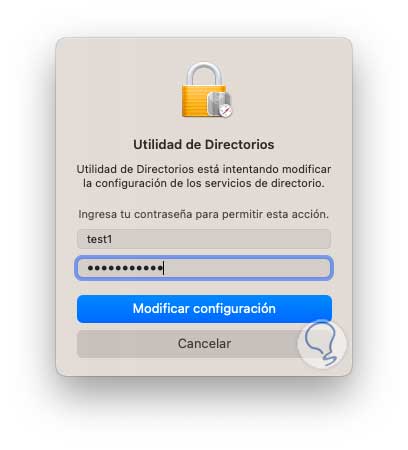
We click on the lock icon and enter the password to enable the changes:
Step 4
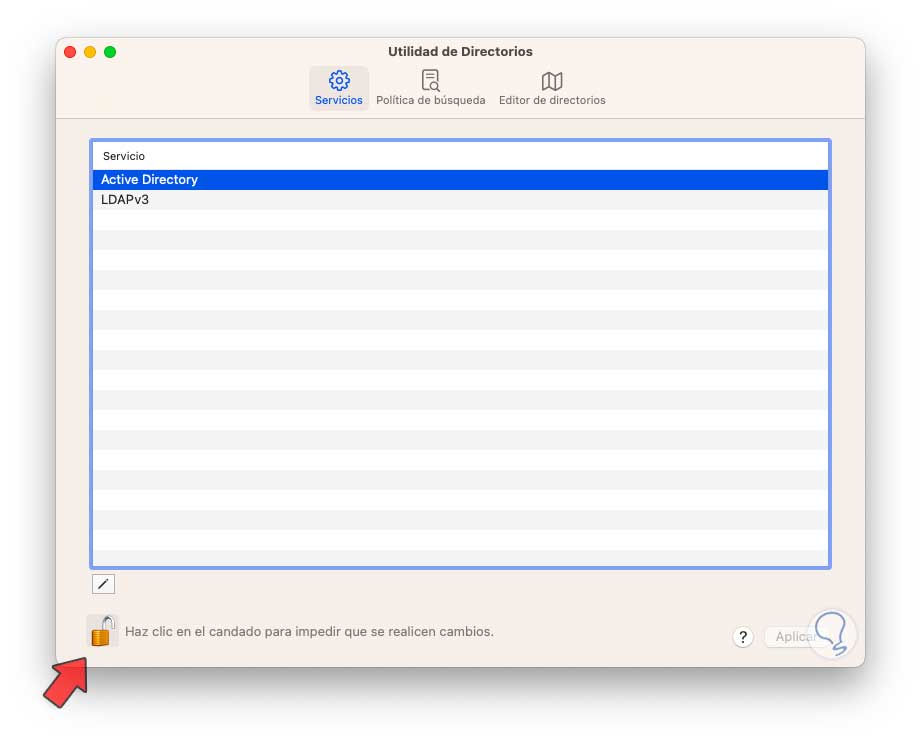
We see that editing the Directory has been enabled:
step 5
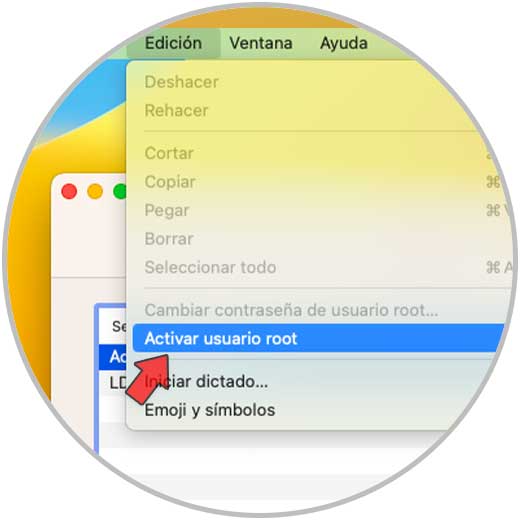
From the "Edit" menu we click on "Activate root user":
Step 6
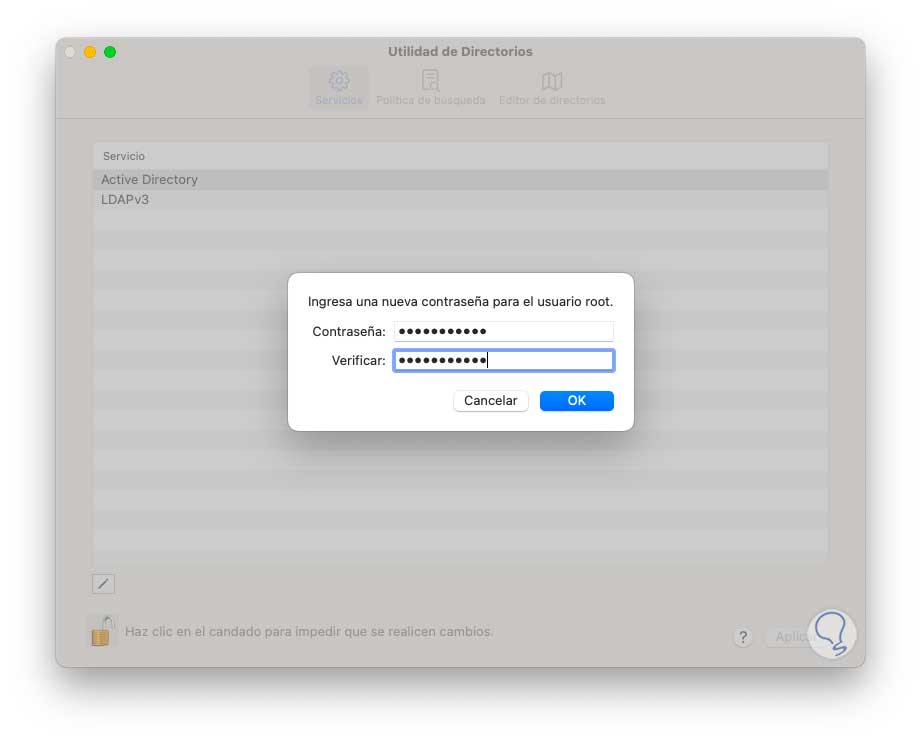
We assign the password to the root user:
Step 7
Apply the changes.
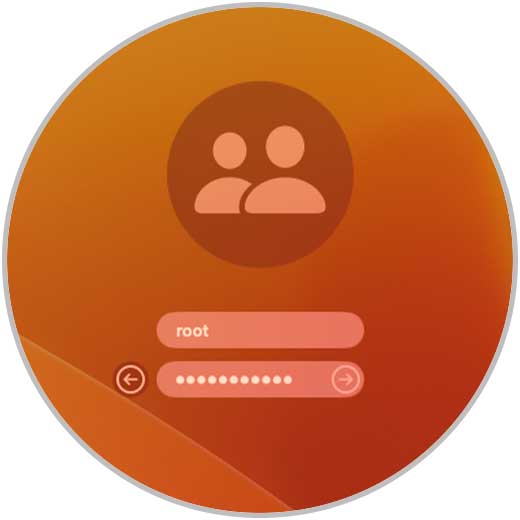
In both cases, when we are on the login screen we will see the following:

step 8
There we click on "Other" and then enter the root user and the password that has been assigned:
3 How to disable Root user on Mac from Terminal
Step 1
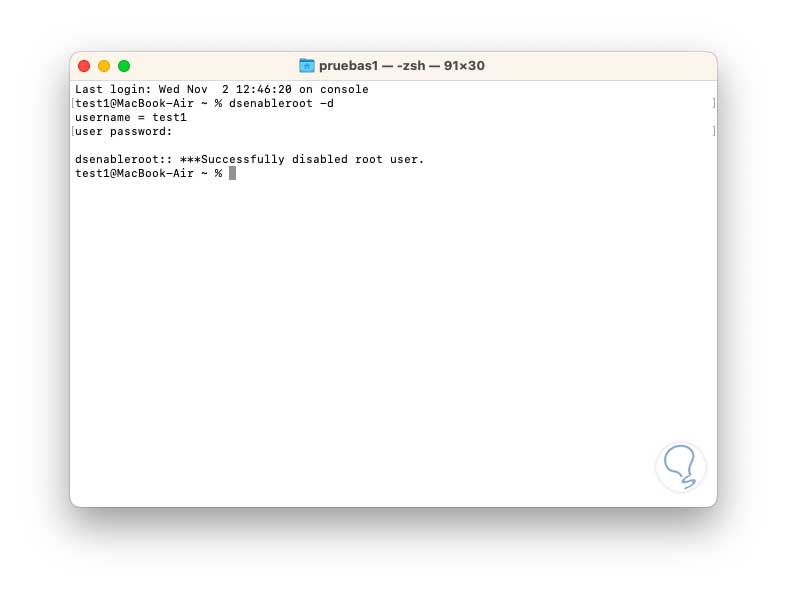
When we have finished the tasks TechnoWikis recommends you deactivate this user, in this case we open the terminal and execute the following:
dsenableroot -d
Note
the -d parameter allows to disable the user 8disable)
Step 2
We confirm the password of the root user for its deactivation:
4 How to disable Root user on Mac from Directories
Step 1
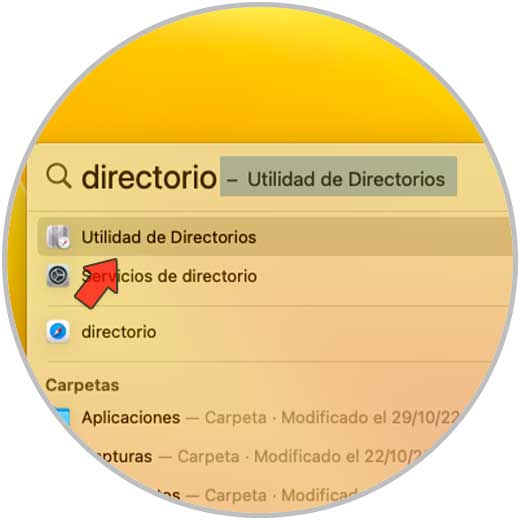
This task is also possible to perform from the macOS Directories Utility, we open the Directories utility from Spotlight :
Step 2
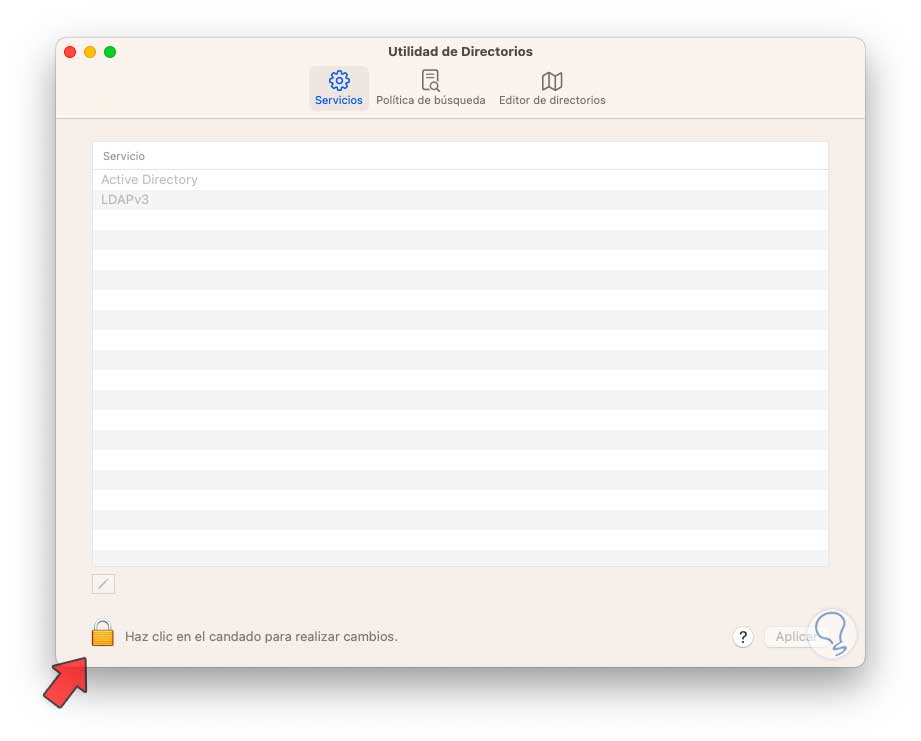
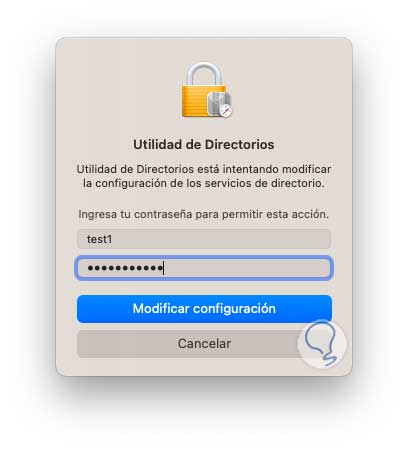
We click on the lock icon and enter the password to enable the changes:
Step 3
We enter the password:
Step 4
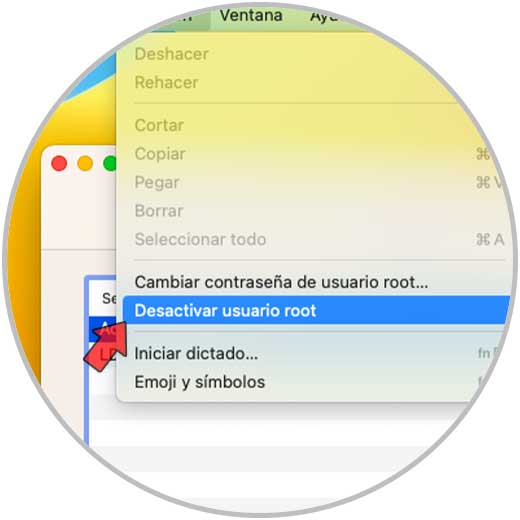
From the "Edit" menu we click on "Deactivate root user":
5 How to change root user password on Mac
Step 1
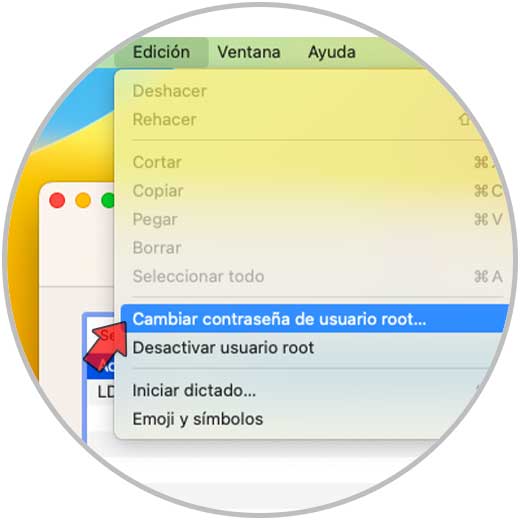
It is possible to change the password for greater security, open the Directories utility, click on the lock icon and enter the password to enable the changes, from the "Edit" menu we click on "Change root user password":
Step 2
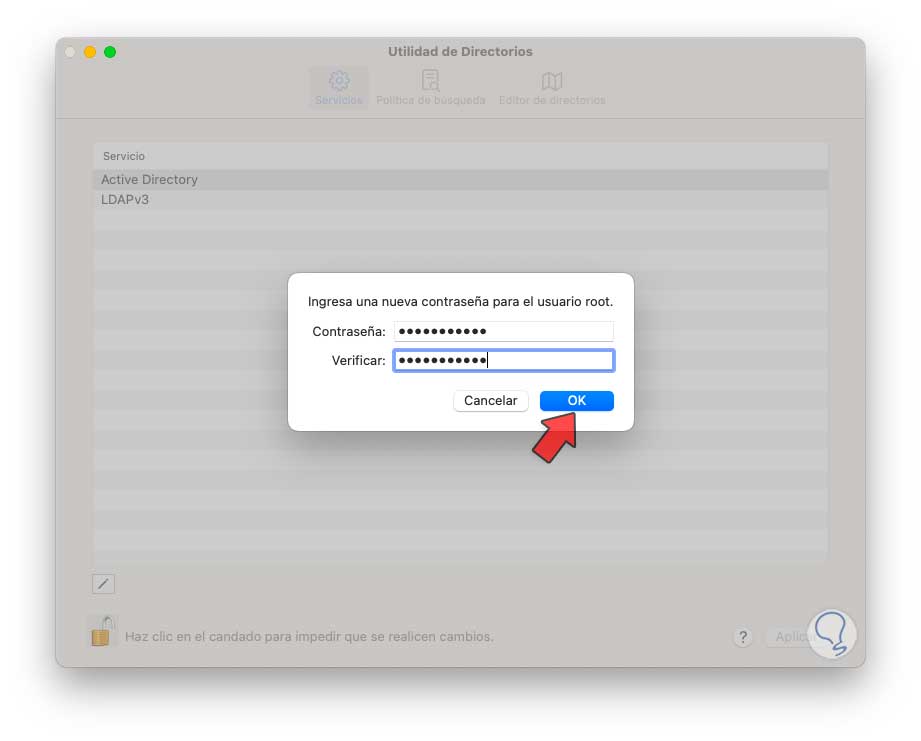
Set the new password. Apply the changes.
We have learned how to manage the root user in macOS with the responsibility that comes with it..