The new launch of an operating system will always be a reason to be in expectation about what new features this will bring and what impact it will have on its users, well, recently Apple at its annual WWDC conference 2018 announced the launch of macOS Mojave which arrives as The replacement of High Sierra with new features that surely more than one will love..
Just one of them, perhaps the most striking, is the Dark Mode or Dark Mode which will cover even Xcode and this will facilitate the visualization of all the elements in the system and, as an additional point, will be of great help for visual health of the millions of macOS users.
When using this Dark Mode, the subtle colors and fine points of each content fit into the center screen so that the toolbars and menus go back to the background to give a much greater visual impact. The dark mode works with the integrated applications that come in macOS Mojave and third-party applications may also be compatible with their use..
Let's see how to activate or deactivate this mode simply in macOS Mojave.
1. How to activate Dark Mode in macOS Mojave
Step 1
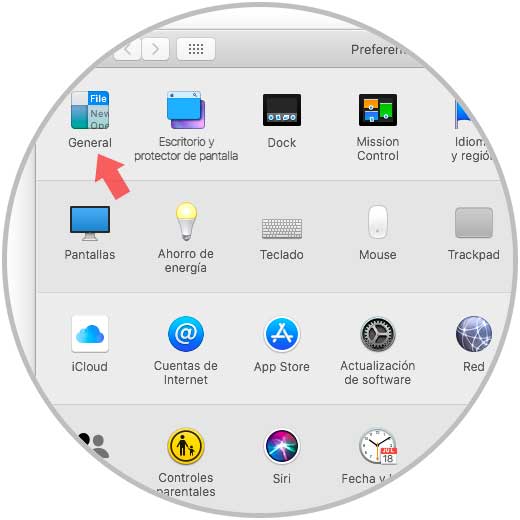
For this we must go to System Preferences using one of the following options:
- By clicking on the Apple icon and there by selecting System Preferences
- Click on the System Preferences icon located in the Dock
The following will be displayed:

Step 2
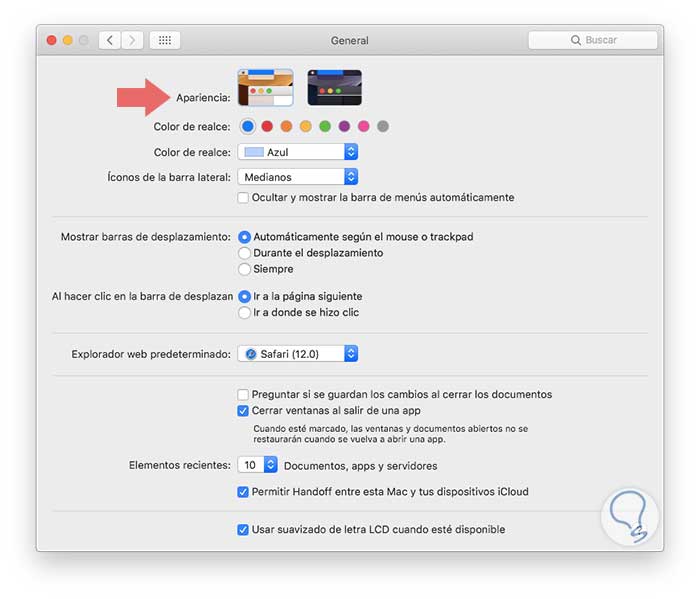
There we click on the General category and we will see the following:

Step 3
In the Appearance line we can see the options of Light Mode (default) and Dark Mode, just select the Dark Mode so that the changes are applied:

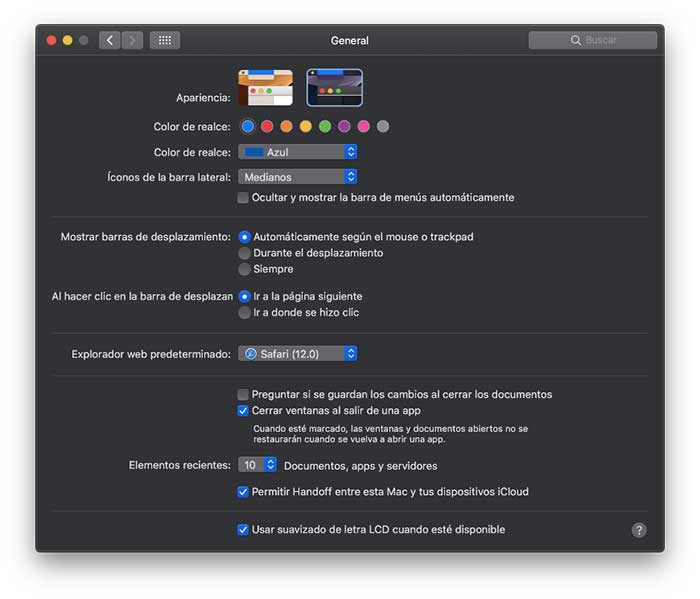
Step 4
On leaving, we can see how the appearance of macOS Mojave totally changes:
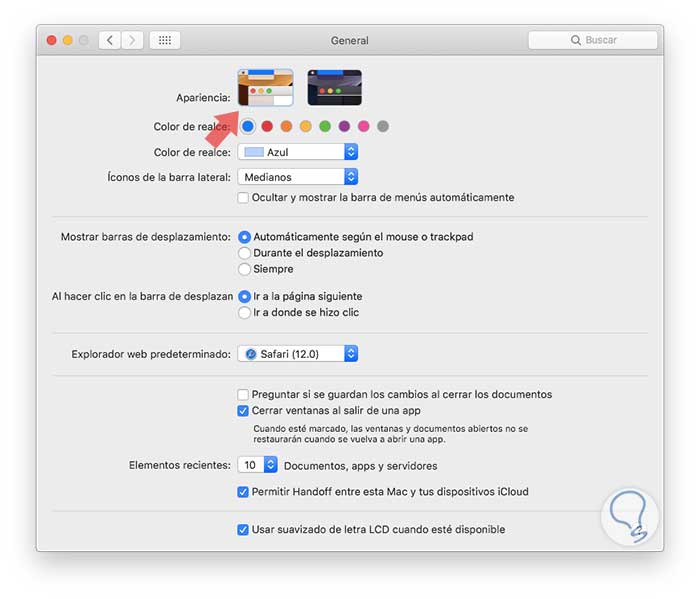
2. How to disable Dark Mode in macOS Mojave
The process for this is the same, just go to System Preferences / General and click on the Clear Mode located in the Appearance section:

In this way we can set this new dark mode in macOS Mojave..