DISM (Deployment Image Servicing and Management) is an integrated maintenance tool in Windows 10, thanks to which it will be possible to carry out maintenance and preparation of Windows images, including Windows PE, Windows Recovery Environment (Windows RE) and Windows Settings. When using DISM we can also carry out maintenance tasks on a Windows image (.wim) or a virtual hard disk (.vhd or .vhdx)..
Although it is a tool that we can use from the command line or from the Windows 10 installation medium itself, in some cases it can present some type of error during its execution such as:
Common errors DISM
- DISM error no operation was performed
- DISM could not load the provider
- Disk error 0x8000ffff, 0x800f0954, 0x800f081f
- DISM error processing cleanup-image command, add-package
- DISM error while trying to copy boot files: Dism.exe could not validate the command line
To correct this, TechnoWikis brings a series of practical and complete solutions that will be of great help to optimize and recover the use of DISM in Windows 10.
1. Check the antivirus to fix DISM Windows 10 error
Although it seems somewhat illogical, since the function of the antivirus is to protect the operating system from attacks by viruses, lamware, rootkits, etc., in very spontaneous cases the antivirus itself, whether it is integrated with Windows m10 or any third party, can cause a level of error with the use of DISM and the reason is because the DISM utility executes a total and integral analysis of the entire image of the operating system, with which the antivirus can recognize this action as a threat preventing its continuity and effective analysis .
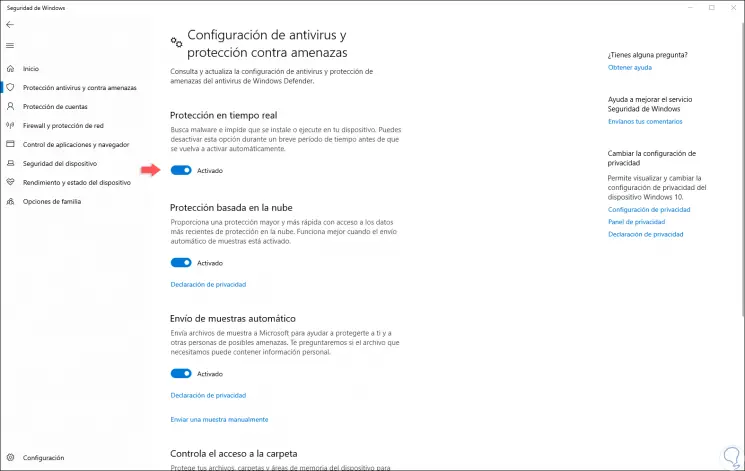
To check if this is the cause of the error, we can temporarily disable our antivirus and run the DISM utility again and thus validate whether or not the action is completed, in the case of third-party antivirus, these have a console from where it can be disabled for a specific time and if we have the integrated option of Windows 10, we must go to "Windows Security" and there, in the "Anti-virus and threat protection" section, deactivate the "Real-time protection" switch :
2. Copy the Install.wim file from the hard disk to fix DISM Windows 10 error
The install.wim file (Windows image file) is a compressed file which contains a set of files and associated file system metadata and is included in any Windows installation media in the "sources" folder .wim). To obtain this Install.wim file, simply download Windows 10, mount it and search for the Install.wim file.
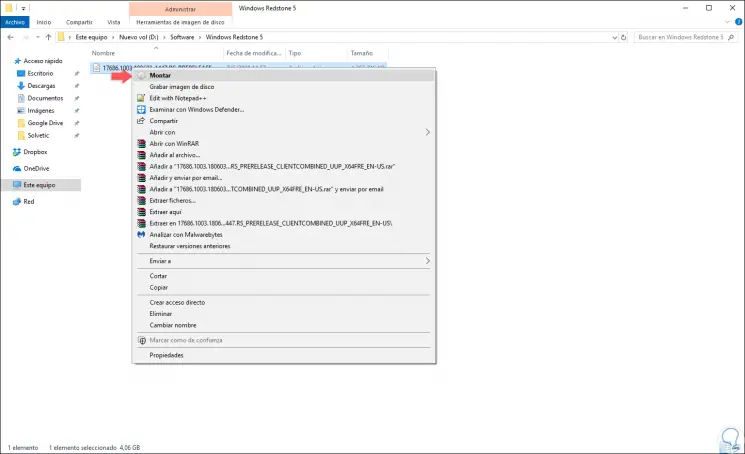
Step 1
For this, once we download the ISO image, we right click on it and select the option “Mountâ€:
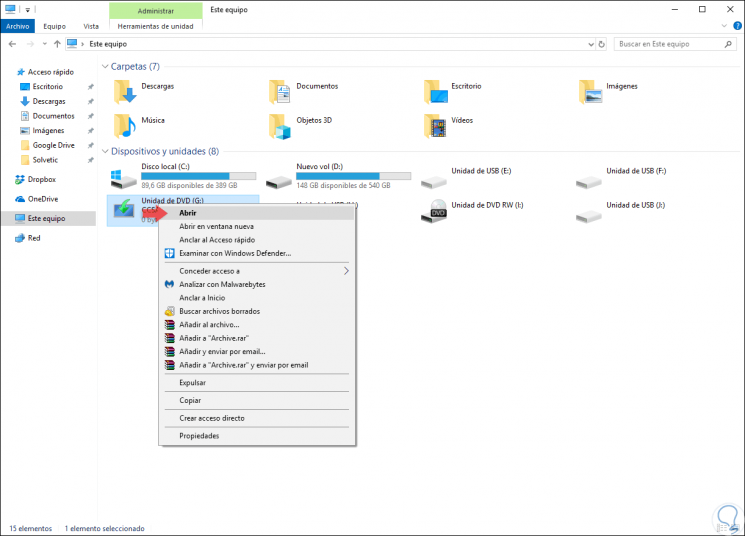
Step 2
This will create a virtual drive in the Windows 10 file explorer, there we will right click again and select “Openâ€:
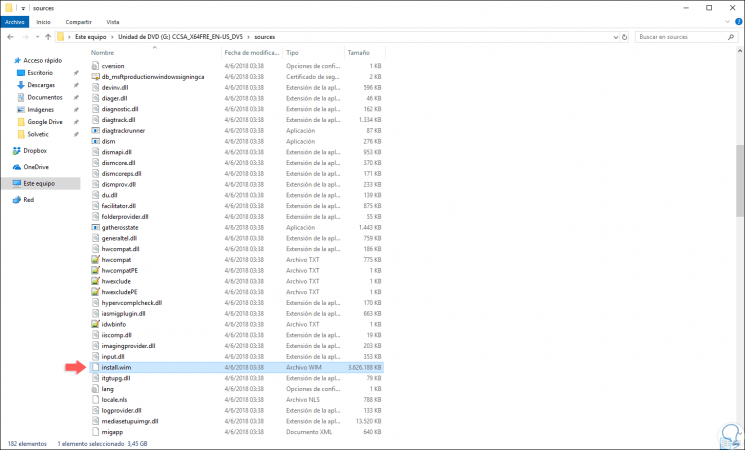
Step 3
When accessing the content of the ISO image, we will go to the “sources†folder and locate the “install.wim†file. We proceed to copy the Install.wim file and paste it into the path where DISM is to be executed, we must take into account that DISM is case sensitive.
3. Enter the correct location of the DISM file to fix DISM Windows 10 error
This solution applies when DISM displays the message "Source files cannot be found", for this we must mount the Windows 10 ISO file and specify the location of the Install.wim file according to the steps indicated in the previous point. After defining where is the correct path of Install.wim, we execute the following: It will be necessary to replace X: by the letter that Windows 10 has assigned to the ISO image which in this case is G.
DISM / Online / Cleanup-Image / RestoreHealth /source:WIM:X:\Sources\Install.wim:1 / LimitAccess
4. Clean the components of the system image to solve DISM error Windows 10
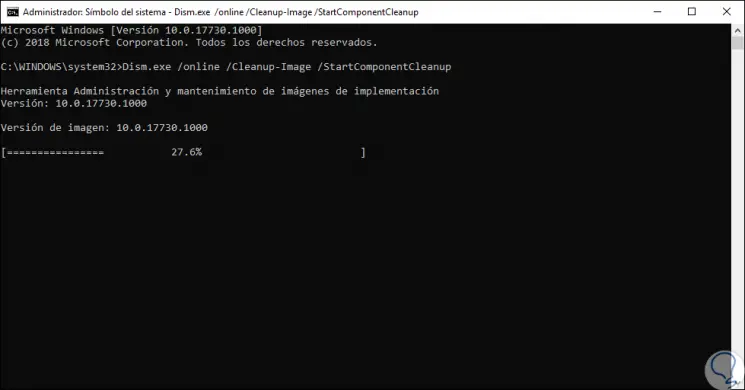
Step 1
Another option available to correct this error in DISM is to clean the image components of the system using the DISM utility and for this we must access the command prompt as an administrator and then execute the following:
Dism.exe / online / Cleanup-Image / StartComponentCleanup
Step 2
Once this is done we can execute the following:
DISM / Online / Cleanup-Image / StartComponentCleanup DISM / Online / Cleanup-Image / AnalyzeComponentStore Dism.exe / online / Cleanup-Image / StartComponentCleanup Dism.exe / online / Cleanup-Image / StartComponentCleanup / ResetBase
5. Reset Windows Update services to fix Windows 10 DISM error
Some DISM problems are caused by Windows updates, and if DISM does not run correctly, the problem could be in the Windows Update services so we can restore those services and for this we must access the command prompt as administrators and there execute each of the following commands in their order:
net stop wuauserv cd% systemroot% \ SoftwareDistribution ren Download Download.old net start wuauserv net stop bits net start bits net stop cryptsvc cd% systemroot% \ system32 ren catroot2 catroot2old net start cryptsvc
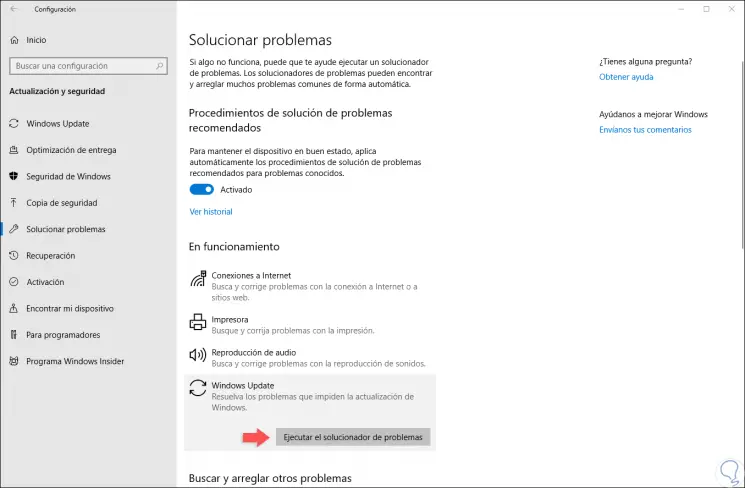
6. Run the troubleshooter to fix DISM error Windows 10
Windows 10 has an integrated tool that has been developed in order to analyze and correct various errors that occur in the operating system or its components and through that utility it is possible to correct DISM errors.
Step 1
To access this utility, we go to the Start / Settings / Update and security menu and there we go to the "Troubleshoot" section and there we click on the "Windows Update" option and click on the "Run the troubleshooter" button:
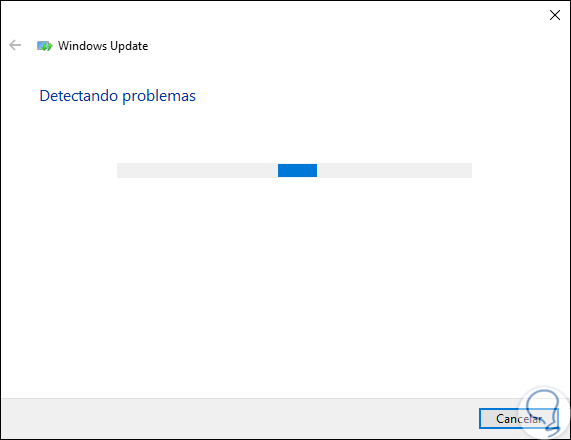
Step 2
The process of analysis and error detection will begin:
7. Disable proxy services to fix DISM error Windows 10
Some users implement a proxy in order to navigate safely and without restrictions to the network, but we must know that the use of a proxy the great management of the network passes through it and this can be a root for it present the error of DISM. To disable this proxy, we go to the Start / Settings / Network and Internet path and go to the "Proxy" section. There we click on the respective switches to proceed with the disabling of this server.

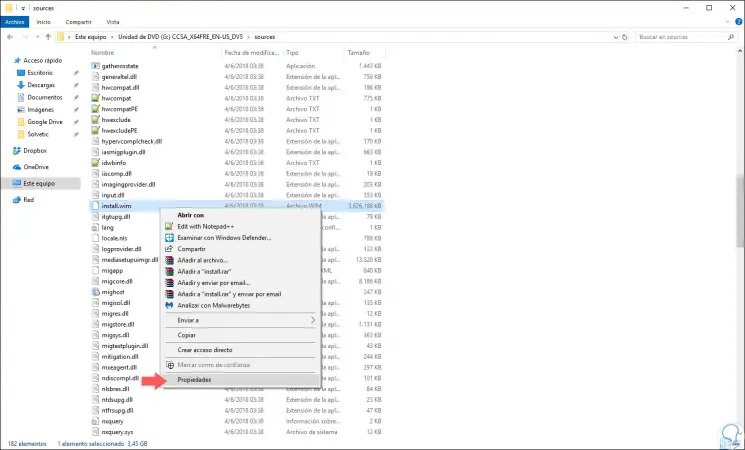
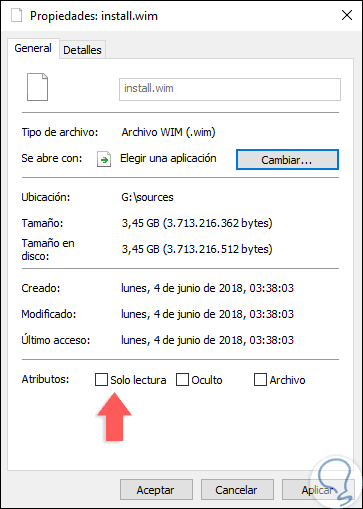
8. Verify the properties of Install.wim to fix DISM error Windows 10
In specific cases, the Install.wim file can be configured as a read-only file, so the error is generated at the time of execution with the DISM utility.
Step 1
To verify this type of permission, it will be necessary to mount the Windows 10 ISO image, go to the “sources†folder and right click on install.wim and select the “Properties†option:
Step 2
In the displayed window we go to the “General†tab and there we must validate that the “Read only†box is unchecked. Click on Apply and Accept to save the changes.
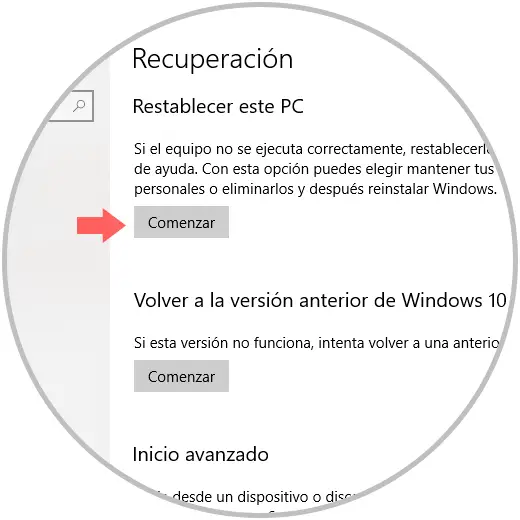
9. Reset the computer to fix DISM Windows 10 error
In the event that none of the options indicated for a complete solution to the DISM error we can resort to resetting the computer to restore all the general settings, but Windows 10 allows us to keep our files without losing them.
To achieve this, we go to the Start menu / Settings / Update and security and there we go to the “Recovery†category where we will see the following. There we click on the "Start" button located in the "Reset this PC" section and follow the steps of the wizard..
Thus, we have several solutions to allow DISM to be executed correctly in Windows 10.