We are on specific dates when more than ever, everything leads us to remember those who matter most to us. Also in this the design makes its contribution and it is that you can send your best wishes in an original way. We already know that thanks to the edition we can improve photographs but also create creations from scratch..
Today we show you some tricks to be able to design a postcard or personal Christmas greeting card. There are many styles and that is why it is you who have the last word.
Think of a design, open your Photoshop CC 2017 or CS6 and create great Christmas greetings..
To keep up, remember to subscribe to our YouTube channel! SUBSCRIBE
How to create Christmas postcard in Photoshop CC 2017 design 1
You must keep in mind that to start this project you must have material, images, brushes ... so you must first have an idea in mind, collect what is necessary and then get to work!
Step 1
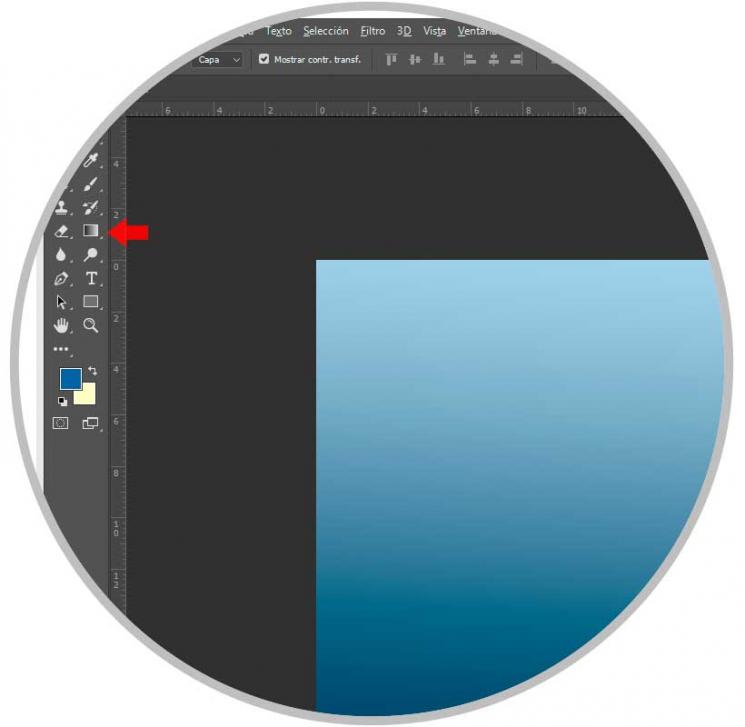
The first thing we will do is create our fund. For this we will need brushes with different shapes, for example, with snowflakes.
We will create a new layer that will be our fund and in this case we add a degraded background.
Step 2
We will recreate another new layer to insert the background ornaments with the brushes we have obtained. As a tip, create different patterns with the brush in separate layers and give each layer a different opacity, so the effect will be better. For example, a layer with motifs at 67%, another at 46% and another at 30%.

Step 3
To give a more defined background to our background, create a white rectangle that occupies our entire background. Then reduce opacity to around 30%.

Step 4
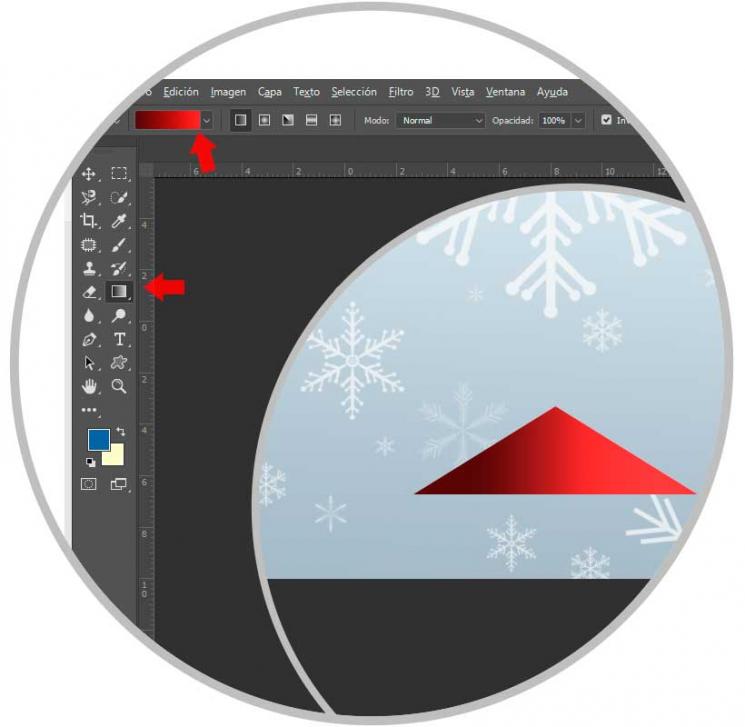
Now we will create our Christmas tree manually. To do this we go to the tools, choose Polygon Tool (choose 3 sides without smoothing) and insert a triangle in black. We duplicate it with the following combination
+ J Ctrl + J
Step 5
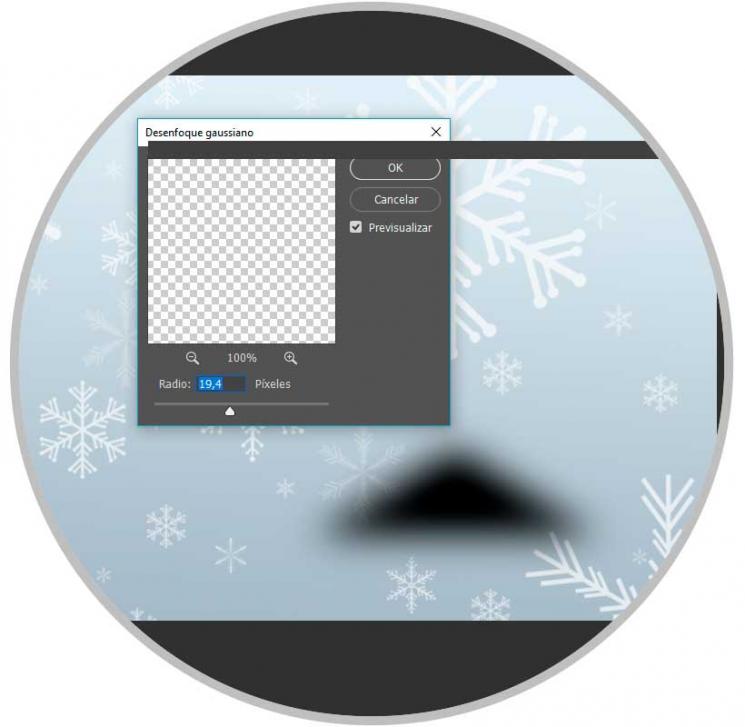
To the original triangle we will apply a Filter - Blur - Gaussian Blur. The value will be close to 20%.
Step 6
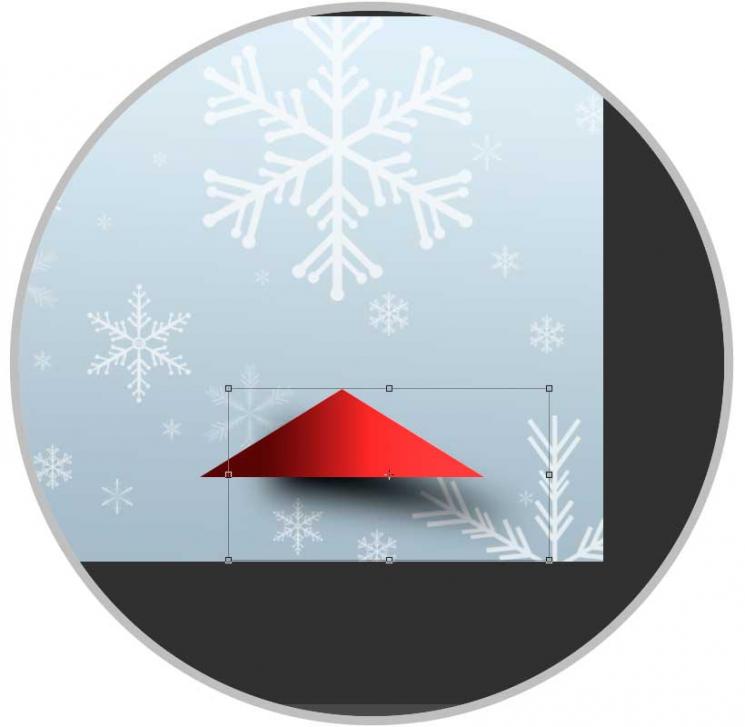
We will place the blurred triangle below the colored triangle, we will press the following combination and choose Free Transformation. We will modify this layer until the effect is shadow cast below the color triangle.
+ T Ctrl + T
Step 7
Now with the two layers selected we will duplicate them (Ctrl + J) and enter their transformation mode (Ctrl + T). From here we will right click and choose the option of Flip Horizontal so that the gradient effect is opposite. It also changes the size so that a pyramidal tree effect is created.

Step 8
Continue creating this effect alternately until you create a tree shape with the size you want.

Step 9
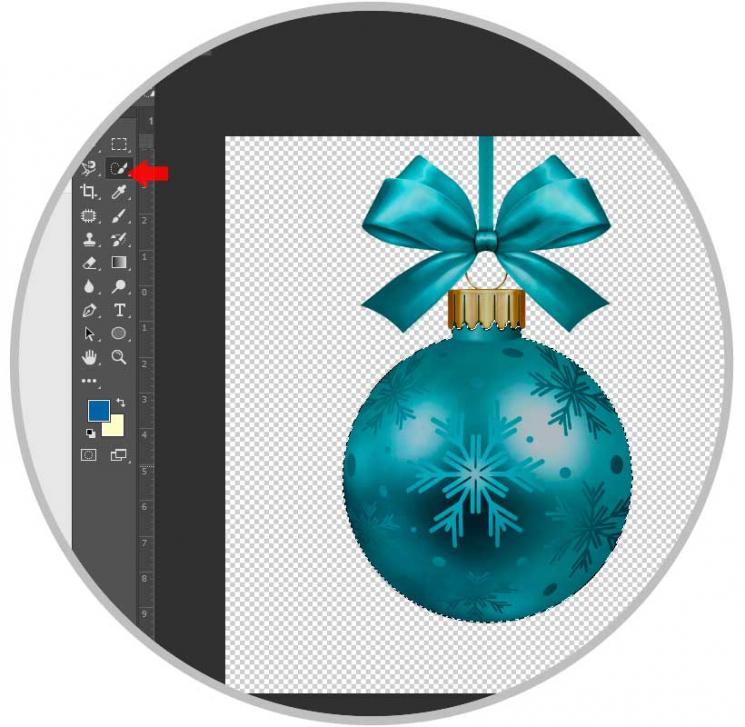
Christmas cards can be as original as you want so you can add everything you want. In this case we have chosen the image of a Christmas ball and added the TechnoWikis logo. If you want to create your own ball we will do the following. Open the image of the Christmas ball and with the tool "Quick Selection" we will select the area where our image will go.
Step 10
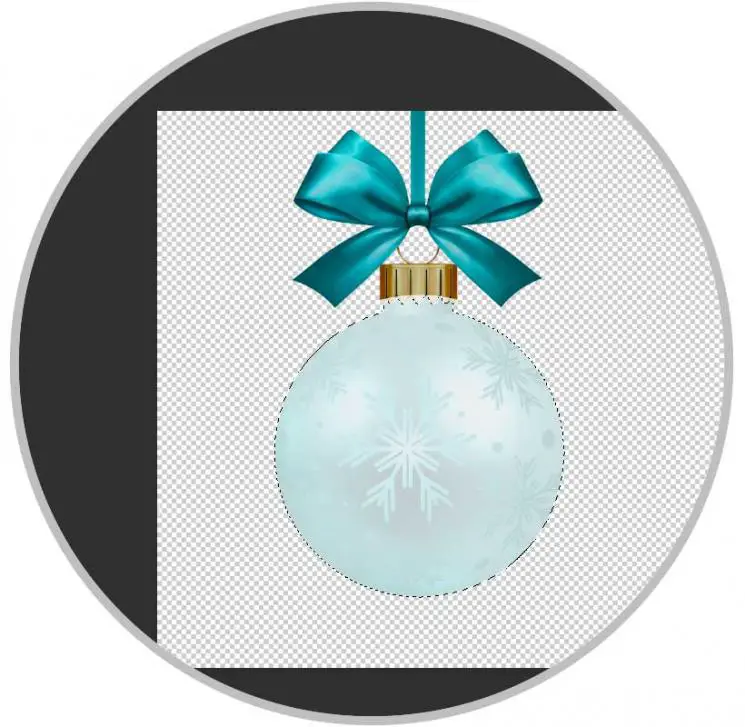
We create a white ellipse and place it on the new layer. On the white ellipse we right click "Create clipping mask". We will see how the ellipse adapts to our image.
Step 11
On our new image we put the final effect, in this case the logo. As we have done with the ellipse, we can do with any other image by attaching it to the shape of the ball. Now we just have to select all our composition, copy it and take it to our postcard project.

Note
Remember that in the “Blending Options†of each layer you can modify the visual characteristics of each image.
Step 12
Now we will add our text. For this we recommend that you look for Christmas typefaces such as “Miraculous Christmasâ€.

Step 13
Finally we can add different details such as a snow effect with brush shapes, stars, frames ...

Step 14
The creation possibilities for Christmas cards are immense so you only have to put patience and desire to congratulate Christmas with style. In the following example we have another different composition in which the tree is created with ellipses with which the inner shadow has been worked.

From TechnoWikis we encourage you to create different models and thus congratulate the Christmas holidays with love and style thanks to Photoshop CC 2017..