A frequent task when managing hard drives or any other storage device is the format .
Formatting a device is basically deleting all its information and establishing a file system for compatibility with the operating system where it is to be used..
The most frequent form of format is the fast one but we cannot forget that there is a type of low level format which is much slower, but deeper.
The low level format is designed to restore the sectors of the selected hard disk to their default values ​​and in this way we have the opportunity to recover sectors that seemed already damaged ..
The good thing about all this is that today we will see two special tools for this type of low level format without using complex commands that can damage the disk or storage device.
To keep up, remember to subscribe to our YouTube channel! SUBSCRIBE
1. How to use HDD Low Level Format to format low level disk
It is one of the most used applications worldwide for its simplicity of use, extensive features and free use.
This tool can be downloaded at the following link and we have two options:
Low Level HDD executable
HDD Low Level Format portable
HDD Low Level Format Features
Within its characteristics we have:
- Supports S-ATA (SATA), IDE (E-IDE), SCSI, SAS, USB, FIREWIRE disks
- Supports large units (LBA-48)
- Compatible with most manufacturers such as Maxtor, Hitachi, Seagate, Samsung, Toshiba, Fujitsu, IBM, Quantum, Western Digital and more.
- It supports the low-level format of FLASH cards (SD, MMC, MemoryStick and CompactFlash) using a card reader.
- Compatible with all editions of Windows systems
- The execution speed is limited to 180 GB per hour, which is 50 MB / s
Step 1
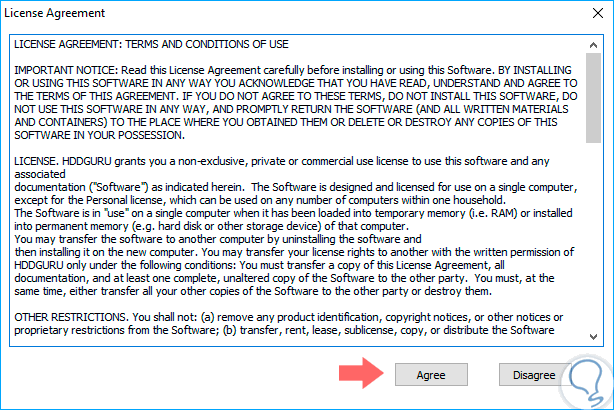
Once downloaded, in this case the portable version, we proceed to its execution and we will see the following:
Step 2
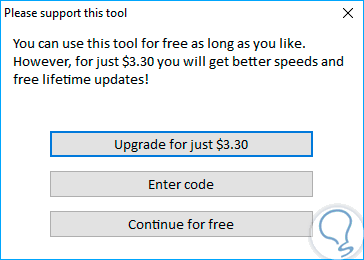
There we click on the “Agree†button to accept the application license. Later we will see the following message:
Step 3
There we have the following options:
- Upgrade to the PRO version for USD 3.30 which offers many more configuration options.
- Press the Enter Code button if we already have a purchase code.
- Click Continue for free to make use of the free version which is more than enough for the low level format.
Step 4
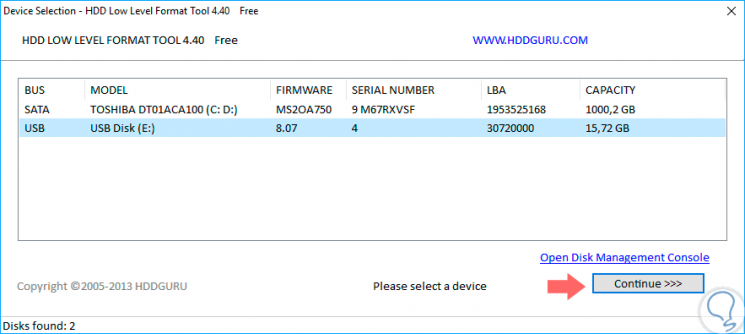
By clicking on the last option we will see the following:
Step 5
There we can see the storage units available in the equipment with details such as:
Step 6
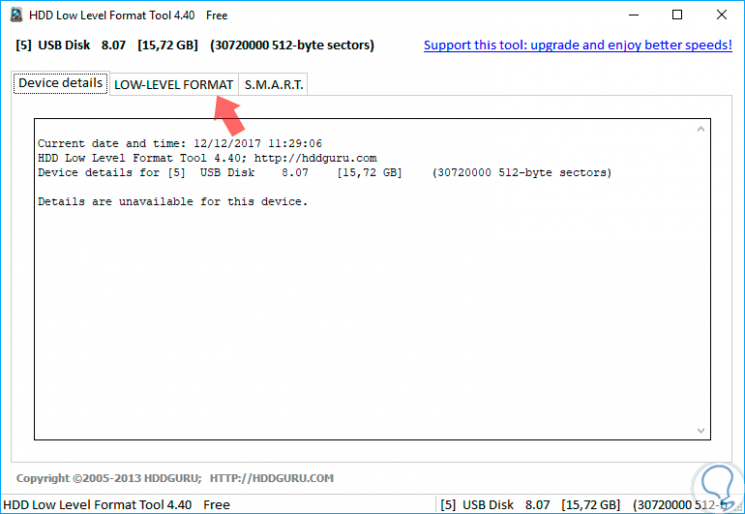
Select the unit to be formatted and click on the Continue button and the following will be displayed:
Step 7
There we have three tabs that are:
Device details
Here we find details of the selected unit.
Low-level format
There we proceed to execute the low level format process.
SMART
This option analyzes and loads the SMART data of the selected unit.
Step 8
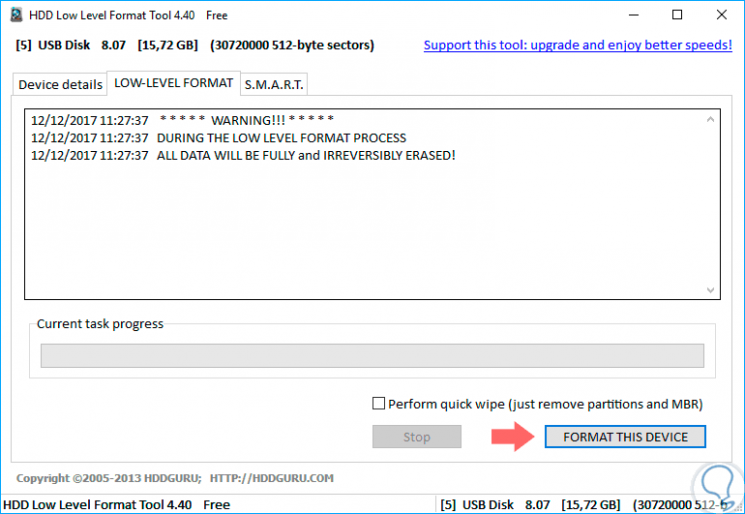
Let's go to the second tab, Low-level format and see the following:
Step 9
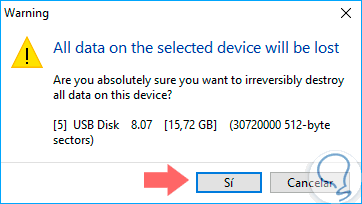
Recall that this process has no setback so we must be fully sure of the action to be performed as well as the selected unit. To start the process, click on the “Format this device†button and the following message will be launched:
Step 10
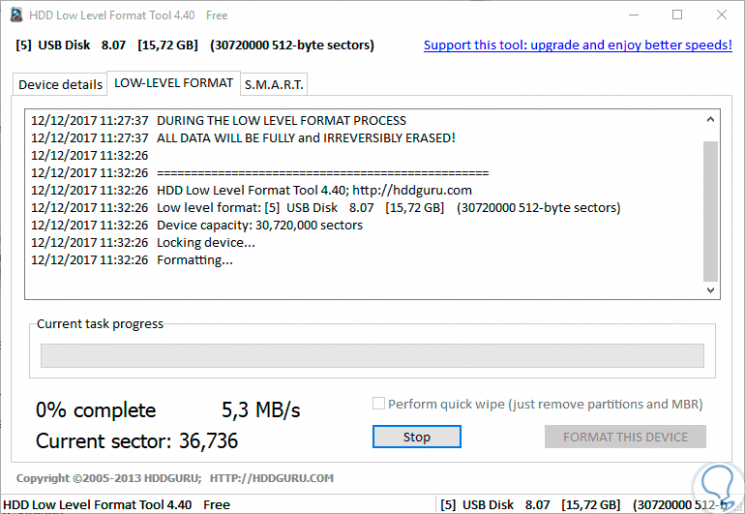
There we click on the Yes button and the formatting process of this unit will begin:
Step 11
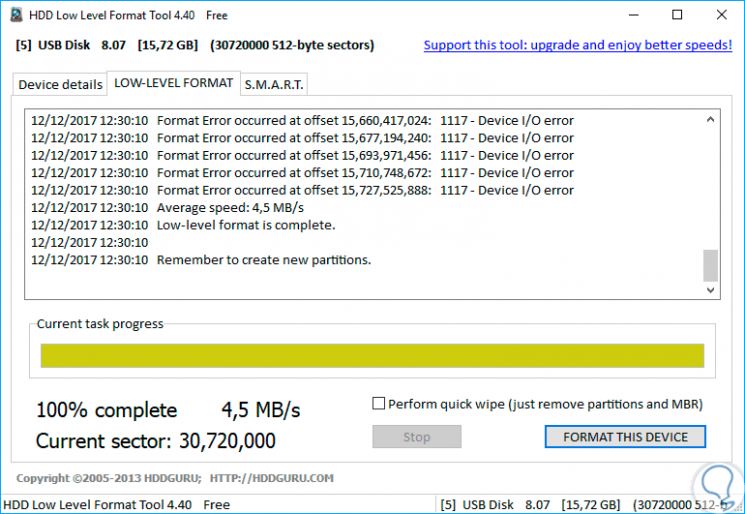
This will take a long time to complete. Once the process is finished we will see the following:
2. How to use Hirens Boot CD to format disk at a low level
The next alternative available to use is Hirens Boot CD which is a multitasking application that will allow us to perform various actions in the operating system as it is a boot disk utility.
This compilation application offers a compilation of programs to help solve most problems in the system thanks to its utilities such as:
Step 1
We can download this tool for free at the following link:
Hirens Boot CD
Step 2
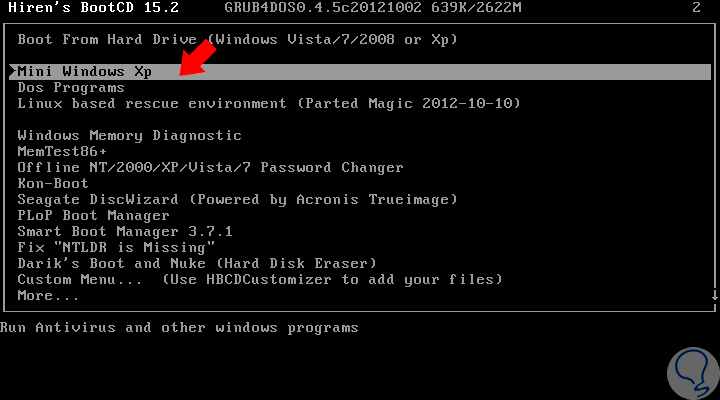
Once we download the compressed file, we proceed to its extraction and we will use the ISO image which we can mount in some virtualization program. Once we create and configure the virtual machine, this will be the first environment when starting the virtual machine:
Step 3
There we select the “Mini Windows XP†line, which is a simple version of Windows XP which can be used as an independent or separate operating system and thus use this XP without affecting the native operating system.
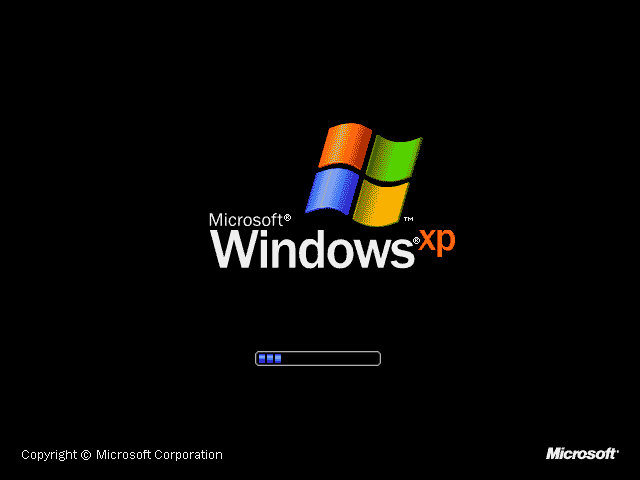
We can see that the system starts charging which takes less than a minute:
Step 4
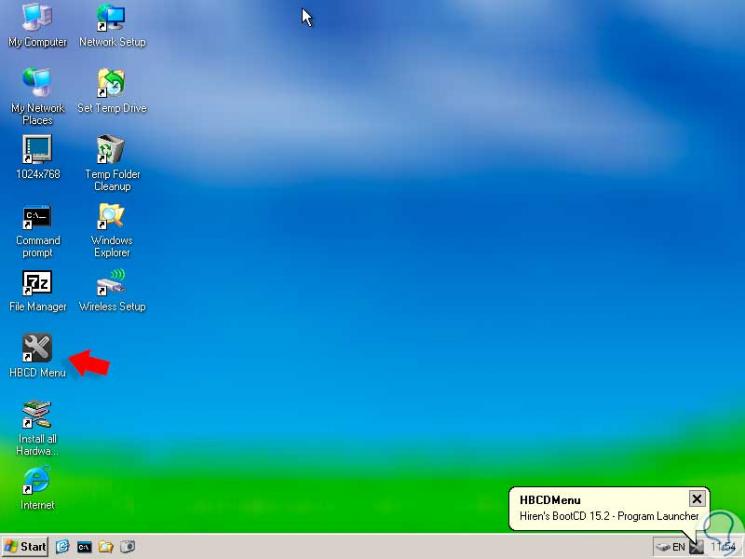
Once loaded we will see the following:
Step 5
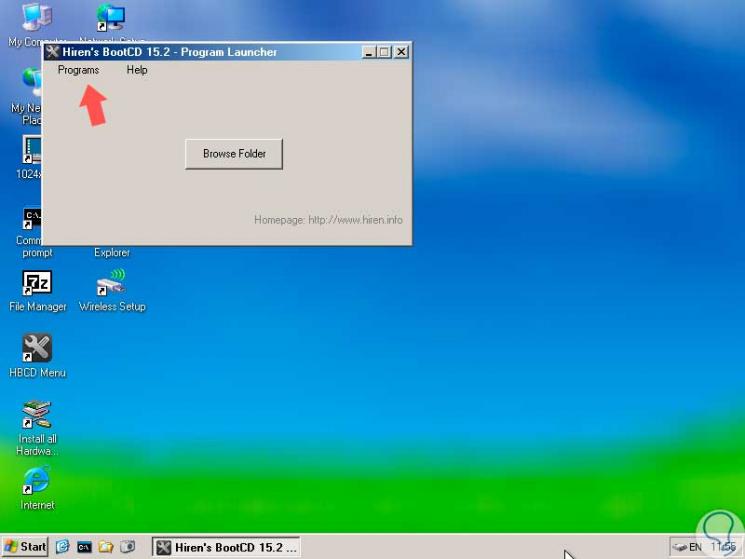
There we will double click on the “HBCD Menu†application and the following will be displayed:
Step 6
There we click on the “Programs†menu and go to the “Hard Disk / Storage / HDD Low Level Format Tool†path:
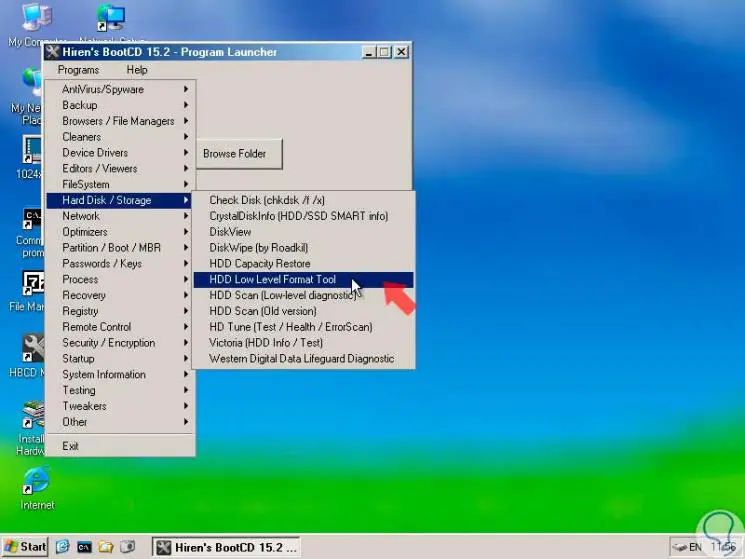
Step 7
Clicking there will display the following window where we can see the currently available storage units:
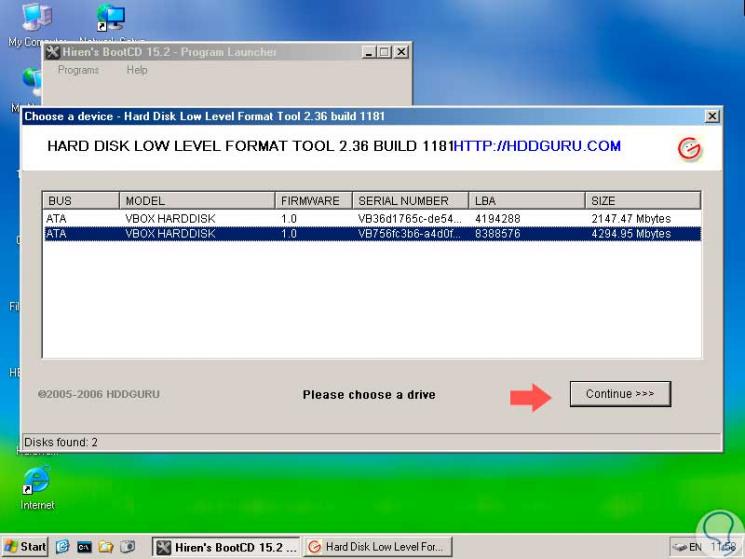
Step 8
There we select the option to format and click on the Continue button and we will see the following:
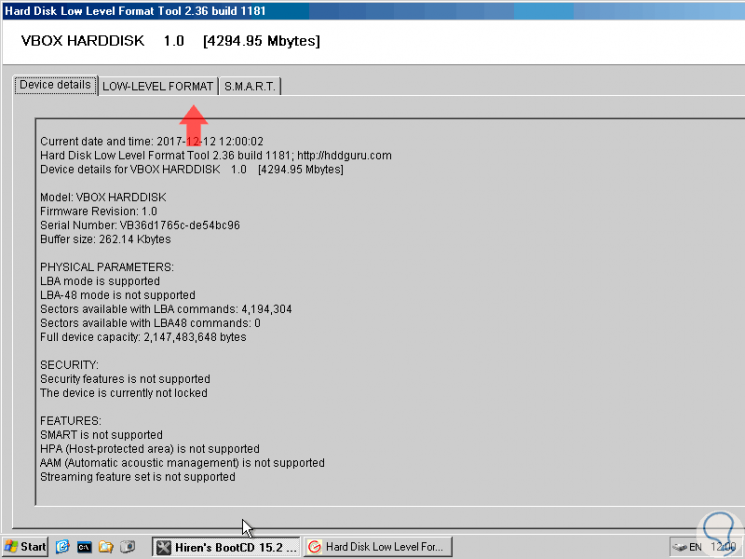
Step 9
There we have the details of the disk selected in the Device Details tab and, like the previous tool, we go to the “Low-Level format†tab and we will see this:
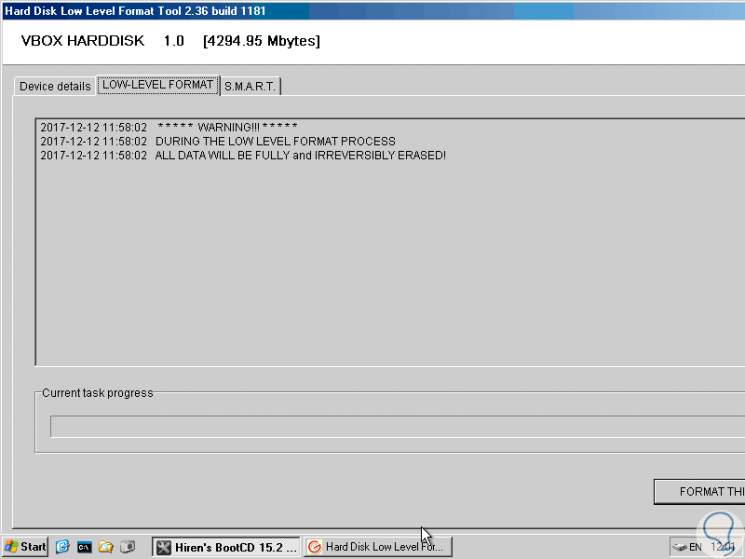
Step 10
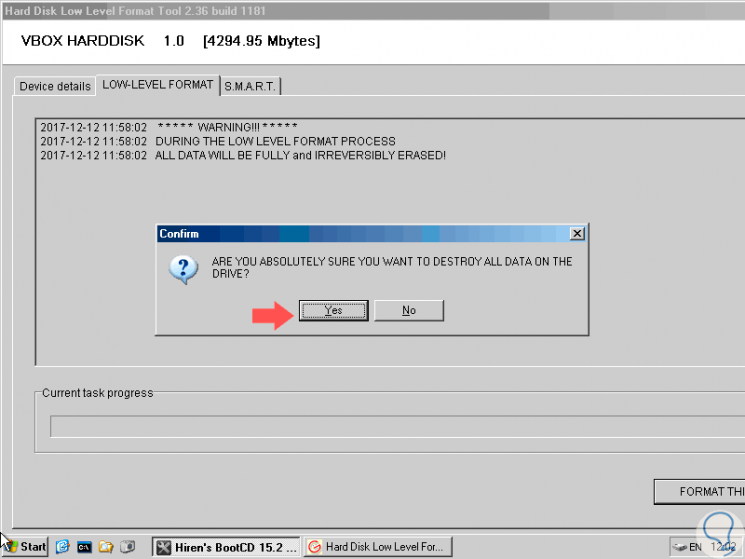
There we click on the Format this device button to start the process and we will receive the following message:
Step 11
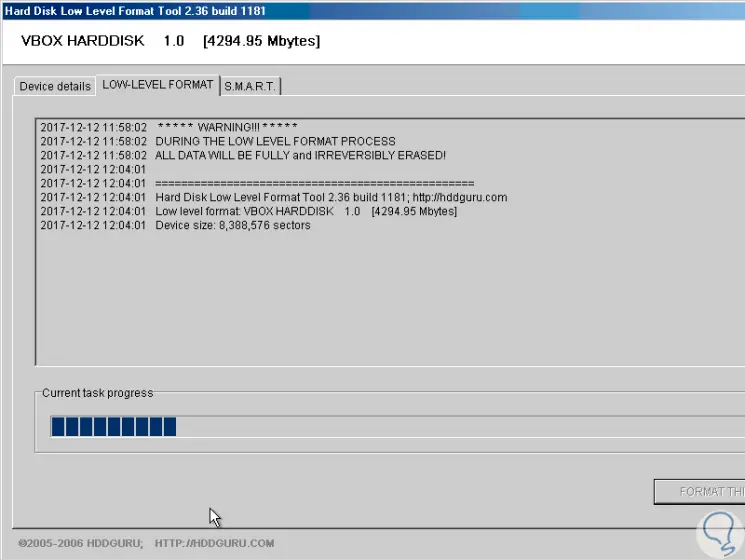
If we are sure of the action, click on the Yes button and the low level format process will begin to the selected unit:
Step 12
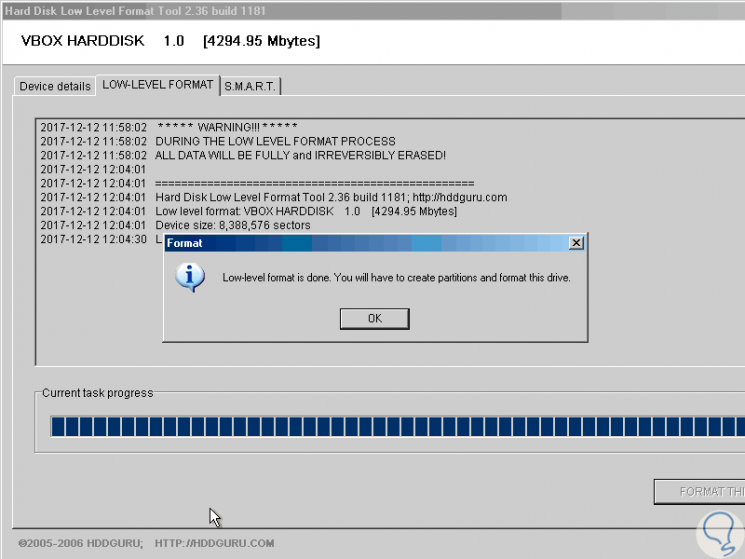
Once the process is finished we will see the following. Click on Ok to close the wizard.
This can be implemented in productive environments by creating the installation medium and configuring the respective steps on the hard drive for execution..
As we see, these two tools are positioned as a solution when executing this type of format without complications and in a practical way.