Hard drives are one of the most useful and essential hardware elements for carrying out various tasks within Windows, and on any system, both support and management..
The basic task of a hard disk is to store our files, but remember that it also installs the operating system and applications that we use daily, hence the importance of this device .
Although we currently have solid state (SDD) or traditional (HDD) hard drives we can see that there are different capacities and colors, but a task that has always been present, and will continue to be, is the formatting of these devices..
The format is nothing more than to erase the current data of the disk so that there is space to add new information, some cases where it is required to apply the format to a hard disk are:
- Need to free space for new data.
- Virus or malware involvement.
- Operational system reinstallation and more.
Now, when we use Windows 10, a system to be discussed in this tutorial, at the time of the format we have the opportunity to use various file systems which are useful for this disk to be read on other systems, we have options such as NTFS, FAT32 or exFAT , but the file system depends on each one of us.
Today we are going to see various methods such as formatting Windows 10 hard disk and formatting our hard drives independent of the file system to use..
To keep up, remember to subscribe to our YouTube channel! SUBSCRIBE
1. Format Windows 10 hard drive with Disk Manager
Step 1
To access this function with Disk Manager , we will use one of the following options:
- Right click on the Start menu, or use the Ctrl + X keys, and then select the option "Disk Management".
+ X Ctrl + X
- Use the Windows + R keys and execute the diskmgmt.msc command and press Enter or OK.
+ R
diskmgmt.msc
Step 2
In the displayed window we can see all the hard drives connected to the computer, external or internal, and to apply the format from this option we can execute any of the following options.
First option to format disk
Right click on the disk to be formatted and select the option “Delete volumeâ€:
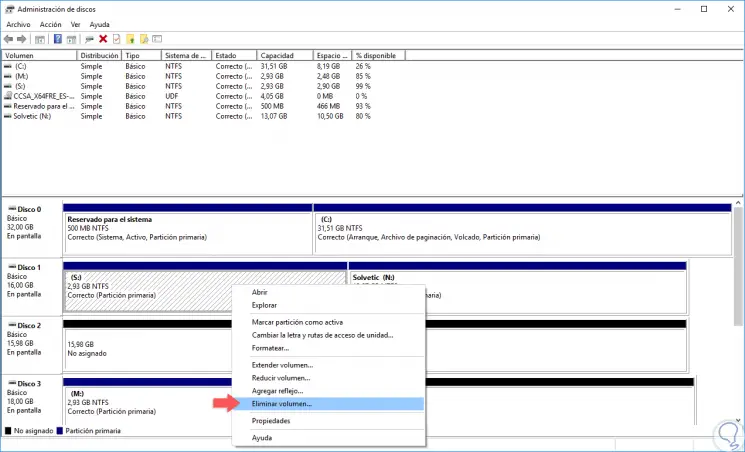
By selecting this option we will see the following:
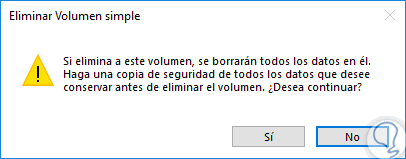
There we click on the Yes button and we can see that the selected hard disk has been left with this unallocated space:
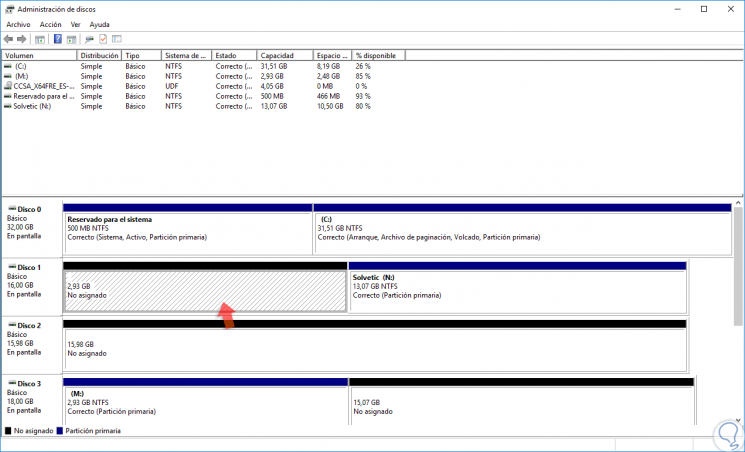
Now, we can allocate the free space completely or partially and create new partitions, for this, we will click on the hard disk and select the option “New simple volumeâ€:
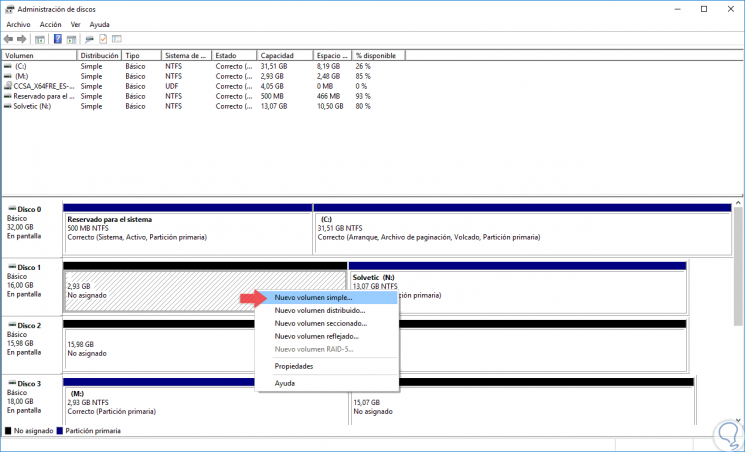
The following wizard will be displayed where we will allocate the desired space:
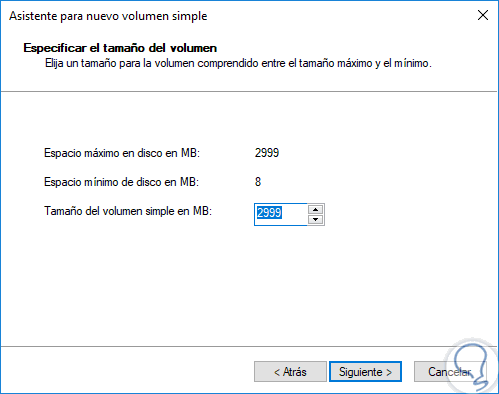
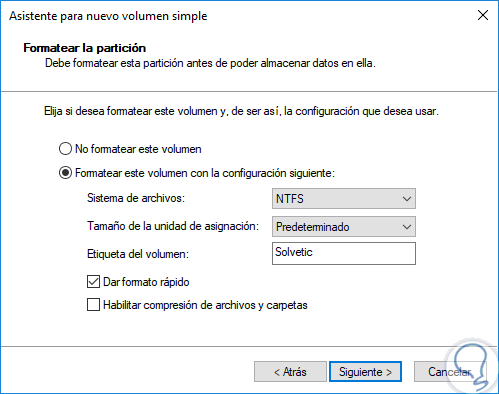
Finally we can select the type of file system to use, the disk label and other values. Click on Next and thus we have formatted this hard disk.
Second option to format disk
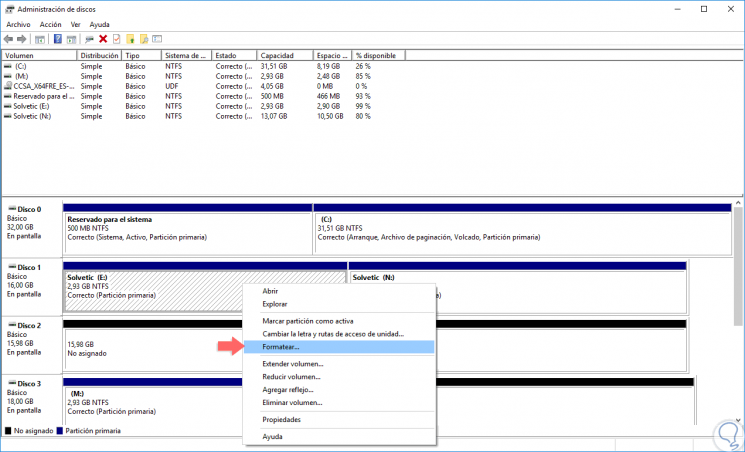
The second option to use from Disk Manager in Windows 10, is to right click on the hard disk and select the "Format" option:
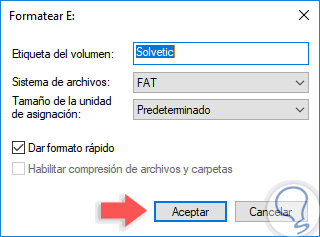
The following window will be displayed where we define label, file system and others. Click on "Accept" to start the formatting process.
2. Format Windows 10 hard drive with PowerShell
PowerShell is the administration console in Windows 10 which offers us the possibility of carrying out various administration and management tasks on many operating system parameters in general.
Step 1
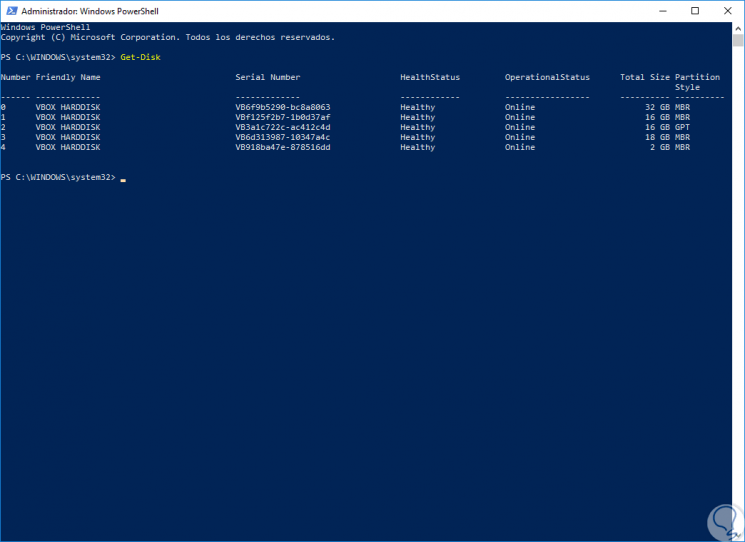
To format a hard disk using Windows PowerShell, we will access the console as administrators and the first command to execute will be the following:
Get-disk
Step 2
This command will give us the detailed list of the disks connected to the equipment:
Step 3
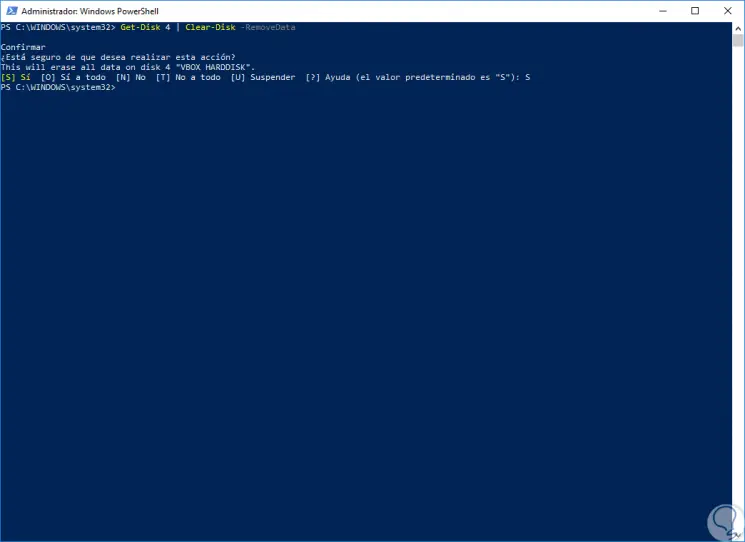
Now, let's run the following syntax to format the hard drive:
Get-Disk “# of disk†| Clear-Disk -RemoveData
Step 4
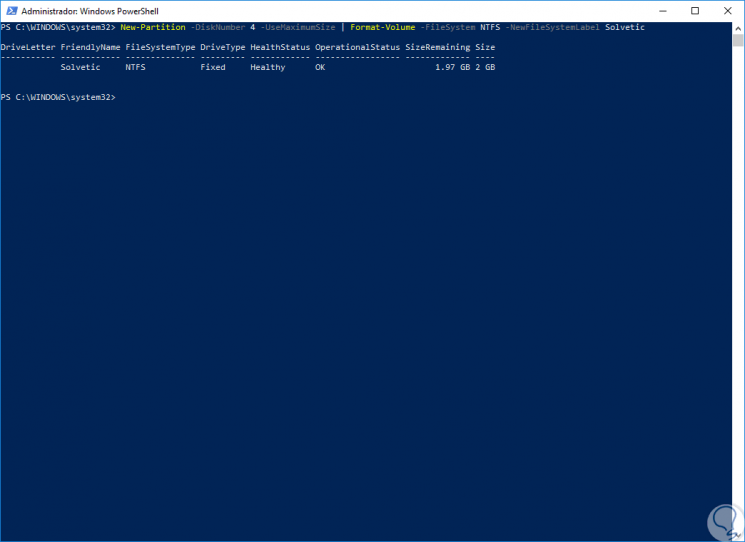
Once this is done, we will execute the following syntax to define the file system and disk label:
New-Partition -DiskNumber “disk #†-UseMaximumSize | Format-Volume -FileSystem NTFS -NewFileSystemLabel “Labelâ€
Step 5
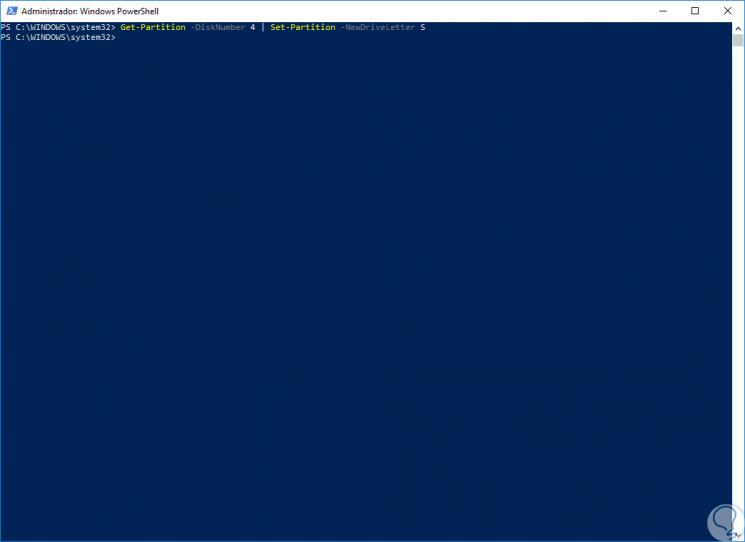
Finally, to establish the letter of the unit we will execute the following:
Get-Partition -DiskNumber “disk #†| Set-Partition -NewDriveLetter "Letter"
3 . Format Windows 10 hard drive with CMD command console
To format a hard disk through commands , we made a very interesting tutorial that is related and it is worth it to take it into account to perform this task that you will surely need to perform at some time, whether on a USB disk , normal, partition etc. .
To keep up, remember to subscribe to our YouTube channel! SUBSCRIBE
Showing directly here an example of use to format with Diskpart command, it would be the following:
Step 1
Logically our first step should be to open the command prompt as an administrator.
Step 2
In the CMD system command window, we type command:
Diskpart
Now press "Enter."
Step 3
We write the command:
List Volume
we will see that when pressing Enter we will see all the available units.
Step 4
If what we want is to format a partition, we will first have to select it with the following command:
Select Volume X
We must substitute X for the volume number of the partition we want to format.
Step 5
Now with the following command we can format the selected drive or partition.
Format fs = ntfs Quick
Format fs = fat32 Quick
Use one of these two commands depending on whether the format is FAT32 or NTFS that you use.
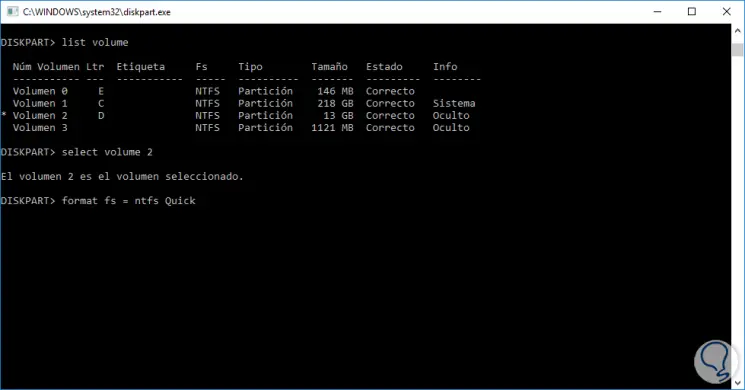
As you can see, in this way it is possible to use the Windows CMD command prompt to be able to format discs, either internal or external. Commands sometimes facilitate and save us to perform this classic task such as formatting.
4. Format Windows 10 hard drive with File Explorer
The traditional method is without a doubt from the system file explorer.
Step 1
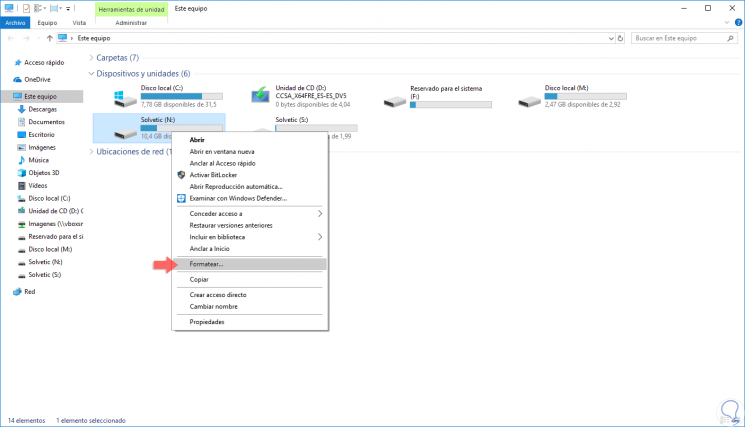
To do this, we access the browser, right click on the disk to be formatted and select the "Format" option:
Step 2
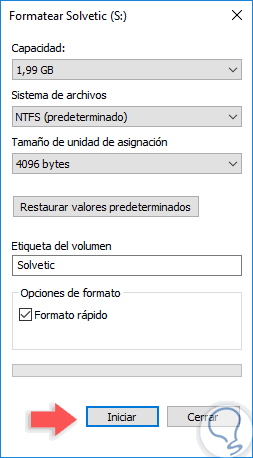
The following window will be displayed:
Step 3
There we define the file system, label, etc., and when this is defined, click on OK and the following will be displayed:

Step 4
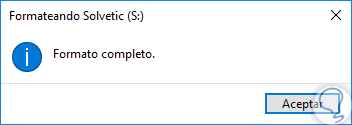
There we click on OK to confirm the action and at the end of the format we will see the following confirmation message. It's that simple to use the Windows file explorer.
5. Format Windows 10 hard drive with third-party programs
There are several utilities developed for the format of our hard drives, but one of the most practical is DBAN, this is an application that comes in ISO format and can be downloaded at the following link:
DBAN
Step 1
This utility is practical for secure deletion of data. Once we download the ISO image, we can burn it to a bootable CD or USB and it will be necessary to configure the BIOS or UEFI boot from that medium.
To know how to edit this order we can visit the following link:
Change boot order
Step 2
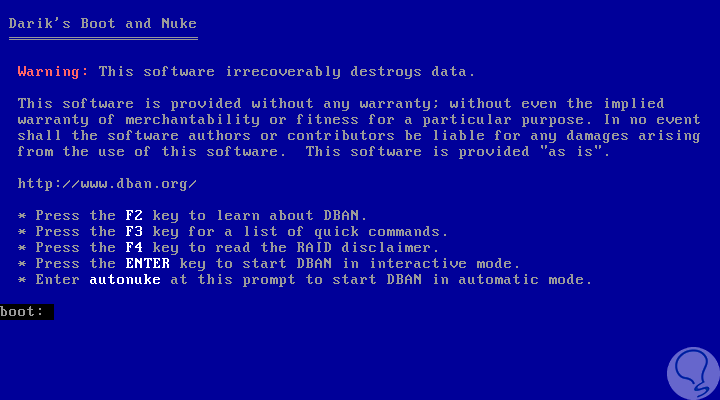
Once the equipment is executed from there we will see the following:
Step 3
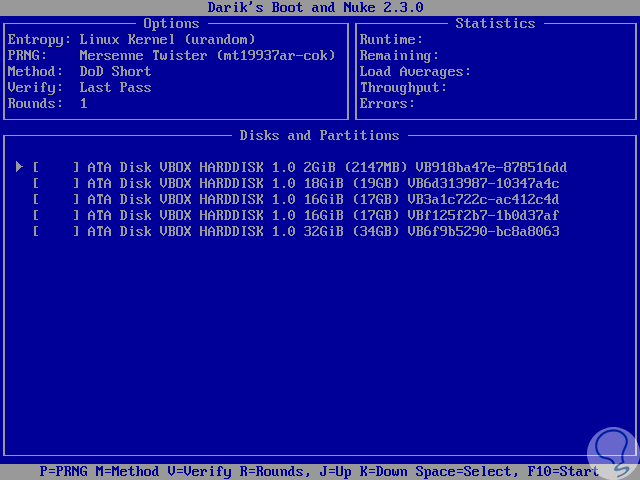
There we have several options and in this specific case we must press Enter and the following window will be displayed where we will see the disks that are currently connected to the equipment:
Step 4
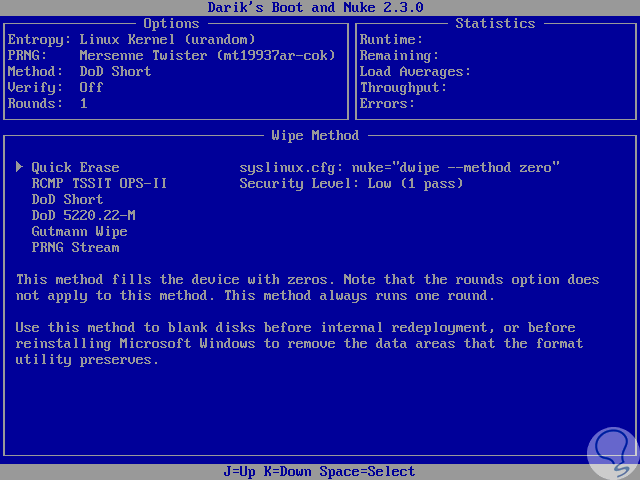
With the scroll arrows we locate the hard disk and confirm it with the Space key and now press the M key to access the format method for the selected disk and there we select the “Quick Erase†option:
Step 5
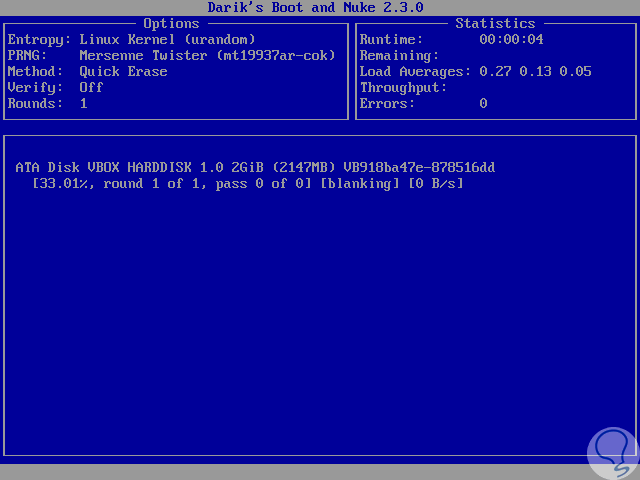
Press Enter and the following will be displayed:
Step 6
There we press the “F10†key to start the formatting process of the selected disk, once this process is finished the system will be restarted and we will see the following:
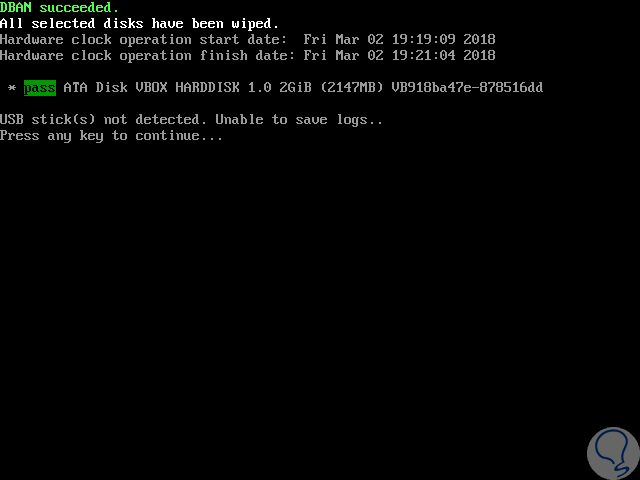
We have seen various methods to format Windows 10 hard drive safely and thus make the most of its use.