Hard drives have been acting as one of the most essential hardware components for decades since the operating system and applications or programs are installed on them. In addition to this, there we keep the files we work daily and also serve as a backup for the most sensitive information.
Today we have seen how hard drives are offered in different shapes, designs, sizes and technologies (HDD - Mechanical Disks or SDD - Solid State Drives) where aspects such as performance, speed, storage capacity, integrated security and plus..
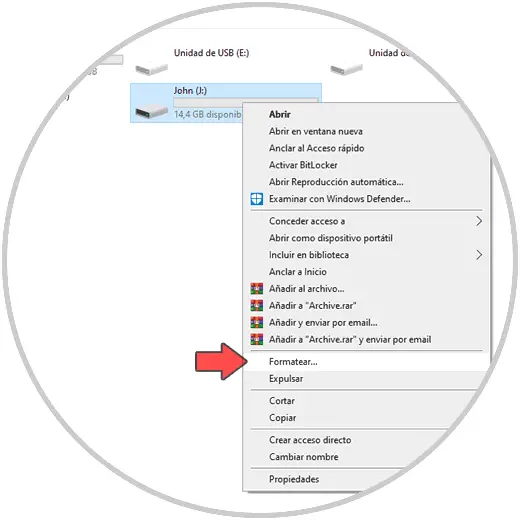
Even with all this, there is a task that will continue to be present in the functions of administrators and users and is to format the hard disk or USB. This process we perform by right clicking on the unit and selecting "Format":
Theoretically, the format is responsible for deleting the entire media content. However, we have to ask ourselves if this is really so.
You should know that when we format the hard disk or USB drive , what really happens internally, is that the data is not deleted in 100% of the disk, but that these are housed in small memory spaces of the physical disk and with the proper recovery tools we can access there and retrieve that information..
To prevent this, it is recommended to apply a low level format (yes, we know that it is more delayed) which took its first steps with the MFM hard drives t
What is the low level format?
This type of format, also called LLF (Low-Level Formatting) or Zero-Fill, is a process in which the correct initialization of the medium is guaranteed when executing an integral erase with the method of filling the entire hard disk drive with zeros or half USB. This process will basically make the hard drive appear fresh from the factory.
Possible reasons to use this format
- In order to eliminate malware or a virus which has the characteristic of not being able to be removed without destroying the boot sector.
- Delete all confidential information for privacy and user security reasons.
- Transfer or update from one operating system to another.
- Detect bad sectors on the disk and proceed with overwriting them.
As we have mentioned, there are two types of hard drives (HDD and SDD), if we use mechanical disks or HDD, in this the head will make a tour of each sector in order to mark all the magnetized units as empty. This is the reason for a low level format to take so much time, since it will be applied to all memory.
The low level format will not create the disk structures and less will implement the data tables since the disk will be absolutely from scratch, but modern disk drives (SDDs) integrate different reserve sectors for data reallocation purposes..
You should consider the following
When the hard disk or USB drive is filled with zeros, 100% of the data recorded there will be destroyed, so before we do anything back up this data
There are basically three types of low level format:
Erase Track ZERO (Delete the zero track)
This method only deletes the first 63 sectors of the unit, this will take between 1 and 2 seconds, this process eliminates the Master Boot Record (MBR) and the Partition Table.
Timed Erase (Timed Erase)
It is a process in which sectors are deleted using different time limits of up to 5 minutes between each one and with this option the sectors located at the beginning of the unit will be overwritten.
Full Erase
As the name implies, it is a method where each sector of data is deleted from the unit so it will take time to complete
What is a logical format of a hard drive or USB
Remember that to format a medium in Windows 10 we right click on it and select "Format". This is a logical level format which consists of providing permissions to the operating system so that it can overwrite data on the sectors or memory cells where the information is hosted, but it will remain hidden somewhere on the disk.
Without more words let's see some methods to make a low level format in Windows 10.
To keep up, remember to subscribe to our YouTube channel! SUBSCRIBE
1. How to use the HDD Low Level Format utility to format hard disk or USB at low level in Windows 10
HDD Low Level Format is a utility specially developed for this type of low level format which is available at the following link:
HDD Low Level Format
It will be possible:
- Download a free version for personal use which has a limited speed of 180 GB per hour, something like 50 MB / s.
- Pay USD 3.30 for a personal use license with no speed limit.
- Pay USD 27.00 for corporate environments.
Main features
Some of its main features are:
- Compatible with Windows and macOS operating systems.
- Compatible with LBA-48 units.
- Supports manufacturers such as Maxtor, Hitachi, Seagate, Samsung, Toshiba, Fujitsu, IBM, Quantum, Western Digital and many more.
- It is fully compatible with disk interfaces such as S-ATA (SATA), IDE (E-IDE), SCSI, SAS, USB, FIREWIRE.
- Supports the low level format for FLASH cards (SD, MMC, MemoryStick and CompactFlash) through the card reader.
Step 1
Once downloaded we proceed to its execution and we will see the following:
Step 2
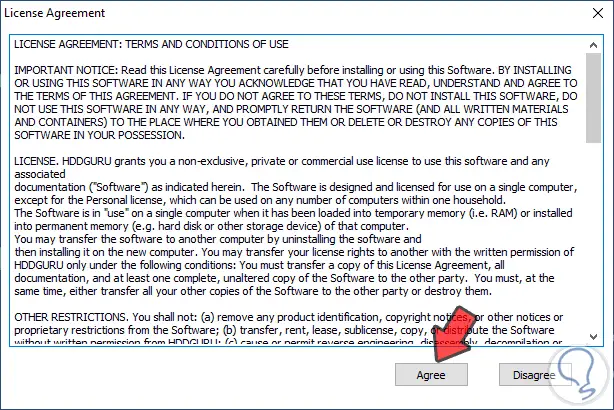
We click on the Agree button to accept the terms of the license and then we will see the following:
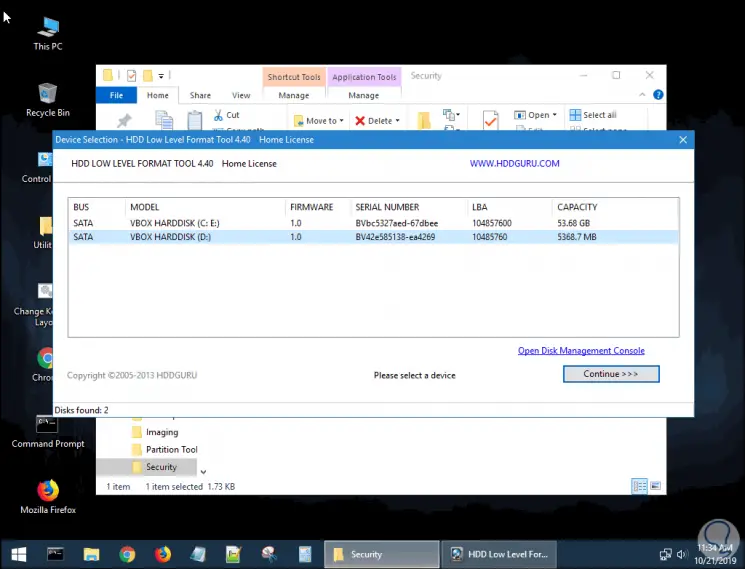
Step 3
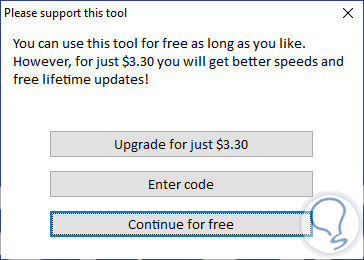
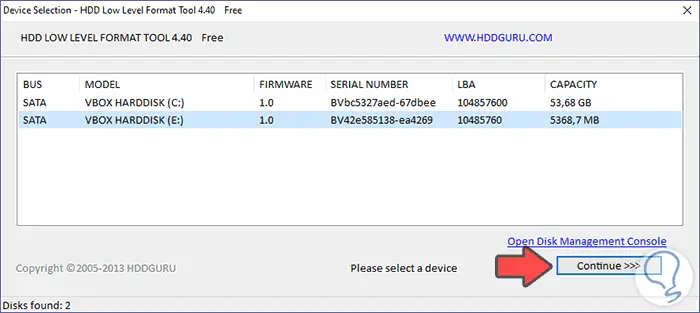
There we click on the “Continue for free†button because it is for personal use and in the following window we will select the hard disk or USN drive to be formatted at a low level:
Step 4
Once selected we click on “Continue†and in the next window we go to the “LOW-LEVEL FORMAT†tab:
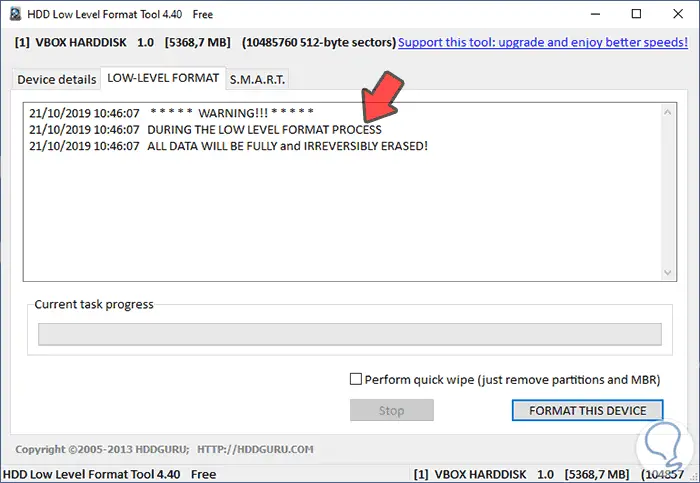
Step 5
To apply a logical format, we activate the “Perform quick wipe†box but as this is not the case, we will directly click on the “FORMAT THIS DEVICE†button and we will see the following:
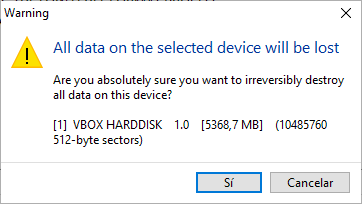
Step 6
There it is indicated that all the data will be deleted, we confirm the action by clicking Yes and the low level format of the selected unit will proceed:
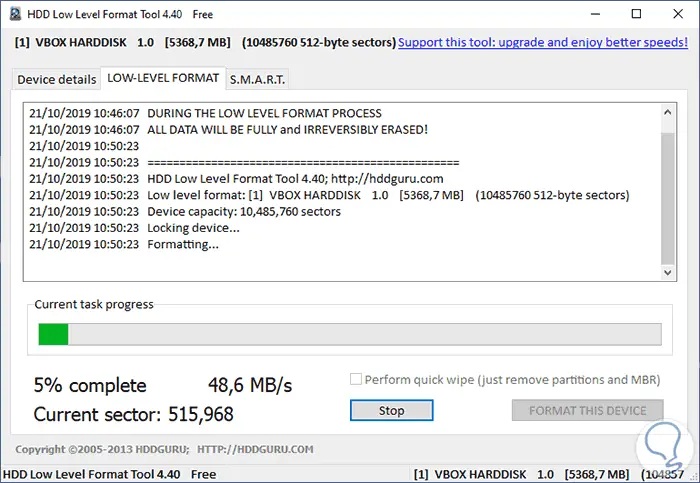
Step 7
When this process ends we will see the following:
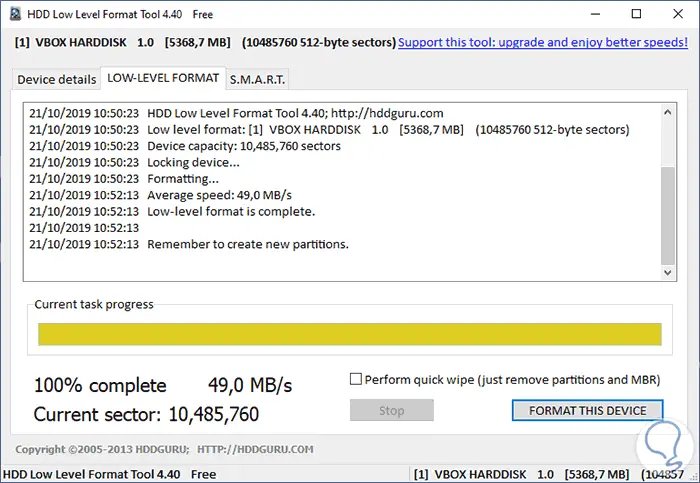
As we can see, the process is completed, the erasure speed and the number of erased sectors are indicated, as an end point, remember to create new partitions with the selected unit.
In this way HDD Low Level Format is one of the most comprehensive solutions for this process of low level format in Windows 10.
2. Format Windows 10 hard drive or USB using Hiren's BootCD
Well-known to most of all of us in the IT field, Hiren's BootCD is a small suite of utilities to carry out various support tasks of both software and hardware.
Your download is available at the following link:
Hiren's BootCD
This new edition supports UEFI boot and requires a minimum of 2 GB of RAM for optimal operation. This suite integrates programs in approaches such as:
Step 1
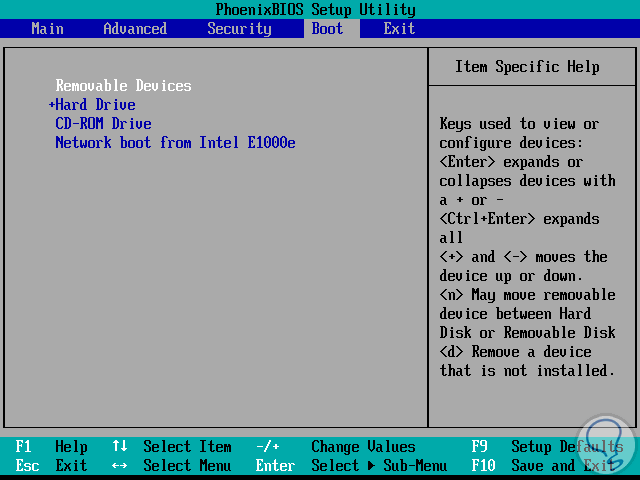
Once we download this utility we must burn it to a bootable DVD or USB since its use is through this method. When it is recorded we must go to the BIOS or UEFI of the device and in the Boot section establish what method to use:
- Removable Devices for USB
Step 2
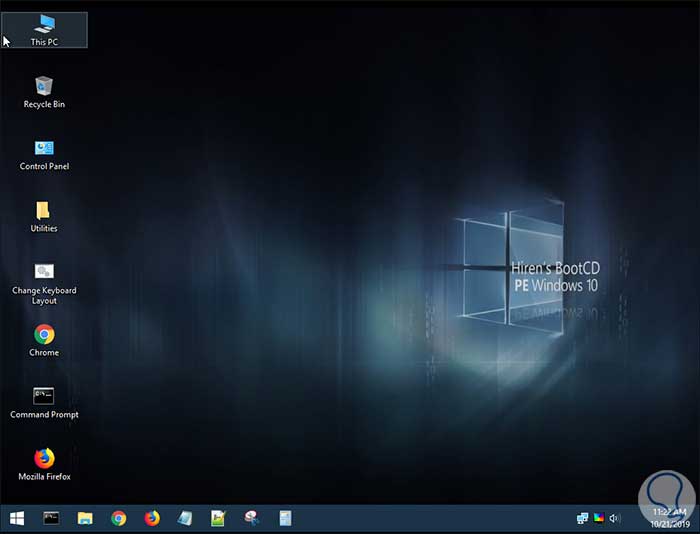
Now there is a topic to consider and it is as follows. Hiren's BootCD PE (Preinstallation Environment) is a restored edition of the traditional Hiren's BootCD based on Windows 10 PE x64 to which it had its last update in 2012. This implies an app with few updates but with this latest version of Hiren's BootCD PE we will have the popular tools of Hiren's BootCD only in a different environment, when we start from the ISO image we will be directed to an environment similar to this:
Step 3
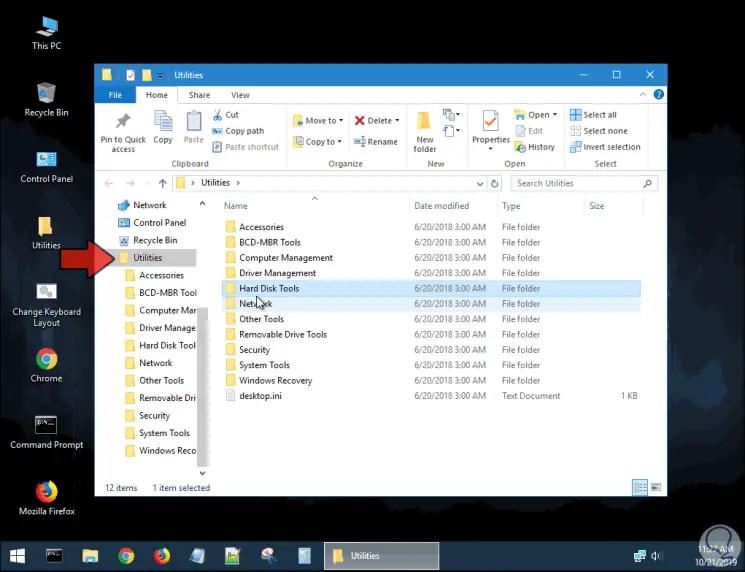
As you can see it is a traditional Windows 10 environment. There we will go to the “Utilities†folder where we will see the following:
Step 4
We select the “Hard Disk Tools†folder and there we open the Security folder where we will find the HDD Low Level Format utility that we have already worked on:
Step 5
There we run the utility and we must repeat the whole process already mentioned before:
Now, this is due to the updates that have been applied to this utility.
3. Format Windows 10 hard drive or USB using Hiren's BootCD previous version
It is possible to make use of the old version of Hiren's BootCD which is available at the following link:
Hiren's BootCD old version
Step 1
With this version at the time of executing the ISO we will see the following:
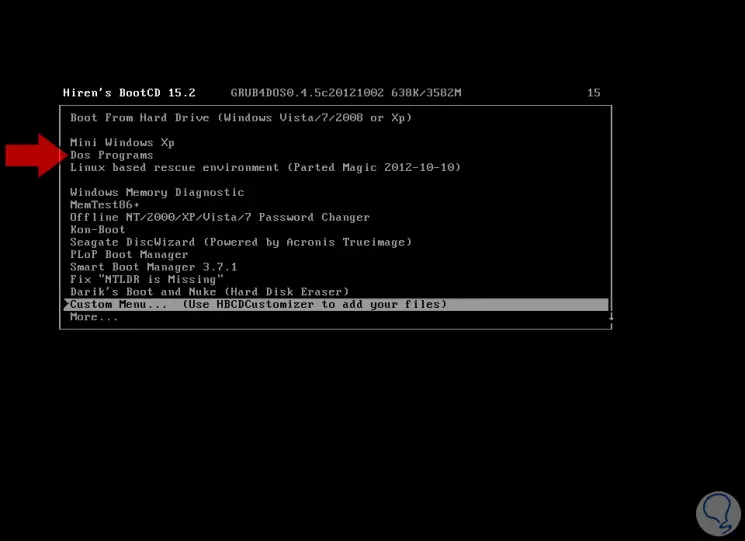
Step 2
There we go to the “Dos Programs†line and then select “Hard Disk Toolsâ€:
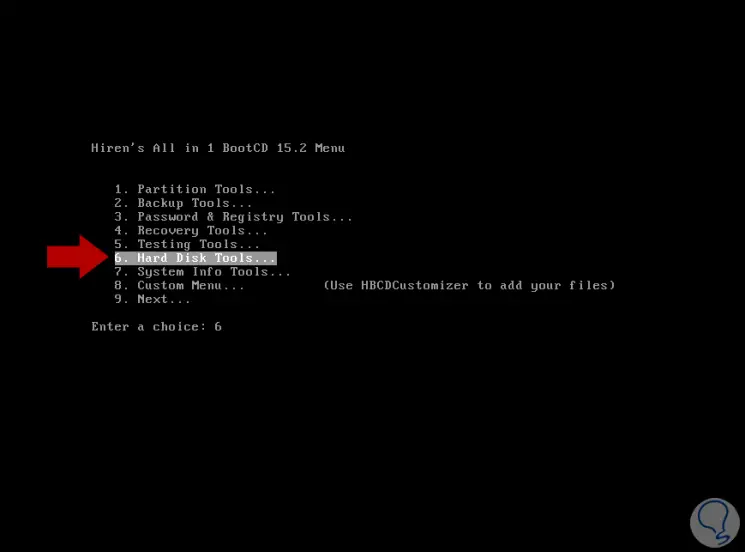
Step 3
We will see the following and go to the More line:
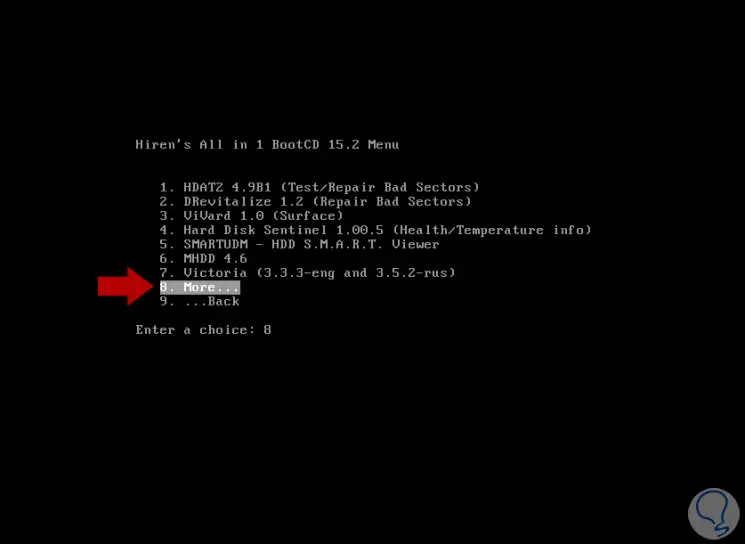
Step 4
Then we locate the WDClear utility:
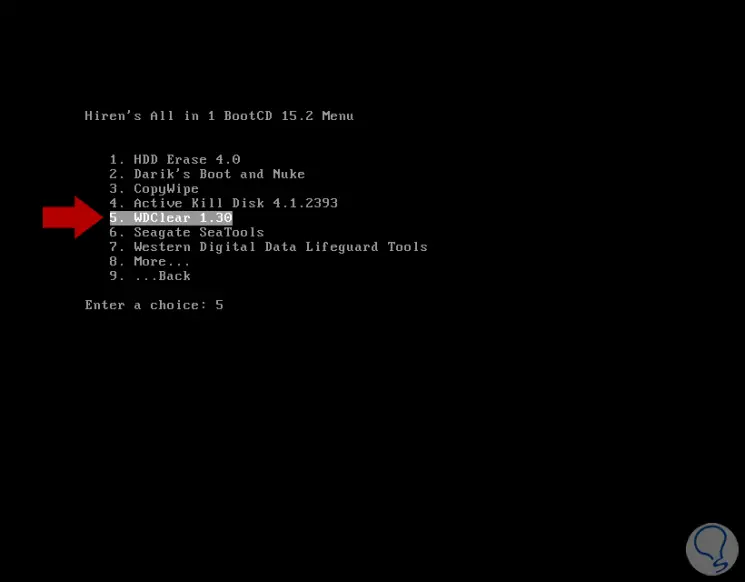
Step 5
Press Enter and after the dependencies are loaded we will see the following:
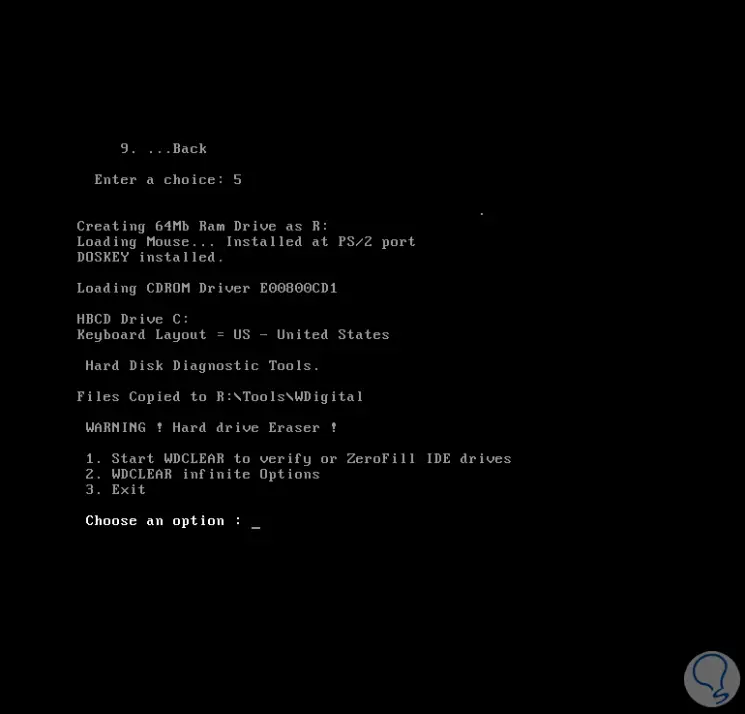
Step 6
There we select the desired option which, for the process we carry is option 1 “Start WDCLEAR to verify or ZeroFill IDE driversâ€, press Enter and we will see the following:
Step 7
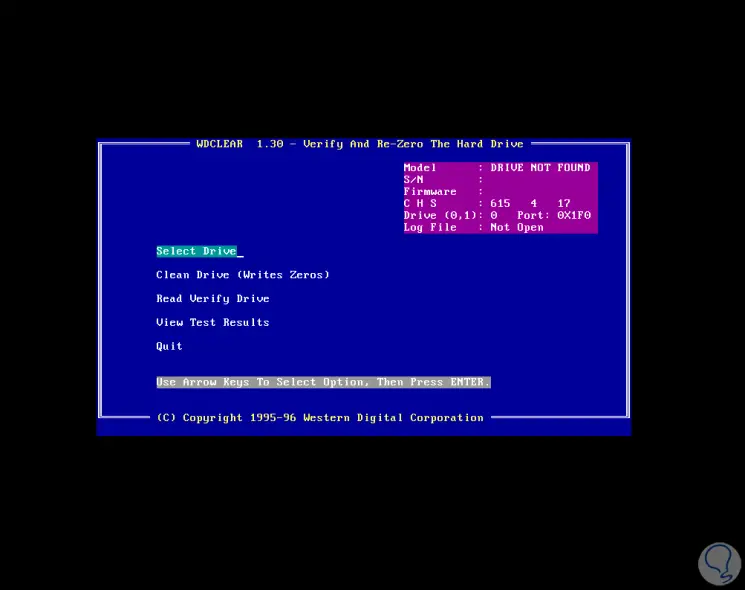
There we select the unit with the “Select Drive†option and after this we click on the “Clean Drive (Writes Zeros) option to execute the process, but first we will receive the following warning:

Press the R key to execute the low level format, but as we mentioned this process is obsolete and it is more advisable to use HDD Low Level Format.
Note
As you can see, WDClear does not detect hard disk drives due to their age, but it is an option that TechnoWikis gives you in case you want to use it.
4. Format Windows 10 low-level hard drive or USB with DBAN
DBAN (Darik's Boot and Nuke) is a freeware utility that offers a system of six (6) erasing passes which guarantees the complete erasure of the hard disk or USB drive.
Your download is available at the following link:
DBAN
Most outstanding features
Some of its most outstanding features are:
- Deleting data locally or remotely through the developer's administration console (paid version).
- Automatic detection and unlocking of blocked units.
- Simultaneous high-speed deletion of several units simultaneously.
- SSD detection and secure deletion with the utility's own SSD method.
- Compatible with HMG / CESG, NIST, BSI and DoD erase methods.
- Ability to format SATA drives after the process.
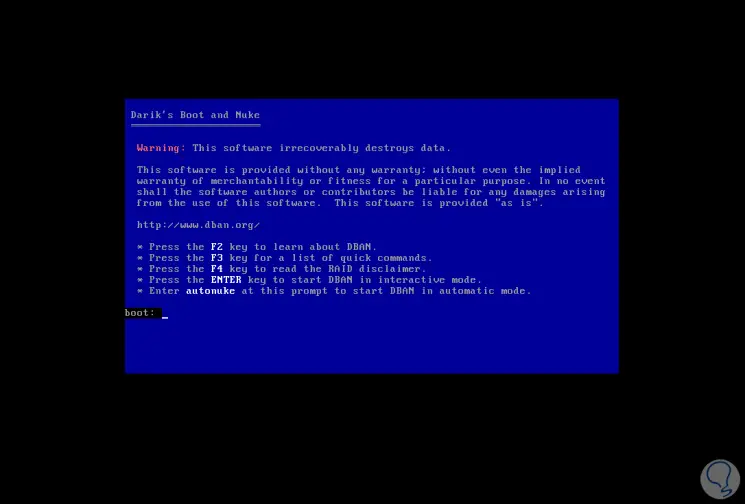
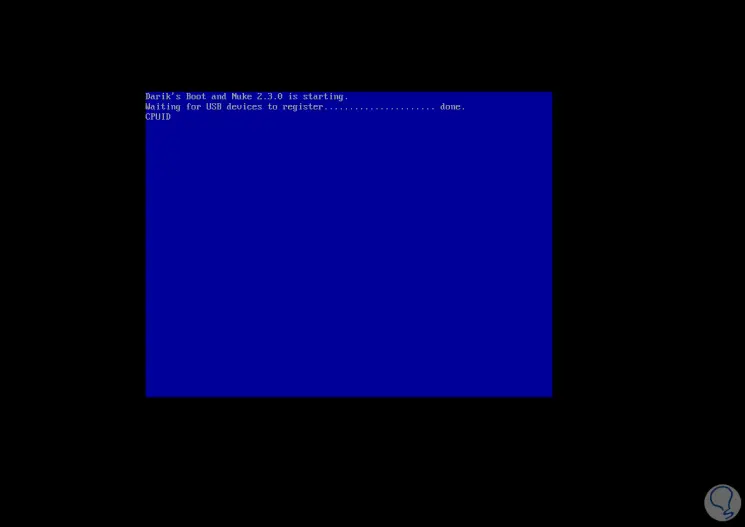
Step 1
Like the previous one, we must create a bootable USB or burn it to a DVD and then from the BIOS define the boot method. Once done we will see the following:
Step 2
Press the Enter key and the analysis process will take place:
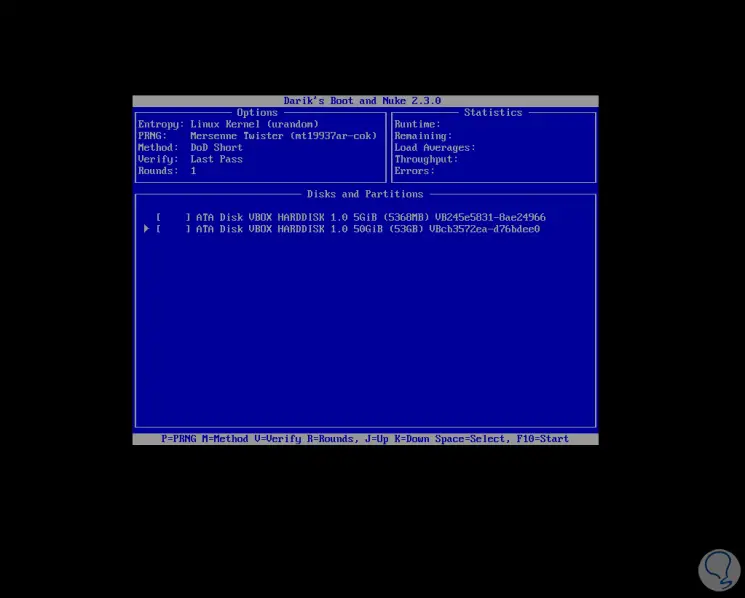
Step 3
After this we will select the unit to delete:
Step 4
Press Enter and the unit will be selected:
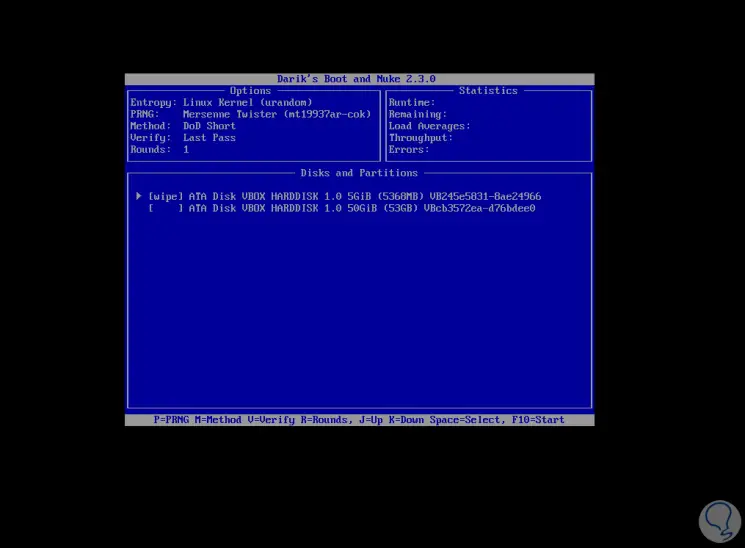
Some options are:
- M key to define the erase method to use.
- R key to define how many laps will be executed.
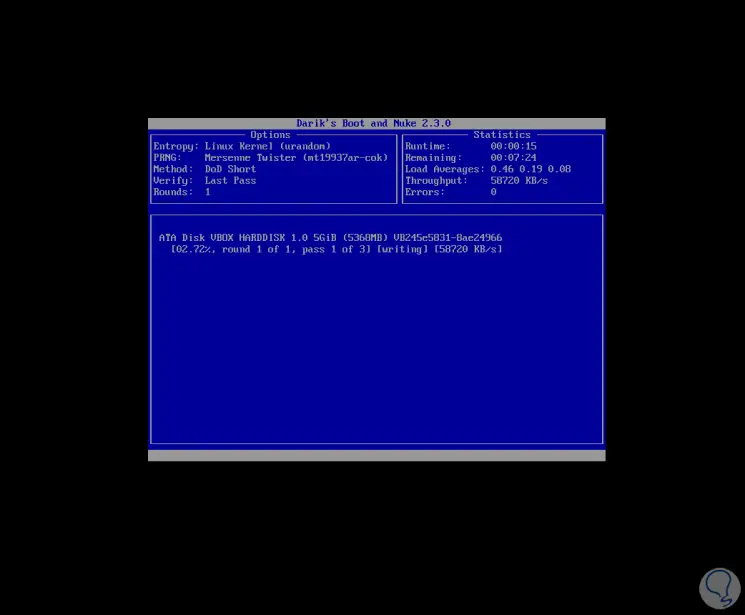
Step 5
After selecting the unit, press the F10 key to start the low level format process:
Step 6
When this has come to an end, we will observe the following:
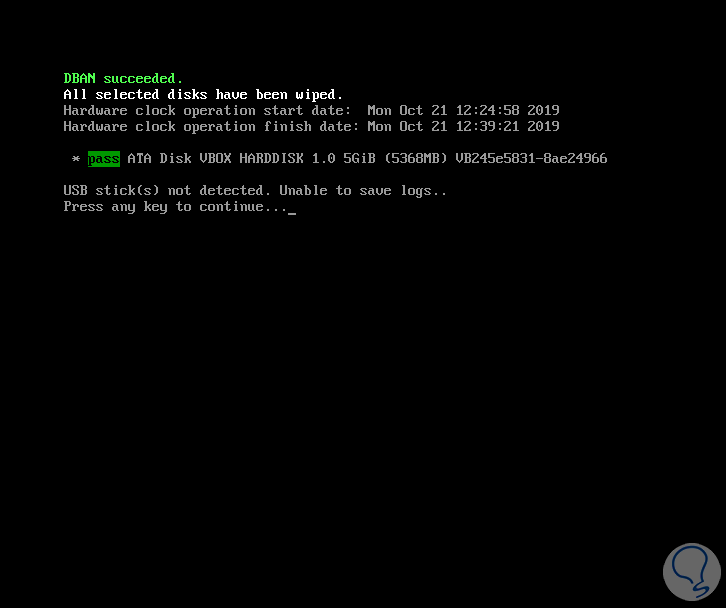
As we see, the deletion process has been successful.
With some of the solutions that TechnoWikis has given you it will be possible to make a complete low level format knowing that all the data will be destroyed and thus ensure privacy.