In many cases it is necessary to extract the text of an image in an editable format for various reasons such as editing settings, data modification, administrative support, etc. This is possible thanks to the OCR (Optical Character Recognition) technology which allows us to convert different types of files, such as PDF, images and more, into a format with editing and management capabilities..
This is a simple process thanks to the various tools available on the network, but when we must carry out this process on Android we can face something more complex.
Fortunately, Microsoft has developed an application called Office Lens which allows us to perform multiple tasks with files on Android. Office Lens allows us to perform tasks such as cropping, editing and readable various images and documents. Office Lens has the ability to convert images into Word, PowerPoint and PDF files and we can even save the images in OneNote or OneDrive for later access..
Office Lens is available for download at the following link:
Office Lens
Some of the things that Office Lens allows us to do are
- Create digital copies of printed documents, business cards and more
- It has OCR technology for extracting text from multiple files
- It includes the Whiteboard mode, with which Office Lens trims and cleans the reflections and the shadows of the images improving its appearance
- It has the Document mod thanks to which Office Lens cuts and applies color to images in a perfect way
- We can convert images to Word (.docx), PowerPoint (.pts.) Or PDF (.pdf) files.
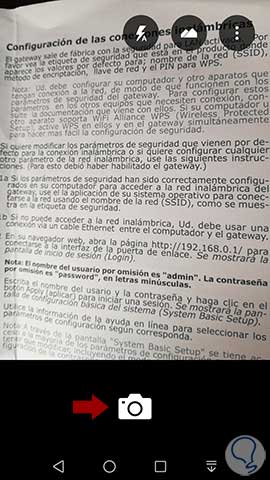
Step 1
Once downloaded and installed Office Lens on Android, we proceed to run the application and select the text to capture, remember that Office Lens includes its own camera:
Step 2
Once we define the text to capture, click on the camera icon located in the center to take the image, it will be automatically saved.
As soon as it is saved, it will open and we can click on the icon of three vertical dots and there select the most appropriate option:
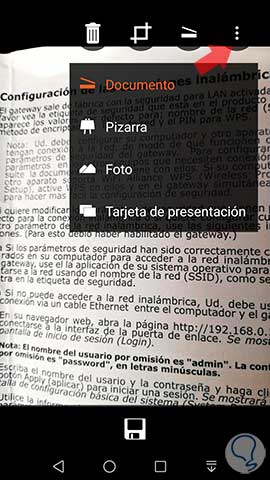
These options can be selected based on the type of file captured.
Additional options are
- Activate the scanner for a new image
Step 3
Once the image is defined, click on the save icon and the following window will be displayed:
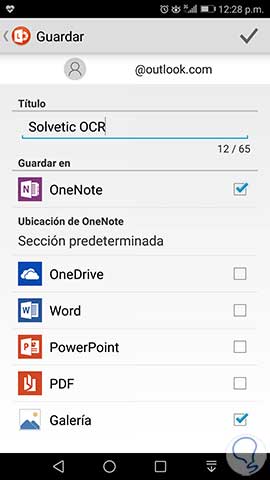
There we define the following
- Mail account to use for storage
- Name to assign to the document
- Location where the image will be stored
Note
In case of not having an account we must create one in Microsoft since it will be mandatory for the rest of the process.
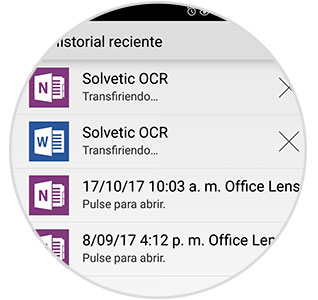
Step 4
Once we activate the boxes where the file will be stored, click on the check button at the top and we can see that the transfer process begins, and once the transfer is completed we will see the following:
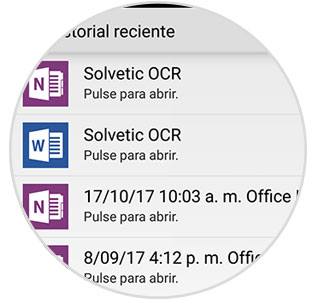
Step 5
There we click on the appropriate option to open the saved image, in this case Word and this will be opened in that application where we can make the necessary adjustments to the text:

So simple Office Lens becomes an alternative for managing text images and other files where it is necessary to extract its content..