Security when surfing the web is one of the most relevant priorities that we must keep in mind when we access regardless of the type of action we take. Through the Internet thousands of attacks of various types are generated that violate our privacy and information if they become effective..
To counter these vulnerabilities a bit, software developers (especially speaking of web browsers), have implemented DNS over HTTPS (DoH) which is a new security and privacy standard to encrypt DNS requests that run within the browser.
What is DNS over HTTPS (DoH)
DoH has been developed to improve network browsing security . This is because when we enter a website, the browser will send a request through the Internet in order to find the IP address of that particular website. This is normal, which is not very reliable, is that this request is sent to those servers using a plain text connection, that is, this connection is not encrypted.
Such a failure will allow an attacker with the appropriate tools to see what site we are visiting as well as the data we are registering there creating a security hole for the user..
If we decide to enable DNS over HTTPS (DoH), it takes care that the domain name sent to the DNS server, which must be compatible with DoH, makes use of an encrypted HTTPS connection thus replacing the plain text connection. In this way we will be preventing you from seeing the sites we are trying to access.
Since March 2018, both Google and Firefox are running tests of the DNS versions through HTTPS in their browsers to increase end-user security.
DoH makes use of HTTP / 2 and HTTPS and additionally it is compatible with DNS response data. However, some key aspects of the protocol still need to be improved, such as:
- Parental control and content filters
- Interoperability with 5G networks
With DoH we can be sure that our Internet provider (ISP) does not distribute our data to third parties for advertising, policy or any other element that affects privacy..
Now with TechnoWikis you will see how to activate DNS over HTTPS in Google Chrome, Firefox Quantum or Microsoft Edge.
1. How to enable DNS over HTTPS in Google Chrome
Chrome is one of the most popular browsers for its different functions and DNS over HTTPS is an ideal solution to increase your productivity.
Step 1
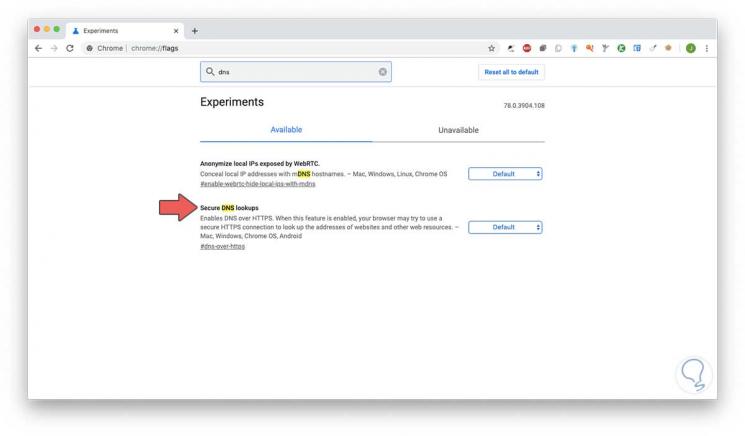
If we want to activate this protocol there you must understand that DoH is an experimental feature not available for official use on Google, so it can be prone to errors. But still if we run the risk we must go to a new window and enter the following:
chrome: // flags
In the search field we enter “dns†and there we must locate the line “Secure DNS Lookupâ€:
Step 2
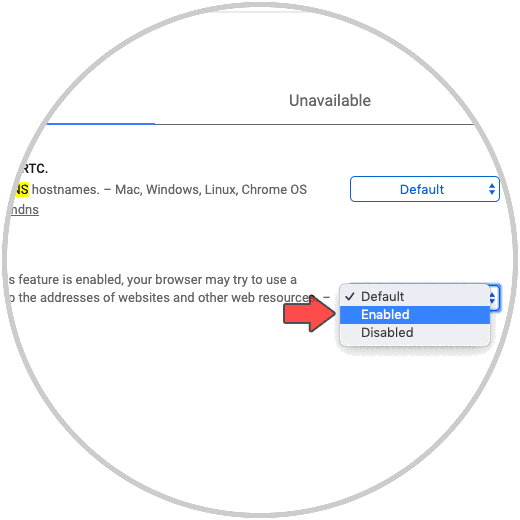
We will see that its value is "Default" which is disabled. There we display the available options and select “Enabledâ€:
Step 3
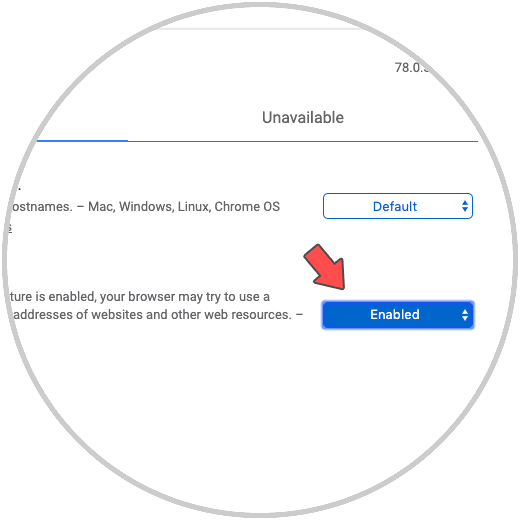
We verify that this change has been made:
Step 4
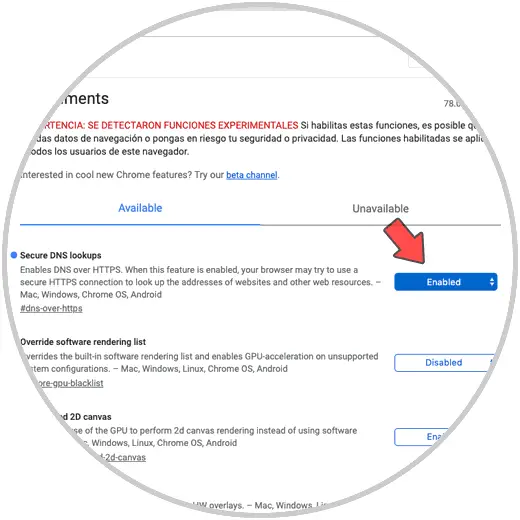
To confirm the changes we must restart Google Chrome by clicking on the “Relaunch†button and when Google Chrome is activated again we will see that DNS over HTTPS has been enabled:
2. How to enable DNS over HTTPS in Google Chrome by editing the shortcut
Step 1
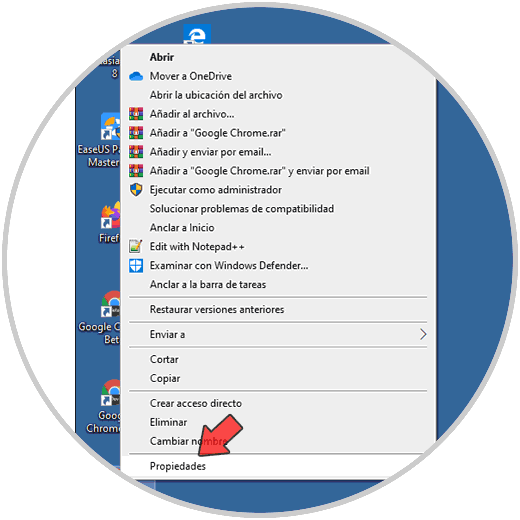
Another method that Google Chrome offers us to activate DoH there is editing the shortcut, for this we locate the Google Chrome shortcut on the desktop, right click on it and select “Propertiesâ€:
Step 2
In the displayed window we will go to the "Shortcut" tab and in the "Destination" field we go to the end of the text, leave a space and paste the following:
--enable-features = "dns-over-https <DoHTrial" --force-fieldtrials = "DoHTrial / Group1" --force-fieldtrial-params = "DoHTrial.Group1: server / https% 3A% 2F% 2F1.1.1 .1% 2Fdns-query / method / POST
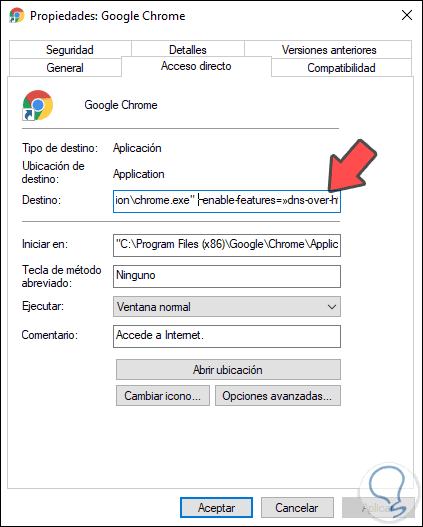
Click on Apply and Accept to save the changes and in this way we have enabled DNS over HTTPS in Google Chrome.
Step 3
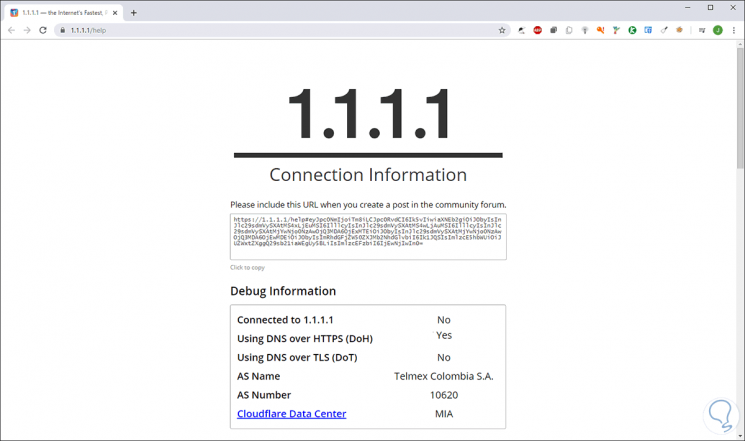
Finally, to test this validation in Google Chrome we will go to a new tab and enter the following:
https://1.1.1.1/help
There we check that the DoH line is active (Yes):
3. How to enable DNS over HTTPS in Firefox Quantum
Step 1
The process in Firefox Quantum is much simpler, for this we must click on the browser menu and select “Optionsâ€:

Step 2
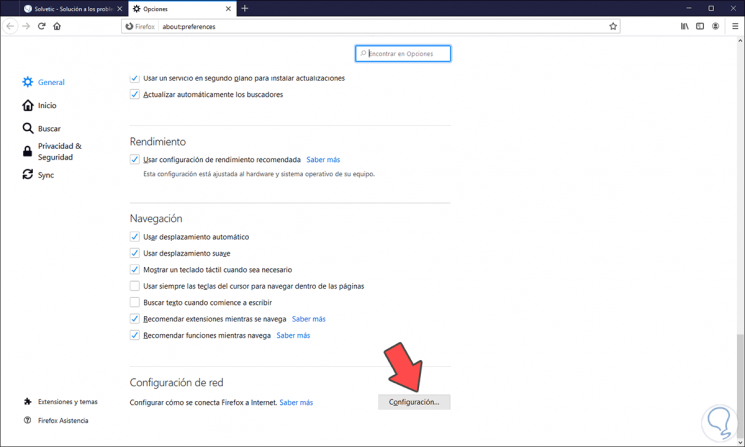
In the window that appears, we go to the "General" section and at the bottom we will go to the "Network Configuration" option and click on the "Configuration" button:
Step 3
The following window will be displayed where we must activate the “Enable DNS over HTTPS†box:
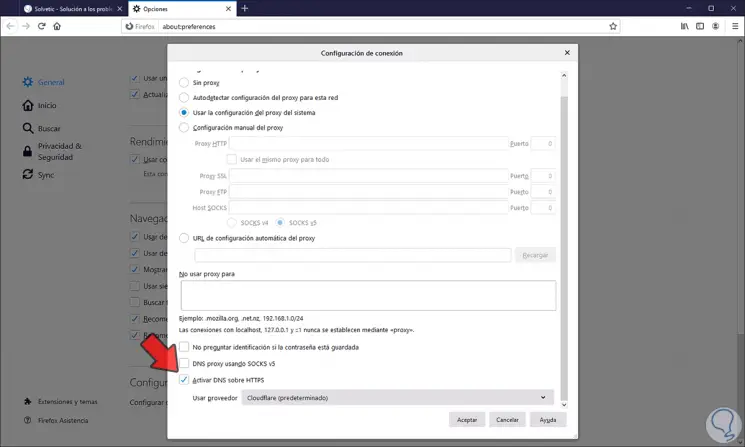
By default, Cloudflare is configured as the default server, but we can click on Custom and use another server if necessary.
Step 4
Now we go to a new tab and enter the following:
about: config
We will receive the following warning:

Step 5
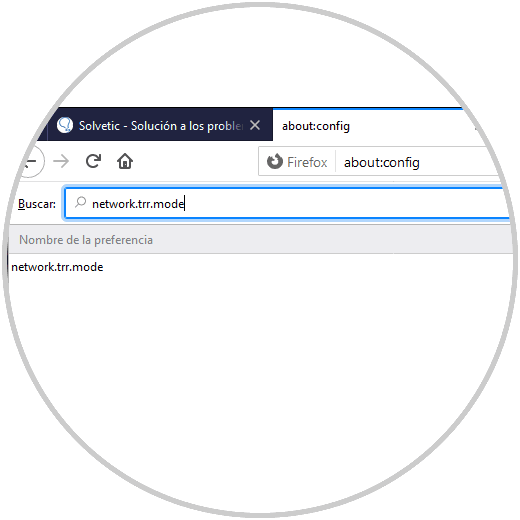
We click on "Accept irrigation" and access the Firefox Quantum test settings, there we enter the following in the search field:
network.trr.mode
Step 6
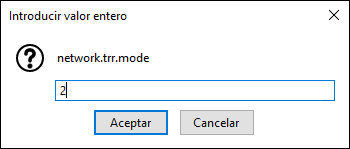
We double click on the parameter line and set the value 2:
Step 7
We click on Accept and we will see that the change is applied:

Note
The value 5 allows DoH not to be automatically enabled later.
Step 8
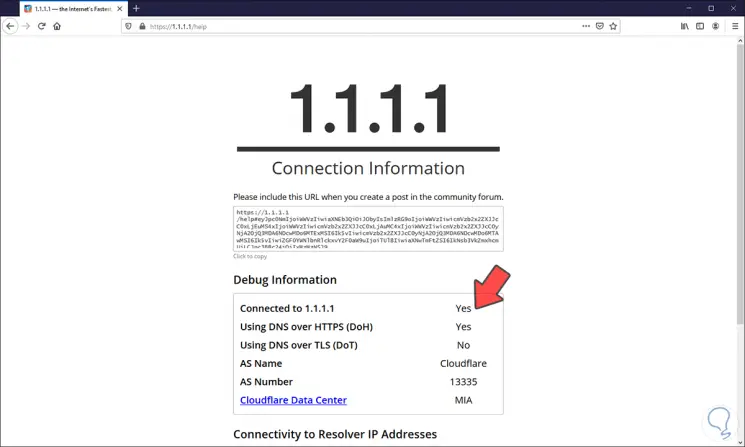
After this we can enter again https://1.1.1.1/help to validate the status of DoH:
DNS over HTTPS is not compatible (for now) with either Safari or Microsoft Edge.
Thanks to DoH we will have a much more secure and private browsing when we access one of these web browsers.