Time management is a fundamental factor when it comes to achieving our goals since not managing time correctly will simply cause us to lose the perspective of what we want. That is why Microsoft has thought about giving us a little help by integrating in its application “ Alarms and clock †the timer option, with which it will be possible to keep a precise control of the tasks performed in Windows 10 and determine the priority of each one of them..
TechnoWikis will explain how to use this timer effectively.
Basic requirement
The only condition to use this timer is against the November 2019 edition of Windows 10 which you can check using the Windows + R keys and executing the “winver†command:
+ R
winver
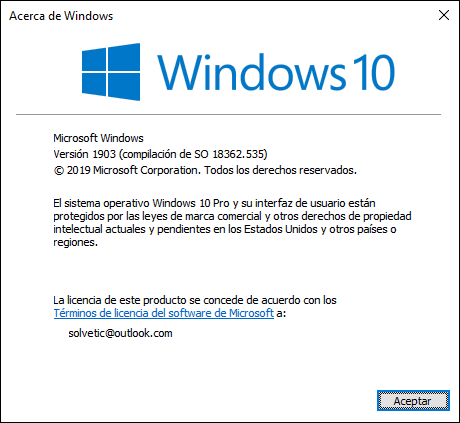
November 2019 is the 1903 version and if you don't have it, just go to the following link:
Windows 10 update
There we can update the system online with the option "Update now" or download the Media Creation Tool if we wish.
To keep up, remember to subscribe to our YouTube channel! SUBSCRIBE
1. How to use the timer in Windows 10
With the updated system we will be able to use the timer.
Step 1
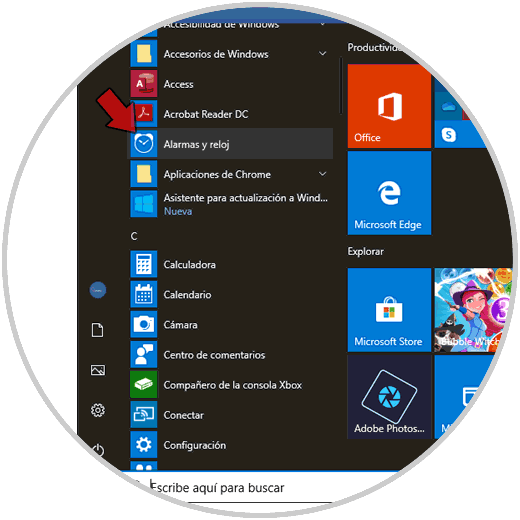
To do this we access the “Alarms and clock†application from one of the following options:
- Through the search box of the Start menu.
- From the programs in the Start menu.
Step 2
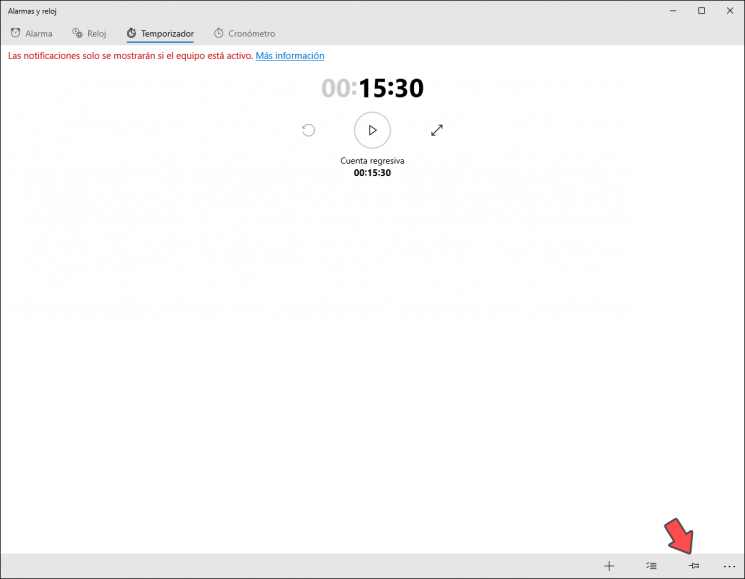
Once we open this application we will go to the “Timer†tab where we will see the following. There by default a 15 minute and 30 second timer is available.
For much faster access to timers, we can pin it to the Start menu by clicking on the first lower button from right to left:
Step 4
We will see the following:

Step 5
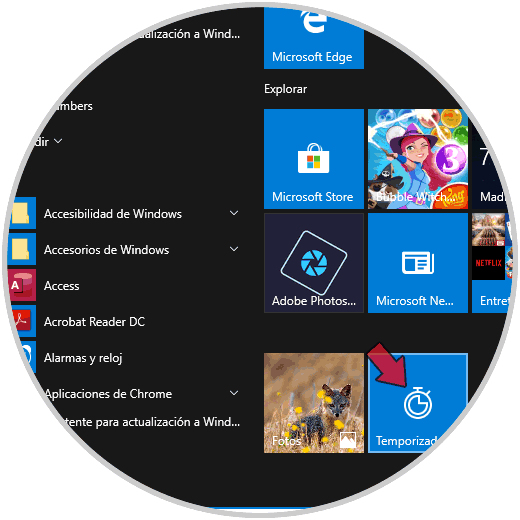
There we confirm the anchor by clicking on the “Yes†button and when accessing the Start menu it will be possible to display the timer there:
2. How to add a new timer in Windows 10
Step 1
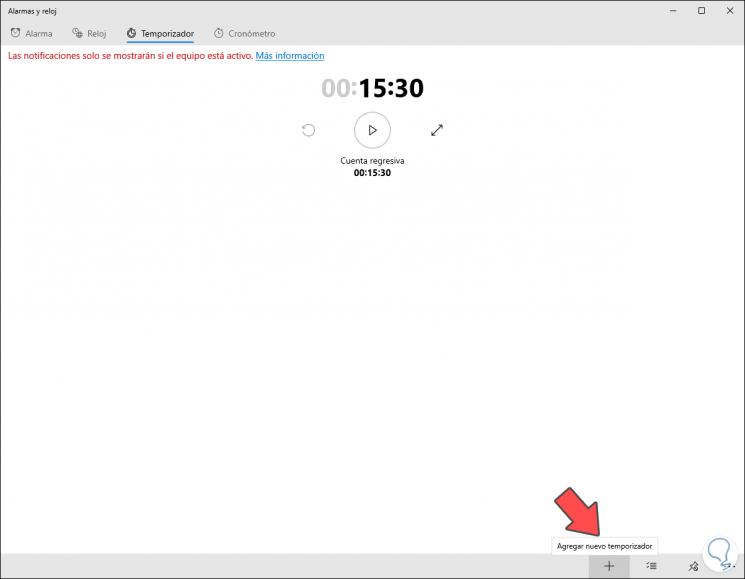
To create a new timer, just click on the + sign located at the bottom:
Step 2
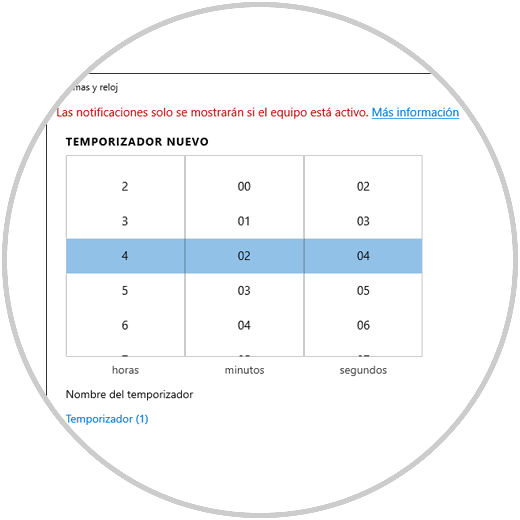
Selecting this will display the following window where we can define the hours, minutes and seconds of the timer:
Step 3
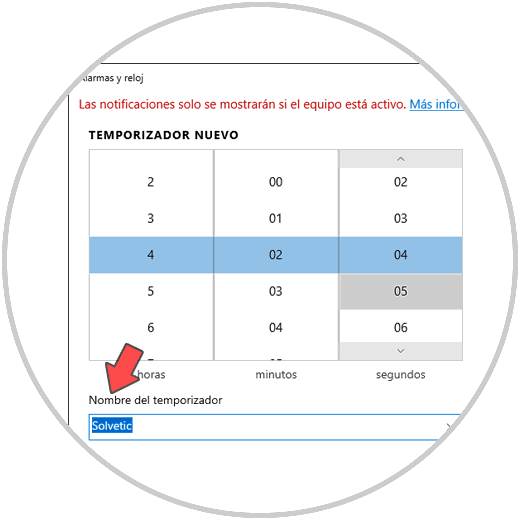
These values ​​will define the total timer time, if we want better control over it, it is possible to click on the “Timer Name†line and assign the desired name:
Step 4
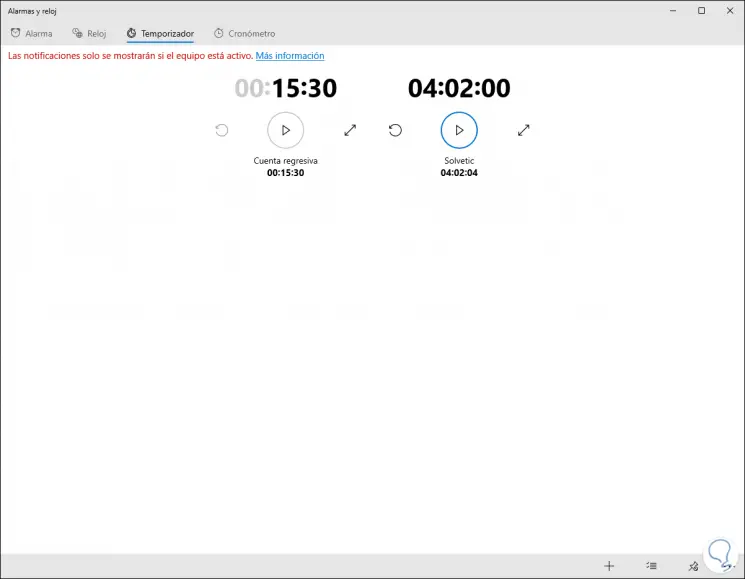
Once these values ​​are defined, we will click on the "Start" button located at the bottom. We will see the timer in the system go into action:
3. How to use timers in Windows 10
By accessing the Timer tab again we can see the various timers we have created.
Step 1
Next to each timer we find three actions to perform:
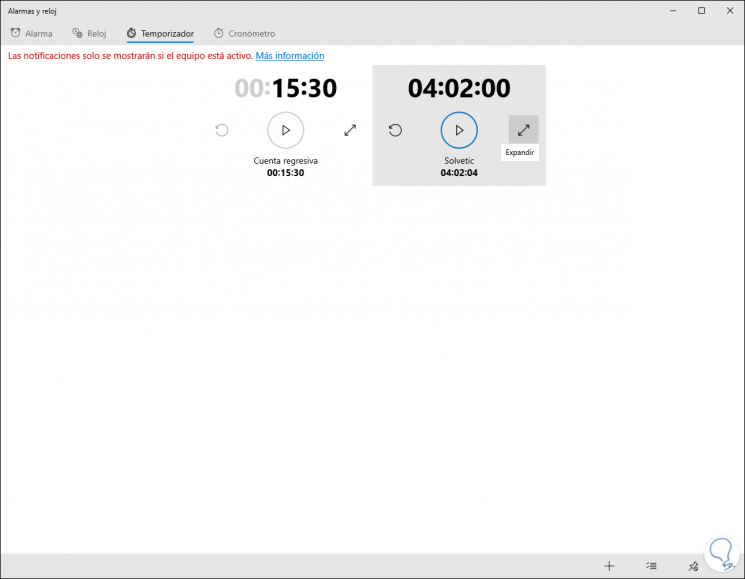
Step 2
If we expand the timer it will occupy the entire dimension of the timer window:
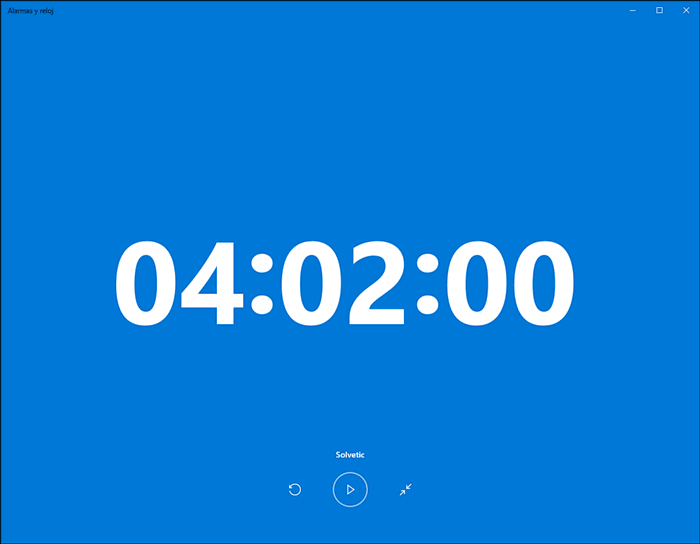
Step 3
To return to its normal state we must click on the "Restore" option at the bottom. If for some reason we need to pause a timer, just do so by clicking on the pause icon in it:
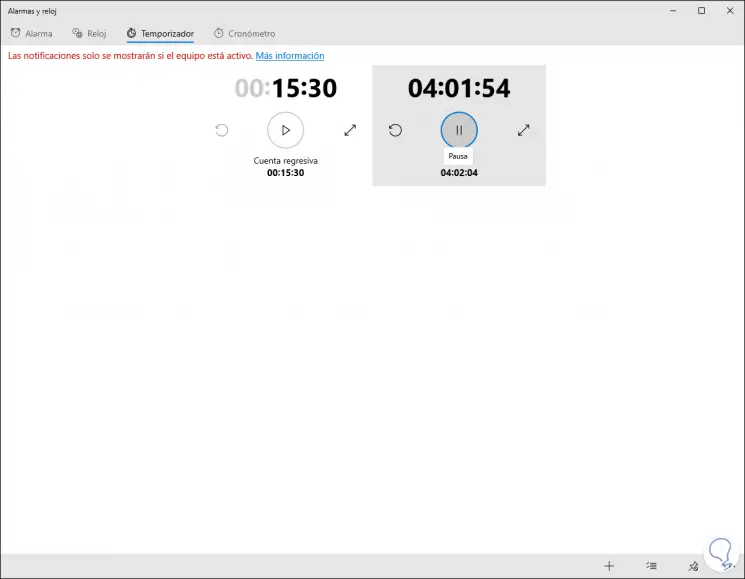
Step 4
By default, when the timer reaches its end, we will receive both a visual and audible alert in the taskbar. This audible alert will pause any other sound in the system to capture our attention.
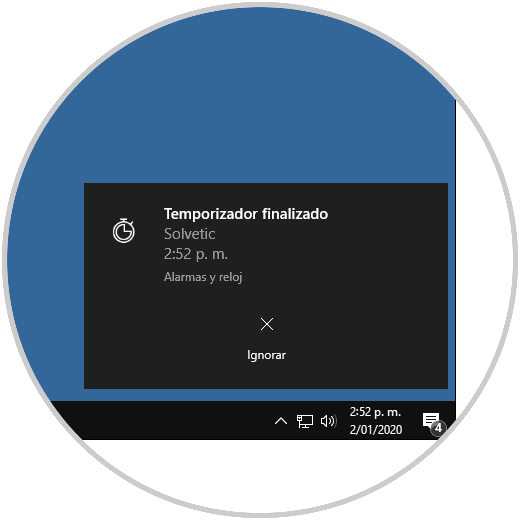
If for some reason we need to edit a timer variable, just click on it to modify either its time or name:
4. How to remove a timer in Windows 10
Step 1
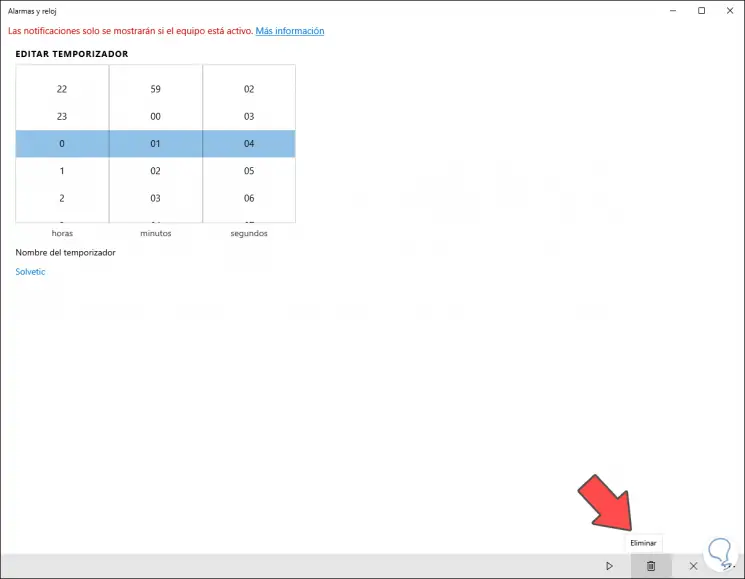
If for some reason the timer will no longer be used, we can remove it by clicking on the "Delete" button located at the bottom:
Step 2
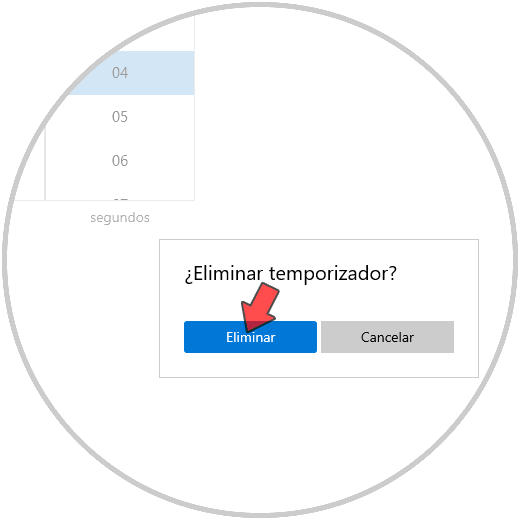
Clicking there we will see the following warning. We confirm the action by clicking on the "Delete" button.
Step 3
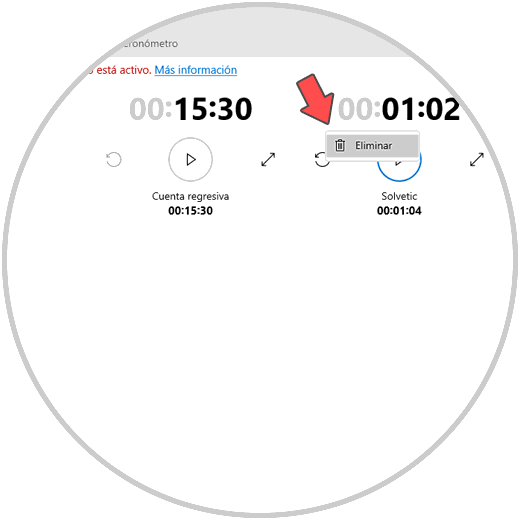
Another more practical method to remove a timer in Windows 10 is to right click on it and select "Delete":
Step 4
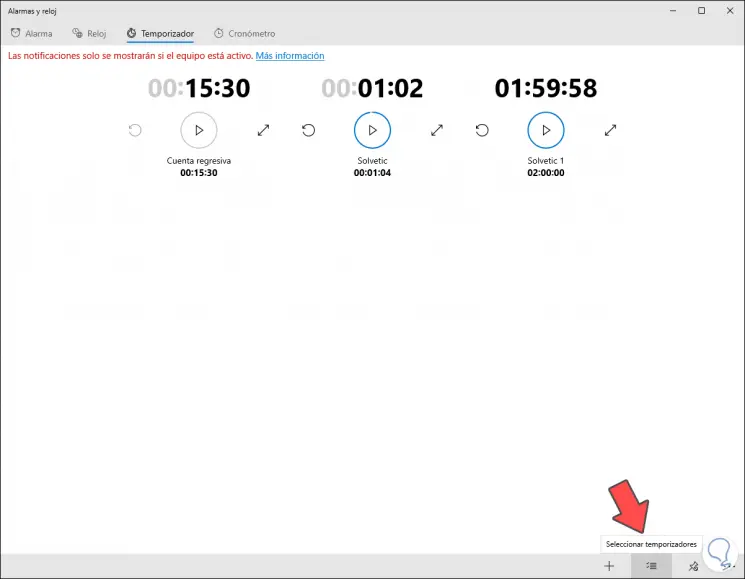
In the main window it will be possible to eliminate several timers if we wish, for this we will click on the option “Select timersâ€:
Step 5
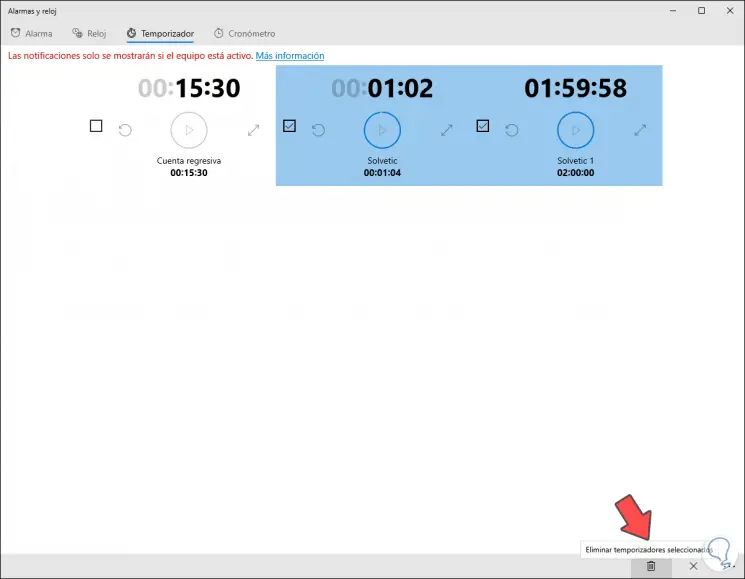
Then we can select (by activating their boxes), the desired timers and then click on the “Remove selected timers†button at the bottom:
Step 6
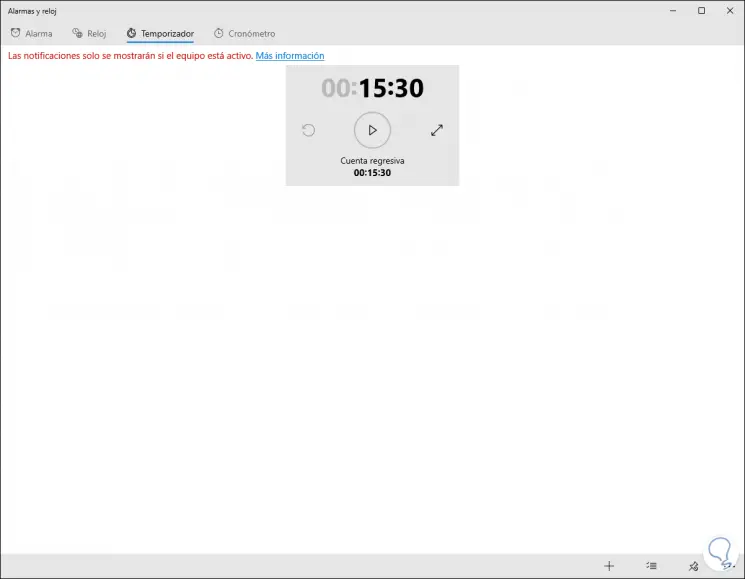
So we will see only the timer that we have decided to leave active:
With this new functionality integrated in Windows 10 we have an alternative for better control of the tasks to be executed..