The alarms have always been one of the allies (although for many it is their public enemy # 1) for thousands of users since thanks to them we can be attentive to various events both work and personal without being overlooked. In the case of Windows 10 a new functionality has been integrated with which the control and management of alarms will be much more bearable . So TechnoWikis will explain how to make full use of these and thus have a friend in the form of a clock to let us know every situation we can forget..
Alarms lend us a hand to be able to release the continuous tension of having to remember many things at once. Whether we talk about alarm alarms or alarms of specific events , having a warning system can solve more than one awkward situation. An alarm in the form of a reminder is a really useful tool to not forget events such as birthdays or meetings.
To use this method, you need to have the November 2019 edition of Windows 10 which is available to update online or with the Media Creation Tool utility at the following link:
Once our team has this version of Windows 10 we can confirm it using the following keys and executing the winver command:
+ R
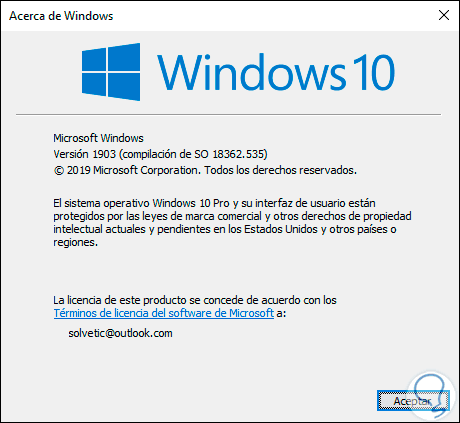
November 2019 is version 1903. Now if we are ready to explore what the “Alarms and clock†function offers in Windows 10..
To keep up, remember to subscribe to our YouTube channel! SUBSCRIBE
1. Access Alarms and clock in Windows 10
Step 1
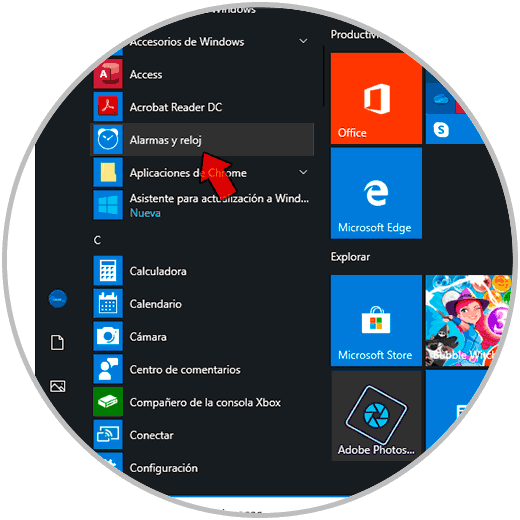
To go to this functionality we can use one of the following methods:
- Through the Start search box
Step 2
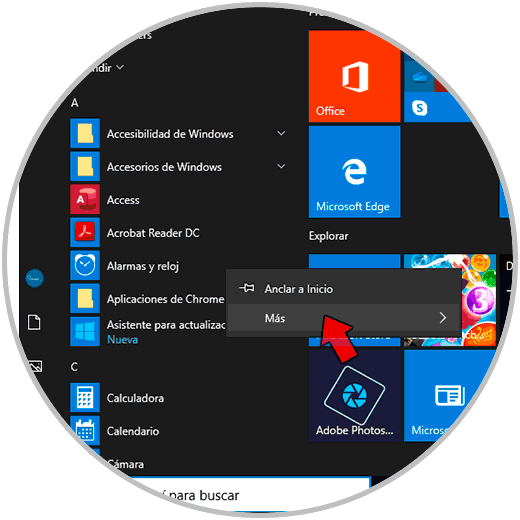
For faster access to the functionality we can right click on it and select "Pin to Start":
Step 3
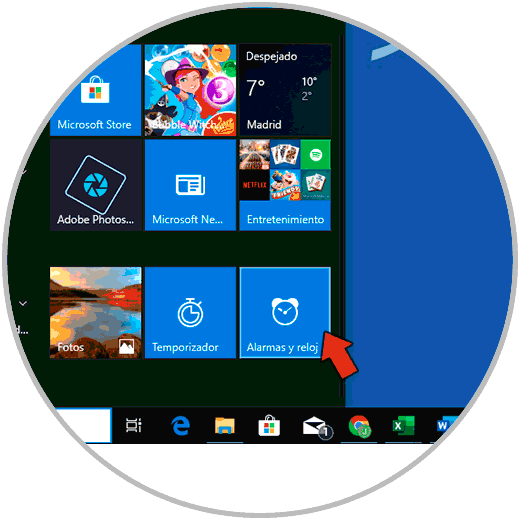
Once we do this when we access the Start menu we can see there the direct link to Alarms:
Step 4
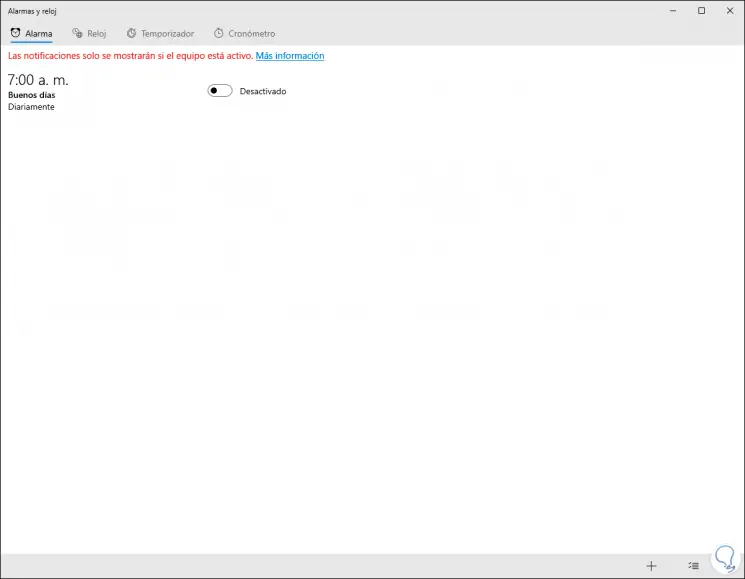
When accessing Alarms we will see the following:
2. Add new alarms in Windows 10
Step 1
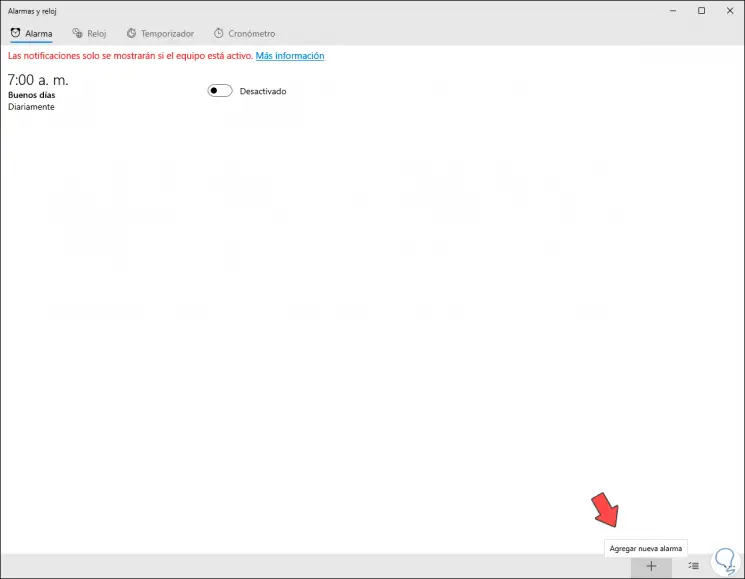
To add one or more alarms, we will click on the + sign (Add new alarms) located at the bottom of the application:
Step 2
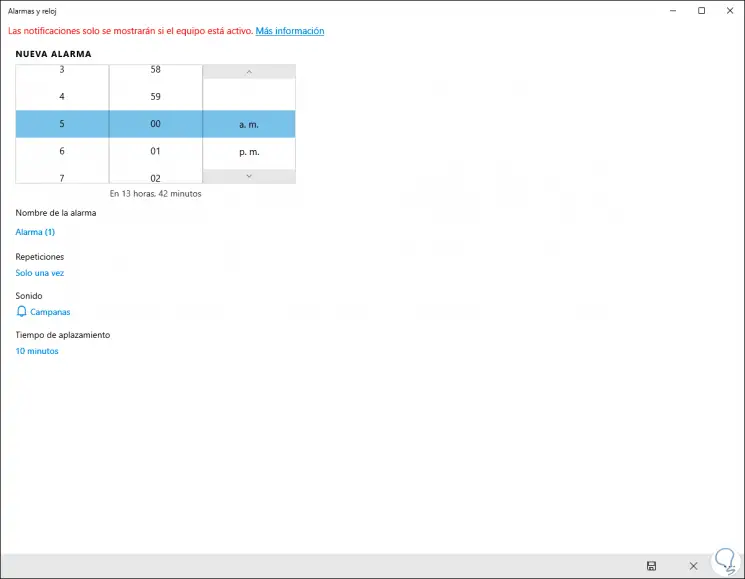
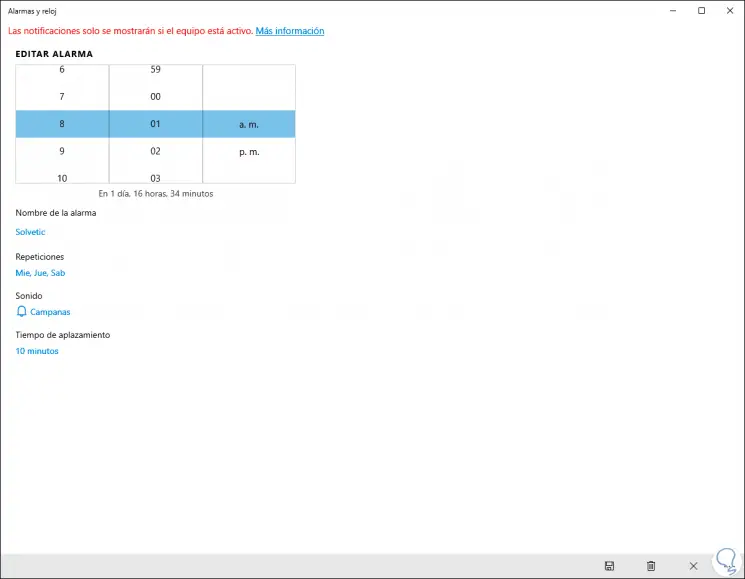
When doing this, we will first define the time at which the alarm will be activated in Windows 10:
Step 3
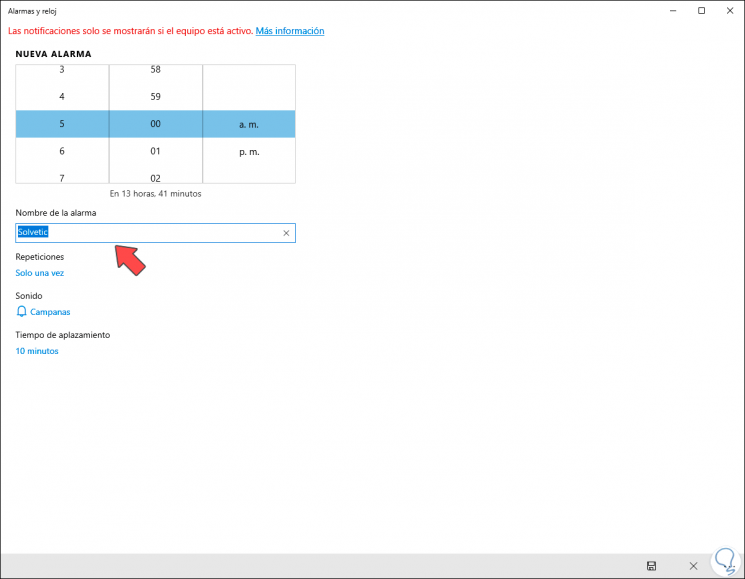
After this, we can click on the “Alarm Name†line to assign the desired name:
Step 4
After this, we will have the possibility to define the frequency of the alarm, “Repeats†line, the options to be used are:
- Only once which will sound based on the frequency of time entered
- Possibility to select which days will sound
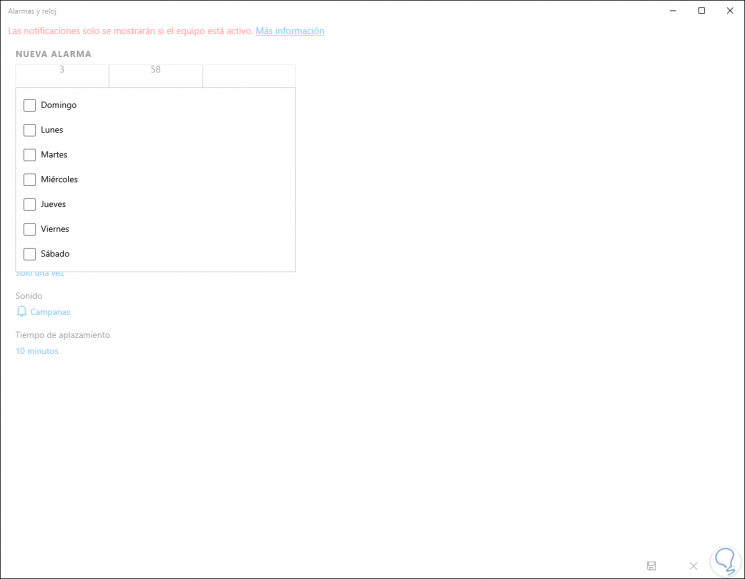
Step 5
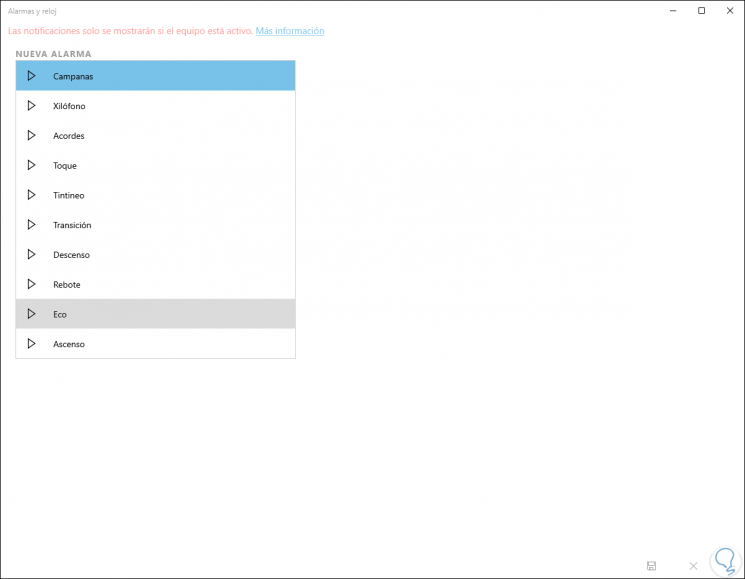
After this we can define what tone the alarm will have in the system, clicking on “Sound†will display the complete list of sounds available for this purpose:
Step 6
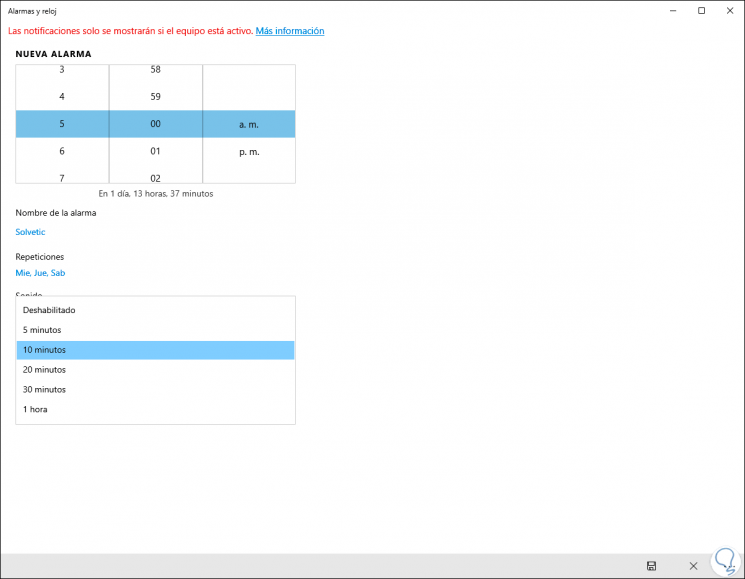
Finally we have a series of time ranges in which we can postpone the alarm:
Step 7
When we complete the alarm values ​​we will click on “Save†to complete the process:
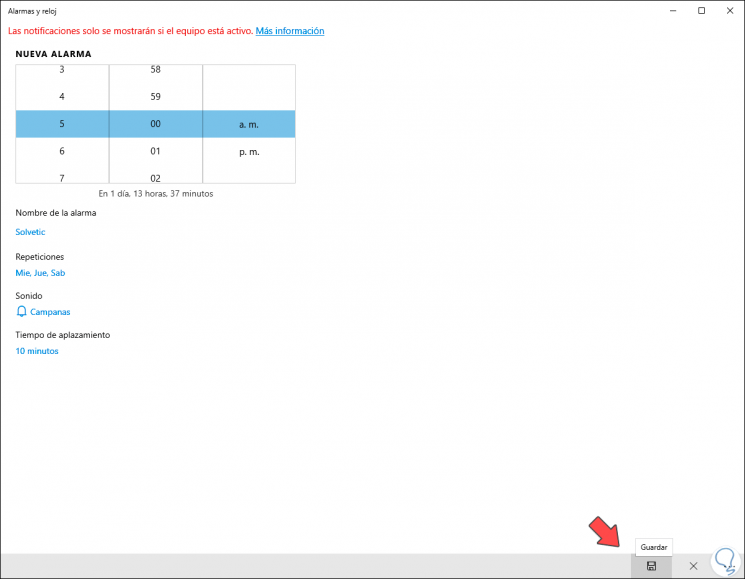
Step 8
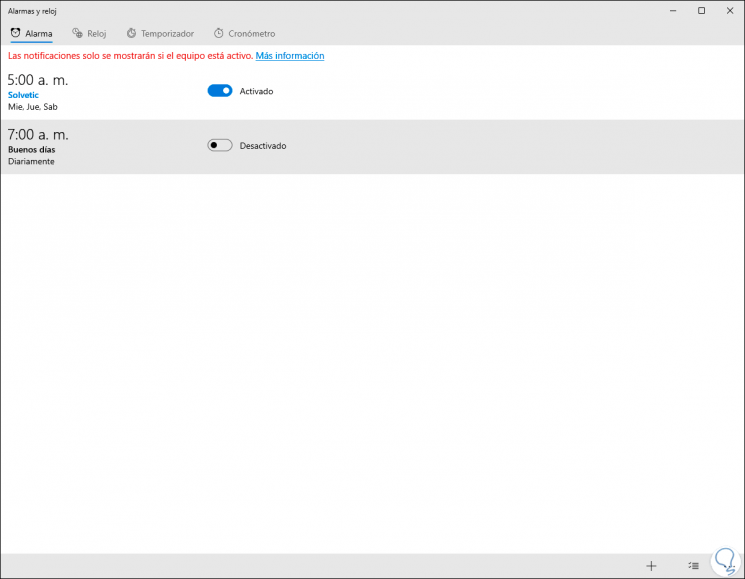
When doing this it will be possible to visualize our alarm in the central panel:
3. Use alarms in Windows 10
The correct functioning of the alarms implies that it is active, so it is necessary that the switch is in this state, if it becomes “Disabled†the alarm will simply not sound.
Step 1
To edit an alarm in Windows 10, we must click on it and then adjust the necessary parameters. Don't forget to save the changes at the bottom.
Step 2
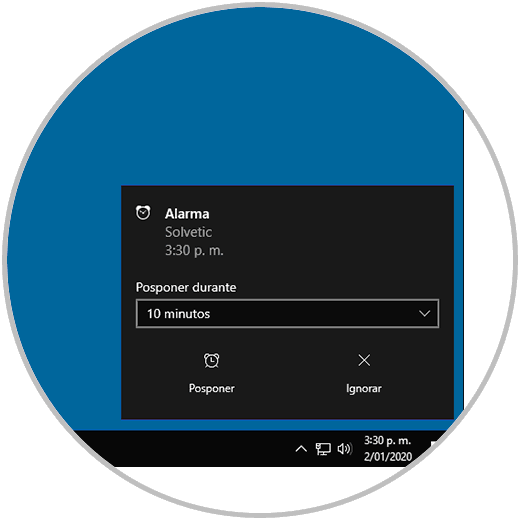
When the alarm is activated in the system, it will silence any active sound of the system and launch a visual alert with alarm details, there we can postpone it if necessary. If we want to postpone the alarm we will click on “Postpone†and if we want to hide the visual message we click on “Ignoreâ€.
4. Remove an alarm in Windows 10
Step 1
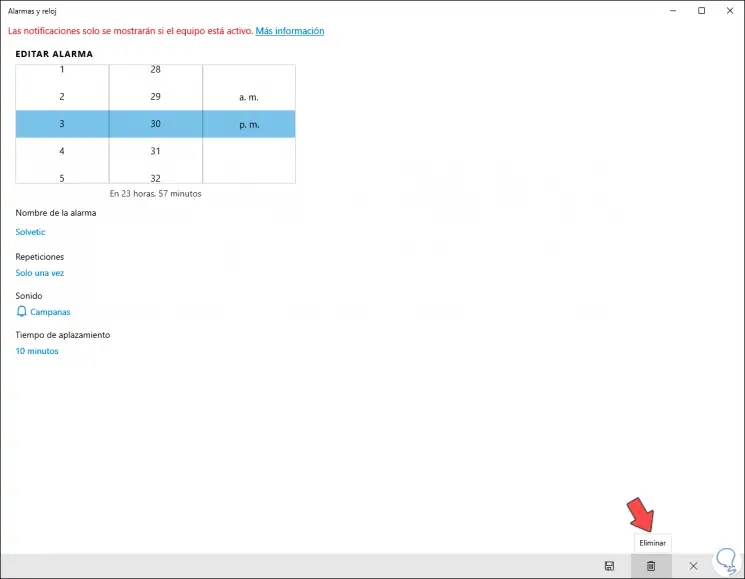
At the moment we want to eliminate an alarm from the system, we must access the edition of this and click on the "Delete" button at the bottom:
Step 2
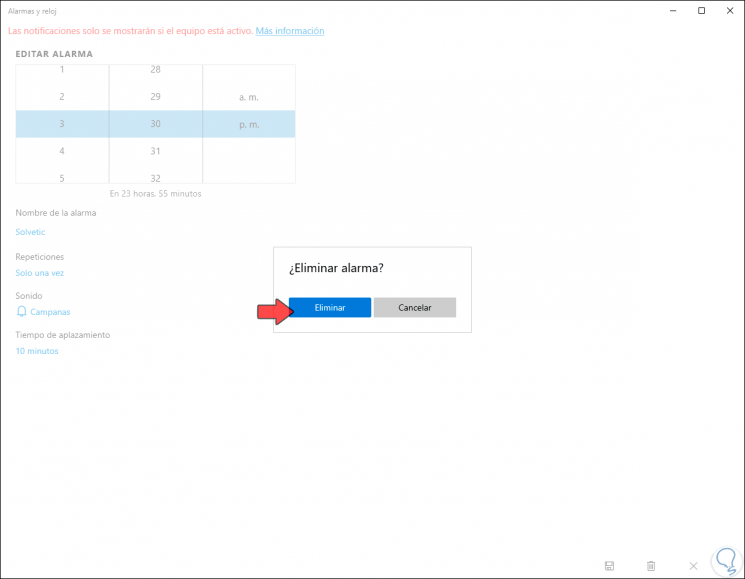
Clicking on this button will display the following. There we confirm the elimination of the alarm by clicking on "Delete".
Step 3
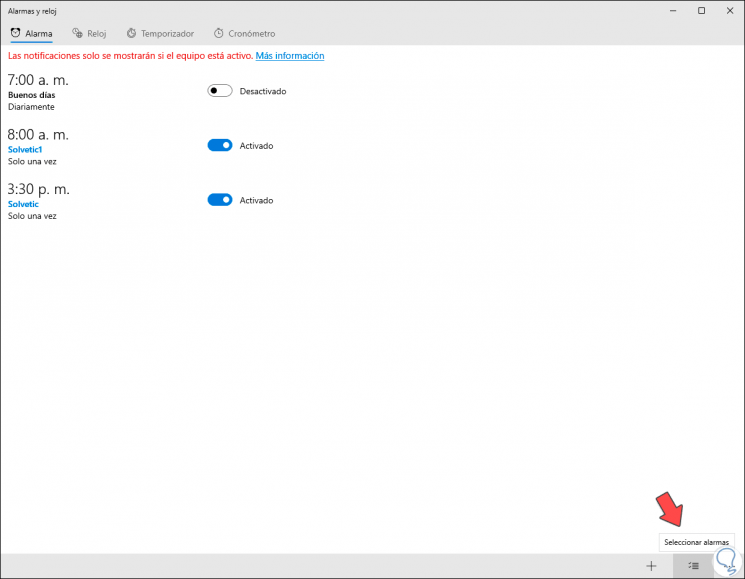
In case of having different alarms, we can click on the “Select alarms†option at the bottom:
Step 4
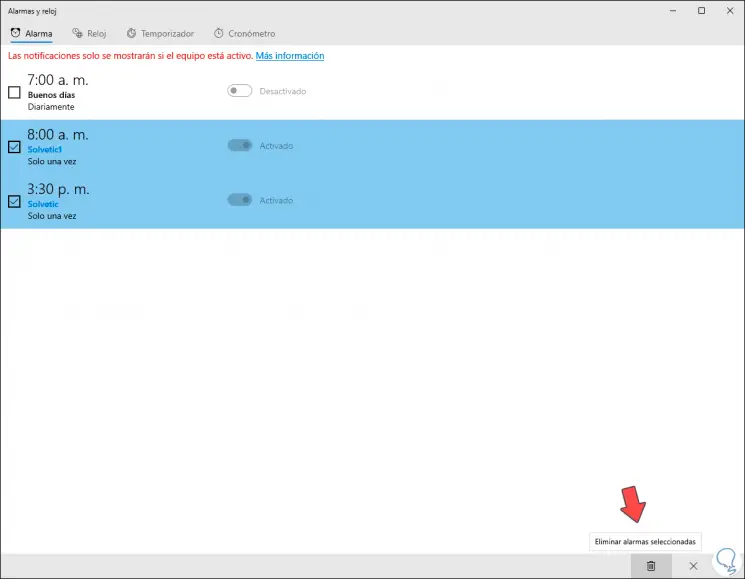
There we can activate the desired alarms and at the bottom click on the option "Remove selected alarms":
Step 5
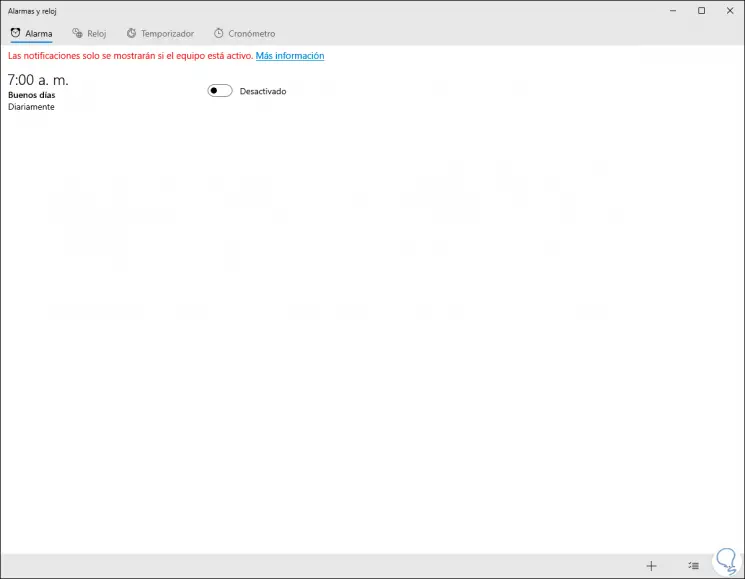
Automatically these will be eliminated:
With this simple process we can add and manage alarms in Windows 10.