Windows Defender is Microsoft's commitment to security issues in Windows 10 and that is why we have seen its constant evolution both in the detection and elimination of different types of threats, both local and external..
Windows Defender uses a periodic scanning system (which we can adjust according to our needs) in order to analyze the equipment allowing its integrity to always be adequate. However, in some computers this scanning task implies a high CPU consumption which has a direct negative impact on other global tasks of the operating system.
That is why TechnoWikis will then give you the right solution to prevent Windows Defender tasks from consuming more resources than necessary CPU..
1. How to configure Windows Defender from Windows PowerShell
The first method we will see involves using the Windows 10 management console and from there setting up the Windows Defender CPU usage.
Step 1
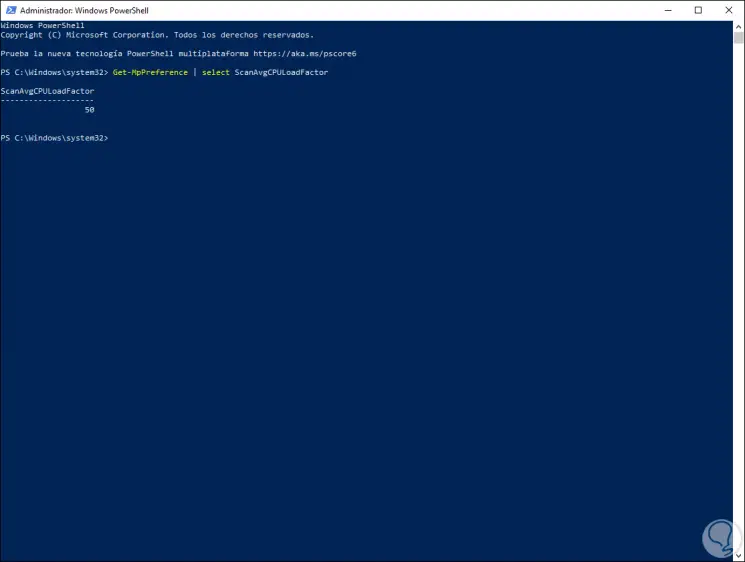
For this we access Windows PowerShell as administrators and once the console is open we will execute the following:
Get-MpPreference | select ScanAvgCPULoadFactor
Step 2
Get-MpPreference is a cmdlet developed in order to access preferences for Windows Defender scans and updates. When executing this command we find the percentage of CPU assigned to Windows Defender:
Step 3
By default the value is 50%, if we want to edit this parameter we will execute the following:
Set-MpPreference -ScanAvgCPULoadFactor <percentage>

2. How to configure Windows Defender from local Windows 10 policies
Step 1
This step applies only to the Pro and Enterprise editions of Windows 10 and for use we will use the Windows + R keys and execute the following:
+ R
gpedit.msc

Step 2
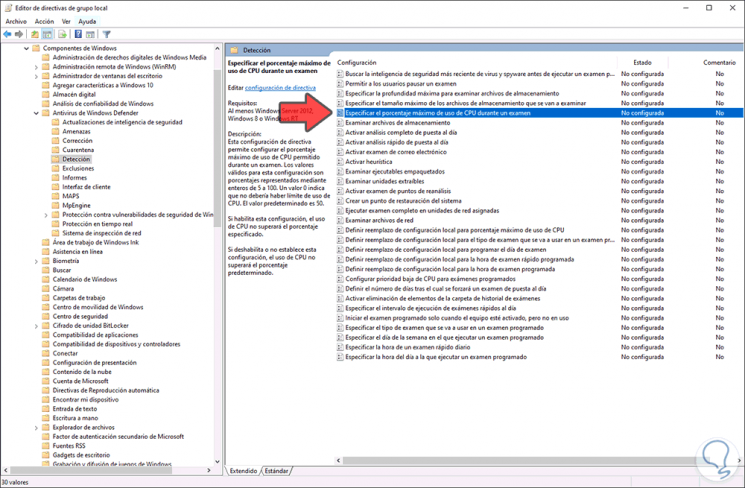
Press Enter and in the policy manager we will go to the following route:
- Administrative Templates.
- Windows Defender Antivirus.
In the central policies we locate the policy called “Specify the maximum percentage of CPU usage during an examâ€:
Step 3
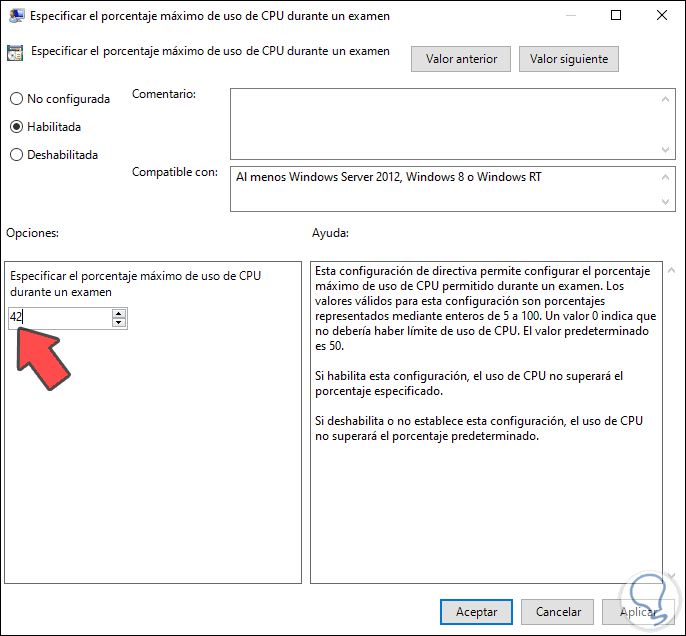
We double click on it and in the pop-up window we activate the “Enabled†box and in the lower field we assign the desired percentage of CPU usage. We click Apply and Accept to save the changes.
3. How to configure Windows Defender from the Windows 10 registry editor
For this step TechnoWikis recommends that you create a system restore point or create a backup since a bad configuration can lead to general system errors.
Step 1
For this method we combine the Windows + R keys and execute the “regedit†command:

Step 2
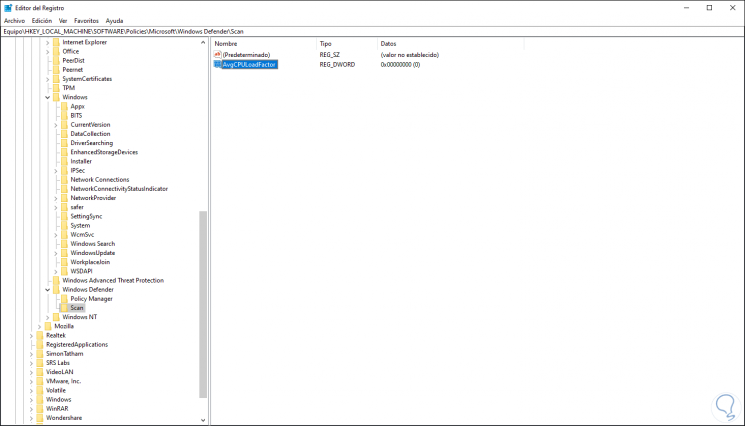
Press Enter and we will go to the following route:
HKEY_LOCAL_MACHINE \ SOFTWARE \ Policies \ Microsoft \ Windows Defender \ Scan
There we select the DWORD value called “AvgCPULoadFactorâ€:
Note
If this value is not created we can do it by right clicking and selecting the New / DWORD Value option (32 bits).
Step 3
We double click on this DWORD value and in the pop-up window we activate the “Decimal†box and assign the desired value between 5 and 100:
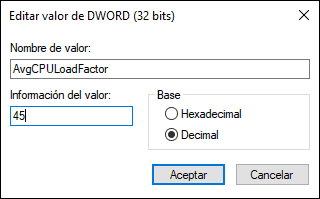
Click OK and we can exit the registry editor of Windows 10.
With any of these three methods we can configure the CPU usage for the Windows Defender analysis processes and thus manage the system resources..