Windows Defender is the protection mechanism integrated in Windows 10 to prevent threats at the level of viruses, malware and other threats, for this reason Windows Defender runs a series of scans in the background, which can cause high processor usage, affecting all other active processes or jobs in the system. It is for this reason that we can limit the use of CPU or processor for Windows Defender, there are some options that we will see in detail with TechnoWikis..
It is important to control the use of the Windows 10 CPU since in most cases it is the reason for a saturation of the computer, thus giving problems such as bugs or significant slowdowns of the system. We can limit the Windows 10 CPU usage of a program like Windows Defender and thus control its demand on resources.
Ted also left the video tutorial to know how to limit the use of CPU Windows 10 Defender..
To stay up to date, remember to subscribe to our YouTube channel! SUBSCRIBE
1. Limit Windows Defender CPU usage from PowerShell
PowerShell has been integrated into Windows 10 as a modern and dynamic console that integrates hundreds of cmdlets that allow much more direct work on all the components of the system.
Step 1
To limit the CPU use for Windows Defender, from this method we access the console as administrators and first we execute the following command:
Get-MpPreference | select ScanAvgCPULoadFactor
Step 2
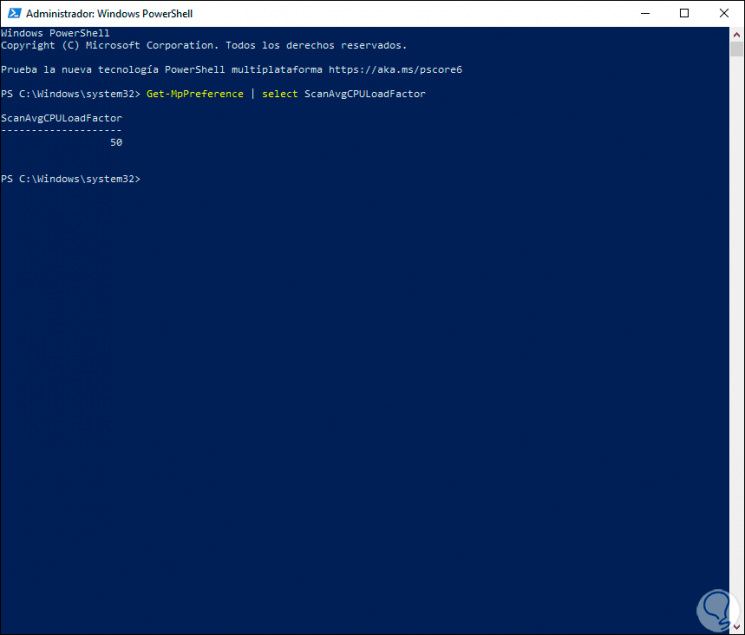
This command will display the maximum percentage of CPU use that can be allocated for Windows Defender:
Step 3
In this case we can see that up to 50% of the CPU is destined for Windows Defender analysis and detection tasks, to reduce this percentage, for example, to 25%, we will execute the following:
Set-MpPreference -ScanAvgCPULoadFactor 25
Step 4
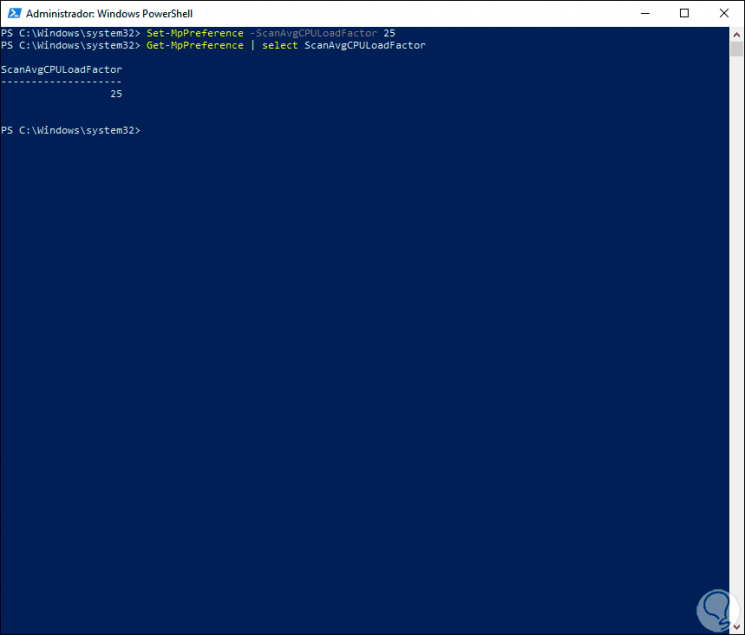
After executing this order we enter again “Get-MpPreference | select ScanAvgCPULoadFactor ”to confirm the changes:
Get-MpPreference | select ScanAvgCPULoadFactor
2. Limit Windows Defender CPU usage from GPO
Step 1
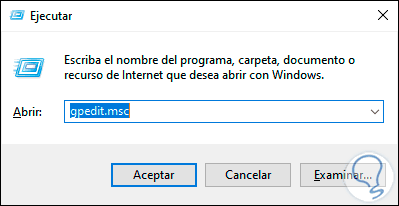
These group policies are only available for Windows 10 in its Pro and Enterprise editions, to make use of them we access Run and enter the following command:
gpedit.msc
Step 2
We click OK or press the Enter key and in the editor we will go to the following path:
- Microsoft Defender Antivirus
Step 3
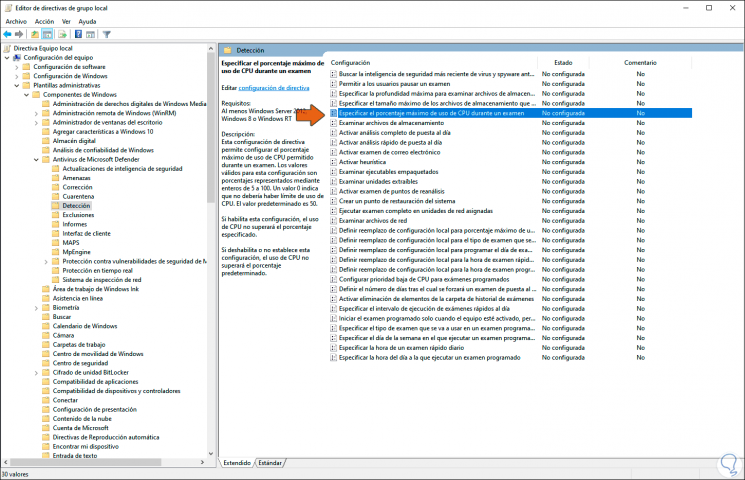
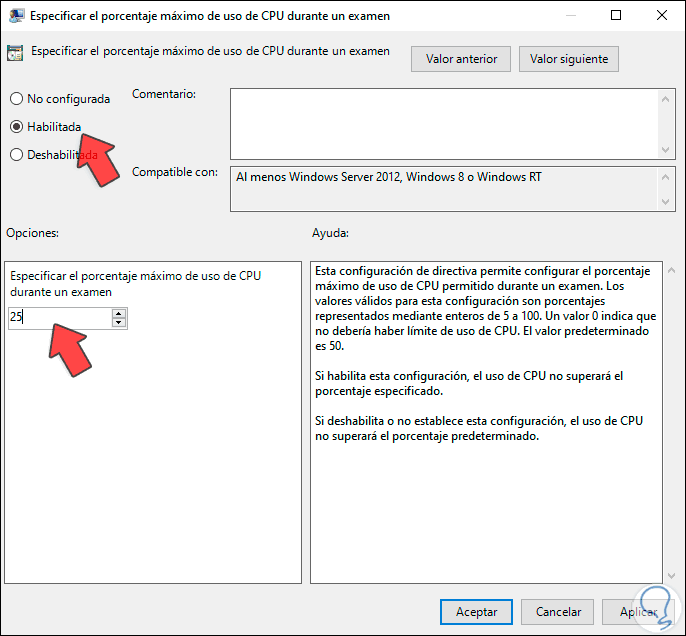
In the central part we locate the policy called "Specify the maximum percentage of CPU use during an exam":
Step 4
We double-click on this policy and in the pop-up window we activate the “Enabled” box and in the “Specify the maximum percentage of CPU usage during an exam” field we enter the desired percentage: We click Apply and OK to save the changes.
3. Limit Windows Defender CPU usage from Registry Editor
Step 1
Before using this method we must create a backup of the logs or create a system restore point in case something fails, then we open Run and enter:
regedit

Step 2
In the editor we will go to the following route:
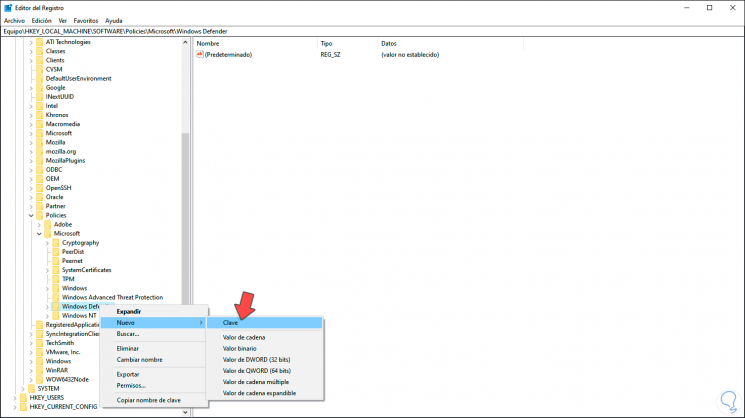
HKEY_LOCAL_MACHINE \ SOFTWARE \ Policies \ Microsoft \ Windows Defender
Step 3
We right click on "Windows Defender" and select "New - Password":
Step 4
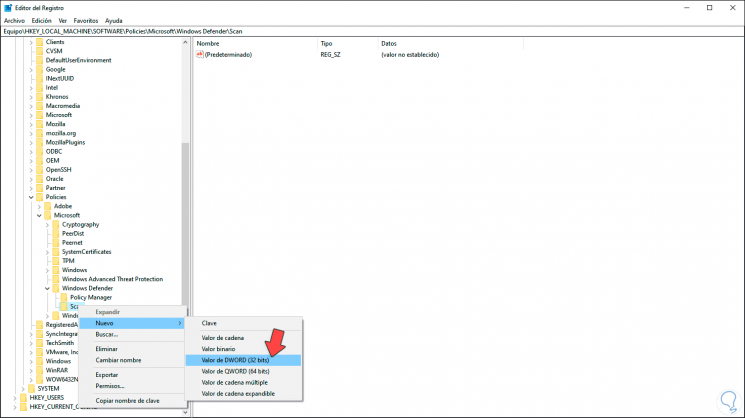
This key will be called "Scan", now we right-click on Scan and select "New - DWORD Value (32 bits)":
Step 5
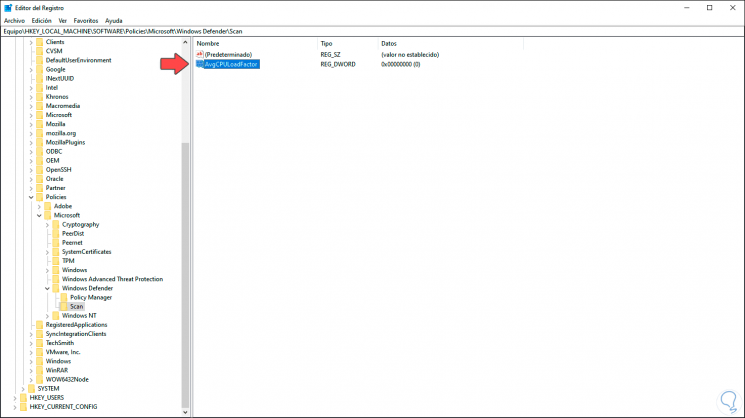
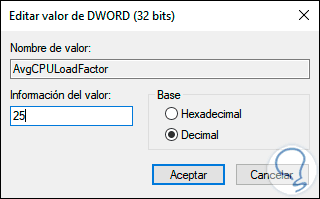
We will call this DWORD value “AvgCPULoadFactor”:
Step 6
We double click on it and in the "Value information" field we assign the desired percentage of CPU usage, but we must activate the "Decimal" box. We click OK to save the changes.
With these methods it will be possible to set the CPU usage limit for Windows Defender in Windows 10..