Windows 10 launches in each edition that develops new functions designed to improve and optimize the user experience both at the level of general use of the system and its applications. In the Creators Update edition, version 1703, a functionality called Shared Experiences was integrated into the Windows 10 operating system which was created with the mission of giving us the possibility to execute a task on a Windows 10 device and continue it or finish it on another device Windows 10 linked..
With this new feature it will now be possible to share web links, messages, application data and more elements with other Windows 10 devices or with linked Android devices. This will facilitate the task of sharing or transferring videos, photos and documents with other Windows 10 devices. via Bluetooth or Wi-Fi in a safe and complete way.
The main purpose of this project is to allow the compatibility and execution of Android applications on Windows and Xbox devices, but if we do not make frequent use of this shared experience we can disable it in order that our Windows 10 device cannot be detected by others Networked computers..
To keep up, remember to subscribe to our YouTube channel! SUBSCRIBE
1. Disable shared experiences from the Windows 10 Configuration utility
Configuration has been created as a central point from where it will be possible to manage various system configurations and from there we can disable the shared experiences of Windows 10.
Step 1
For this, we will go to the Start menu and select “Settingsâ€, we will see the following.
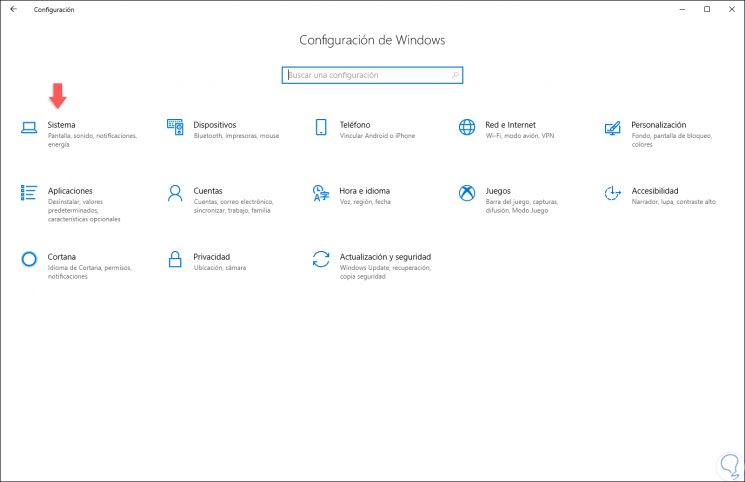
Step 2
There we go to the “System†category and go to the “Shared experiences†section where we will see the following:
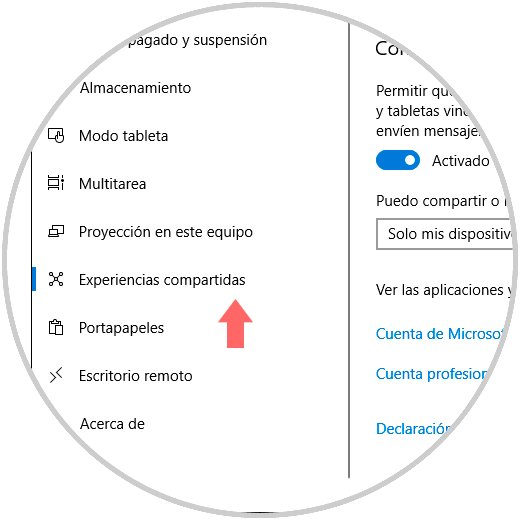
Step 3
There we click on the “Share between devices†switch so that this function is disabled on the device:
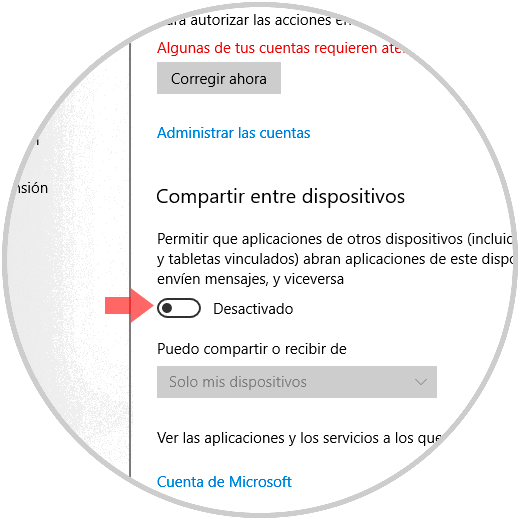
2. Disable shared experiences from Windows 10 Group Policies
This method applies to the Pro, Enterprise and Studio editions of Windows 10.
Step 1
To access the group policy editor, we will use the following key combination and execute the following command:
+ R
gpedit.msc
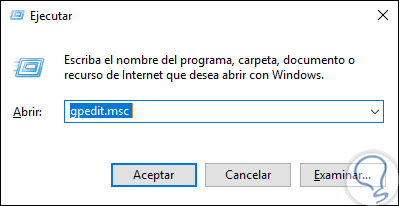
Step 2
In the deployed administrator we will go to the following route:
Step 3
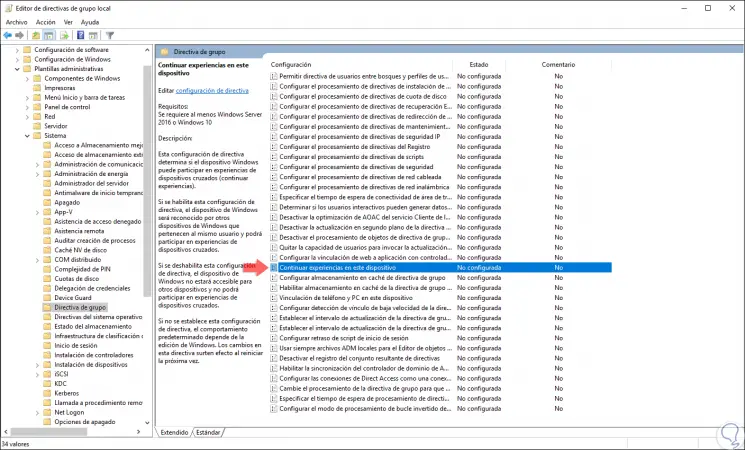
In the central panel, we must locate a policy called “Continue experiences on this deviceâ€:
Step 4
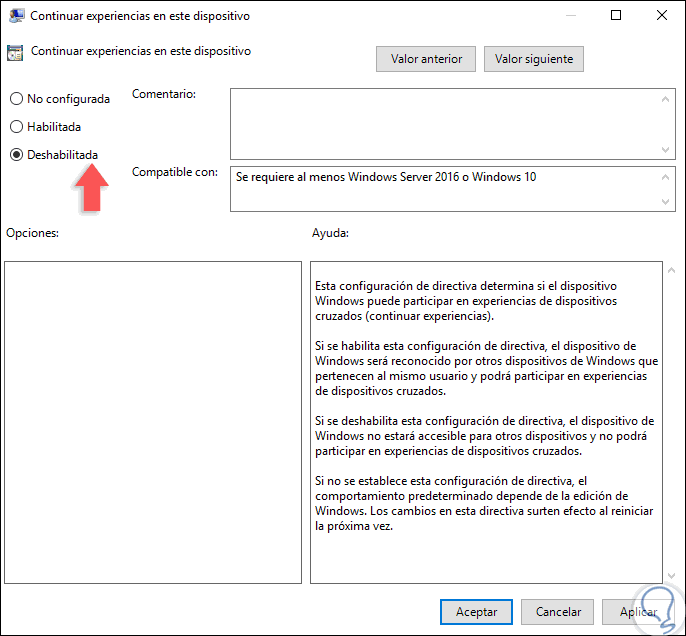
We double-click, or right-click / Edit, and in the displayed window we activate the Disabled box:
Step 5
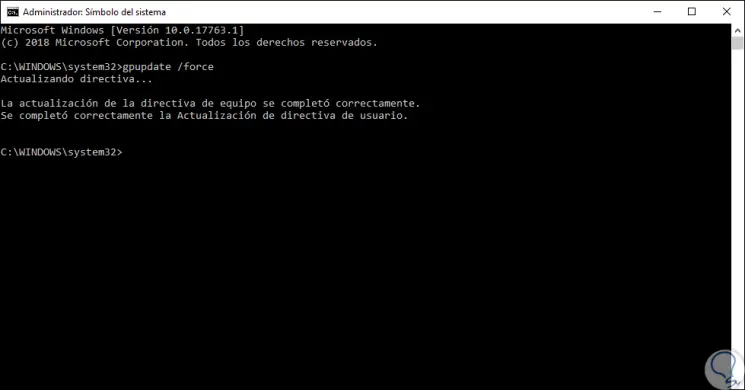
Click on the Apply and Accept button to save the changes. After this, we will go to the command prompt and execute the following line. This allows the policy to be updated and applied in the system.
gpupdate / force
3. Disable shared experiences from Windows 10 Registry Editor
This option can be used in all editions of Windows 10. Before accessing, we recommend that you create a backup copy of the files, since operating system logs that can cause instability will be worked out if they are not configured correctly.
Step 1
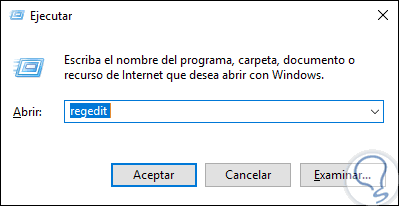
To access this option we will use the following key combination and execute the “regedit†command:
+ R
Step 2
In the displayed window we will go to the following route:
HKEY_LOCAL_MACHINE \ SOFTWARE \ Policies \ Microsoft \ Windows
Step 3
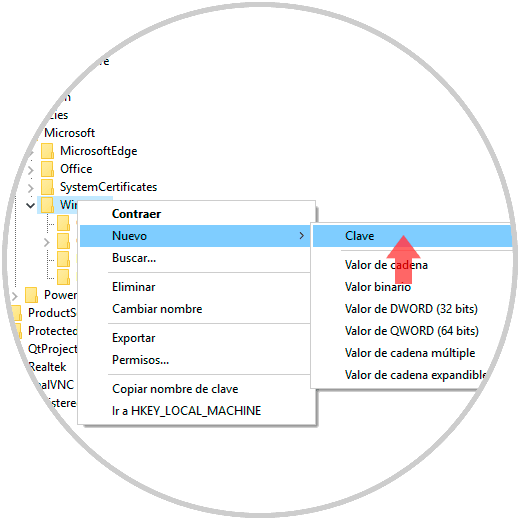
There we will right click on Windows and select the New / Password option:
Step 4
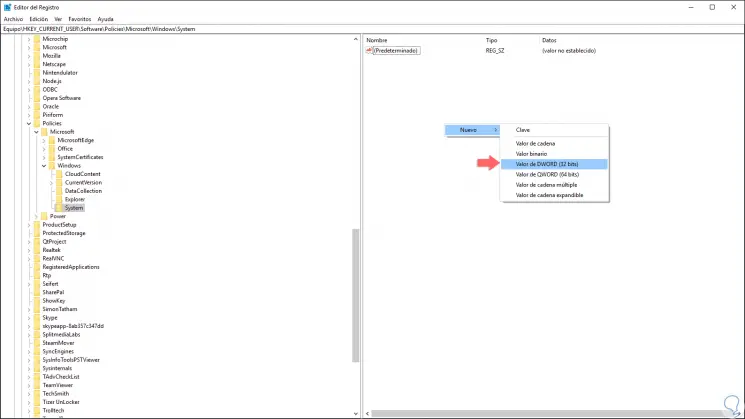
This new key will be called System. Now we will right click on some free System place and select New / DWORD Value (32 bits):
Step 5
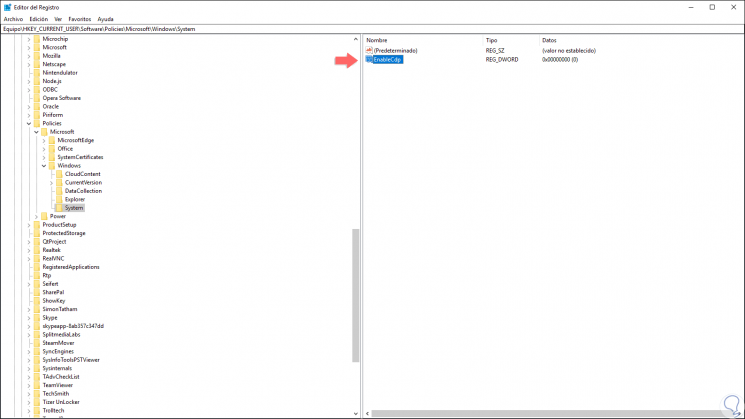
This new value will be called EnableCdp:
Step 6
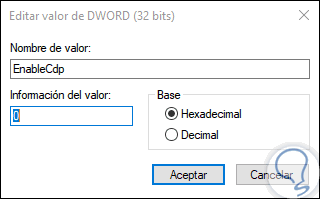
We double-click on this value and in the Value information field we assign the value 0. Click on OK and we can exit the editor.
Thus we have several methods to disable shared experiences in Windows 10.