Microsoft is constantly releasing new updates, both security and quality, for its Windows 10 operating system, security being perhaps the most important for its mission. Within this world of Windows 10 updates , it is normal that these, once they have been downloaded, are automatically installed on the system so that their corrections and news are applied correctly, but this requires the system to restart and not always you have enough time or space to execute this action since some of these updates may take more than an hour..
For this, Microsoft has integrated an option, since build 14997, to be able to pause these updates and thus prevent them from being automatically applied to the system. This gives us the opportunity to manage our time much more centrally, and now, in the 1809 edition, this functionality of Windows 10 has been improved and today we will see how to carry out the process of pausing updates in Windows 10 .
1. How to pause Windows 10 updates from the Configuration utility
Since the new Windows 10 update called October 2018, Microsoft has added a new Group Policy option which has been created with the function of enabling or disabling the action to pause updates for the operating system.
Step 1
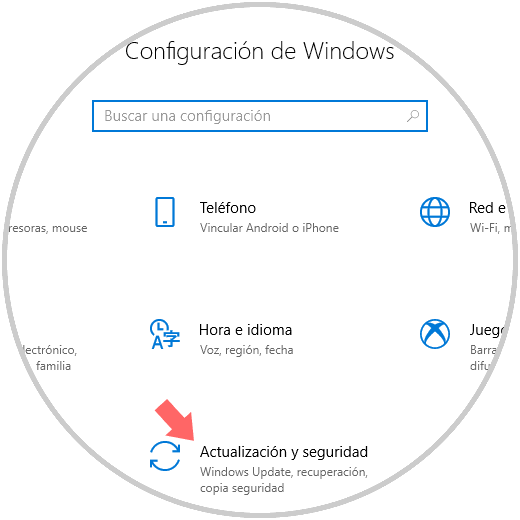
To access this function, we will go to the Start menu and there we select the Configuration utility:
Step 2
There we select the category Update and security and in the new window we will go to the Windows Update section:
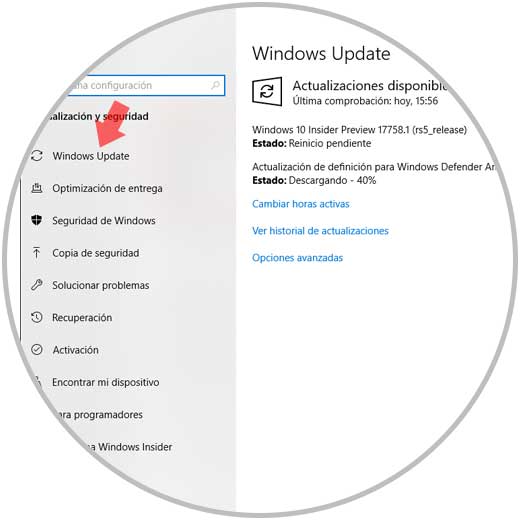
Step 3
There we click on the Advanced Options line and at the bottom we must enable the Pause updates switch:
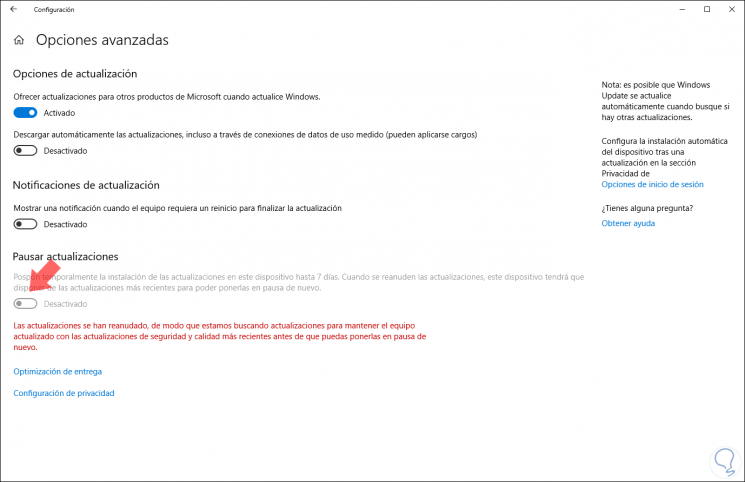
This way the updates will be paused for a period of 7 days if we are in the Windows Insider program or up to 35 days if we are not..
2. How to restrict access to the pause updates feature in Windows 10
The focus of the tutorial is to disable this Configuration option in order to prevent other users from accessing and pausing updates.
Step 1
The first alternative we will use will be through the system registry editor, for this, we use the Windows + R key combination and execute the regedit command and press Enter.
Note
TechnoWikis advises creating a backup or restore point before executing this task.
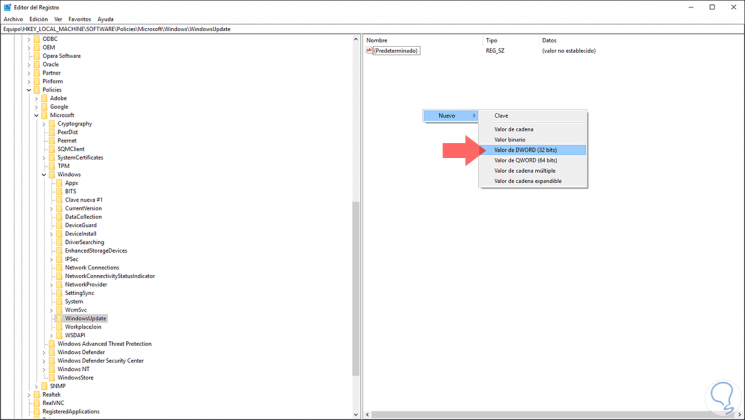
In the displayed window we will go to the following route:
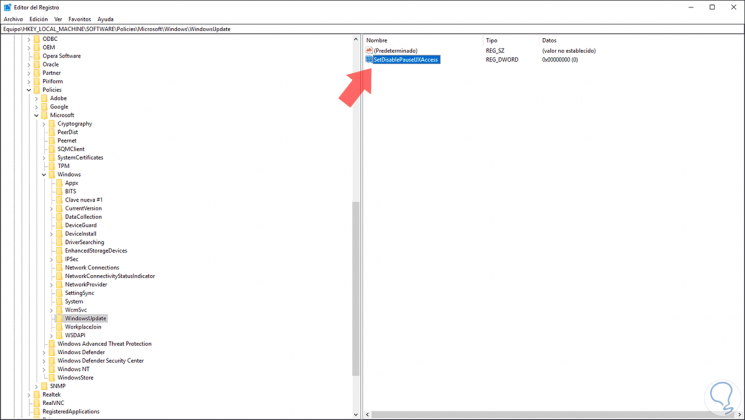
HKEY_LOCAL_MACHINE \ SOFTWARE \ Policies \ Microsoft \ Windows \ WindowsUpdate
Step 2
There, we must right click somewhere blank and select the New / DWORD Value option (32 bits):
Step 3
This new value will be called SetDisablePauseUXAccess:
Step 4
Now we will right click / Modify or double click on this DWORD value and in the window we will go to the Value data field and set its value to one (1):
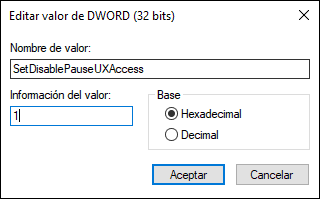
Click on OK and it will be necessary to restart the system to apply the changes.
3. How to restrict access to Windows 10 updates through the group policy editor
Step 1
This option applies to the Pro, Enterprise and Studio editions of Windows 10 and to access this editor we will use the Windows + R key combination and execute the gpedit.msc command and press Enter, in the window we will go to the following route:
Step 2
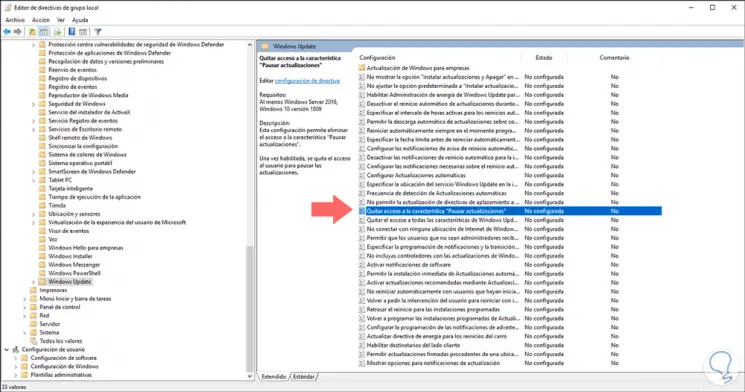
In the central panel we will locate the policy called Remove access to the “Pause updates†feature:
Step 3
Double click on it and in the open window we activate the Enabled box:
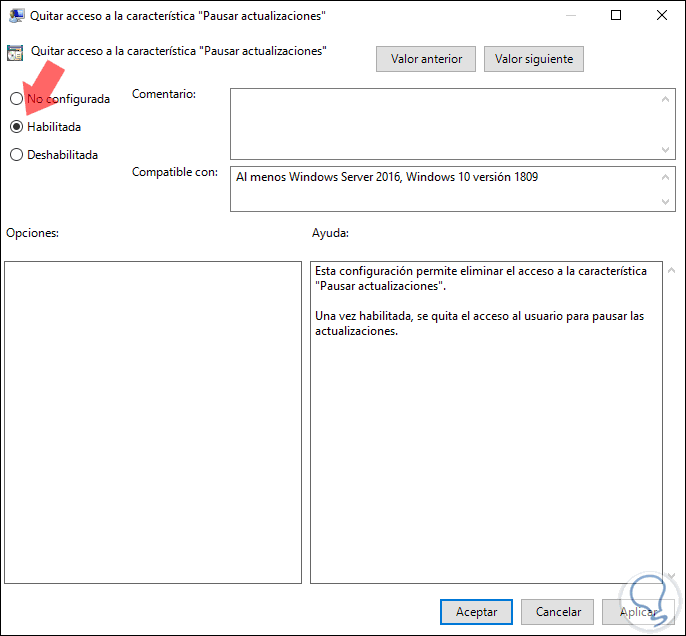
Click on the Apply and Accept button to save the changes..
That simple will prevent users from pausing updates in Windows 10.