Windows 10 has as one of its main axes the use of services and processes which are executed in the background and which by default should not affect the optimal performance of the system and its components..
But with the new updates of Windows 10, we have seen a process called wsappx which is part of the operating system itself, and is running in the background or can make excessive use of CPU and disk resources which results in a negative impact on system performance.
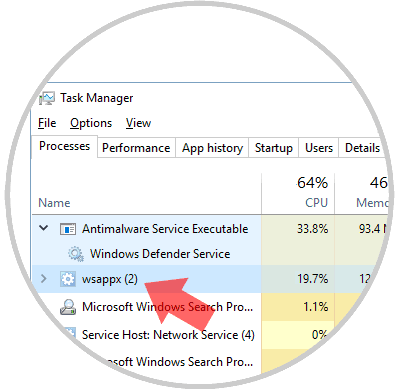
What is Wsappx?
This wsappx process is associated with the Windows Store and Microsoft's new Universal application platform (Universal Windows Platform (UWP))..
In summary, its main task is related to the management, installation, removal and update of applications from the Windows Store and as it is something we do not do frequently, we can proceed to its disabling to gain more use of resources focused on other types of tasks essential.
This process usually has three internal threads that are:
AppX Deployment Service (AppXSVC)
This process offers infrastructure support in order to implement store applications. This service will be initiated on demand and if it is deactivated, storage applications will not be implemented in the system and may cause execution errors.
Client License Service (ClipSVC)
It is another thread that offers infrastructure support for the Microsoft store. Like the previous one, it is a service that starts on demand and all disabled applications that have been purchased from the Windows Store will not behave ideally.
Windows Store Service (WSService)
This service is identical to the previous one.
From this point of view, all the desktop applications that we use in common in Windows, use CPU and disk resources when they are installed, removed or updated, while we work with the applications of the Windows Store, we can see the resources used by the AppXSVC thread instead of the traditional installation program..
This process cannot be disabled since they do not run automatically in the background, they are only active when we do some process in the Windows store and they close when we do not use these applications, but today TechnoWikis will give some guidelines on how to solve the error of high consume.
1. Make use of group policies to solve high CPU and disk usage Windows 10
Step 1
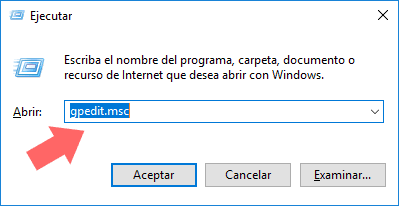
To perform this method, we will use the following key combination:
+ R
We execute the following command:
gpedit.msc
Press "Enter" or "Accept."
Step 2
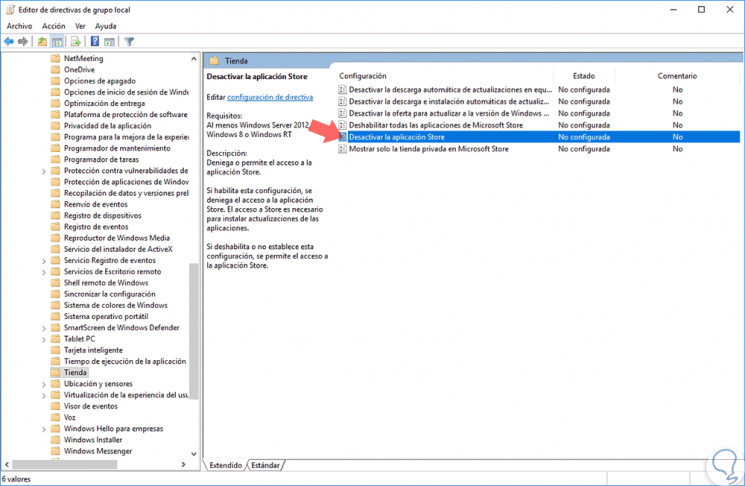
In the displayed window we will go to the following route:
There we will double click on the policy called "Deactivate the Store application":
Step 3
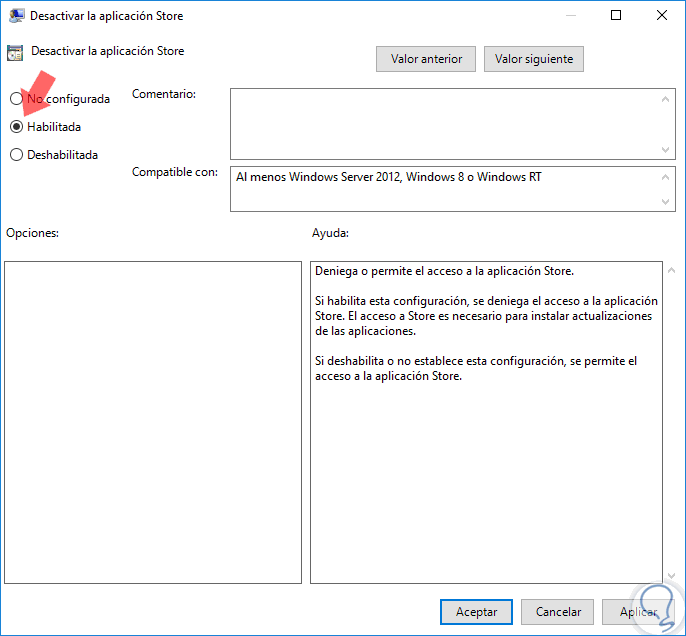
The following window will be displayed: There we activate the "Enabled" box and click on the "Apply and Accept" button to save the changes.
Note
This process only applies to the Windows 10 Pro and Enterprise editions.
2. Scan the computer for viruses to solve high CPU and Windows 10 disk usage
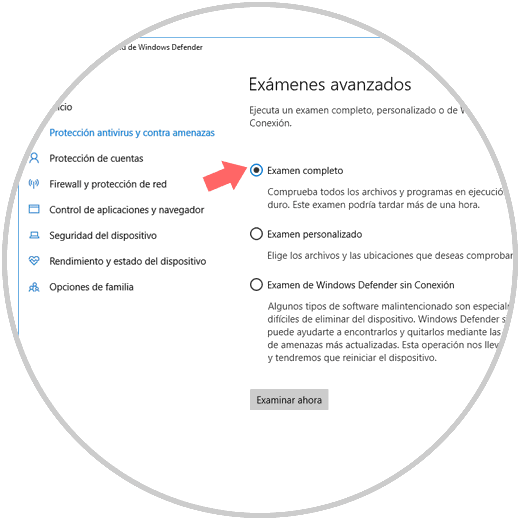
Another cause that can cause the high consumption of resources in the system is the presence of viruses or malware which can be downloaded very simply. For this we can make use of any of the antivirus applications available for free or use the Windows 10 integrated application, Windows Defender.
To do this, we go to the "Windows Defender Security Center" and in the "Anti-virus and threat protection" section and proceed to run a full scan in search of threats:
3. Run a disk scan to solve high CPU and Windows 10 disk usage
We can see how the wsappx process is not the root of high resource consumption in Windows 10 but there are many other reasons within which we include internal damage to the disk at the sector level.
Windows 10 offers us an integrated tool to analyze the hard disk and for this we will access the command prompt as administrators and there we execute the following:
chkdsk / f / r
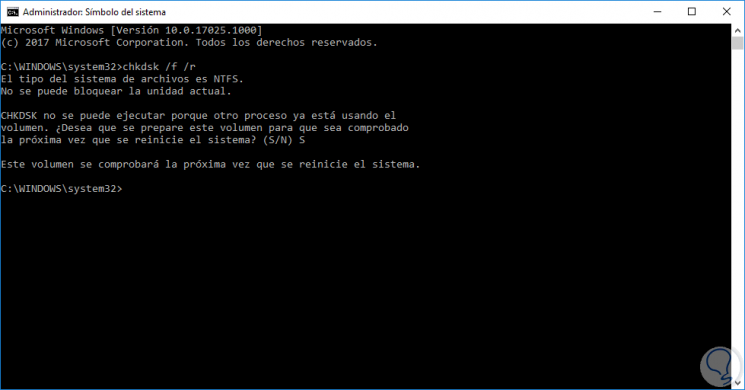
Thus, when the system is rebooted it will make a detailed analysis on the disk in search of errors:

We can understand how many processes are an integral part of Windows and each one plays a special role but we also have useful alternatives to improve the performance of our team.