Blizzard Entertainment has been developing entertainment software for all types of users since 1994, which is really demanding, since this involves graphics, videos, audio, 3D and much more. Within its portfolio of options there is a free game service called Battle.net, which is one of the most active in the world as it has millions of users worldwide..
By accessing the website we can register for free to access the games and download the application for the PC, we can go to the following link:
Battle.Net
This will download the Battle launcher with which we will manage our account and can manage the games. In diverse situations we may encounter errors when accessing Battle and therefore TechnoWikis will give you a complete list of solutions with which Battle will work in the correct way.
1. How to run Battle.Net as an administrator
One of the simplest solutions is to grant administrator permissions to Battle since Windows 10 works frequently with them, so if you do not have some permissions you will not be granted permission to access the application.
Step 1
To assign these permissions we will go to the route where Battle has been installed:
C: \ Program Files (x86) \ Battle.net
There we will right click on the launcher and in the options displayed select "Properties":

Step 2
In the pop-up window we go to the "Compatibility" tab and check the "Run this program as administrator" box:
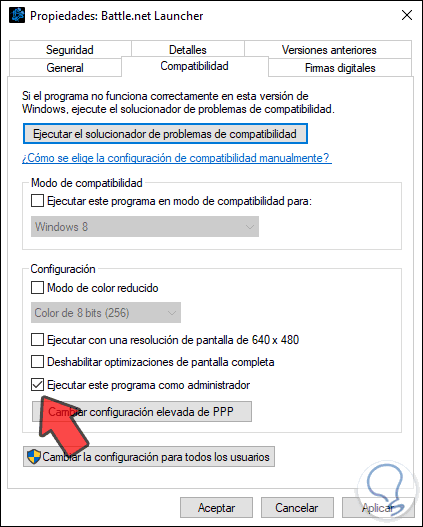
We click Apply and then OK to save the changes..
2. How to empty the DNS of the Windows 10 system
The DNS (Domain Name System) server allows IP addresses to be translated into a domain name and vice versa, but with frequent use of the network to download or update Battle games, the DNS can become saturated creating access conflicts.
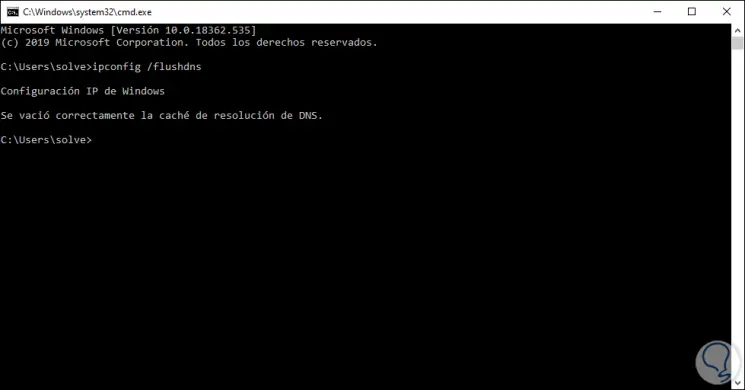
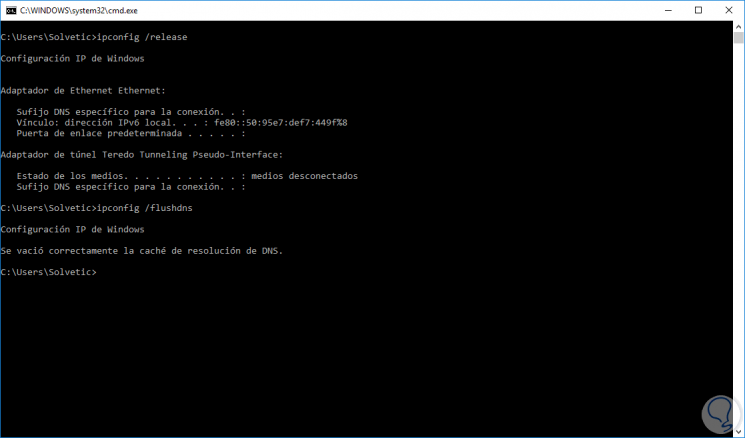
In this case the most ideal solution is to empty this DNS and for this we access the command prompt as administrators and there we execute the following:
ipconfig / flushdns
3 . How to check the Windows 10 firewall
One of the reasons that can affect access to Battle.Net is the system firewall or even the antivirus. This is due to the rules of entry and exit that these have, which have been developed in order to allow network packet traffic.
Step 1
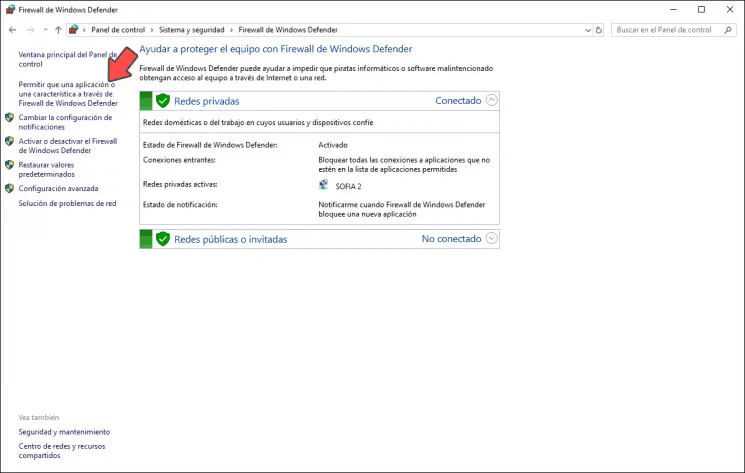
Therefore an extreme configuration can bring consequences of opening Battle. To check if this is the reason we will go to the following route:
- Windows Defender Firewall
Step 2
There we click on the line “Allow an application or a feature through Windows Defender Firewall†and the following will be displayed:
Step 3
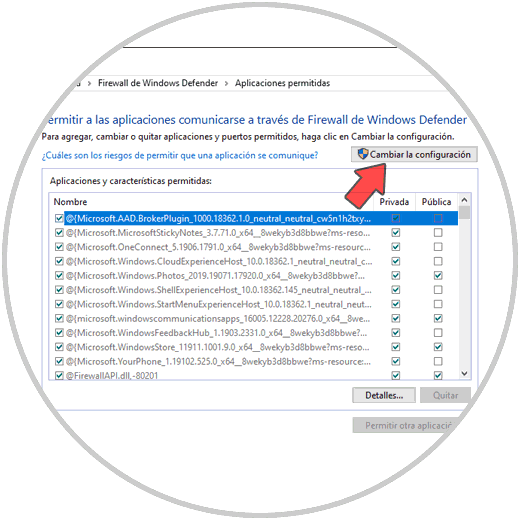
We click on the "Change settings" button and then all the available options will be activated:

Step 4
We click on the "Allow another application" button and in the next window click on the "Browse" button and go to the Battle path:
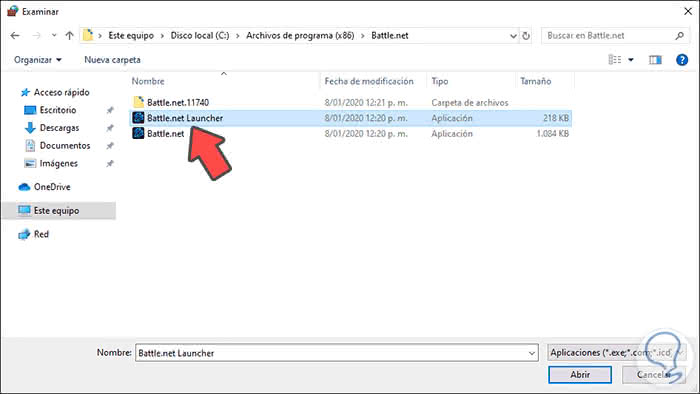
Step 5
Select the launcher and click Open:
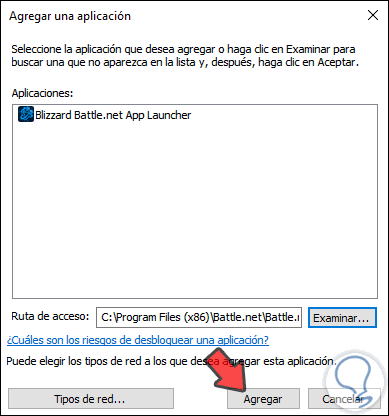
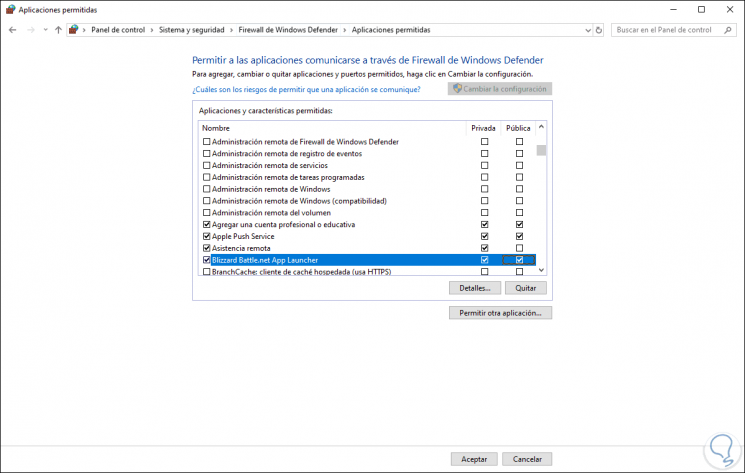
Step 6
We click on “Add†and after this we assign the permissions based on the type of network used (private or public). Finally we click on OK to save the changes.
4. How to clear the cache and objects from the Battle Tools folder
When we run Battle.Net, by default a series of processes and services are launched that allow its correct operation, therefore, if any of these services or files were to have any type of failure will result in a negative impact on access to Battle .
Step 1
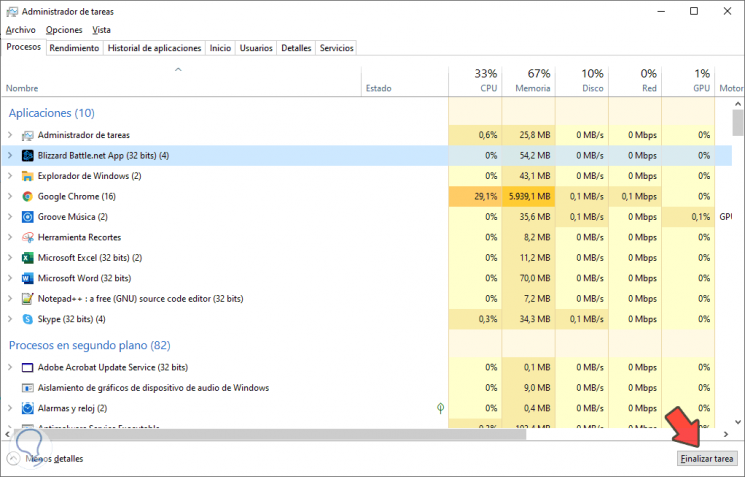
To correct this, we will go to the Task Manager and finish the task of the following services:
- Blizzard Update Agent.exe
Step 2
We can use two ways:
- Right click on the service and select “End taskâ€
- Select the service and click on the “End task†button
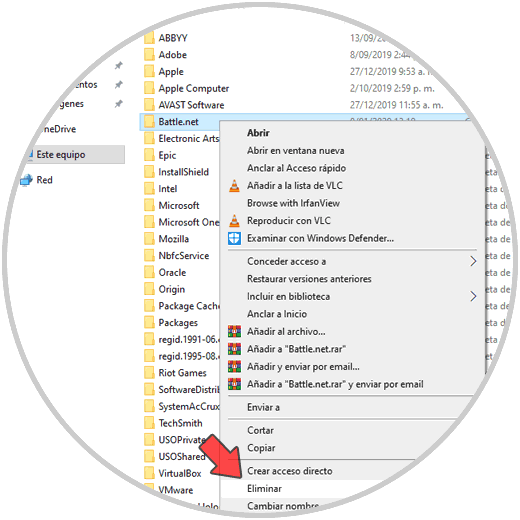
Once we finish these services, we go to Windows Explorer in the following path:
C: \ ProgramData
Step 3
There we proceed to delete the Battle.net folder. Then we proceed to start the application.
5. How to disable Windows 10 background programs
Windows is a service-based operating system and many of them are executed in the background and can interfere with the execution of Battle.net.
Step 1
These programs can be disabled easily and thus validate that Battle starts correctly. To do this, we combine the Windows + R keys and execute the following command:
msconfig
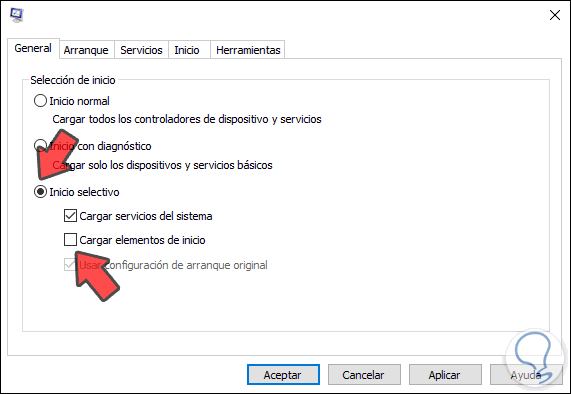
Step 2
There we will go to the "General" tab and activate the "Selective startup" box and then uncheck the "Load startup items" box:
Step 3
Now we will go to the “Services†tab and there we activate the “Hide all Microsoft services†box and click on the “Disable all†button:
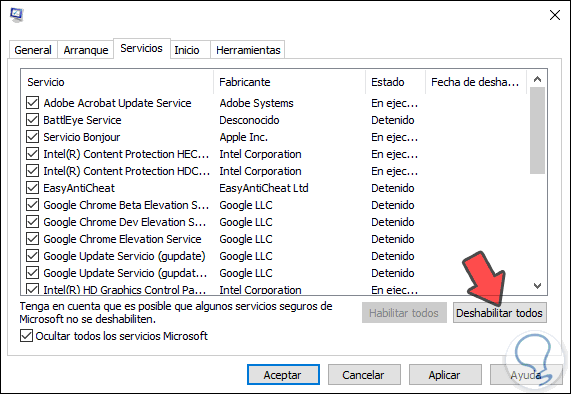
So we will only disable the different services of the system itself, click on Apply and Accept to complete the process, restart the system and access Battle.net.
6. How to enable secondary Battle.net login
This is a parameter that manages startup processes using alternate credentials.
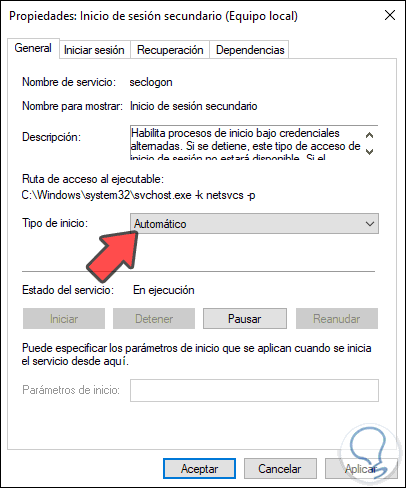
Step 1
To activate it, we use the Windows + R keys and execute the services.msc command. Next we locate the service called “Secondary loginâ€:

Step 2
We double click on it and in the field "Startup type" we set the value "Automatic". We confirm the changes by clicking on Apply and Accept.
7. How to reinstall the Battle.net launcher
If none of the solutions provided help correct the error we can resort to reinstalling the launcher.
Step 1
First, we will go to the following route:
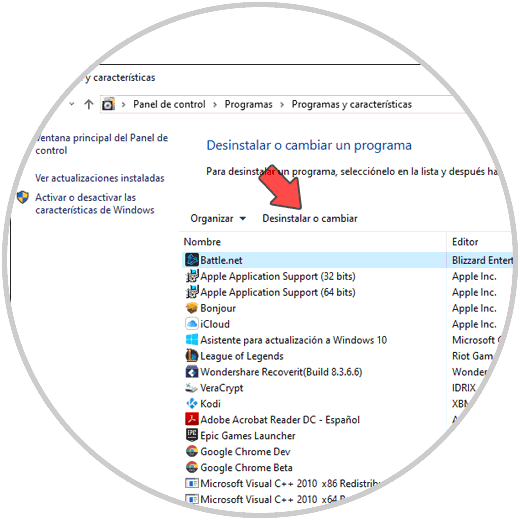
- Programs and characteristics
Step 2
There we select Battle and click on the “Uninstall or change†button at the top. We follow the steps in the wizard to uninstall the current Battle launcher.
Step 3
We restart the system and once we access we will go to the following link to download the launcher again:
Battle.net
8. How to update network drivers and Windows 10 operating system
An outdated driver is a natural error factor of various applications within which Battle.net can be.
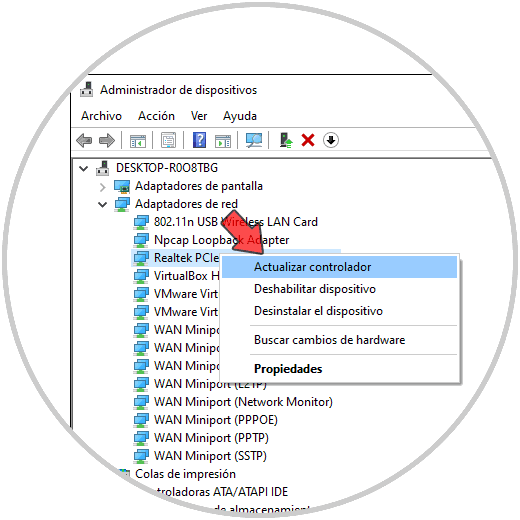
Step 1
To update the drivers, we will access the Device Manager and there we will display the options of the “Network adapters†line and then right click on the current network controller and select “Update driverâ€:
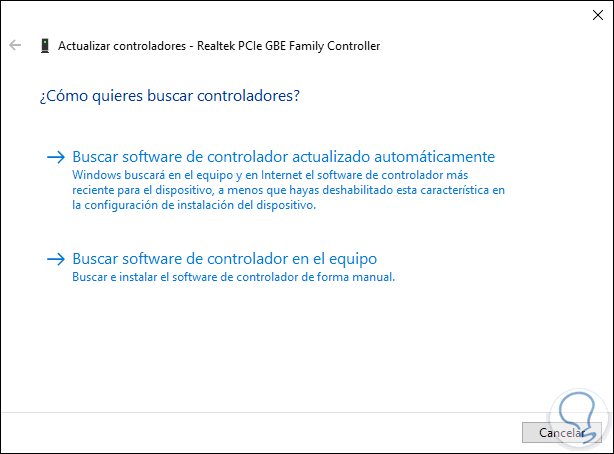
Step 2
After that we can update the controller either manually or automatically:
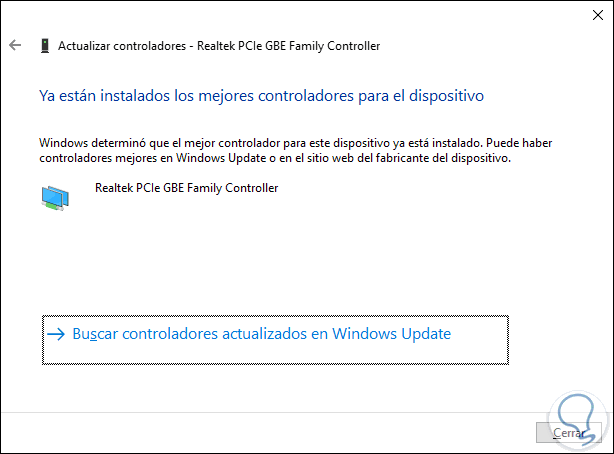
Step 3
After this we can validate if the controller has been updated or not:
Step 4
The other step to follow is to look for updates of the operating system, for this we will go
- In the "Windows Update" section, click on the "Check for updates" button:
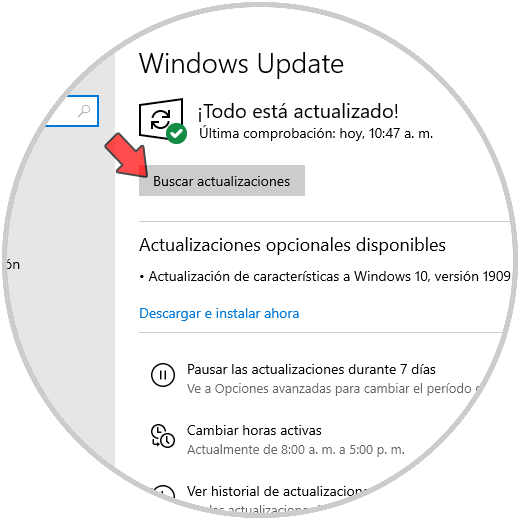
Once everything is updated, we can try to access Battle.net..
9. How to release and renew the PC IP address
Being a game that needs network connectivity for its operation, any problem with the IP address will prevent the connection processes from being adequate and thus prevent Battle.net from opening.
Step 1
To correct this, we can release and renew the IP address and this will refresh the connection.
Step 1
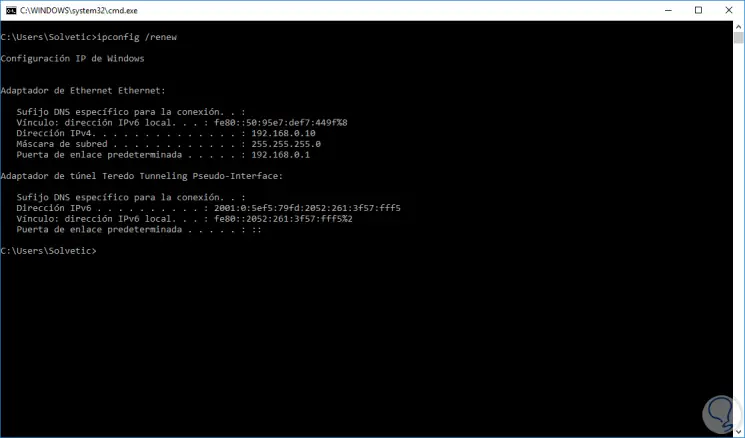
To do this we access the command prompt as administrators and to release the IP we will execute the following:
ipconfig / release
Step 2
Now, to renew the IP address we will execute:
ipconfig / renew
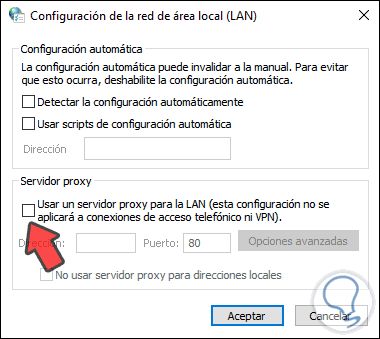
10. How to disable proxy servers
A proxy server is used for the purpose of increasing browsing security and privacy, but this may be the root cause of battle.net not being executed. In this case TechnoWikis recommends you disable the proxy in the following route:
Step 1
Control Panel \ Networks and Internet

Step 2
We select the line "Internet Options" and in the window we will go to the "Connections" tab:
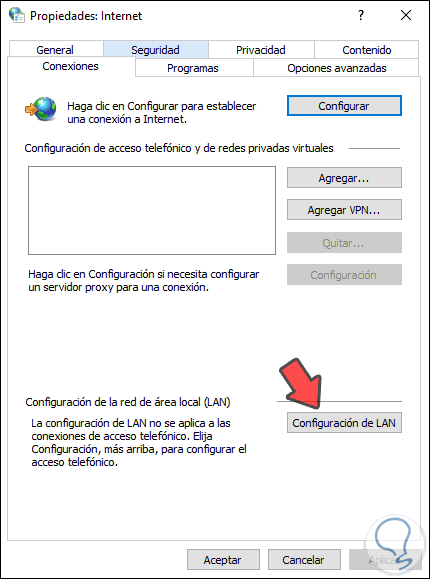
Step 3
We click on "LAN Settings" and there we deactivate the "Use a proxy server for LAN" box. We click OK to save the changes.
11. How to reset the Hosts PC file entries
This is a file that has the purpose of managing access to websites whether or not allowing their permissions.
It is ideal in this case to add some lines so that battle.net has full access to the network. This file is found in the path C: \ Windows \ System32 \ drivers \ etc. There we must access as administrators in the notebook for editing and if the following lines are present in the file we must delete them:
127.0.0.1 eu.actual.battle.net 127.0.0.1 us.actual.battle.net 127.0.0.1 enGB.nydus.battle.net
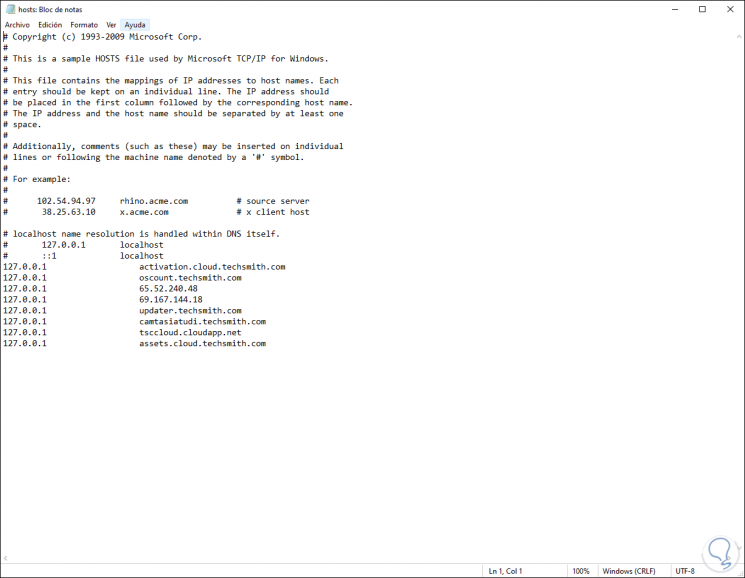
After deleting them, if they exist, we save the changes to the file.
Note: Restart network devices
The error can be caused by failures in the network devices of the system, to discard this we can simply disconnect the network peripherals for one or two minutes or check the network connections to rule out that any cables are badly connected.
These solutions have been designed to provide a comprehensive and complete solution to Battle.net access errors and thus have full access at the time such action is necessary.