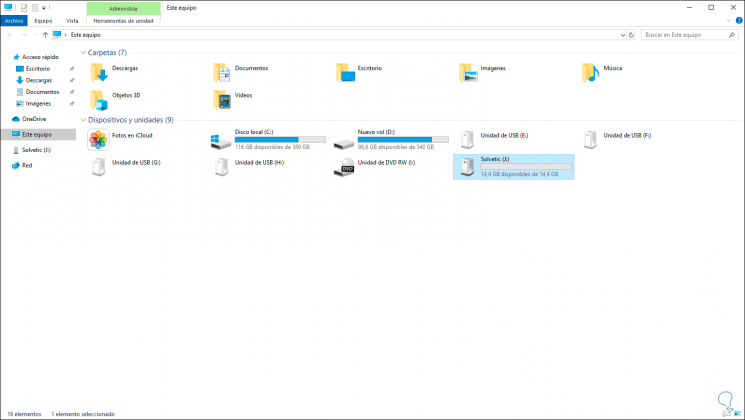
Our units help us to organize the content in different places, whether internal or external. From each unit we can manage different aspects depending on what we have dedicated that storage unit for. Within the command terminal we can move between each unit to configure or make changes that we need at any given time bypassing the graphic mode. Microsoft has integrated various options for customization and administration of Windows 10 and one of them is the automatic assignment of letters to the connected internal and external storage units , this can be validated from the File Explorer of the system :
Windows does an analysis on the letters A to Z in order to find the first available letter to assign to the new drive and you should know that the letters A and B are designed for diskette drives which are not active today to million users and as a rule, the letter C is assigned to the unit where Windows 10 is installed. Then we can interact between the different units even from the command console as we will see in this tutorial..
If for any reason you want to change the letter of a unit in Windows 10 you have several ways which TechnoWikis will explain in detail. We will also see how to change units from the command console and thus work on them easily.
To keep up, remember to subscribe to our YouTube channel! SUBSCRIBE
1. Change drive in CMD in Windows 10
Step 1
We open CMD as Administrators
Open CMD
Step 2
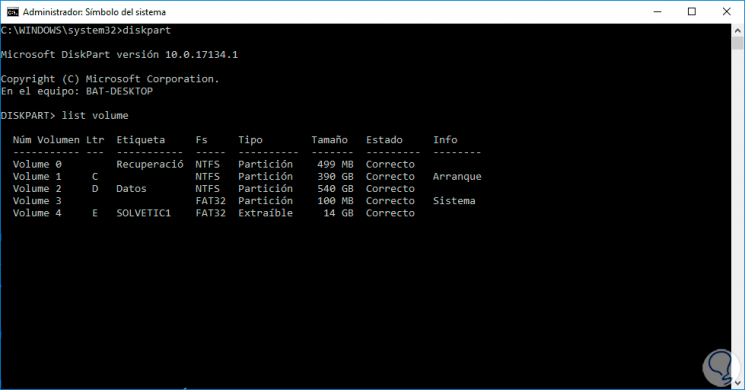
Now we execute the diskpart command and then list volume to see our drives:
Diskpart Volume list
Step 3
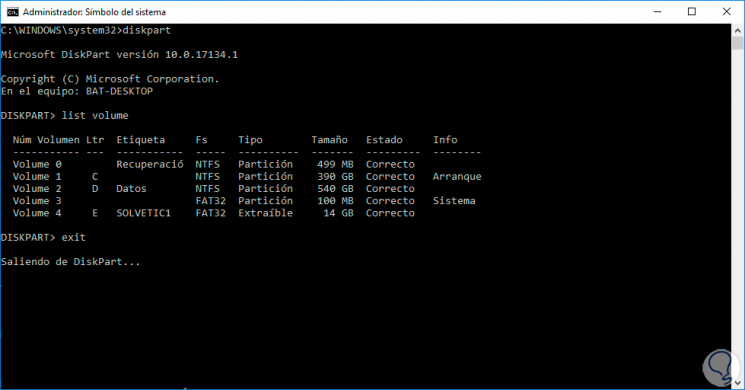
We leave diskpart with the exit command:
Step 4
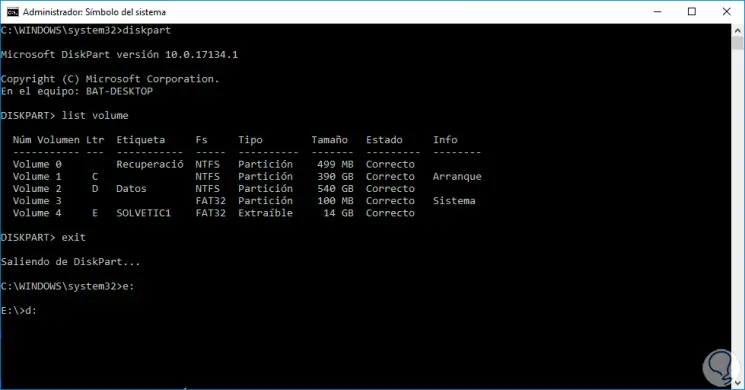
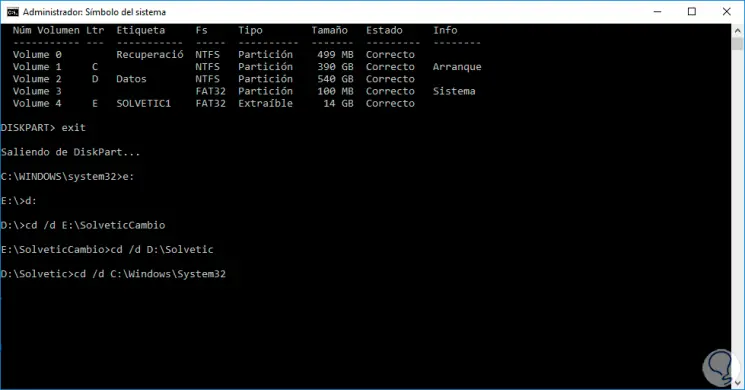
The simplest command to change disk drive is to place the letter followed by a colon, for example, e:
Step 5
If we want to change to a directory of another unit we will put the following syntax:
Cd / d "directory path"
Step 6
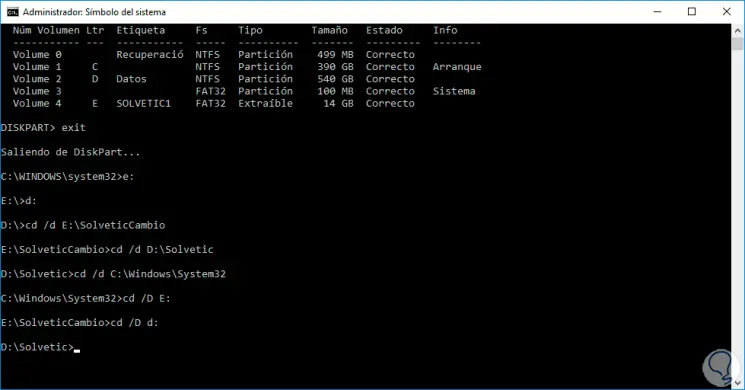
Finally, another option to change the unit is to use the following syntax:
Cd / d unit: For example, cd / de:
2. Change drive letter from Disk Manager in Windows 10
Step 1
To access this administrator you can use any of the following options:
Step 2
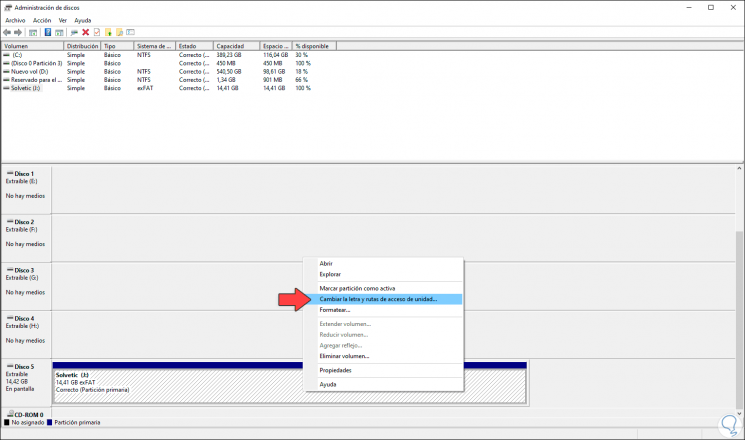
Once we access the Administrator we will locate the unit to which we are going to change the letter, in this case it will be to a USB drive that has the letter J assigned, we right click on it and select the option “Change the letter and paths to unit":
Step 3
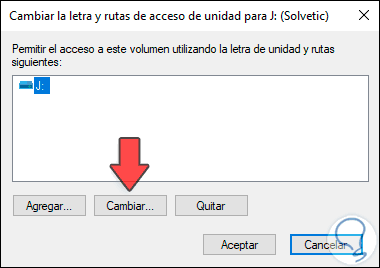
The following window will be displayed with the current letter:
Step 4
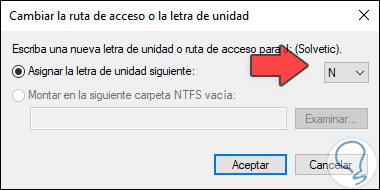
There we click on the "Change" button and in the next window we select the desired letter from the drop-down list:
Step 5
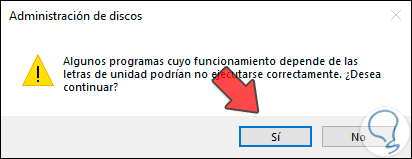
We click OK to complete the process and we will see the following warning.
Step 6
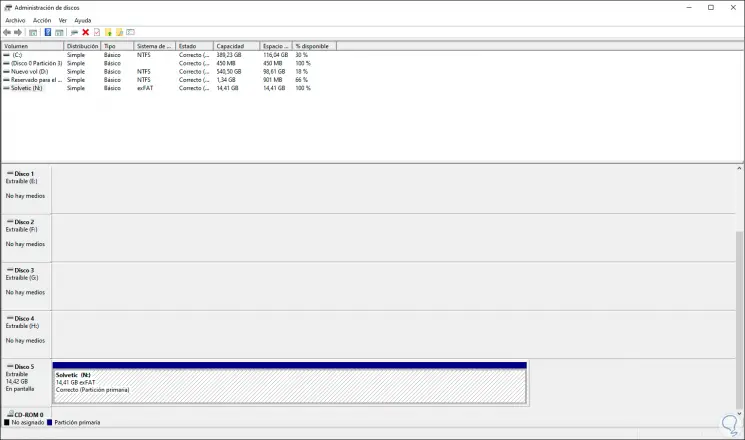
We will see the new letter assigned to that unit:
3. Change drive letter from Windows PowerShell in Windows 10
PowerShell is the modern administration console in Windows 10 with which we have a large series of commands to manage many aspects of the system and of course we can change the drive letter.
Step 1
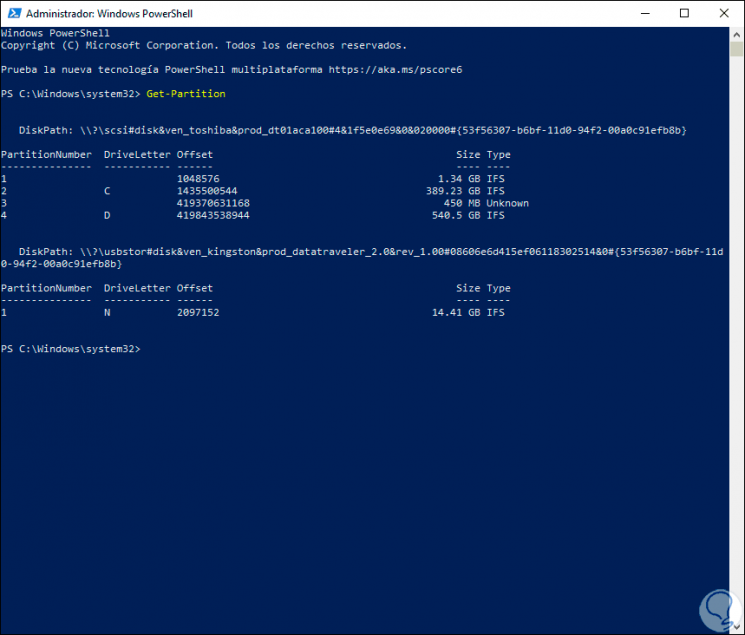
To do this, we access Windows PowerShell as administrators and in the console we execute the following:
Get-Partition
Step 2
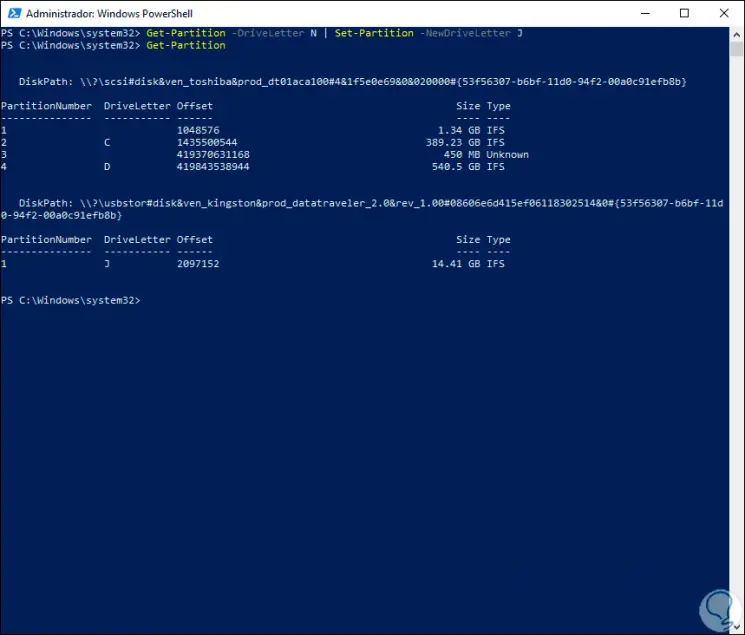
In this case the letter that we are going to modify will be the letter N, this letter we will assign it with the letter J, for this we execute the following:
Get-Partition -DriveLetter N | Set-Partition -NewDriveLetter J
Step 3
We can run Get-Partition again to validate the change:
4. Change drive letter from Command Prompt in Windows 10
Last but not least, we can change the letter using the command prompt.
Step 1
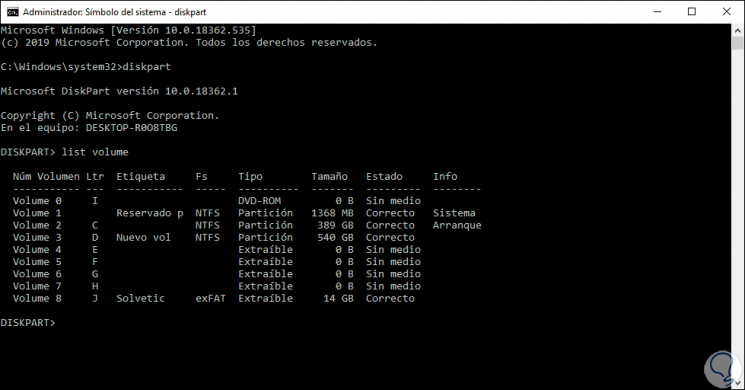
For this we access as administrators and execute the "diskpart" command, then we list the drives with the "list volume" command:
Step 2
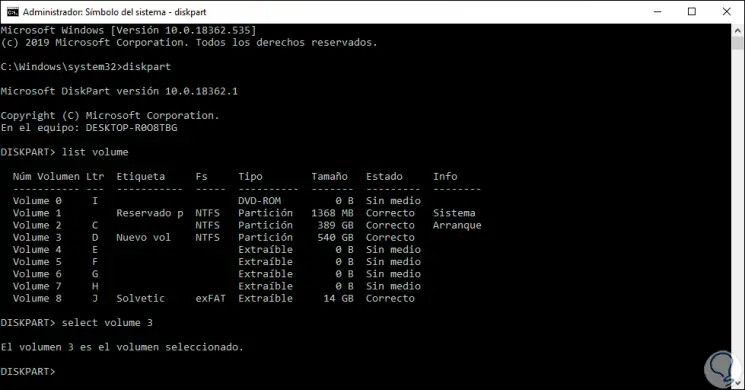
In this case we will change the letter D, there we will focus on the “Volume†column to select the unit, in this case it will be 3:
select volume 3
Step 3
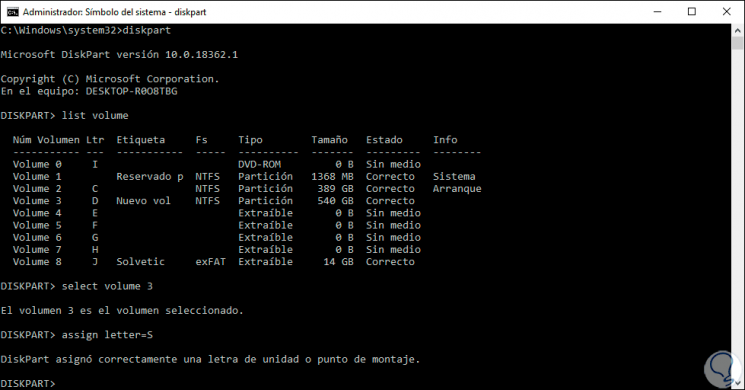
Now we simply execute the following to assign the letter, in this case the letter S:
assign letter = S
So simple you have several methods to modify the letter in the storage units in Windows 10..