Audio is one of the most delicate aspects in Windows operating systems since with daily work it is normal for us to play our favorite songs, watch series or movies when we have free time or we can listen to notifications from both the system and applications. Therefore, many users are looking for the best audio components and one of the most popular is Realtek HD Audio Manager, which is able to automatically detect the audio devices integrated in the equipment and facilitate its management, Realtek has designed An administrator called Realtek HD Audio Manager which is installed together with the driver and this is an administrator who provides us with functions such as:
Realtek HD Audio Manager Features
- Compatible with Dolby's Digital Theater Systems (DTS).
- It integrates a six-channel digital to analog converter (DAC).
- Allows the deactivation and / or enable of specific speakers in the equipment.
- Integrates a sound test button.
- We can define the audio configuration as Speaker 5.1, Quad and Stereo.
- It has a volume control section .
Today TechnoWikis will explain how you can access this administrator or correct errors associated with the use of Realtek (remember that we access from the taskbar) and thus get an additional benefit to the audio on your computer.
If you do not have this Realtek administrator you can download it at the following link:
Realtek HD Audio Manager
Next, we will solve errors associated with accessing the sound manager from the taskbar.
1. Open Realtek Sound Manager from File Explorer
Let's see a simple way to find the sound manager if we don't see it from the taskbar.
Step 1
We open File Explorer with these forms:
File Browser
Step 2
We will go to the next route from the explorer
C:\Program Files\Realtek\Audio\HDA
Step 3
Here we double click on the file "RAVCpl64.exe" and if it does not open we test with the file "RtkNGUI64.exe" 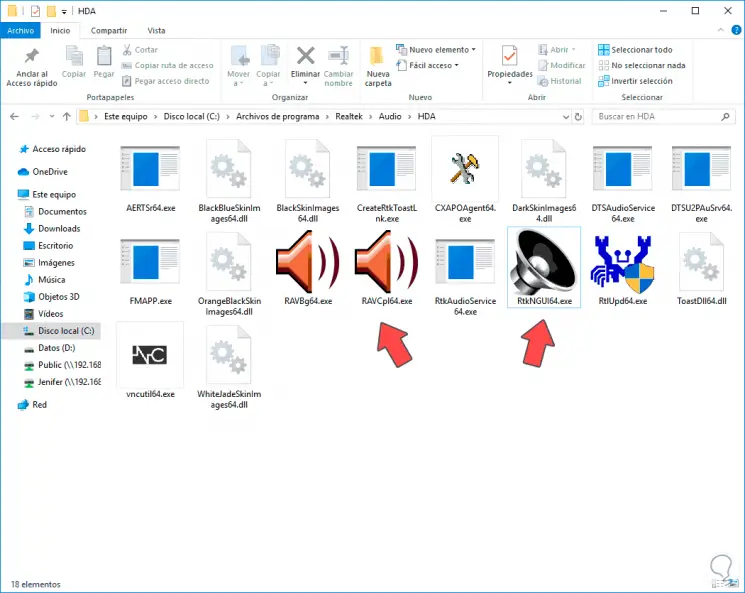
Next, we will see more solutions to be able to see the Realtek Administrator when it does not appear in the taskbar.
2. Reinstall the driver to open Realtek Sound Manager
Like many applications on Windows, the Realtek administrator may not work at certain times.
Step 1
If this is the case, we must access the Device Manager using one of the following methods:
Device Manager
Step 2
There we will go to the "Sound and video controllers and gaming devices" section, we will deploy the drivers installed there and click on the "Realtek High Definition Audio" driver and click on the "Uninstall the device" option: 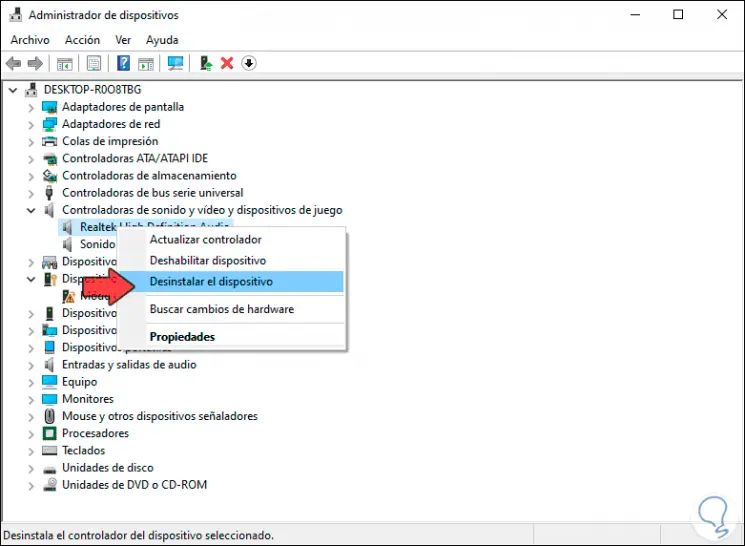
Step 3
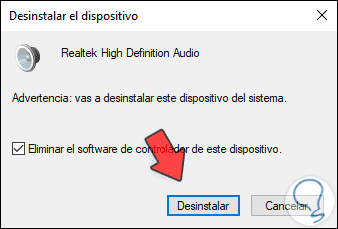
In the pop-up window we activate the "Remove the driver software from this device" box. This will completely eliminate the services associated with Realtek together with the operating system driver.
Step 4
Now there is the possibility of reinstalling the Realtek audio driver, this allows all the associated processes to be updated and thus its operation is optimized, for this we must first download the Sound Manager from the link that we have indicated above, a Once downloaded, we proceed to its execution and follow the steps of the installation wizard, TechnoWikis recommends you install as administrator by right clicking on the executable and selecting "Run as administrator": 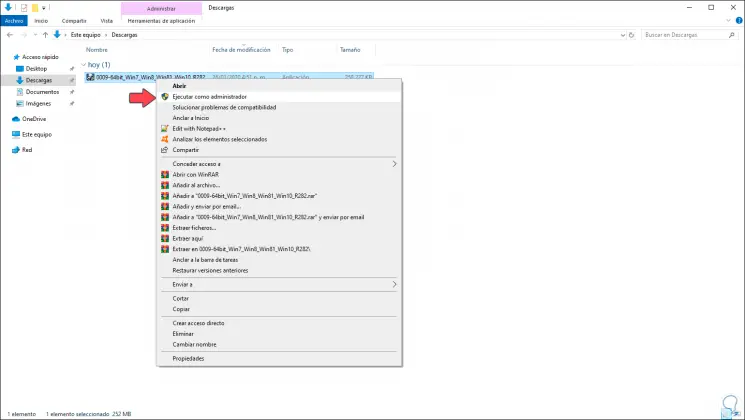
Step 5
This will give way to the process of extracting the files:
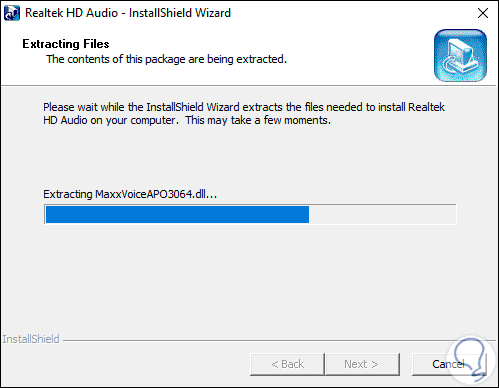
Step 6
Then we will see the following: 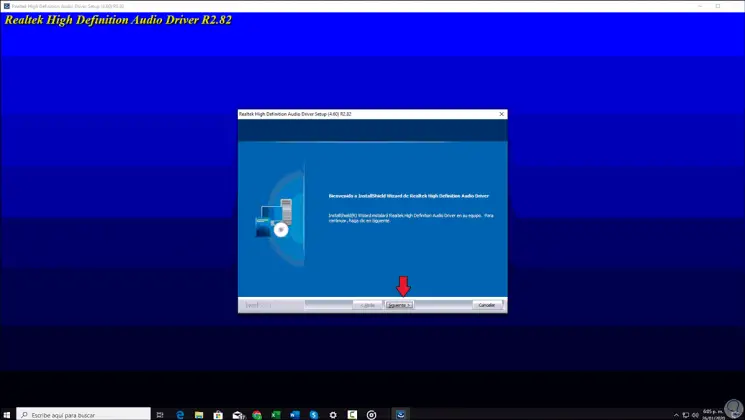
Step 7
There we click Next and the following will be displayed: 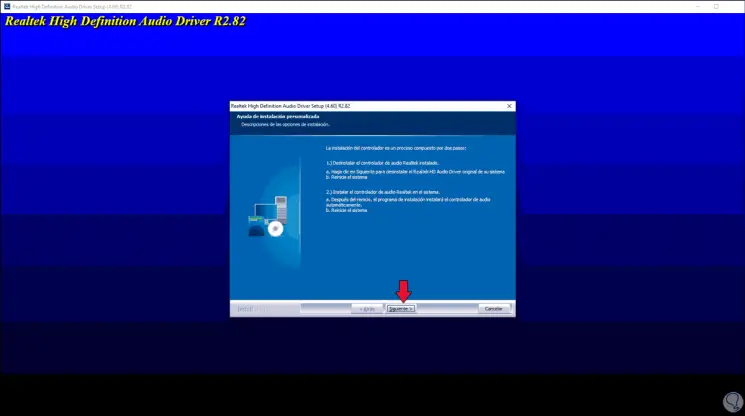
Step 8
We click Next and the installation process of the Realtek audio manager will start on Windows 10: 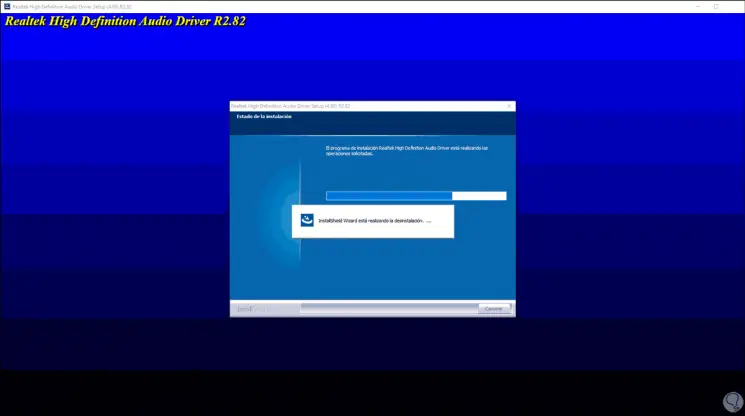
Step 9
When this process comes to an end we must restart the equipment to complete the process: 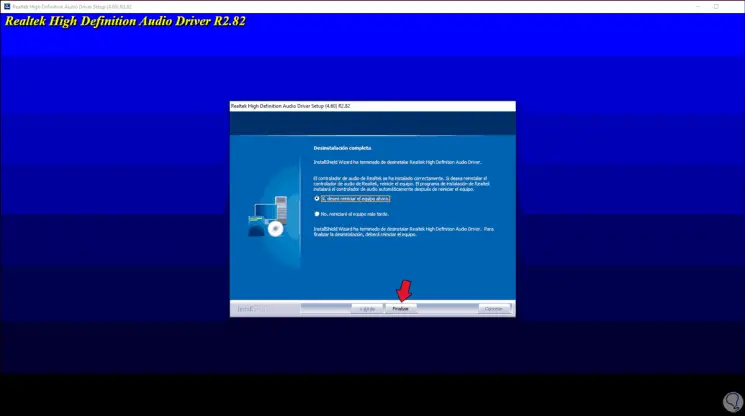
Step 10
Once installed we will go to the following route:
C: \ Program Files \ Realtek \ Audio \ HDA
Step 11
There we will right click on RAVCpl64 and select the option "Send to / Desktop (Create shortcut)": 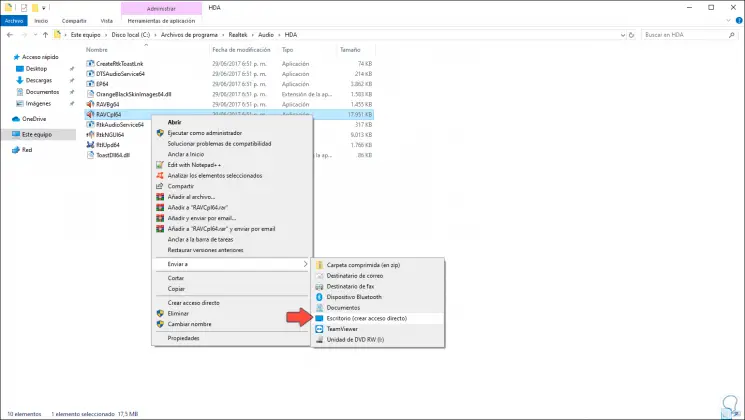
Step 12
There we can right click on this shortcut and select the option "Pin to Start" for a better control of it or we can pin it to the taskbar to access with a click. 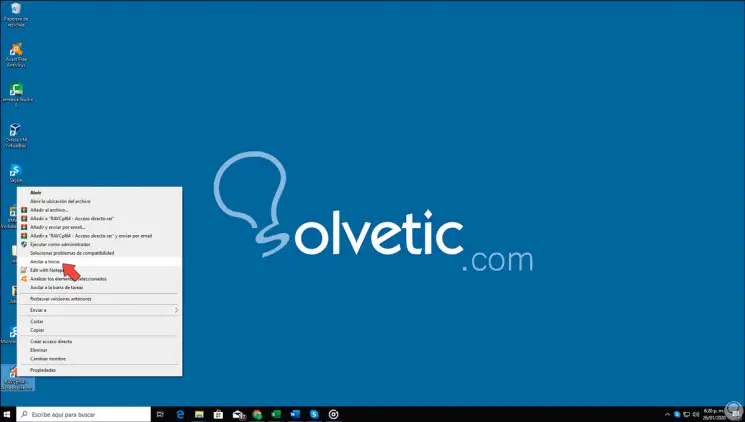
3. Enable at boot to open Realtek Sound Manager
As mentioned earlier, when installing the Realtek sound manager from the taskbar.
Step 1
Now, on some computers this icon is not available there, we will see how to verify that the administrator is correctly installed for access.
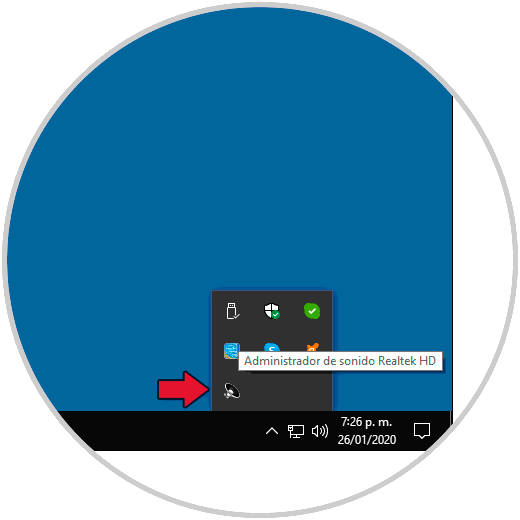
Step 2
This step implies validating that the Realtek sound manager has been started from the system startup, for this we must go to the Task Manager and in the "Start" tab we validate that the "Realtek HD Audio manager" line is enabled. If not, we must enable it. 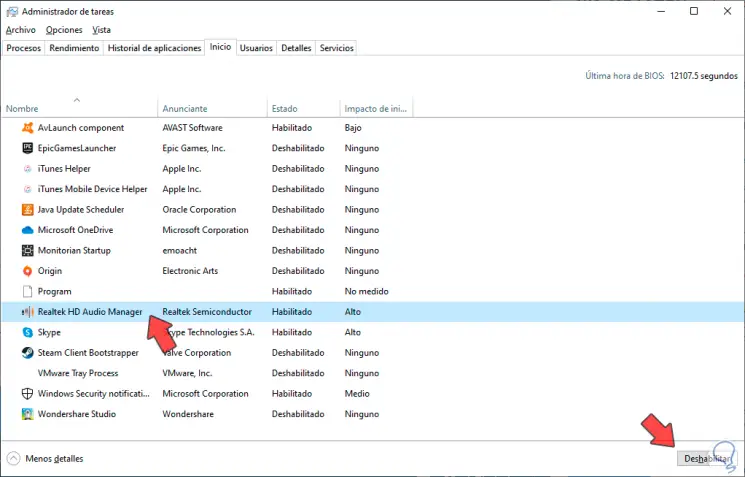
4. Activate icon in taskbar to open Realtek Sound Manager
When Realtek Administrator is installed on Windows 10, access to it is automatically created from the control panel
Step 1
To validate that this is so we will go to the following route in the panel:
Step 2
Remember that to access All the elements we must go to the "View by" field and there select "small icons" or "large icons". There we must find the line "Realtek Sound Manager", we simply click on that line for opening. 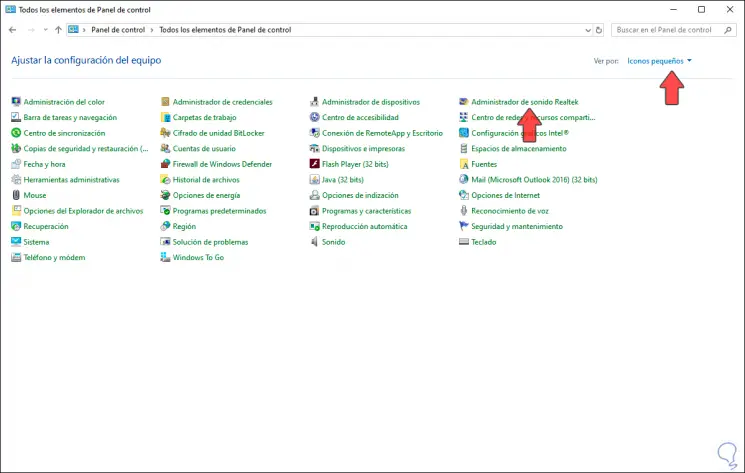
Step 3
Using any of the above options we will see the following. We click OK to save the changes. 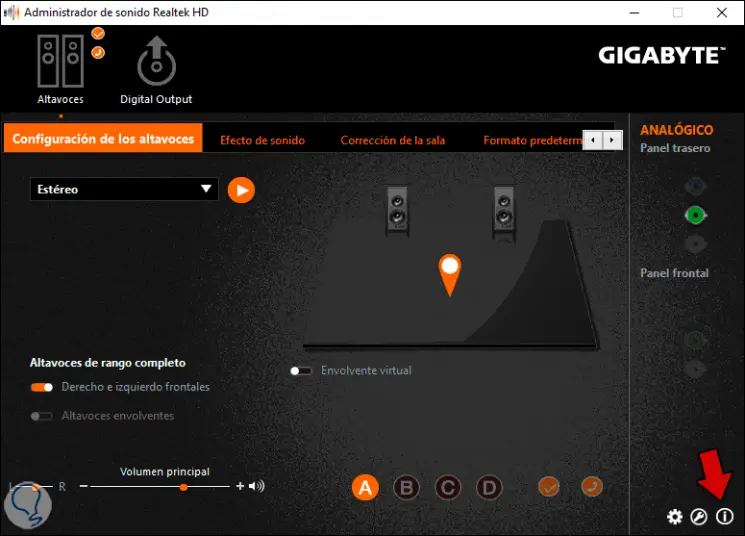
Step 4
To allow the administrator to always be available from the taskbar, we will click on the "i" information icon and validate that the "Show icon in the notification area" switch is active: 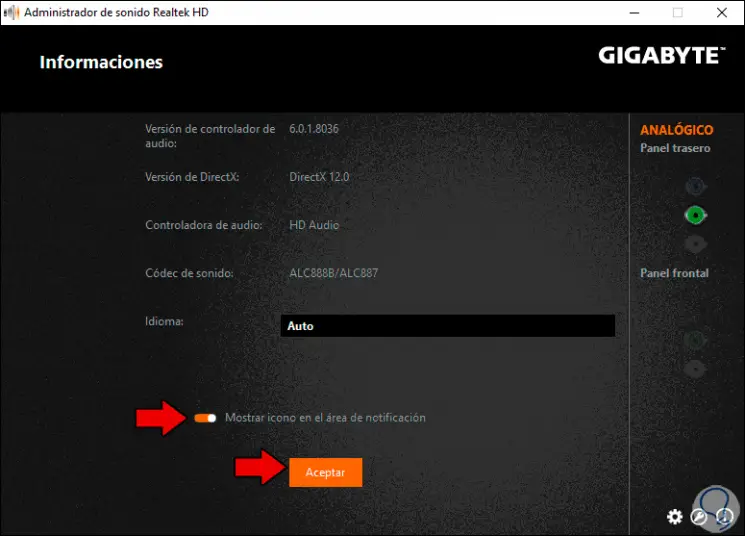
Step 6
From this moment on we are ready to get the most out of the Realtek sound manager.
Note
If the latest version of the administrator (2.82) generates errors, it is ideal to use version 2.81 for compatibility issues with Windows 10.
Step 7
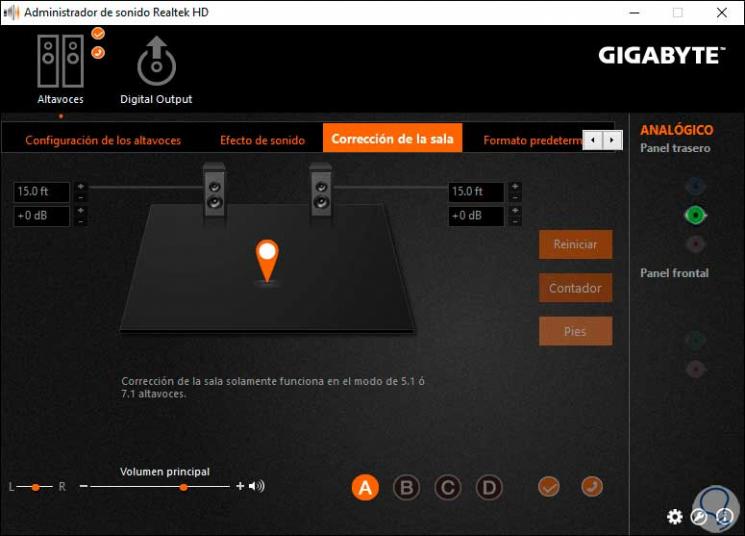
You can see the different administrator options as:
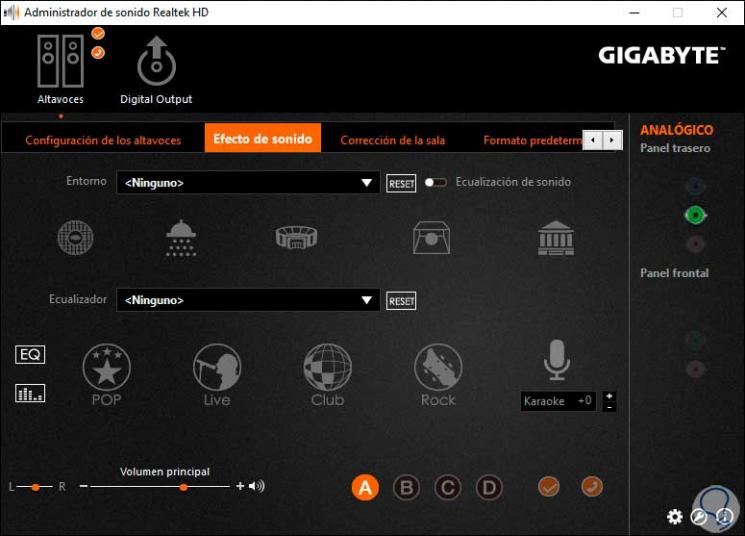
- Room settings Volume adjustments, formats to use for audio quality, integrated or connected panel settings, volume adjustments and much more.
With this, it is possible to access the sound manager and provide a comprehensive solution to your most common mistakes.