Security when we surf the web must be one of the premises that everyone who accesses the Internet has in mind and there are many reasons for this, from information theft, attacks, data capture, etc., the network is an inexhaustible source of information, but without a doubt that it is also the epicenter of many security vulnerabilities..
There are certain security measures that we can implement (from passwords to firewall) our web browsing and one of the best for this is the use of a VPN , maybe you have heard it a lot but today in TechnoWikis we will explain what it is and how we can implement a VPN server in Windows 10 for free and without resorting to expensive plans or providers.
What is VPN?
VPN (Virtual Private Network) is a way to surf the web privately and securely without exposing our browsing identities and tastes. This is possible since a VPN network is responsible for masking the IP address thus avoiding the tracking by applications or entities dedicated to it.
The VPN network acts by creating a data tunnel between our local network and an exit node in another geographical location, it can be hundreds or thousands of kilometers away from our place and this will make it simulate that we are in a remote place when really it's not like that..
VPN features
A VPN network basically hides aspects such as:
- The IP address of the local computer
- Our location in case we use streaming
- Web activity developed in browsers
If you are concerned about security, TechnoWikis tells you that these VPNs use encryption in order to encrypt the data over a Wi-Fi network making the data illegible in case they become in the wrong hands. We leave you video and text of how we are going to see how to create our own VPN server in Windows 10 .
To keep up, remember to subscribe to our YouTube channel! SUBSCRIBE
1. Create VPN server in Windows 10
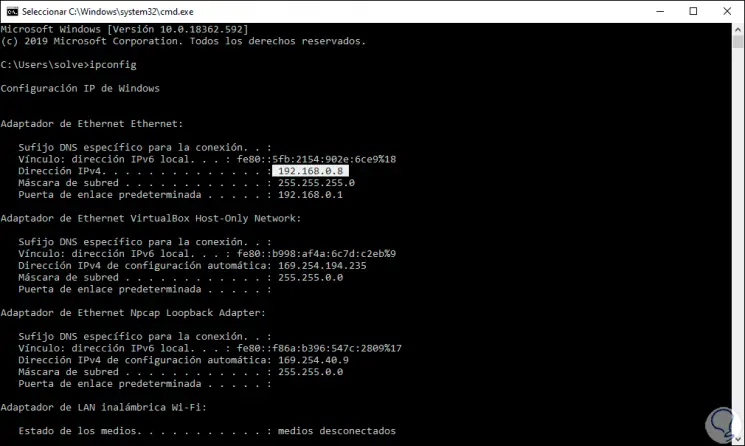
Before starting there are two aspects to consider and are knowing the local IP address and the public IP address.
Step 1
For the IP address of the device we must access the command prompt and there execute the ipconfig command:
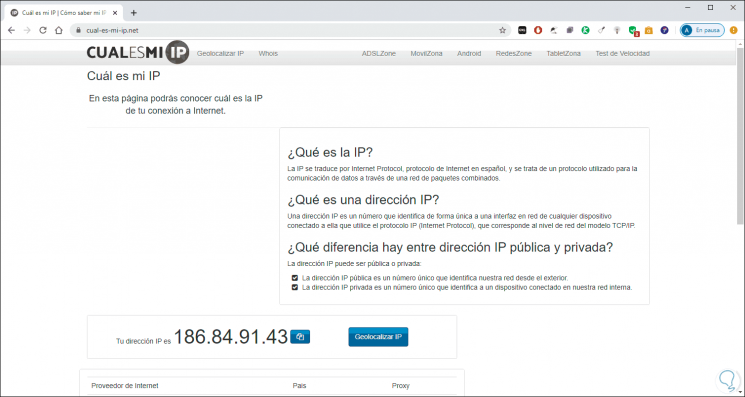
Step 2
To know the public IP address we can go to Google and enter “ip publica†and some of the sites displayed will give us these details. Once we have this data we are ready to create the VPN server in Windows 10.
Step 3
Now we will go to the following route:
- Control Panel
- Network and Internet
- Center network and sharing
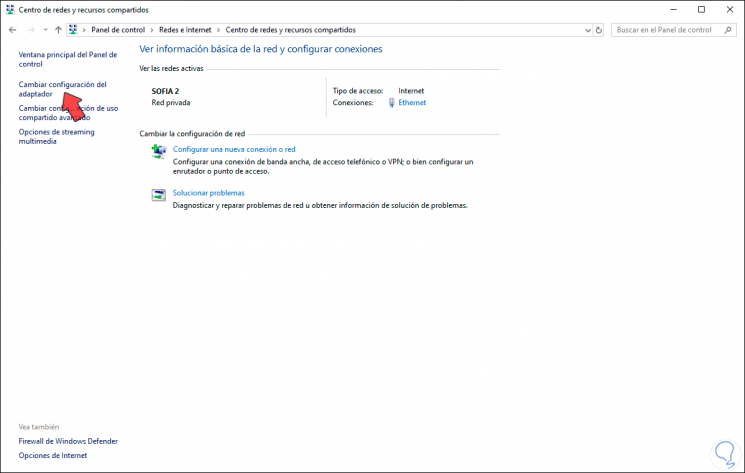
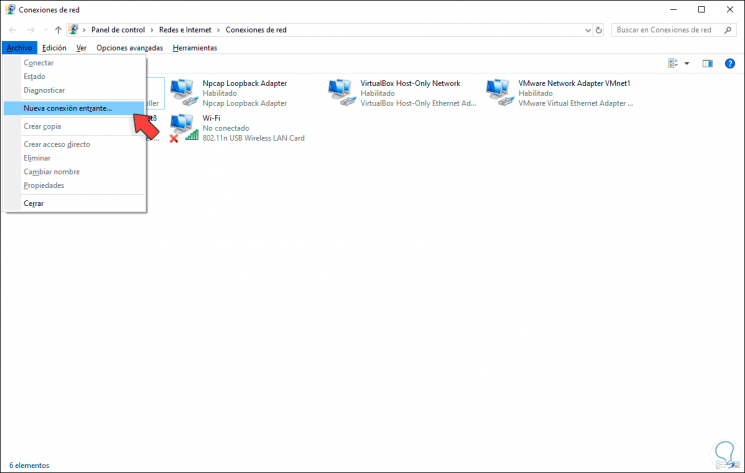
Step 4
There we go to the section “Change adapter configuration†and there we press the Alt + A keys and in the displayed list we select the option “New incoming connectionâ€:
Step 5
In the displayed window we select the user (we can create it) that will have access permissions to the VPN network in Windows 10:
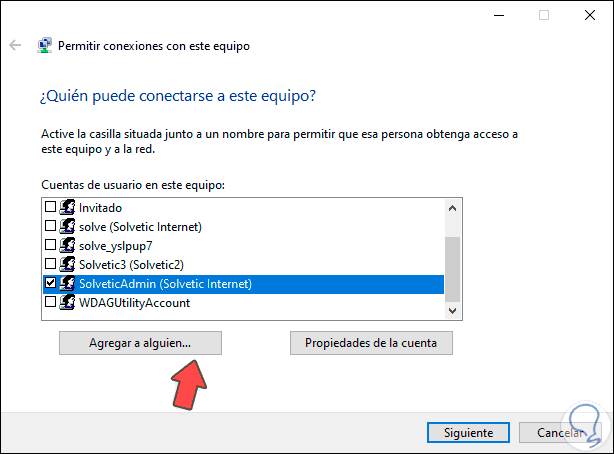
Step 6
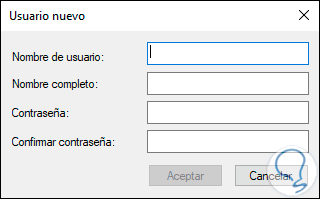
We can click on “Add someone†to add a new user if this is the case:
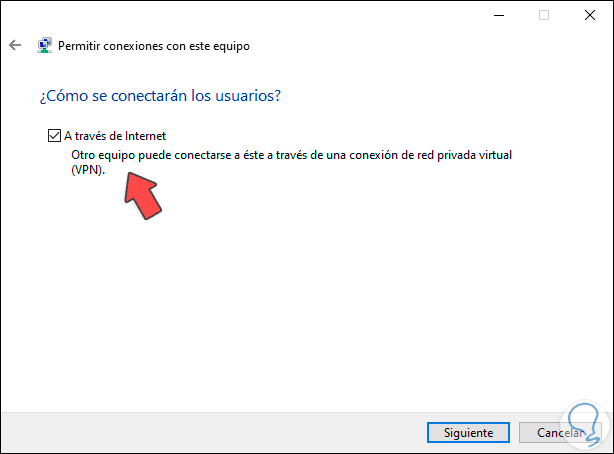
Step 7
We click on Next and in the next window we activate the “Via Internet†box:
Step 8
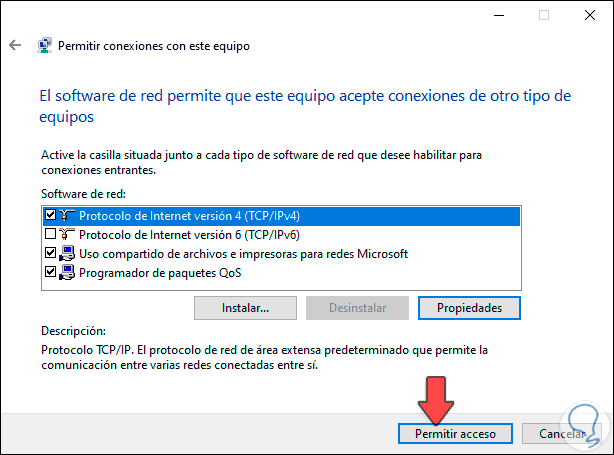
We click Next and the following will be displayed:
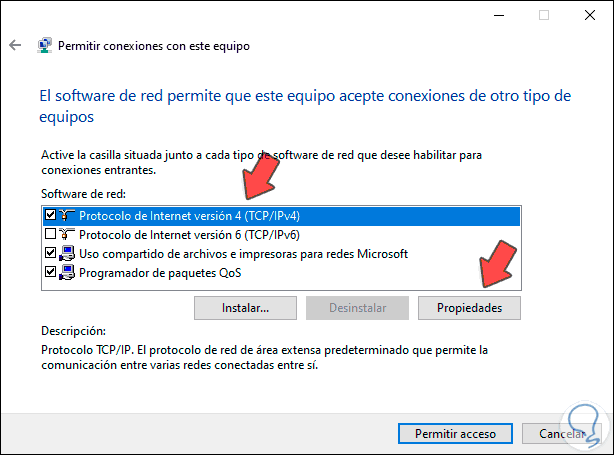
Step 9
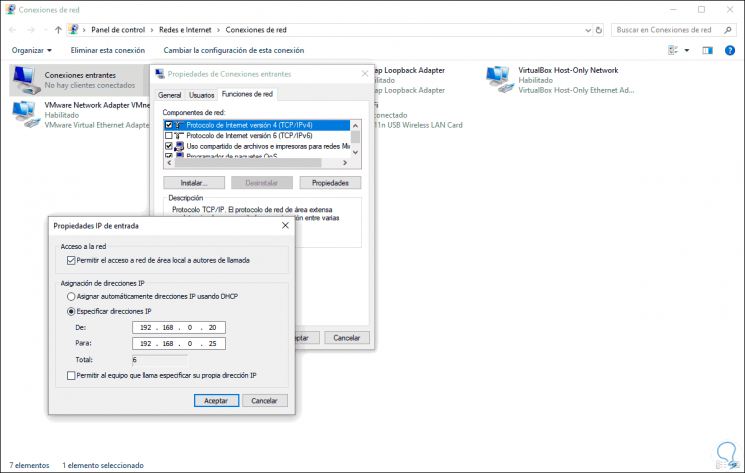
There we select the line "Internet Protocol version 4 (TCP / IPv4) and click on the" Properties "button and in the pop-up window we define the following:
- Check the box “Allow local area network access to callersâ€.
- Check the box "Specify IP addresses" and in the respective fields enter the range of addresses to assign based on our local IP.
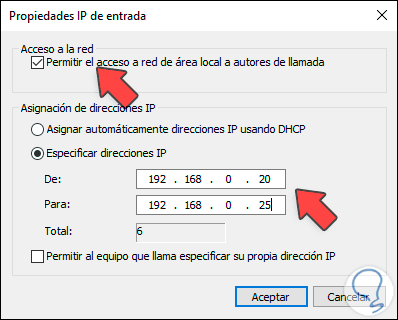
Note
In the Total field we will see the amount of IP addresses to use.
Step 10
We click on Accept and in the next window we click on “Allow accessâ€:
Step 11
The permission process starts:

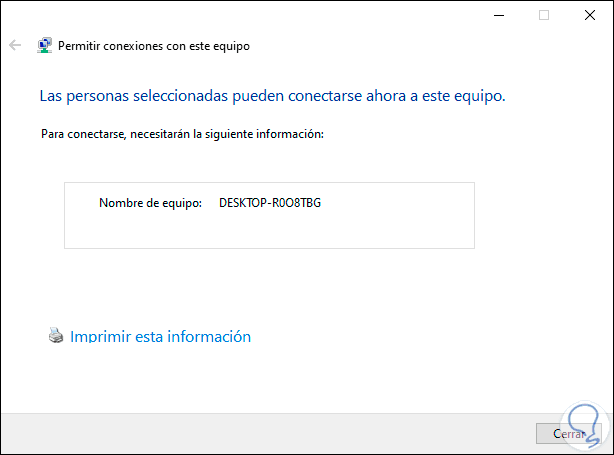
Step 12
When it finishes we will see the following. This is the name of the local computer that will act as a VPN server.
2. Assign permissions through the Firewall to create VPN server in Windows 10
The Firewall in Windows 10 has the mission of allowing or not allowing incoming and outgoing connections to maximize security, so we must grant the necessary permissions for the VPN network.
Step 1
For this we will go to the following route:
- Windows Defender Firewall
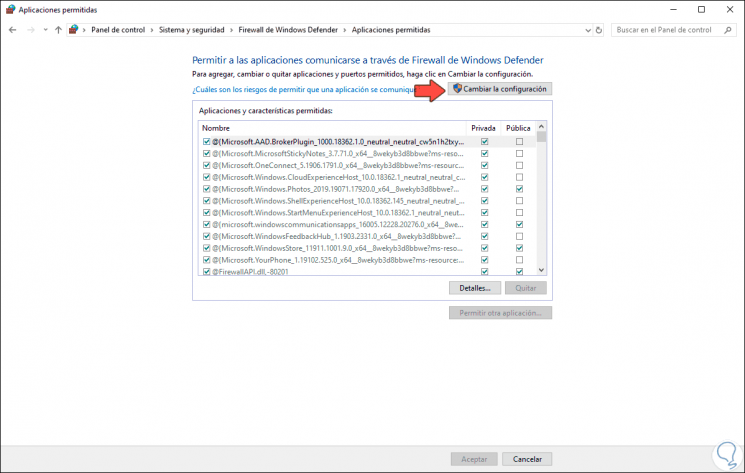
Step 2
There we click on the “Change settings†button and we must ensure that the “Routing and remote access†line permits the permissions on the Private and Public networks. We click OK to save the changes.

3. Configure the VPN server in Windows 10
Step 1
Once we do the above, we will go to the following route:
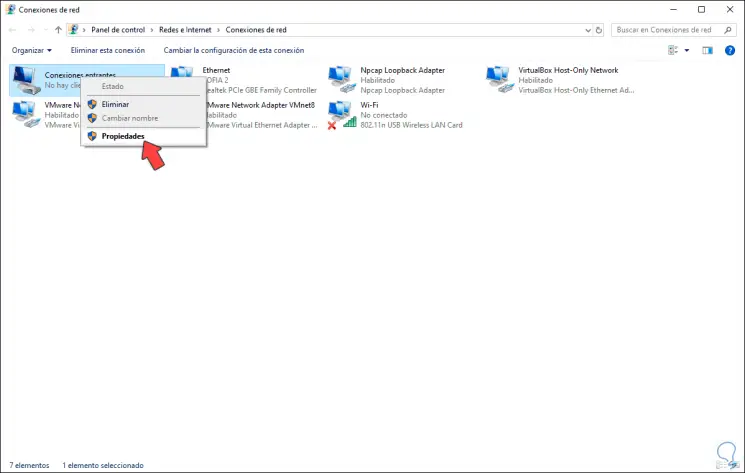
Step 2
There we right click on the connection created and select "Properties":
Step 3
There we can validate all the parameters that we have established:
4. Configure router permissions on Windows 10
Step 1
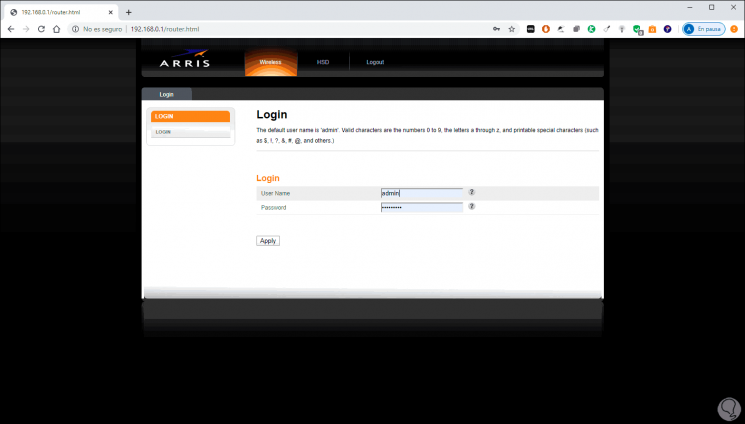
The VPN uses port 1723 for its connection, this must be added in the router or modem permissions, for this we will go to a browser and enter the default gateway address and enter the access credentials provided by the ISP:
Step 2
We access and, in this case, we will go to the “Firewall†section and position ourselves in the “Virtual Servers / Ports†category:
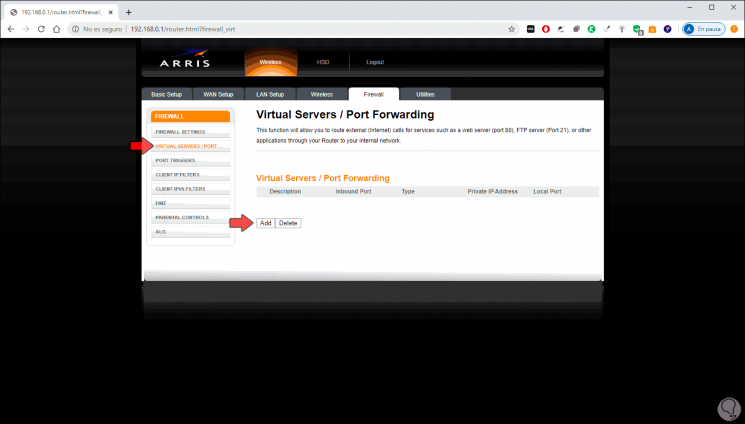
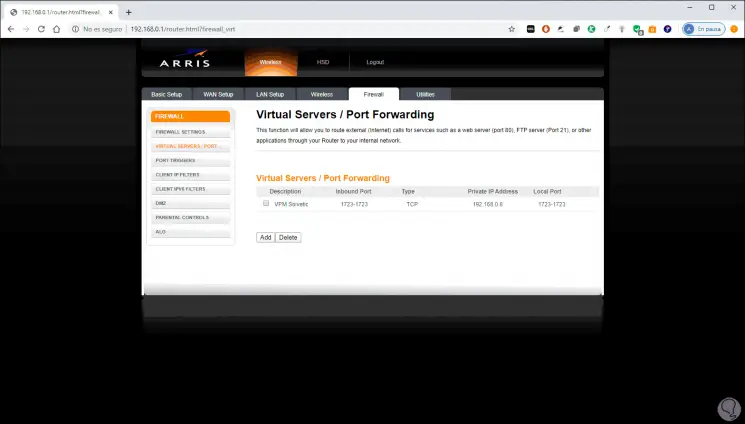
Step 3
There we click on “Add†to enter the VPN port and enter port 1723 in the Local and Inbound fields and in the Private IP field we enter the local IP of the device:
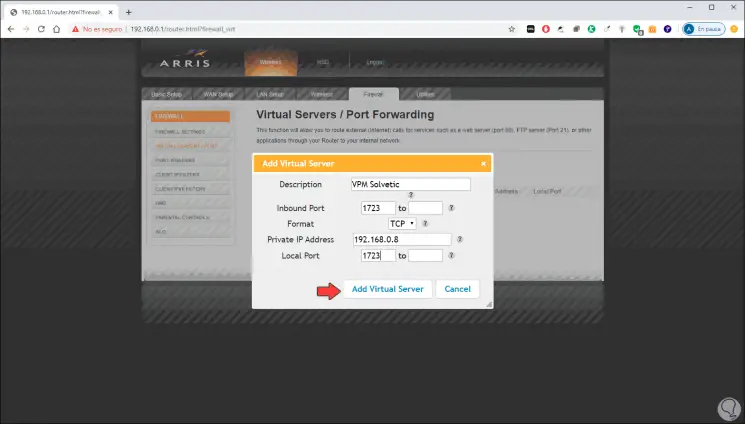
Step 4
We click on “Add Virtual Server†to save the changes:
5. Create a VPN from Settings in Windows 10
Step 1
There is the possibility of creating a local VPN directly on the route:
- Network and Internet / VPN
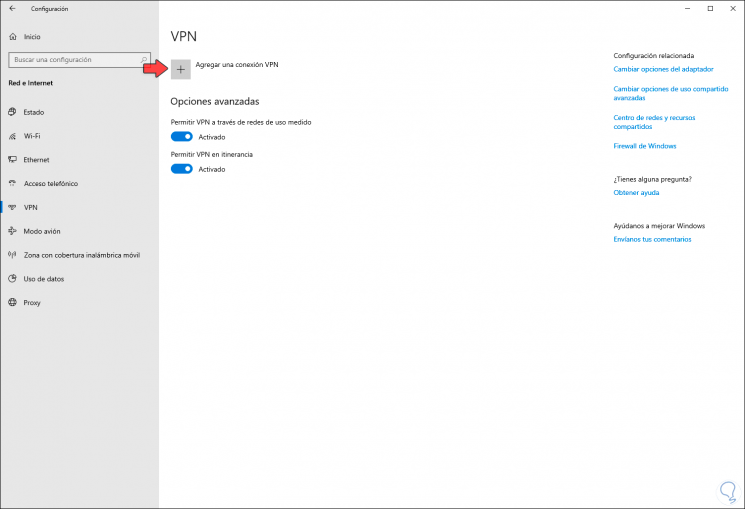
Step 2
There we click on “Add a VPN connection†and complete fields such as:
- VPN provider, we choose Windows Integrated
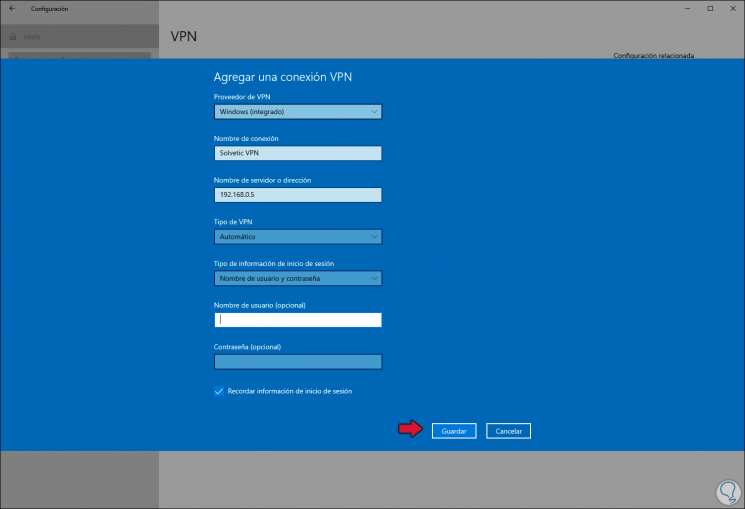
Step 3
We click on Save to apply the changes:
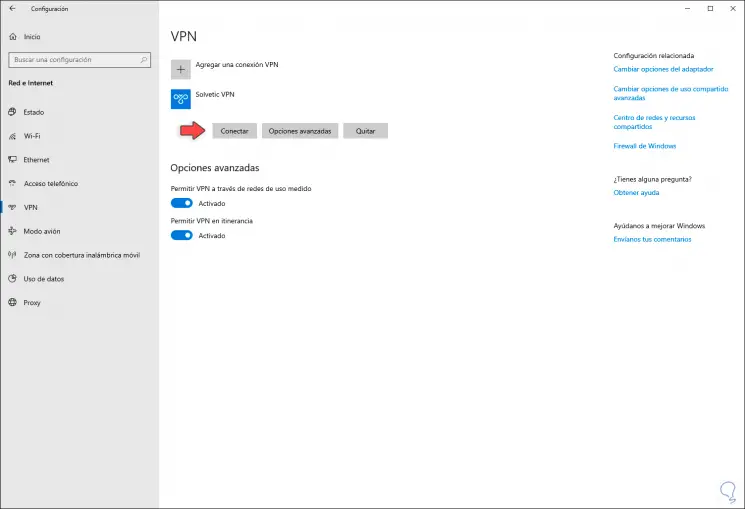
Step 4
From this point we will be able to establish a VPN connection with this Windows computer without paying anything extra for it.

In this way we have created and configured a VPN server in Windows 10..