Photoshop v editing is one of the favorite tasks for those who work with photography. It is a necessary tool to give the final look to photographs that can always have something else such as eliminating red eyes . It helps us a lot because in addition to editing, it allows us to transform some files into others. Sometimes we need a specific type of image because the platform where it will be uploaded requires it and then Photoshop comes into play..
If in addition to working with images we are editors at the web level, it is worth mentioning how important it is for a good administration to take into account the size of the uploaded files. Starting from this, if we have very heavy images, users will resent their experience by having to download giant files that will also quickly consume their mobile data. Within the options we offer you will see how to control this aspect.
We also leave you the video tutorial with the necessary steps to save an image in Photoshop 2020, 2019 in different ways..
To keep up, remember to subscribe to our YouTube channel! SUBSCRIBE
1. Save an image in Photoshop CC 2020, 2019 in the same file
The first way is to save the image in the same file, that is, we make changes, but we save them in that same file without creating a new one. If we are working on an image in a PSD project, the project will not be saved as the image as such. To have the final image you will have to export that project according to the following chapters.
Step 1
To do this we will go to the “File†menu and then click on “Saveâ€.
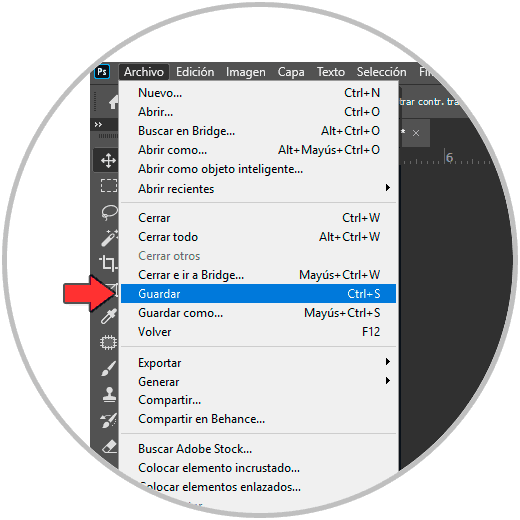
Step 2
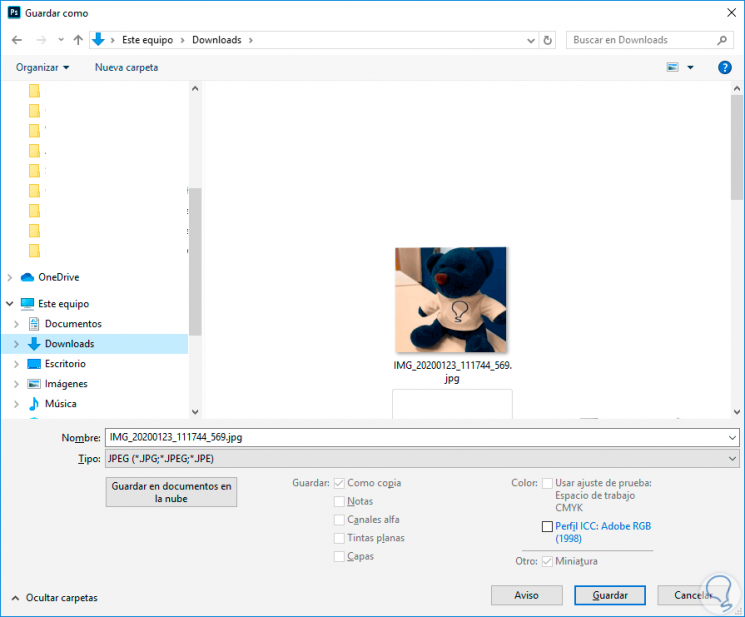
The location where that file is located will open by default and we can save it by overwriting our original file. If we are in a project, the save option will not open any options panel and apply the changes directly.
Keyboard shortcut to save Photoshop image
We can also use the following quick shortcut:
+ S Ctrl + S
2. Save an image in Photoshop CC 2020, 2019 in another file
This option involves saving changes to an image by exporting it as a new one, either with the same or a different format. This export is also useful when we are working on a project and we want to export the final result as an image as such. To do this we will do the following
Step 1
To make this save we will go to the “File†menu and then click on “Save asâ€.
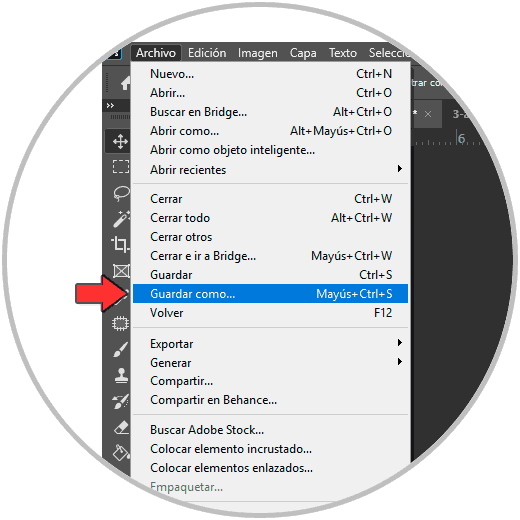
Step 2
We choose a save path for our image by also choosing the type of file.
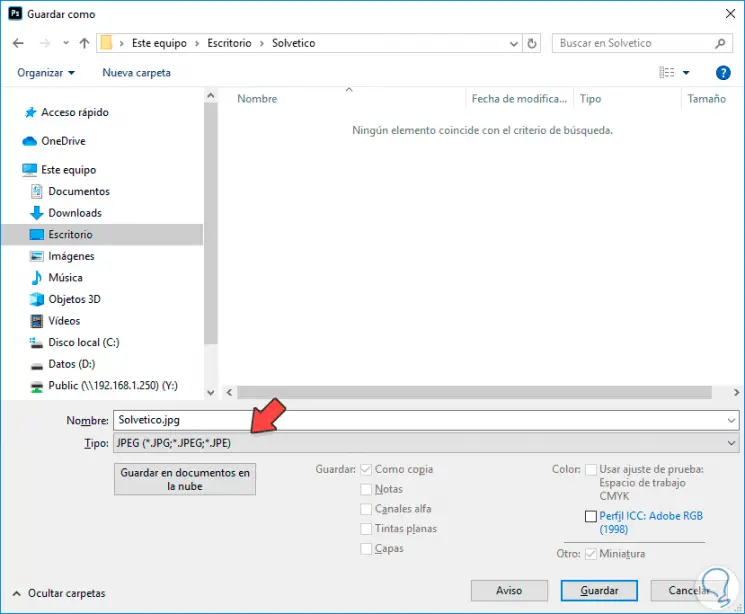
Step 3
Once this is done we will see a panel of selection of final options such as the quality of our image.
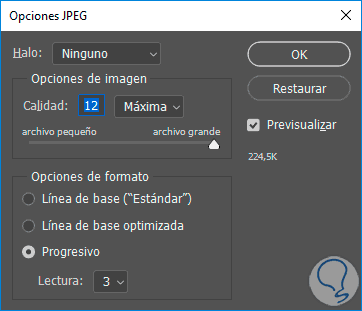
Keyboard shortcut to save as in Photoshop
We can use the following keyboard shortcut faster:
+ Ctrl + S Shift + Ctrl + S
Some users mention certain quality losses with this type of export so we will see another more complete way to control the final quality of the image.
3. Save an image in Photoshop CC 2020, 2019 for web or without losing quality
Save image for web or web optimization is an image compression tool that allows us to export more precisely, especially for subsequent uploads to a web page. One of the most important factors when uploading images to a website is its size and that is why this option allows us to analyze very well the final size of our image according to the saved parameters. Here we can control in detail the formats of PNG, JPEG and GIF.
Step 1
To find this option we will go to the following menu:
- Save for “inherited†Web
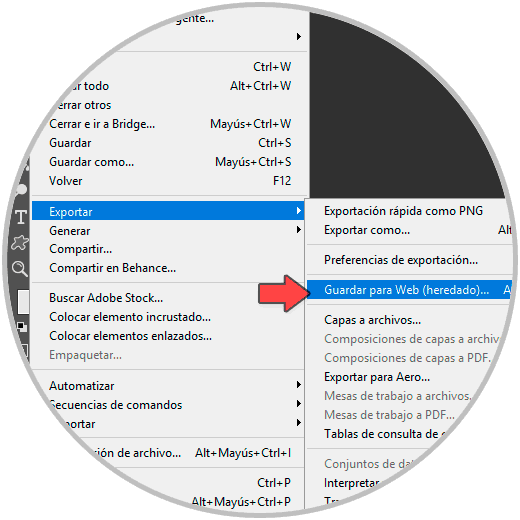
Step 2
In this window we can configure the export much more detailed. We can choose the format, quality, color profile or size on the right. In the lower left part of the image we will see what our final image occupies.
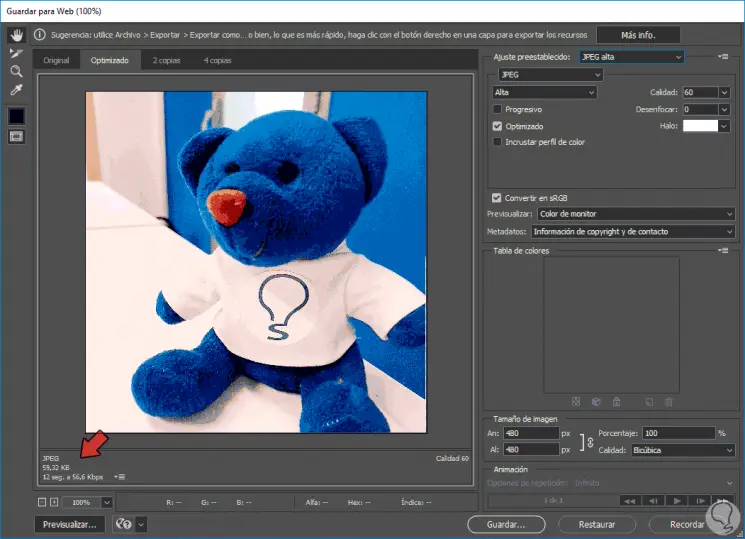
Keyboard shortcut to save as Photoshop web
For faster saves this keyboard speeds up the tasks of this option:
+ Mayus + Ctrl + S Shift + Shift + Ctrl + S
4. Save an image in Photoshop CC 2020, 2019 with quick export
Finally, we have the option to save an image quickly with the quick export option.
Step 1
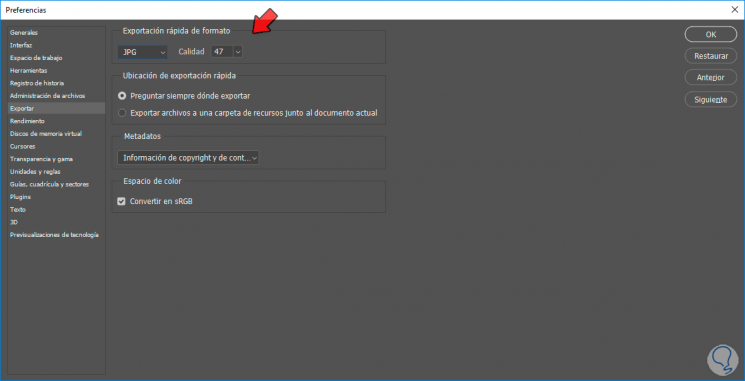
This option allows us to save an image quickly in a format that we usually use a lot like PNG or JPEG. To configure this option we will go to the following menu:
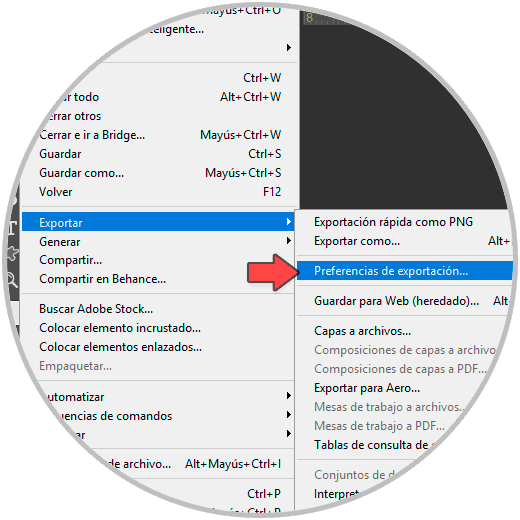
Step 2
Here we can choose the default format, as well as other export properties. Depending on the format chosen we will have some options or others
Step 3
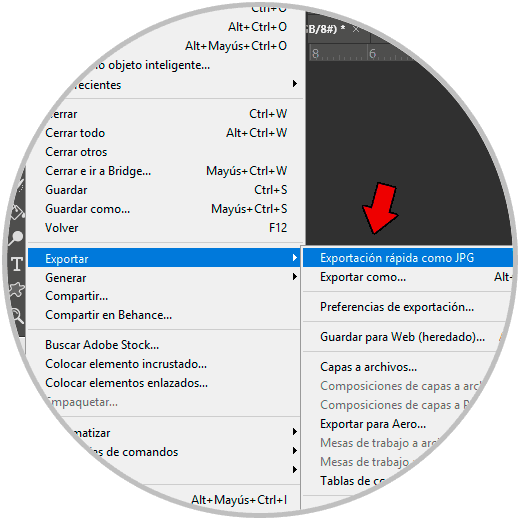
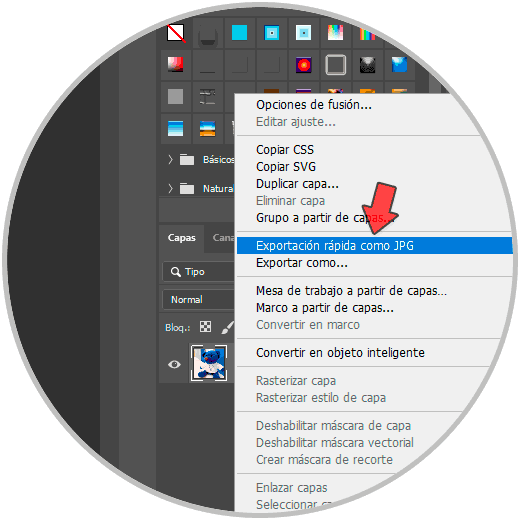
Once this option is configured we can use it in two different ways:
- Within the image to be saved, we go to the following menu: "File - Export - Quick export as". It will be exported with the format that we have configured.
- We can also right click on the layer we want to export quickly and click on “Quick export asâ€.
With these options we have different ways we can save our images in the format we want and in a simple way..