Virtualization is one of the most practical technologies that has been developed, since it allows you to virtualize hardware, software, user sessions, storage units and many other things without having a direct impact on the behavior of the real environment. That is why elements such as knowing how to activate VT X in the Windows 10 BIOS is important for a good operation..
This will prevent already implemented services from being affected and best of all, it is a free option that only requires some aspects of hardware for its operation. That is why today we make use of applications such as VMware, VirtualBox or Hyper-V to mount our virtual machines. But behind it is the CPU, which if you do not have the virtualization properties enabled, we will simply have an error when using any of the available virtualization services. We can find this need in different computers and it will be a valid process to enable vt-x bios lenovo ASUS HP and other brands of equipment.
One of the most popular is VT-X (Intel Virtualization Technology), which gives the possibility that different working implementations can share a resource set without using all global resources, some of the features of VT-X are:
VT-X Features
- It facilitates the download of processing created in the multicore packages and that at the same time is directed towards the network adapters.
- Allows memory isolation and monitoring for each virtual machine that is created in Windows 10.
- It allows the software on the virtual machine to run without any performance or compatibility issues.
- Manages that the appropriate resources of the graphics processing units (GPUs) are assigned to each virtual machine.
- Improvements in security and network functions.
Check if virtualization is active
Now, the BIOS or UEFI play an essential role in all this process of virtualization, since if virtualization is not enabled, we simply will not be able to do anything and it is simply because this is the initial step so that everything virtualization offers us is done reality.
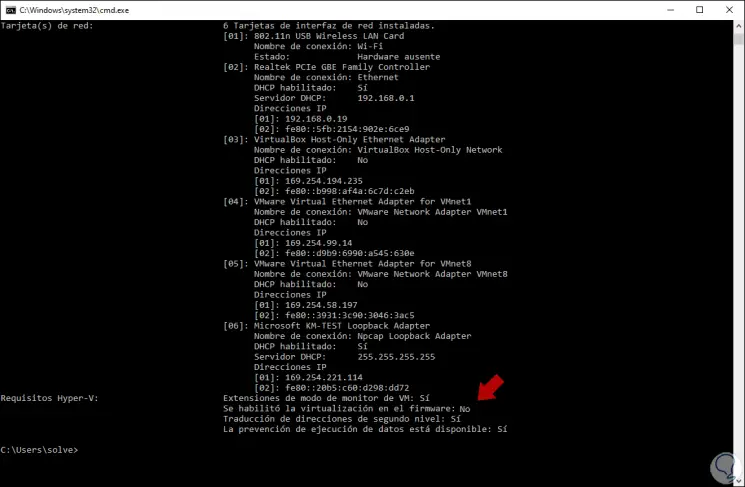
To check the virtualization status in UEFI or BIOS we must access the command prompt console and execute the following:
systeminfo.exe
At the bottom we find the line "Hyper-V Requirements" and we focus on the line "Virtualization is enabled in the firmware" and there we check its current status. If the result is "No" you should continue reading this tutorial since TechnoWikis will explain how to enable virtualization on your computer directly in the BIOS.
We also leave you the video tutorial to know how to activate VT-X in Windows 10 BIOS:
To stay up to date, remember to subscribe to our YouTube channel! SUBSCRIBE
1. How to activate VT-X in UEFI BIOS Windows 10
Step 1
To do this we log into Windows 10 and go to the Start menu and from Settings where we will see the following:
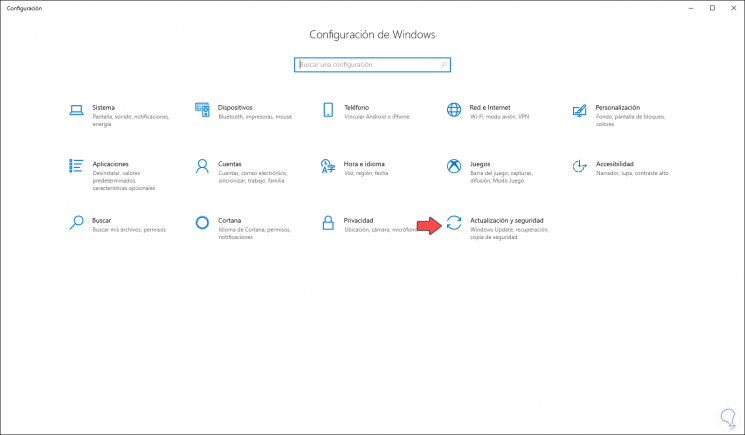
Step 2
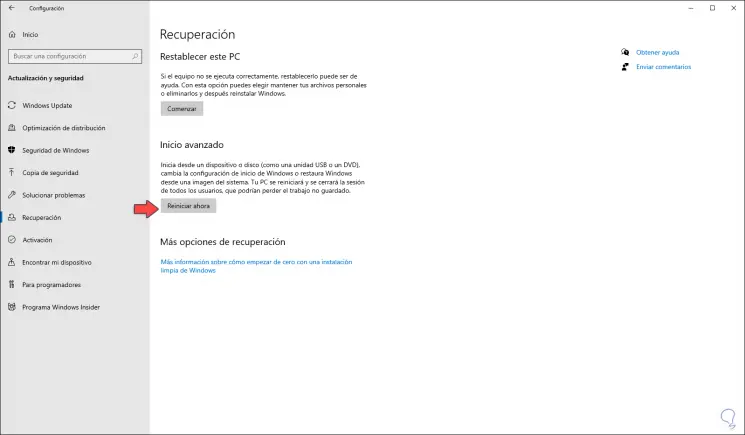
We go to the "Update and security" category and in the "Recovery" sector we click on the "Restart now" button hosted in the "Advanced start" section:
Step 3
The system will be rebooted and we will see the following:
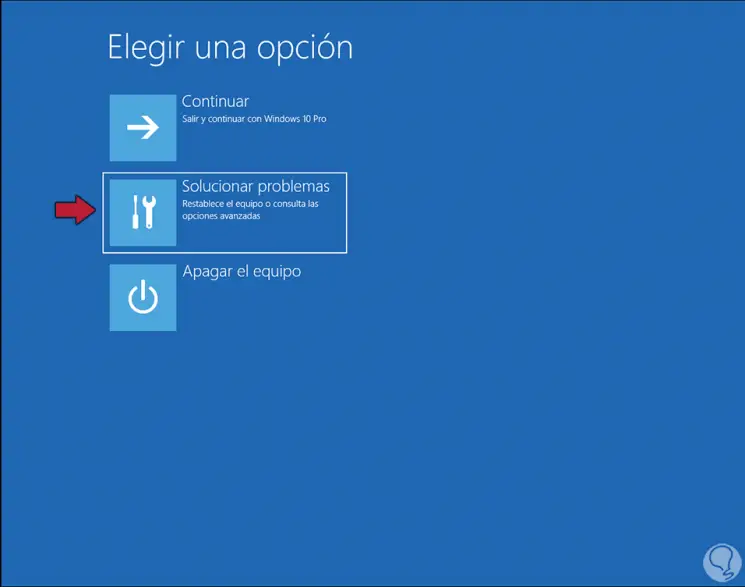
Step 4
We click on "Solve problems" and in the next window we click on "Advanced options":
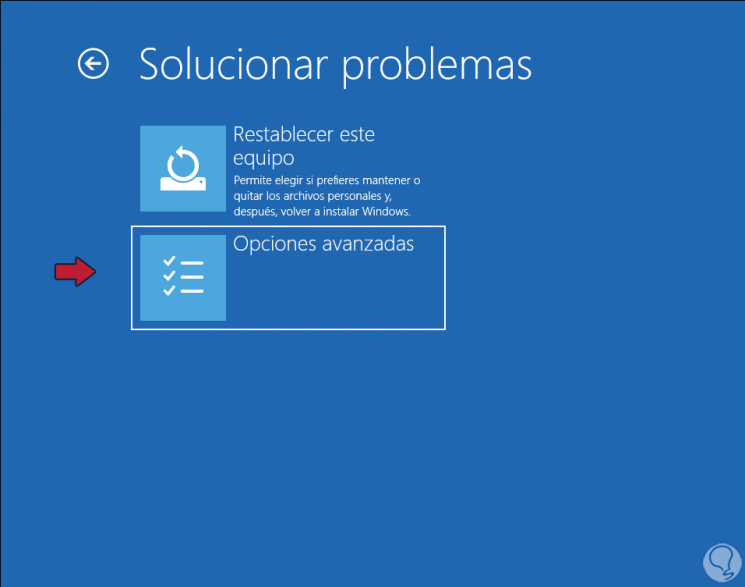
Step 5
Then we will have various options and there we will select "UEFI Firmware Configuration":

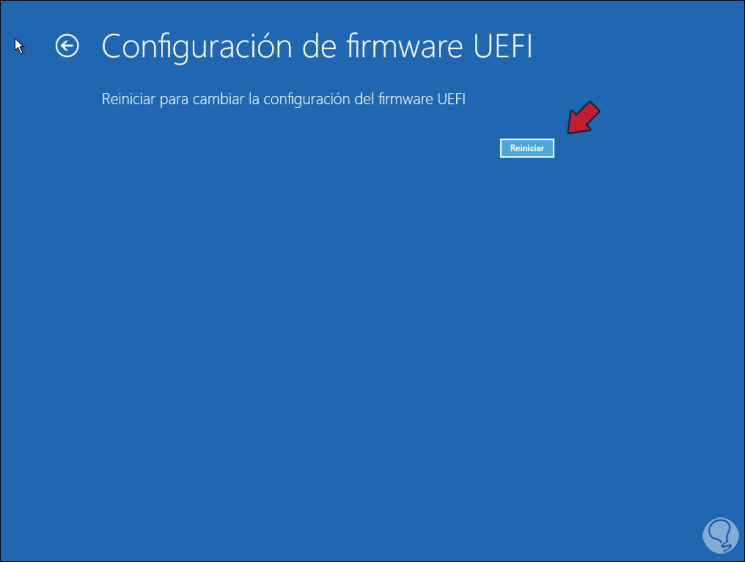
Step 6
The following window will be displayed. We click "Restart" to access the UEFI configuration of the equipment.
2. How to activate VT-X in Windows 10 BIOS
Step 1
Now, if your computer is based on BIOS, you can access it directly when any of the keys available according to the manufacturer, in the following link we explain the various options to use:
Step 2
This will make us access the BIOS configuration and there we will go, this based on the manufacturer, to the "Configuration" tab and there we will find the line "Intel Virtual Technology":
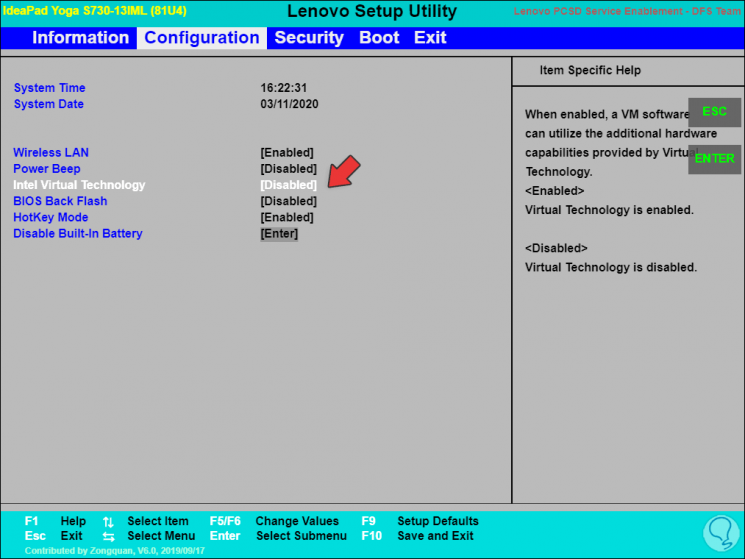
Step 3
As we see its status is Disabled, we double-click on that line and set its value to "Enabled":
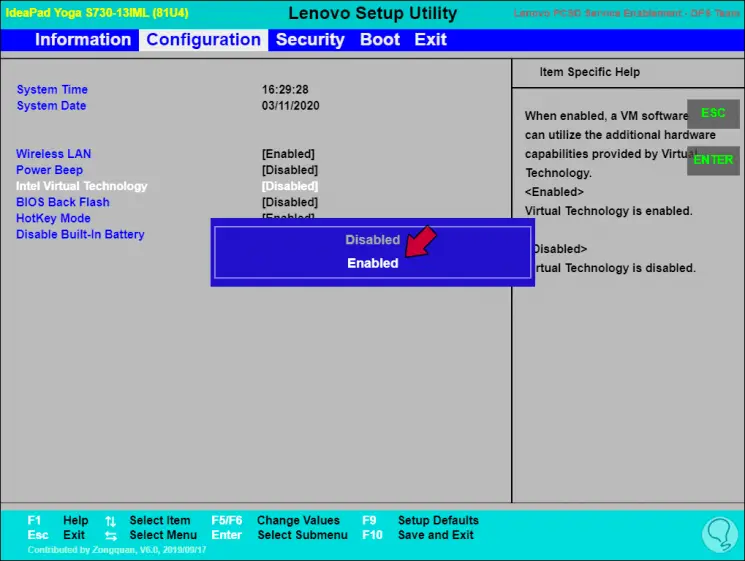
Step 4
We see the changes. We save the changes with the F10 key.

Step 5
We start Windows 10 and again run the command "systeminfo.exe" from the console and this time we will see that the line "Virtualization was enabled in the firmware" has been set to "Yes":
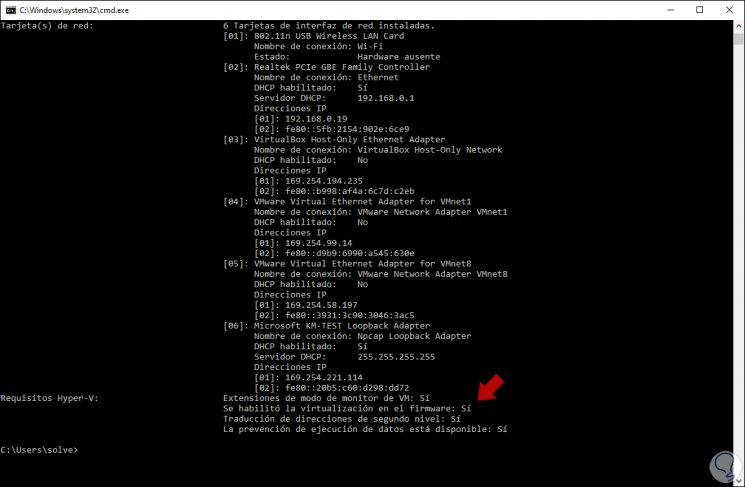
With these options we have been able to know how to activate VT X in the Windows 10 BIOS. From this moment on, the system is ready to take full advantage of virtualization technology and thus test systems, applications and other elements without affecting the productive environment where we are..