Currently, the IT world is turning to a new technology that promises great benefits not only of dynamism but also of security and scaling and this is the use of cloud storage (Internet) of hundreds of products and applications. In this segment Microsoft plays a very important role with its Azure offer. Microsoft Azure integrates a significant number of services in the cloud which seeks to fully comply with the demands of organizations regardless of their size..
Thanks to Azure, it will be possible to create, manage and carry out application implementations by taking access points worldwide (more than 130 countries) and with the best resource options and control tools for these applications or services .
Azure advantages
By implementing and using Azure for the management of our virtual machines or products we are accessing a world that offers us advantages such as:
- Implementation of artificial intelligence and more
Security functions
In addition to these advantages of Azure, when we create and assemble a product there for use with our organization, we are accessing security functions such as:
- Central identity administration and access control
- Protection of data hosted on disks
- Key and certificate management
- Centralized control in order to avoid external or internal attacks
Undoubtedly, one of the main uses of Microsoft Azure is the creation of virtual machines, both Windows and Linux, for this reason TechnoWikis will explain how to create a virtual machine in Microsoft Azure..
1. How to access Microsoft Azure
To access Microsoft Azure we must register and from this we will have free access for one year and up to USD 200 in credits. After this time, the operating costs in Azure will be as follows:
Developer
It is implemented in test and non-production environments and costs € 24.46 / month
Standard
It can be implemented for production workload environments and costs € 84.33 / month
Professional Direct
It is part of the critical business unit and its cost is € 843.30 / month
Premier
It is the highest level and requires contacting Microsoft directly for cost issues based on resource requirements.
Step 1
To access Microsoft Azure we must go to the following link:
Azure Portal
Step 2
There we will enter our email address next to the assigned password:
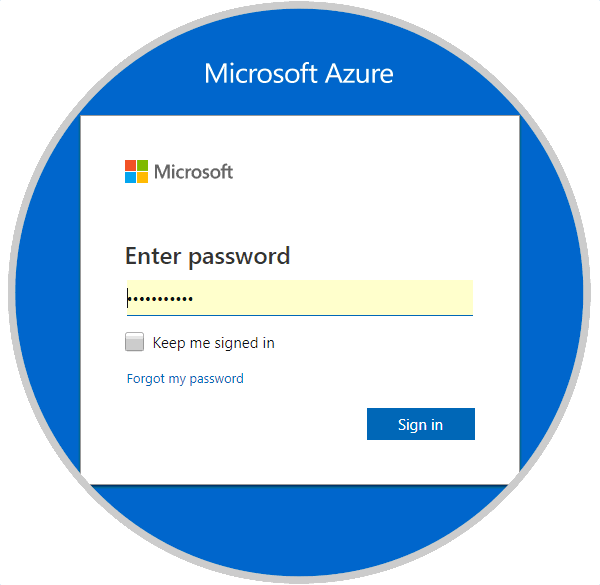
Step 3
There we click on the Sign In button to log in and we will see the following:
Azure offers 3 different ways to create our virtual machines, TechnoWikis will explain each of these options to select the one that best suits our needs.
2. How to create Windows 10 virtual machine using Azure Portal
This is one of the simplest methods since we will execute it directly from the Microsoft Azure board when we access it. If we choose to use the Azure Portal, we will have a browser-based user interface in order to create virtual machines and the resources associated with them.
Step 1
As a starting point we will go to the following link and start session:
Azure Portal
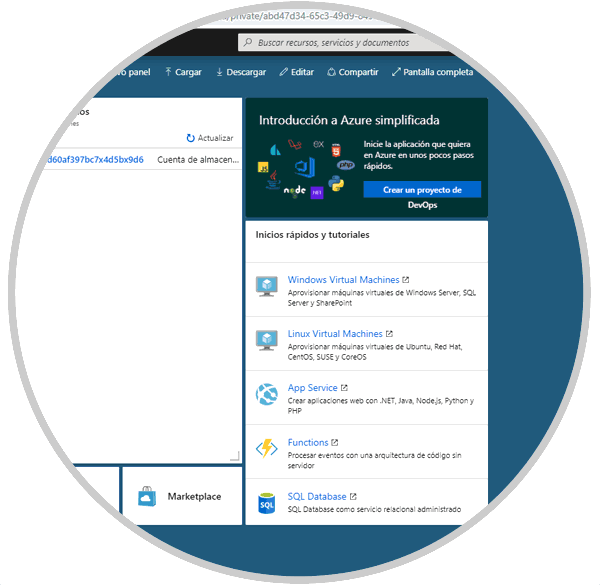
Step 2
In the window that appears, click on the option "Create a resource" located in the left side panel:

Step 3
The following window will be displayed and in the Azure Marketplace field located at the top we enter Windows 10 and the different options to be selected will be displayed:
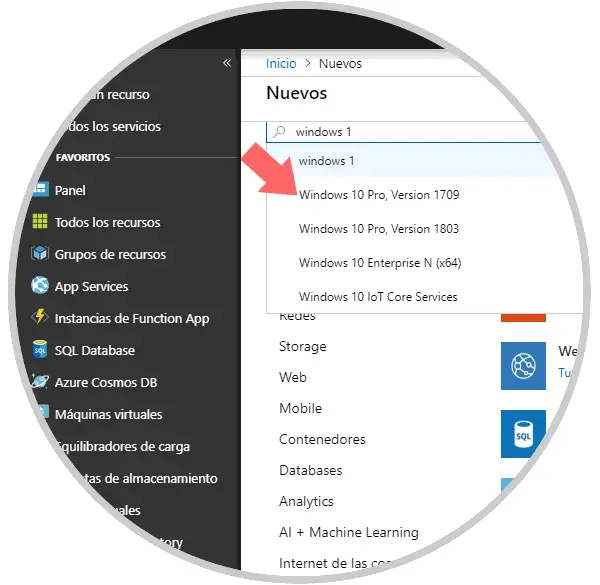
Step 4
In this case we will select the option Windows 10 Pro version 1709 and the following will be displayed:
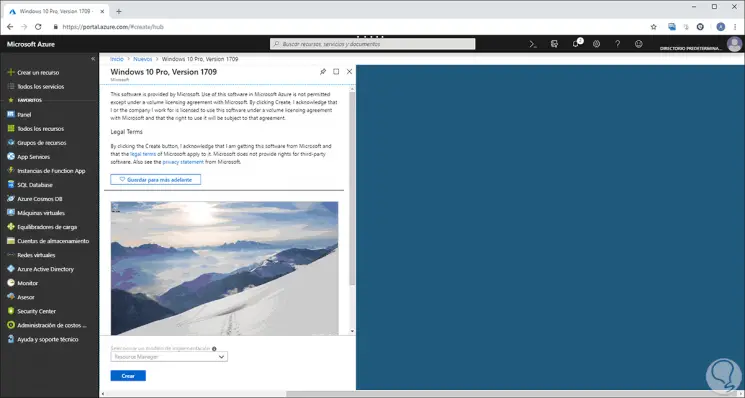
Step 5
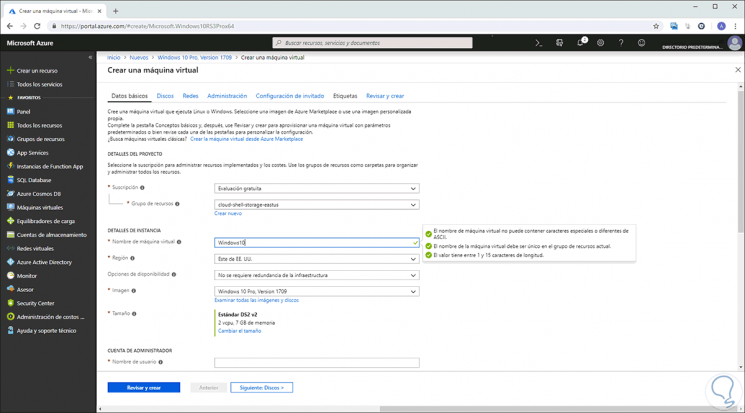
There we click on the Create button located at the bottom and in the new window we will go to the Basic data tab we must assign parameters such as:
- Define the subscription in which we are registered, in this case the Free Evaluation
- Select the resource group, if it does not exist, click on the Create new button
- We assign a name to the virtual machine which must have a maximum of 15 characters, not including special characters and for this Azure will validate each condition
- We define the area where said virtual machine is to be located
Step 6
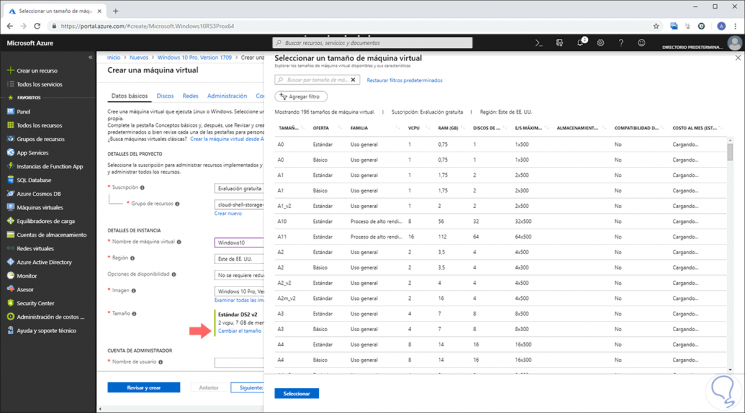
The Size section is created with the default parameters that are:
If you want a better configuration, click on the Resize line and the following will be displayed where we select the best available alternative:
Step 7
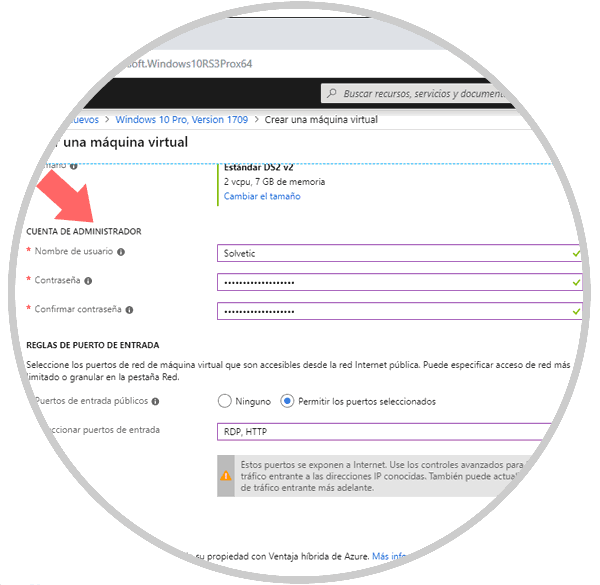
At the bottom we must configure the name of the Administrator user with his password. This password must be at least 12 characters long and meet the complexity requirements defined by Azure. In the Incoming port rules field, we select the Allow selected ports check box and then we will select RDP (3389) and HTTP in the drop-down list in order to allow external access to the virtual machine
Step 8
In the next section called Disks we will see this. There we can select from any of the following types of hard disk:
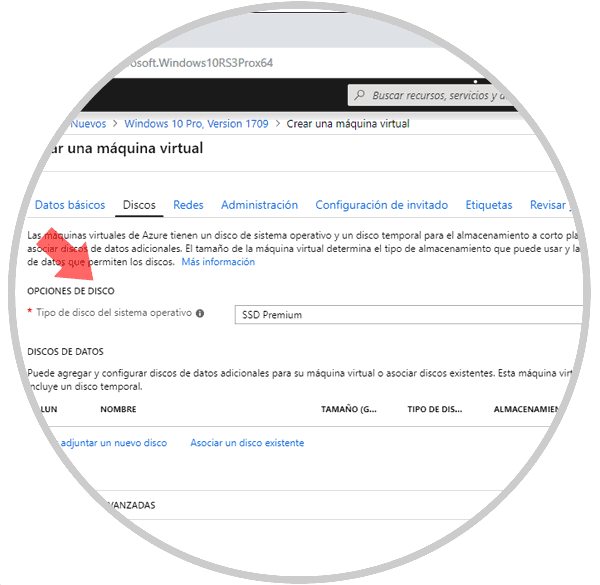
Remember that solid state disks (SDD), offer better startup, shutdown and read / write speed..
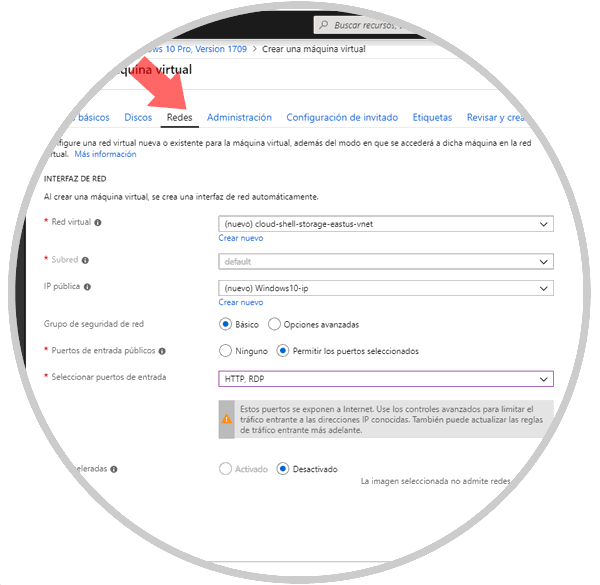
Step 9
In the Networks tab we can add new network adapters and set new IP ranges if necessary.
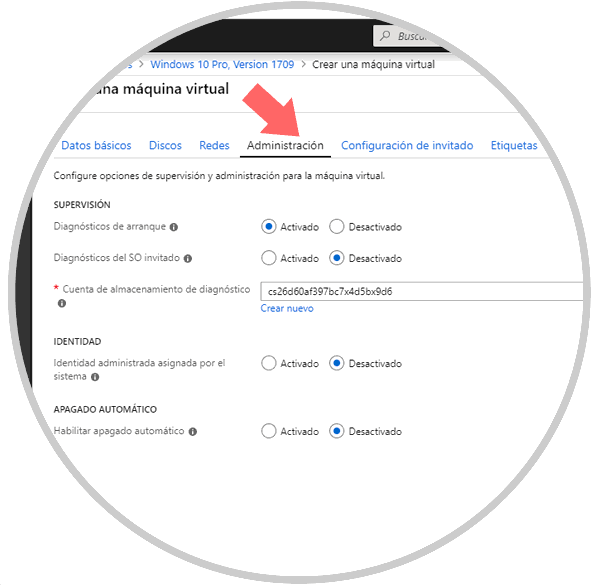
Step 10
In the Administration section we will be able to enable or not the use of control tools such as:
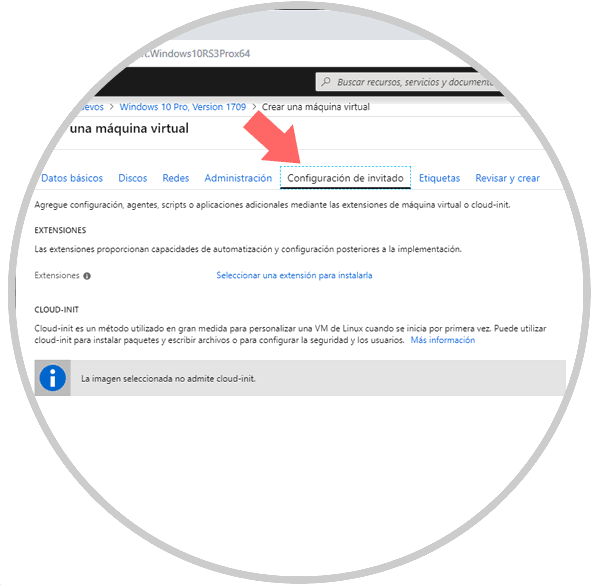
Step 11
In the Guest Configuration section it will be possible to add additional configurations, agents, scripts or applications through virtual machine extensions or cloud-init:
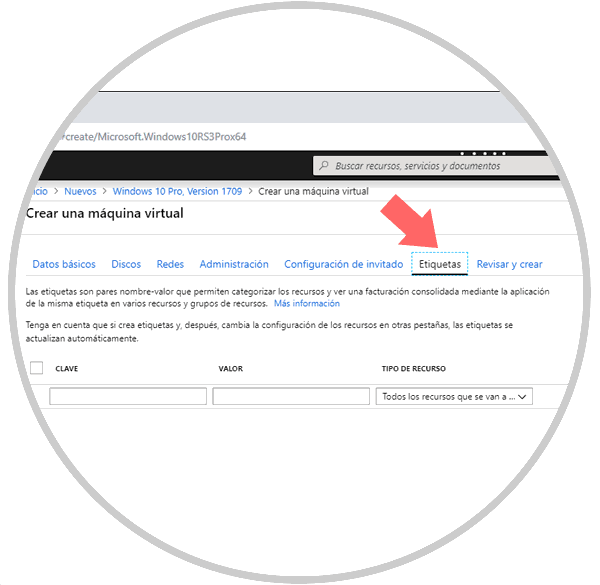
Step 12
In the Tags tab we can create new tags, these are name-value pairs which give the facility to categorize the resources and thus access consolidated invoicing through the application of the same tag in several resources and resource groups in Azure.
Step 13
In the last tab Review and create we will see a summary of the Windows 10 machine to be created through the Azure Portal:
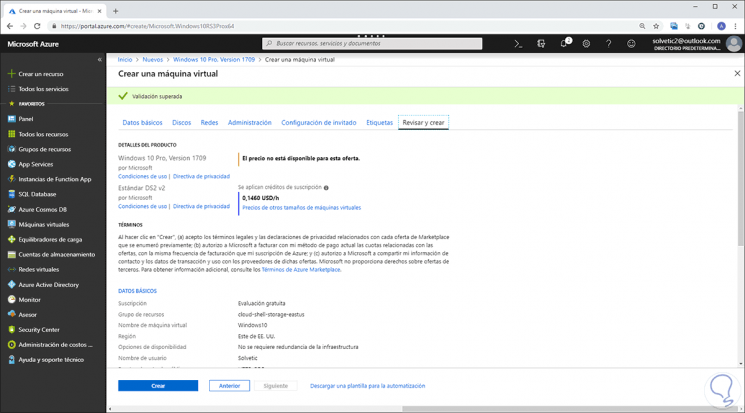
Step 14
If everything is correct, click on the Create button and the process of implementing this virtual machine in Azure will begin:
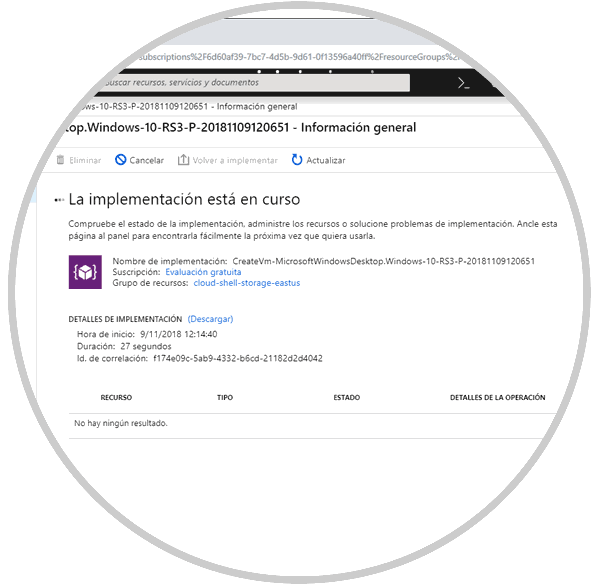
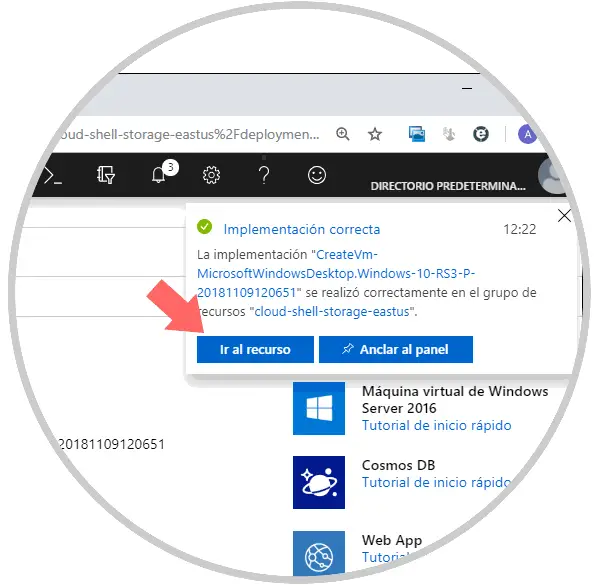
Step 15
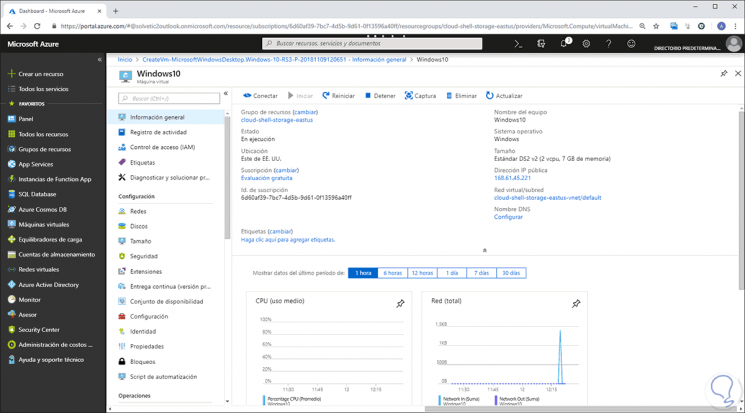
Once this process is finished we will see the following directly in the Azure panel. There we can click on the Go to resource button to go to our created virtual machine.
Step 16
After this process we will be ready to connect to the virtual machine. If we perform this process in macOS we must use a remote access client, but if we use Windows we can click on the Connect button located at the top of the virtual machine:
Step 17
Clicking on the Connect button will display the following side panel:
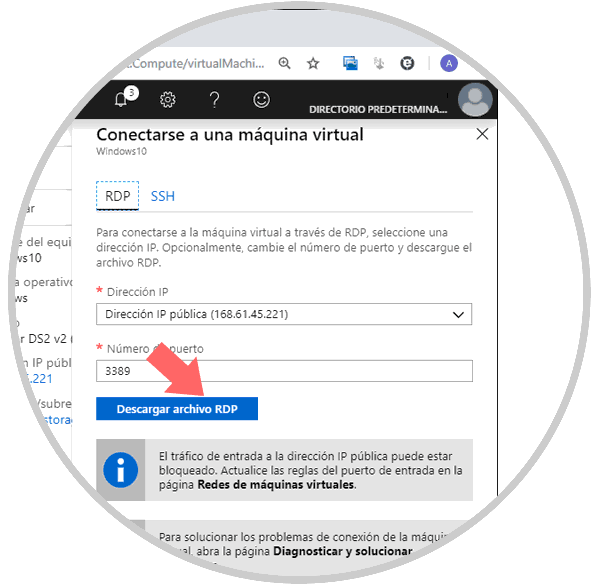
Step 18
There we click on the Download RDP file button and once downloaded we execute it and we will see the following:

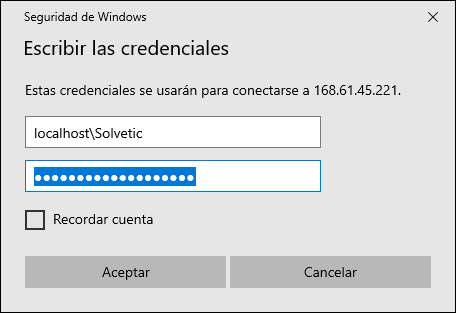
Step 19
There we click on the Connect button and the following window will be displayed where we enter the username in the localhost \ user format with the assigned password:
Step 20
Click on OK to confirm the user and access the virtual machine and we will see the following warning:

Step 21
There we click on Yes to approve the access and start the connection to Windows 10:
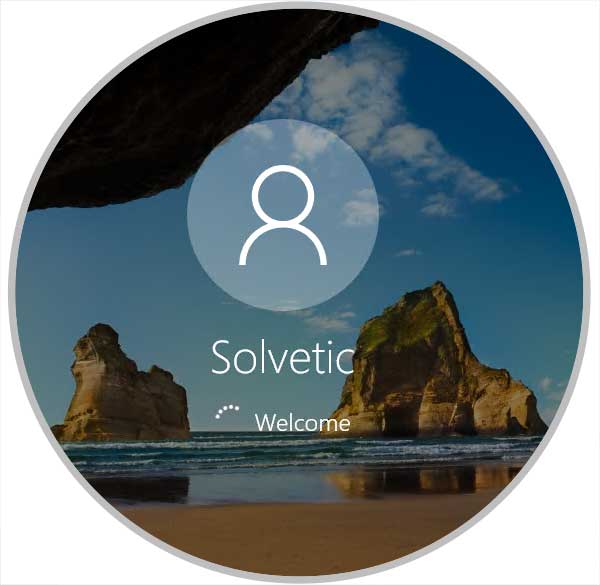
Step 22
Once we access we can use the winver command to confirm that the selected version has been installed, in this case Windows 10 1709:

Thus we have learned to create a virtual machine using the Azure Portal.
3. How to create Windows 10 virtual machine using PowerShell with Azure
Microsoft Azure integrates an Azure PowerShell module which has been developed to create and manage Azure resources from the PowerShell command line or through the use of scripts.
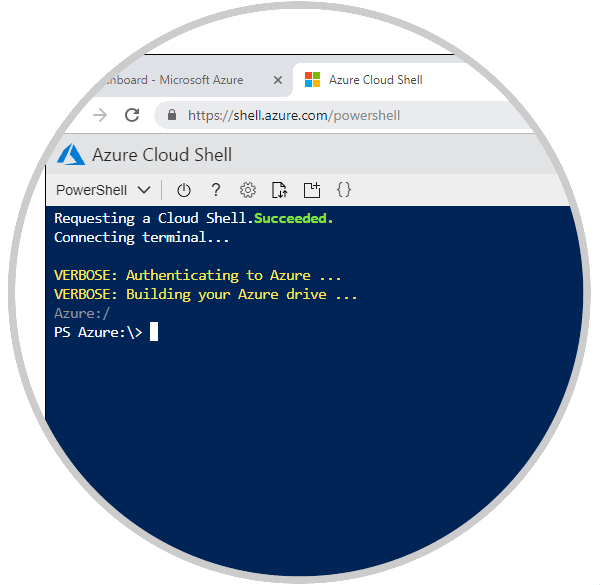
Step 1
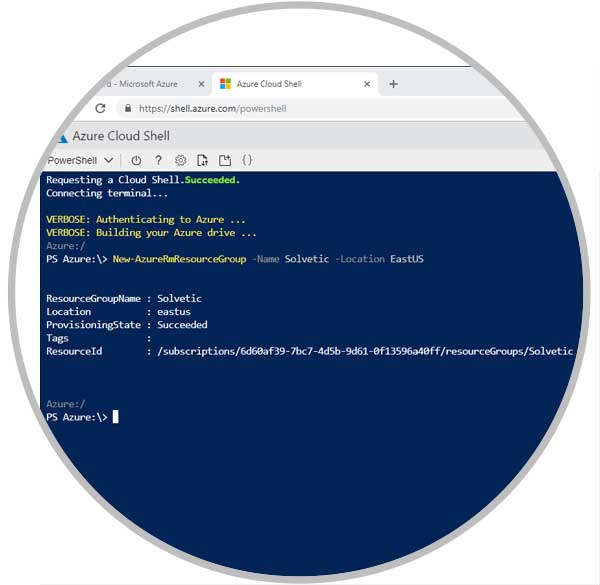
One of the simplest ways to use this method is to go to the following link and log in to Microsoft Azure. As we see there the connection with Azure is established.
Powerhell
If installing and using PowerShell locally, version 5.7.0 of the Azure PowerShell module or any later version is required, to validate the version we must run the Get-Module -ListAvailable AzureRM cmdlet to validate the version.
Step 2
The first step is to create an Azure resource group using the New-AzureRmResourceGroup cmdlet, remember that a resource group is a logical container in which Azure resources are implemented and managed.
For this we execute the following line:
New-AzureRmResourceGroup -Name TechnoWikis -Location EastUS
Step 3
We can replace TechnoWikis with the desired name and define, if necessary, the location of that resource.
Step 4
Now we are going to create the virtual machine using New-AzureRmVM, for this we will paste the following lines with the required values:
New-AzureRmVm ` -ResourceGroupName "TechnoWikis" ` -Name "W10" ` -Location "East US" -VirtualNetworkName "Vnet" ` -SubnetName "Subnet" ` -SecurityGroupName "NetworkSecurityGroup" ` -PublicIpAddressName "myPublicIpAddress" ` -OpenPorts 80.3389
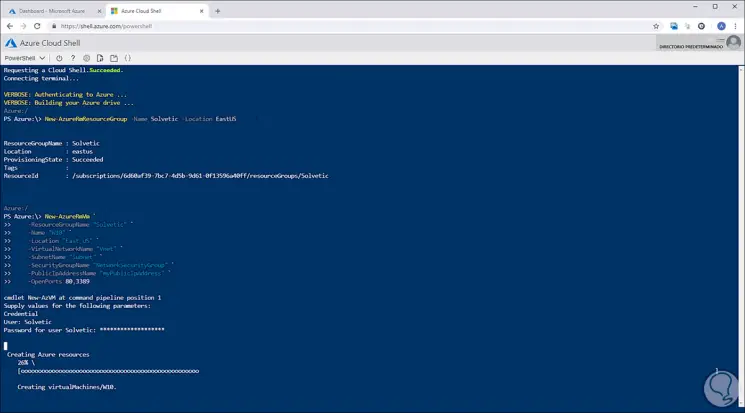
Step 5
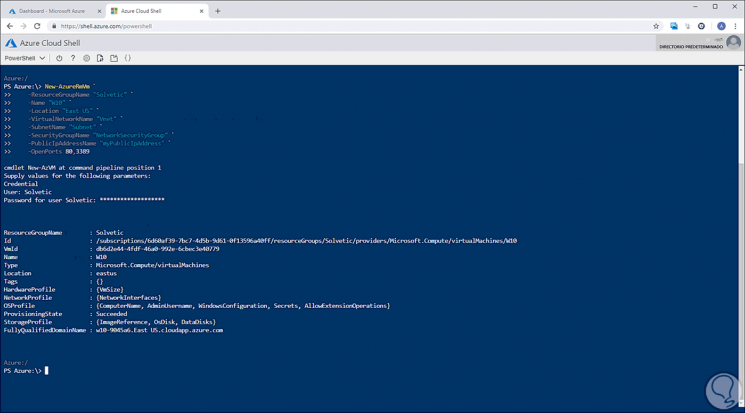
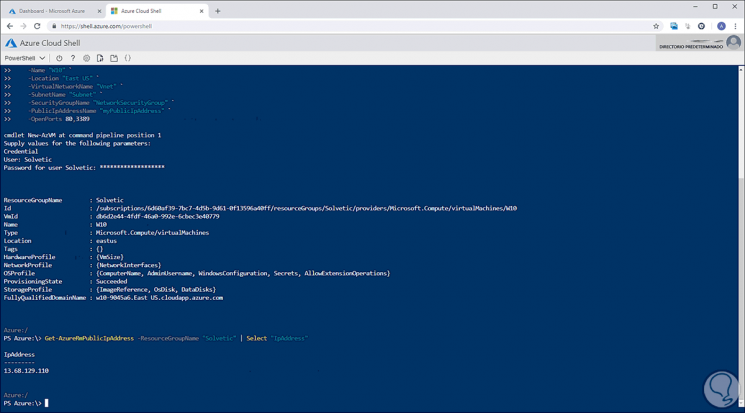
There you will be asked to enter the user's name next to their password and pressing Enter will start the virtual machine creation process.
Once this process concludes we will see a summary of the processed:
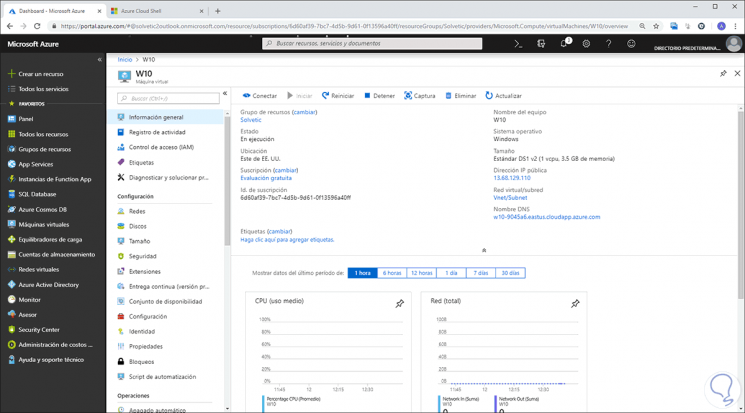
Step 6
If we wish we can go to the Azure Portal and there verify that our virtual machine has been created correctly:
Step 7
Before starting the process of connection to the machine we must know your public IP address, for this we execute the following:
Get-AzureRmPublicIpAddress -ResourceGroupName "TechnoWikis" | Select "IpAddress"
Step 8
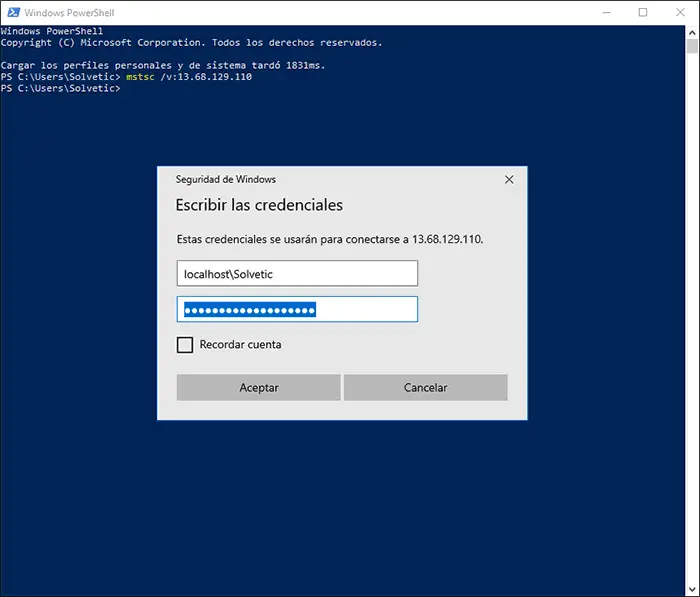
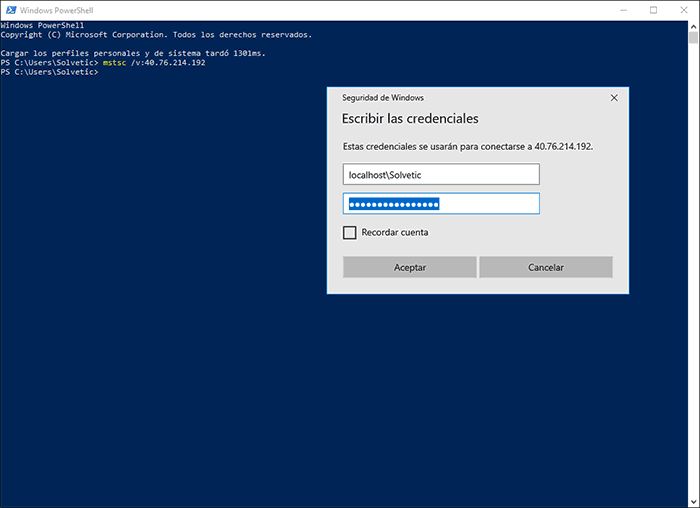
Now, with this IP address we open a local PowerShell session on the physical machine and execute the following syntax:
mstsc / v: IPPublica
Step 9
The remote connection wizard will be displayed where we will enter the respective username and password:
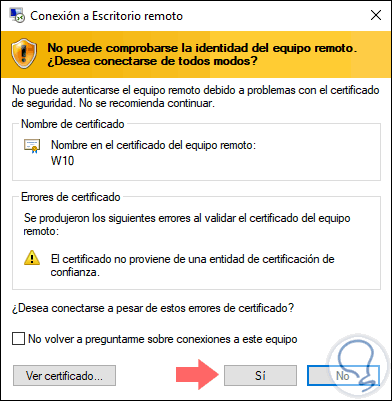
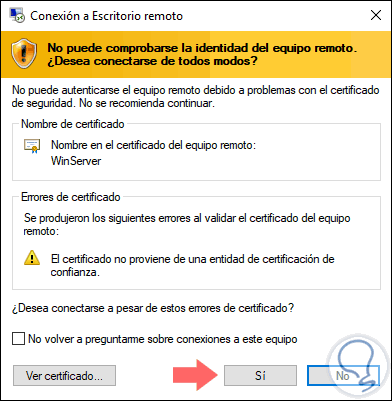
Step 10
Click OK and, like the previous step, we can see the following message. There we click on Yes to access the virtual machine.
Step 11
At the moment we want to eliminate the resources and the virtual machine we will execute the following:
Remove-AzureRmResourceGroup -Name TechnoWikis
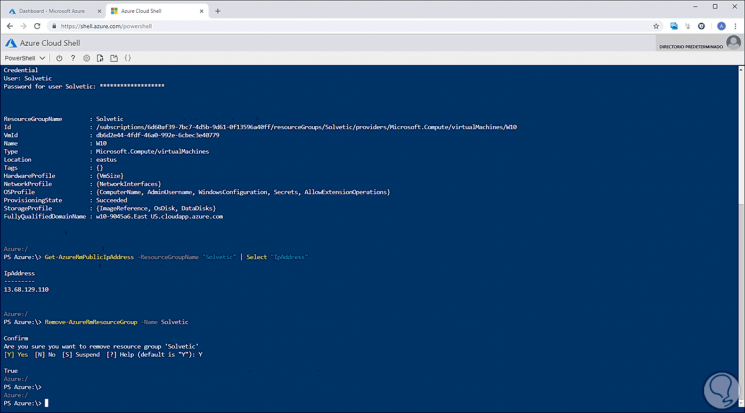
Enter the letter Y to confirm, in this way it will be possible to create our Windows 10 virtual machine with PowerShell in Azure.
4. How to create Windows 10 virtual machine using the Azure CLI
The Azure CLI has been developed to create and manage Azure resources from the command line or using scripts.
Azure Cloud Shell is a free interactive shell that you can use to execute various commands to manage on virtual machines and we can use it both in the browser and through the Windows command prompt.
Cloud Shell has Azure tools preinstalled and configured to be used with our account thus simplifying the actions of Microsoft Azure.
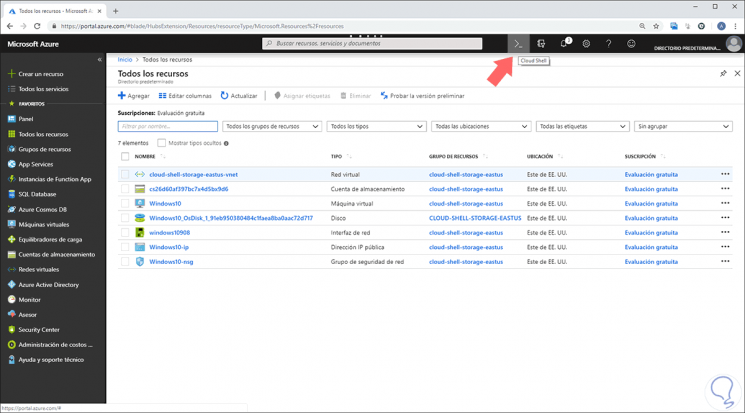
Step 1
To access the Cloud Shell we can click on the respective icon located at the top of the Azure Portal:
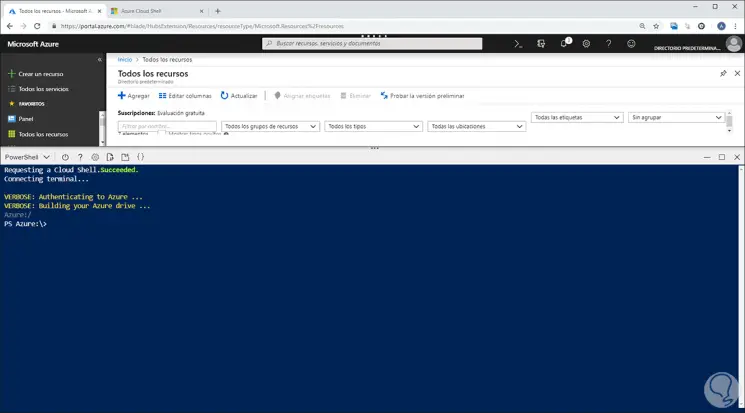
Step 2
There the bash will be displayed at the bottom of the portal:
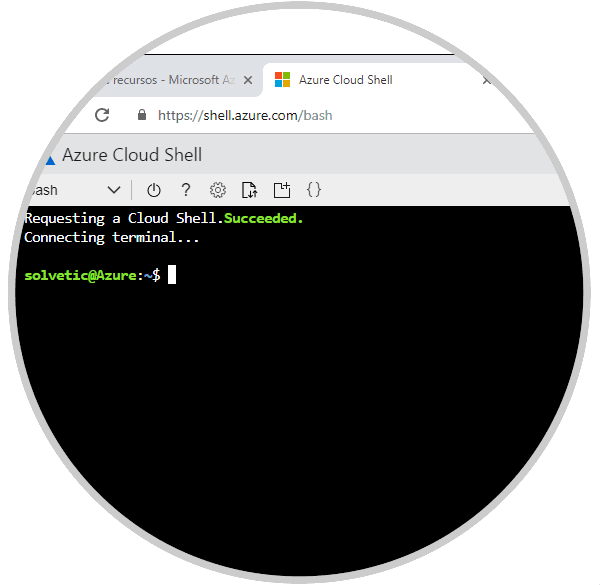
Step 3
If we want to use it from a browser we can go to the following link:
Cloud shell
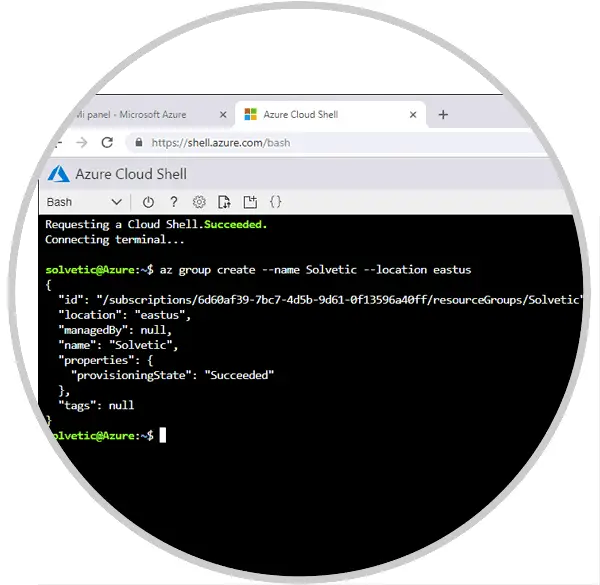
Step 4
The first step to take will be to create our resource group by executing:
az group create --name TechnoWikis --location eastus
Step 5
We have the following locations in Microsoft Azure:
There we can select the desired one.
Step 6
Now we must determine the image to use for our virtual machine, in the Azure bash Windows 10 does not yet have the image available, so for this case we will use Windows Server 2016 as an example.
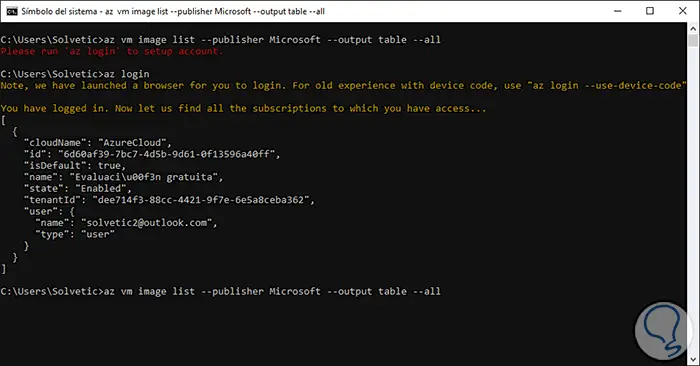
To access the total list of images available from Microsoft we can execute the following:
az vm image list --publisher Microsoft --output table --all
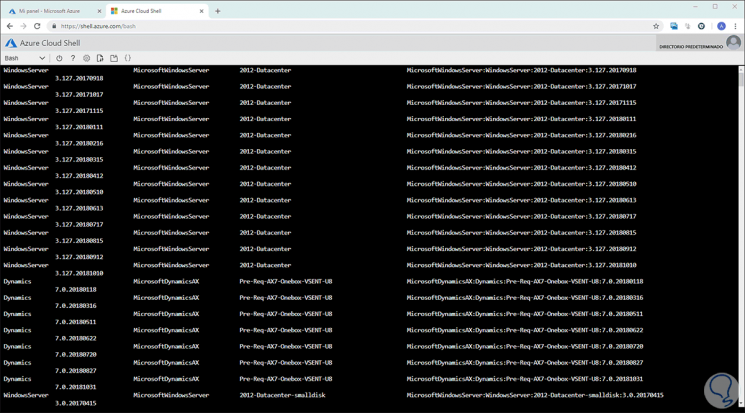
Step 7
To access more images we can run the following line:
az vm image list --output table
Once the name of the image is defined, we will execute the following lines with the desired parameters:
az vm create \ --resource-group TechnoWikis \ --name “MV Name†\ --image win2016datacenter \ --admin-username “User†\ --admin-password “Passwordâ€
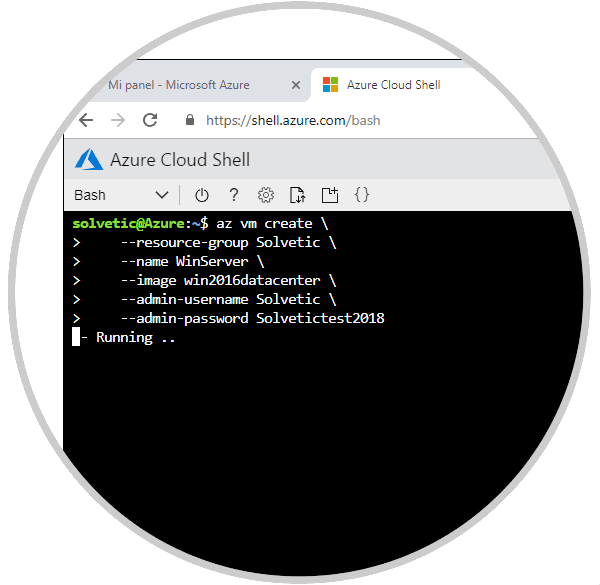
Step 8
Press Enter and the virtual machine creation process will begin. Once finished we will see the following:
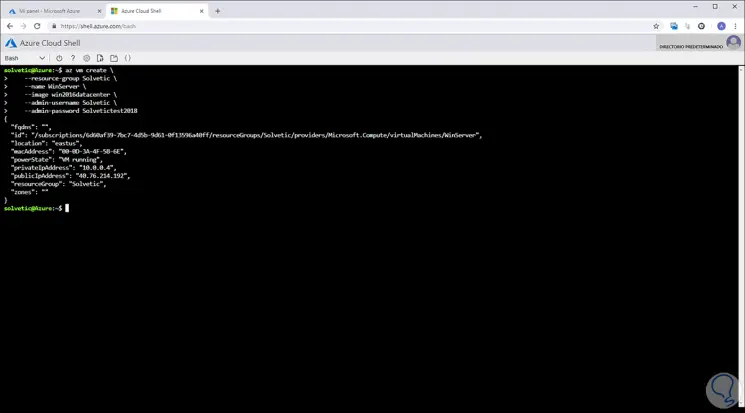
Step 9
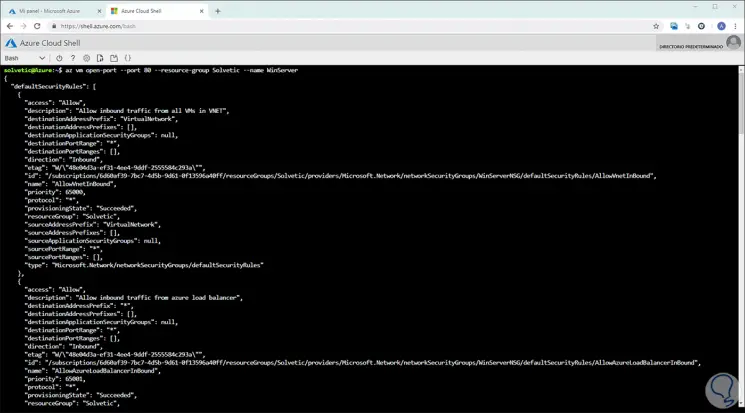
There we can see that Azure indicates the public IP address of the machine with which we will access it remotely. By default, only RDP connections are open when a Windows virtual machine is created in Azure, we can use az vm open-port to open TCP port 80 that will be used with the IIS web server, for this we execute:
az vm open-port --port 80 --resource-group TechnoWikis --name WinServer
Step 10
To connect to the virtual machine we will go to Windows PowerShell locally and there we execute the following syntax:
mstsc / v: IPPublica
Step 11
Enter the credentials created and the remote access window will be displayed:
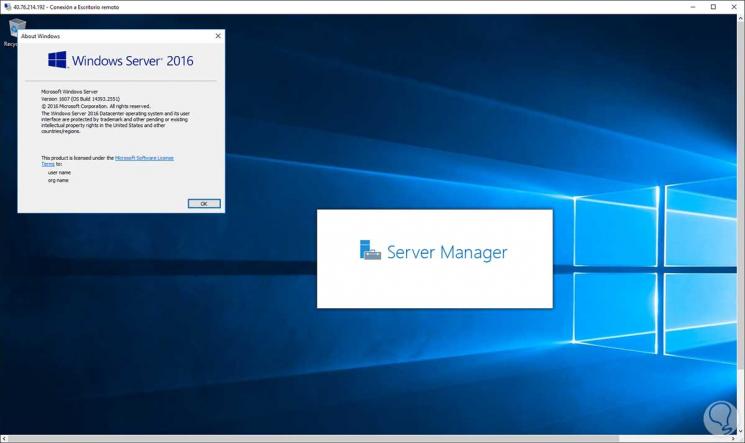
Step 12
There we click on Yes and we can access the virtual machine that we have created through the Azure CLI:
Step 13
As we have mentioned, CLI can be executed from the Windows 10 command prompt, for this we must install it and use the az login command to access Azure. After this we will see details of our registered account and it will be possible to make full use of the available CLI commands.
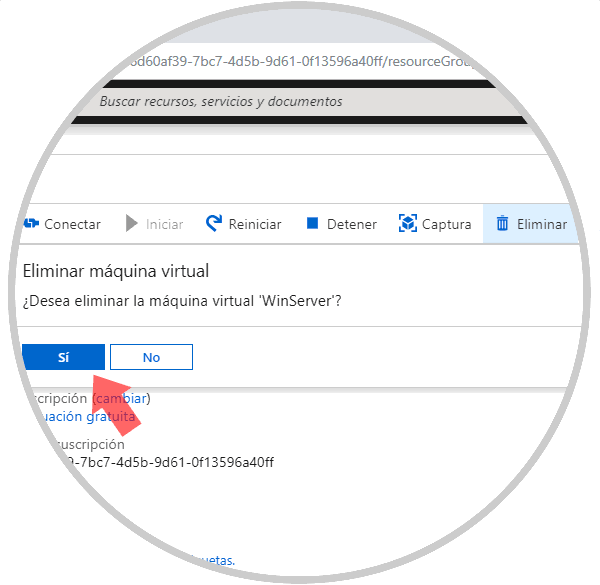
Step 14
When we want to remove an Azure virtual machine, we can go to the Panel, select the virtual machine and click on the Delete button and the following message will be displayed:
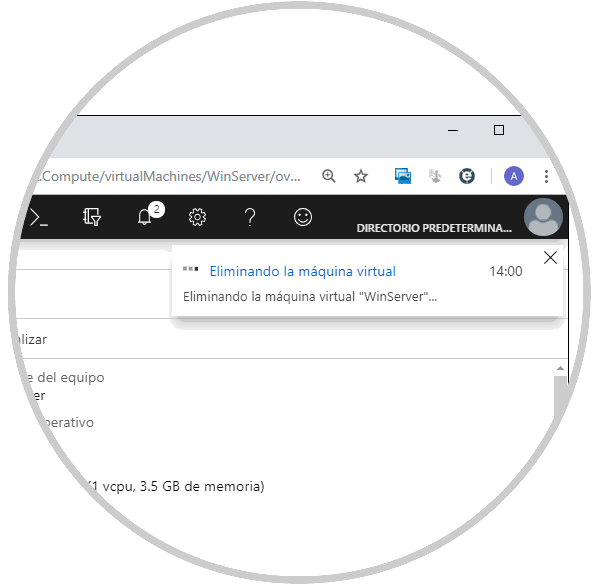
Click on Yes to confirm the action and the process of eliminating the selected machine will begin:
Thus, we have seen 3 methods to create our machines in Microsoft Azure and enjoy each of its administration features.